mirror of
https://github.com/fastapi/fastapi.git
synced 2025-12-25 15:18:36 -05:00
Compare commits
93 Commits
| Author | SHA1 | Date | |
|---|---|---|---|
|
|
8d844bc5cf | ||
|
|
1092261ae1 | ||
|
|
5984233223 | ||
|
|
98bb9f13da | ||
|
|
d375dc6ebe | ||
|
|
ee335bca82 | ||
|
|
601d8eb809 | ||
|
|
b99f350a18 | ||
|
|
c1b0e796c6 | ||
|
|
d9e65147c7 | ||
|
|
6001513c4f | ||
|
|
3fa033d8d5 | ||
|
|
59f7e66ac3 | ||
|
|
08e8dfccbe | ||
|
|
fc70a2f36f | ||
|
|
f5c5dbb739 | ||
|
|
ca939fabf7 | ||
|
|
cc3d795bea | ||
|
|
7fc1bac54b | ||
|
|
27367df90c | ||
|
|
f93861e321 | ||
|
|
30e56ec835 | ||
|
|
48ccef9ad2 | ||
|
|
b79e002635 | ||
|
|
1fa28b7cb6 | ||
|
|
22f7eae3f2 | ||
|
|
ae93773465 | ||
|
|
0f387553d1 | ||
|
|
d53a253c8d | ||
|
|
f8f0a6e462 | ||
|
|
f7eea768f6 | ||
|
|
53d316f706 | ||
|
|
741de7f927 | ||
|
|
16b3669adf | ||
|
|
c5807fdaa4 | ||
|
|
897b7d1b99 | ||
|
|
409264960e | ||
|
|
cfb72eec5a | ||
|
|
778822bd9a | ||
|
|
cfd2c3017f | ||
|
|
caed37a08f | ||
|
|
4c1b54e209 | ||
|
|
e4f0947821 | ||
|
|
22e858f65c | ||
|
|
046d6b7fa0 | ||
|
|
89f36371b9 | ||
|
|
406b3ac805 | ||
|
|
f71ba8885e | ||
|
|
121e87b3e0 | ||
|
|
2d013b8340 | ||
|
|
761e5ff01d | ||
|
|
9812684178 | ||
|
|
f7a87cd6ba | ||
|
|
f67bc3ffe8 | ||
|
|
dff644abe0 | ||
|
|
fc7b4ab880 | ||
|
|
1d0f909ca5 | ||
|
|
a0cdbe449b | ||
|
|
44bd64d797 | ||
|
|
bfa78db458 | ||
|
|
4e77737a3f | ||
|
|
d03c197c80 | ||
|
|
06e42a4e5d | ||
|
|
bd1e85a8d3 | ||
|
|
506d5dce39 | ||
|
|
a7b4c73663 | ||
|
|
d4f3ca1c1b | ||
|
|
471d703611 | ||
|
|
a46bbc54cd | ||
|
|
a4405bbed2 | ||
|
|
e9b189e9f2 | ||
|
|
483bce3ae1 | ||
|
|
7372f6ba11 | ||
|
|
8d92557e53 | ||
|
|
c56342bf79 | ||
|
|
07e094fd50 | ||
|
|
1cc30de32f | ||
|
|
3397d4d69a | ||
|
|
766157bfb4 | ||
|
|
d96223460b | ||
|
|
fd99dfc95b | ||
|
|
10fb7ace04 | ||
|
|
a1a19b103c | ||
|
|
5c111caf40 | ||
|
|
651ee5e4d2 | ||
|
|
c398ac87d9 | ||
|
|
0a77c613b0 | ||
|
|
70bc469373 | ||
|
|
b76334f544 | ||
|
|
14b467db06 | ||
|
|
3a0c22ce7d | ||
|
|
3b7e4e0544 | ||
|
|
d4d5b21b2e |
1
.github/FUNDING.yml
vendored
Normal file
1
.github/FUNDING.yml
vendored
Normal file
@@ -0,0 +1 @@
|
||||
github: [tiangolo]
|
||||
2
.github/ISSUE_TEMPLATE/question.md
vendored
2
.github/ISSUE_TEMPLATE/question.md
vendored
@@ -21,4 +21,4 @@ Is it possible to [...]?
|
||||
|
||||
### Additional context
|
||||
|
||||
Add any other context or screenshots about the feature request here.
|
||||
Add any other context or screenshots about the question here.
|
||||
|
||||
1
.gitignore
vendored
1
.gitignore
vendored
@@ -14,4 +14,5 @@ test.db
|
||||
log.txt
|
||||
Pipfile.lock
|
||||
env3.*
|
||||
env
|
||||
docs_build
|
||||
|
||||
12
README.md
12
README.md
@@ -33,7 +33,7 @@ The key features are:
|
||||
|
||||
* **Fast**: Very high performance, on par with **NodeJS** and **Go** (thanks to Starlette and Pydantic). [One of the fastest Python frameworks available](#performance).
|
||||
|
||||
* **Fast to code**: Increase the speed to develop features by about 200% to 300% *.
|
||||
* **Fast to code**: Increase the speed to develop features by about 200% to 300%. *
|
||||
* **Fewer bugs**: Reduce about 40% of human (developer) induced errors. *
|
||||
* **Intuitive**: Great editor support. <abbr title="also known as auto-complete, autocompletion, IntelliSense">Completion</abbr> everywhere. Less time debugging.
|
||||
* **Easy**: Designed to be easy to use and learn. Less time reading docs.
|
||||
@@ -176,11 +176,11 @@ Run the server with:
|
||||
```console
|
||||
$ uvicorn main:app --reload
|
||||
|
||||
<span style="color: green;">INFO</span>: Uvicorn running on http://127.0.0.1:8000 (Press CTRL+C to quit)
|
||||
<span style="color: green;">INFO</span>: Started reloader process [28720]
|
||||
<span style="color: green;">INFO</span>: Started server process [28722]
|
||||
<span style="color: green;">INFO</span>: Waiting for application startup.
|
||||
<span style="color: green;">INFO</span>: Application startup complete.
|
||||
INFO: Uvicorn running on http://127.0.0.1:8000 (Press CTRL+C to quit)
|
||||
INFO: Started reloader process [28720]
|
||||
INFO: Started server process [28722]
|
||||
INFO: Waiting for application startup.
|
||||
INFO: Application startup complete.
|
||||
```
|
||||
|
||||
</div>
|
||||
|
||||
58
docs/en/docs/advanced/conditional-openapi.md
Normal file
58
docs/en/docs/advanced/conditional-openapi.md
Normal file
@@ -0,0 +1,58 @@
|
||||
# Conditional OpenAPI
|
||||
|
||||
If you needed to, you could use settings and environment variables to configure OpenAPI conditionally depending on the environment, and even disable it entirely.
|
||||
|
||||
## About security, APIs, and docs
|
||||
|
||||
Hiding your documentation user interfaces in production *shouldn't* be the way to protect your API.
|
||||
|
||||
That doesn't add any extra security to your API, the *path operations* will still be available where they are.
|
||||
|
||||
If there's a security flaw in your code, it will still exist.
|
||||
|
||||
Hiding the documentation just makes it more difficult to understand how to interact with your API, and could make it more difficult for you to debug it in production. It could be considered simply a form of <a href="https://en.wikipedia.org/wiki/Security_through_obscurity" class="external-link" target="_blank">Security through obscurity</a>.
|
||||
|
||||
If you want to secure your API, there are several better things you can do, for example:
|
||||
|
||||
* Make sure you have well defined Pydantic models for your request bodies and responses.
|
||||
* Configure any required permissions and roles using dependencies.
|
||||
* Never store plaintext passwords, only password hashes.
|
||||
* Implement and use well-known cryptographic tools, like Passlib and JWT tokens, etc.
|
||||
* Add more granular permission controls with OAuth2 scopes where needed.
|
||||
* ...etc.
|
||||
|
||||
Nevertheless, you might have a very specific use case where you really need to disable the API docs for some environment (e.g. for production) or depending on configurations from environment variables.
|
||||
|
||||
## Conditional OpenAPI from settings and env vars
|
||||
|
||||
You can easily use the same Pydantic settings to configure your generated OpenAPI and the docs UIs.
|
||||
|
||||
For example:
|
||||
|
||||
```Python hl_lines="6 11"
|
||||
{!../../../docs_src/conditional_openapi/tutorial001.py!}
|
||||
```
|
||||
|
||||
Here we declare the setting `openapi_url` with the same default of `"/openapi.json"`.
|
||||
|
||||
And then we use it when creating the `FastAPI` app.
|
||||
|
||||
Then you could disable OpenAPI (including the UI docs) by setting the environment variable `OPENAPI_URL` to the empty string, like:
|
||||
|
||||
<div class="termy">
|
||||
|
||||
```console
|
||||
$ OPENAPI_URL= uvicorn main:app
|
||||
|
||||
<span style="color: green;">INFO</span>: Uvicorn running on http://127.0.0.1:8000 (Press CTRL+C to quit)
|
||||
```
|
||||
|
||||
</div>
|
||||
|
||||
Then if you go to the URLs at `/openapi.json`, `/docs`, or `/redoc` you will just get a `404 Not Found` error like:
|
||||
|
||||
```JSON
|
||||
{
|
||||
"detail": "Not Found"
|
||||
}
|
||||
```
|
||||
382
docs/en/docs/advanced/settings.md
Normal file
382
docs/en/docs/advanced/settings.md
Normal file
@@ -0,0 +1,382 @@
|
||||
# Settings and Environment Variables
|
||||
|
||||
In many cases your application could need some external settings or configurations, for example secret keys, database credentials, credentials for email services, etc.
|
||||
|
||||
Most of these settings are variable (can change), like database URLs. And many could be sensitive, like secrets.
|
||||
|
||||
For this reason it's common to provide them in environment variables that are read by the application.
|
||||
|
||||
## Environment Variables
|
||||
|
||||
!!! tip
|
||||
If you already know what "environment variables" are and how to use them, feel free to skip to the next section below.
|
||||
|
||||
An <a href="https://en.wikipedia.org/wiki/Environment_variable" class="external-link" target="_blank">environment variable</a> (also known as "env var") is a variable that lives outside of the Python code, in the operating system, and could be read by your Python code (or by other programs as well).
|
||||
|
||||
You can create and use environment variables in the shell, without needing Python:
|
||||
|
||||
=== "Linux, macOS, Windows Bash"
|
||||
|
||||
<div class="termy">
|
||||
|
||||
```console
|
||||
// You could create an env var MY_NAME with
|
||||
$ export MY_NAME="Wade Wilson"
|
||||
|
||||
// Then you could use it with other programs, like
|
||||
$ echo "Hello $MY_NAME"
|
||||
|
||||
Hello Wade Wilson
|
||||
```
|
||||
|
||||
</div>
|
||||
|
||||
=== "Windows PowerShell"
|
||||
|
||||
<div class="termy">
|
||||
|
||||
```console
|
||||
// Create an env var MY_NAME
|
||||
$ $Env:MY_NAME = "Wade Wilson"
|
||||
|
||||
// Use it with other programs, like
|
||||
$ echo "Hello $Env:MY_NAME"
|
||||
|
||||
Hello Wade Wilson
|
||||
```
|
||||
|
||||
</div>
|
||||
|
||||
### Read env vars in Python
|
||||
|
||||
You could also create environment variables outside of Python, in the terminal (or with any other method), and then read them in Python.
|
||||
|
||||
For example you could have a file `main.py` with:
|
||||
|
||||
```Python hl_lines="3"
|
||||
import os
|
||||
|
||||
name = os.getenv("MY_NAME", "World")
|
||||
print(f"Hello {name} from Python")
|
||||
```
|
||||
|
||||
!!! tip
|
||||
The second argument to <a href="https://docs.python.org/3.8/library/os.html#os.getenv" class="external-link" target="_blank">`os.getenv()`</a> is the default value to return.
|
||||
|
||||
If not provided, it's `None` by default, here we provide `"World"` as the default value to use.
|
||||
|
||||
Then you could call that Python program:
|
||||
|
||||
<div class="termy">
|
||||
|
||||
```console
|
||||
// Here we don't set the env var yet
|
||||
$ python main.py
|
||||
|
||||
// As we didn't set the env var, we get the default value
|
||||
|
||||
Hello World from Python
|
||||
|
||||
// But if we create an environment variable first
|
||||
$ export MY_NAME="Wade Wilson"
|
||||
|
||||
// And then call the program again
|
||||
$ python main.py
|
||||
|
||||
// Now it can read the environment variable
|
||||
|
||||
Hello Wade Wilson from Python
|
||||
```
|
||||
|
||||
</div>
|
||||
|
||||
As environment variables can be set outside of the code, but can be read by the code, and don't have to be stored (committed to `git`) with the rest of the files, it's common to use them for configurations or settings.
|
||||
|
||||
You can also create an environment variable only for a specific program invocation, that is only available to that program, and only for its duration.
|
||||
|
||||
To do that, create it right before the program itself, on the same line:
|
||||
|
||||
<div class="termy">
|
||||
|
||||
```console
|
||||
// Create an env var MY_NAME in line for this program call
|
||||
$ MY_NAME="Wade Wilson" python main.py
|
||||
|
||||
// Now it can read the environment variable
|
||||
|
||||
Hello Wade Wilson from Python
|
||||
|
||||
// The env var no longer exists afterwards
|
||||
$ python main.py
|
||||
|
||||
Hello World from Python
|
||||
```
|
||||
|
||||
</div>
|
||||
|
||||
!!! tip
|
||||
You can read more about it at <a href="https://12factor.net/config" class="external-link" target="_blank">The Twelve-Factor App: Config</a>.
|
||||
|
||||
### Types and validation
|
||||
|
||||
These environment variables can only handle text strings, as they are external to Python and have to be compatible with other programs and the rest of the system (and even with different operating systems, as Linux, Windows, macOS).
|
||||
|
||||
That means that any value read in Python from an environment variable will be a `str`, and any conversion to a different type or validation has to be done in code.
|
||||
|
||||
## Pydantic `Settings`
|
||||
|
||||
Fortunately, Pydantic provides a great utility to handle these settings coming from environment variables with <a href="https://pydantic-docs.helpmanual.io/usage/settings/" class="external-link" target="_blank">Pydantic: Settings management</a>.
|
||||
|
||||
### Create the `Settings` object
|
||||
|
||||
Import `BaseSettings` from Pydantic and create a sub-class, very much like with a Pydantic model.
|
||||
|
||||
The same way as with Pydantic models, you declare class attributes with type annotations, and possibly default values.
|
||||
|
||||
You can use all the same validation features and tools you use for Pydantic models, like different data types and additional validations with `Field()`.
|
||||
|
||||
```Python hl_lines="2 5 6 7 8 11"
|
||||
{!../../../docs_src/settings/tutorial001.py!}
|
||||
```
|
||||
|
||||
!!! tip
|
||||
If you want something quick to copy and paste, don't use this example, use the last one below.
|
||||
|
||||
Then, when you create an instance of that `Settings` class (in this case, in the `settings` object), Pydantic will read the environment variables in a case-insensitive way, so, an upper-case variable `APP_NAME` will still be read for the attribute `app_name`.
|
||||
|
||||
Next it will convert and validate the data. So, when you use that `settings` object, you will have data of the types you declared (e.g. `items_per_user` will be an `int`).
|
||||
|
||||
### Use the `settings`
|
||||
|
||||
Then you can use the new `settings` object in your application:
|
||||
|
||||
```Python hl_lines="18 19 20"
|
||||
{!../../../docs_src/settings/tutorial001.py!}
|
||||
```
|
||||
|
||||
### Run the server
|
||||
|
||||
Next, you would run the server passing the configurations as environment variables, for example you could set an `ADMIN_EMAIL` and `APP_NAME` with:
|
||||
|
||||
<div class="termy">
|
||||
|
||||
```console
|
||||
$ ADMIN_EMAIL="deadpool@example.com" APP_NAME="ChimichangApp" uvicorn main:app
|
||||
|
||||
<span style="color: green;">INFO</span>: Uvicorn running on http://127.0.0.1:8000 (Press CTRL+C to quit)
|
||||
```
|
||||
|
||||
</div>
|
||||
|
||||
!!! tip
|
||||
To set multiple env vars for a single command just separate them with a space, and put them all before the command.
|
||||
|
||||
And then the `admin_email` setting would be set to `"deadpool@example.com"`.
|
||||
|
||||
The `app_name` would be `"ChimichangApp"`.
|
||||
|
||||
And the `items_per_user` would keep its default value of `50`.
|
||||
|
||||
## Settings in another module
|
||||
|
||||
You could put those settings in another module file as you saw in [Bigger Applications - Multiple Files](../tutorial/bigger-applications.md){.internal-link target=_blank}.
|
||||
|
||||
For example, you could have a file `config.py` with:
|
||||
|
||||
```Python
|
||||
{!../../../docs_src/settings/app01/config.py!}
|
||||
```
|
||||
|
||||
And then use it in a file `main.py`:
|
||||
|
||||
```Python hl_lines="3 11 12 13"
|
||||
{!../../../docs_src/settings/app01/main.py!}
|
||||
```
|
||||
|
||||
!!! tip
|
||||
You would also need a file `__init__.py` as you saw on [Bigger Applications - Multiple Files](../tutorial/bigger-applications.md){.internal-link target=_blank}.
|
||||
|
||||
## Settings in a dependency
|
||||
|
||||
In some occasions it might be useful to provide the settings from a dependency, instead of having a global object with `settings` that is used everywhere.
|
||||
|
||||
This could be especially useful during testing, as it's very easy to override a dependency with your own custom settings.
|
||||
|
||||
### The config file
|
||||
|
||||
Coming from the previous example, your `config.py` file could look like:
|
||||
|
||||
```Python hl_lines="10"
|
||||
{!../../../docs_src/settings/app02/config.py!}
|
||||
```
|
||||
|
||||
Notice that now we don't create a default instance `settings = Settings()`.
|
||||
|
||||
### The main app file
|
||||
|
||||
Now we create a dependency that returns a new `config.Settings()`.
|
||||
|
||||
```Python hl_lines="5 11 12"
|
||||
{!../../../docs_src/settings/app02/main.py!}
|
||||
```
|
||||
|
||||
!!! tip
|
||||
We'll discuss the `@lru_cache()` in a bit.
|
||||
|
||||
For now you can assume `get_settings()` is a normal function.
|
||||
|
||||
And then we can require it from the *path operation function* as a dependency and use it anywhere we need it.
|
||||
|
||||
```Python hl_lines="16 18 19 20"
|
||||
{!../../../docs_src/settings/app02/main.py!}
|
||||
```
|
||||
|
||||
### Settings and testing
|
||||
|
||||
Then it would be very easy to provide a different settings object during testing by creating a dependency override for `get_settings`:
|
||||
|
||||
```Python hl_lines="8 9 12 21"
|
||||
{!../../../docs_src/settings/app02/test_main.py!}
|
||||
```
|
||||
|
||||
In the dependency override we set a new value for the `admin_email` when creating the new `Settings` object, and then we return that new object.
|
||||
|
||||
Then we can test that it is used.
|
||||
|
||||
## Reading a `.env` file
|
||||
|
||||
If you have many settings that possibly change a lot, maybe in different environments, it might be useful to put them on a file and then read them from it as if they were environment variables.
|
||||
|
||||
This practice is common enough that it has a name, these environment variables are commonly placed in a file `.env`, and the file is called a "dotenv".
|
||||
|
||||
!!! tip
|
||||
A file starting with a dot (`.`) is a hidden file in Unix-like systems, like Linux and macOS.
|
||||
|
||||
But a dotenv file doesn't really have to have that exact filename.
|
||||
|
||||
Pydantic has support for reading from these types of files using an external library. You can read more at <a href="https://pydantic-docs.helpmanual.io/usage/settings/#dotenv-env-support" class="external-link" target="_blank">Pydantic Settings: Dotenv (.env) support</a>.
|
||||
|
||||
!!! tip
|
||||
For this to work, you need to `pip install python-dotenv`.
|
||||
|
||||
### The `.env` file
|
||||
|
||||
You could have a `.env` file with:
|
||||
|
||||
```bash
|
||||
ADMIN_EMAIL="deadpool@example.com"
|
||||
APP_NAME="ChimichangApp"
|
||||
```
|
||||
|
||||
### Read settings from `.env`
|
||||
|
||||
And then update your `config.py` with:
|
||||
|
||||
```Python hl_lines="9 10"
|
||||
{!../../../docs_src/settings/app03/config.py!}
|
||||
```
|
||||
|
||||
Here we create a class `Config` inside of your Pydantic `Settings` class, and set the `env_file` to the filename with the dotenv file we want to use.
|
||||
|
||||
!!! tip
|
||||
The `Config` class is used just for Pydantic configuration. You can read more at <a href="https://pydantic-docs.helpmanual.io/usage/model_config/" class="external-link" target="_blank">Pydantic Model Config</a>
|
||||
|
||||
### Creating the `Settings` only once with `lru_cache`
|
||||
|
||||
Reading a file from disk is normally a costly (slow) operation, so you probably want to do it only once and then re-use the same settings object, instead of reading it for each request.
|
||||
|
||||
But every time we do:
|
||||
|
||||
```Python
|
||||
config.Settings()
|
||||
```
|
||||
|
||||
a new `Settings` object would be created, and at creation it would read the `.env` file again.
|
||||
|
||||
If the dependency function was just like:
|
||||
|
||||
```Python
|
||||
def get_settings():
|
||||
return config.Settings()
|
||||
```
|
||||
|
||||
we would create that object for each request, and we would be reading the `.env` file for each request. ⚠️
|
||||
|
||||
But as we are using the `@lru_cache()` decorator on top, the `Settings` object will be created only once, the first time it's called. ✔️
|
||||
|
||||
```Python hl_lines="1 10"
|
||||
{!../../../docs_src/settings/app03/main.py!}
|
||||
```
|
||||
|
||||
Then for any subsequent calls of `get_settings()` in the dependencies for the next requests, instead of executing the internal code of `get_settings()` and creating a new `Settings` object, it will return the same object that was returned on the first call, again and again.
|
||||
|
||||
#### `lru_cache` Technical Details
|
||||
|
||||
`@lru_cache()` modifies the function it decorates to return the same value that was returned the first time, instead of computing it again, executing the code of the function every time.
|
||||
|
||||
So, the function below it will be executed once for each combination of arguments. And then the values returned by each of those combinations of arguments will be used again and again whenever the function is called with exactly the same combination of arguments.
|
||||
|
||||
For example, if you have a function:
|
||||
|
||||
```Python
|
||||
@lru_cache()
|
||||
def say_hi(name: str, salutation: str = "Ms."):
|
||||
return f"Hello {salutation} {name}"
|
||||
```
|
||||
|
||||
your program could execute like this:
|
||||
|
||||
```mermaid
|
||||
sequenceDiagram
|
||||
|
||||
participant code as Code
|
||||
participant function as say_hi()
|
||||
participant execute as Execute function
|
||||
|
||||
rect rgba(0, 255, 0, .1)
|
||||
code ->> function: say_hi(name="Camila")
|
||||
function ->> execute: execute function code
|
||||
execute ->> code: return the result
|
||||
end
|
||||
|
||||
rect rgba(0, 255, 255, .1)
|
||||
code ->> function: say_hi(name="Camila")
|
||||
function ->> code: return stored result
|
||||
end
|
||||
|
||||
rect rgba(0, 255, 0, .1)
|
||||
code ->> function: say_hi(name="Rick")
|
||||
function ->> execute: execute function code
|
||||
execute ->> code: return the result
|
||||
end
|
||||
|
||||
rect rgba(0, 255, 0, .1)
|
||||
code ->> function: say_hi(name="Rick", salutation="Mr.")
|
||||
function ->> execute: execute function code
|
||||
execute ->> code: return the result
|
||||
end
|
||||
|
||||
rect rgba(0, 255, 255, .1)
|
||||
code ->> function: say_hi(name="Rick")
|
||||
function ->> code: return stored result
|
||||
end
|
||||
|
||||
rect rgba(0, 255, 255, .1)
|
||||
code ->> function: say_hi(name="Camila")
|
||||
function ->> code: return stored result
|
||||
end
|
||||
```
|
||||
|
||||
In the case of our dependency `get_settings()`, the function doesn't even take any arguments, so it always returns the same value.
|
||||
|
||||
That way, it behaves almost as if it was just a global variable. But as it uses a dependency function, then we can override it easily for testing.
|
||||
|
||||
`@lru_cache()` is part of `functools` which is part of Python's standard library, you can read more about it in the <a href="https://docs.python.org/3/library/functools.html#functools.lru_cache" class="external-link" target="_blank">Python docs for `@lru_cache()`</a>.
|
||||
|
||||
## Recap
|
||||
|
||||
You can use Pydantic Settings to handle the settings or configurations for your application, with all the power of Pydantic models.
|
||||
|
||||
* By using a dependency you can simplify testing.
|
||||
* You can use `.env` files with it.
|
||||
* Using `@lru_cache()` lets you avoid reading the dotenv file again and again for each request, while allowing you to override it during testing.
|
||||
95
docs/en/docs/advanced/testing-database.md
Normal file
95
docs/en/docs/advanced/testing-database.md
Normal file
@@ -0,0 +1,95 @@
|
||||
# Testing a Database
|
||||
|
||||
You can use the same dependency overrides from [Testing Dependencies with Overrides](testing-dependencies.md){.internal-link target=_blank} to alter a database for testing.
|
||||
|
||||
You could want to set up a different database for testing, rollback the data after the tests, pre-fill it with some testing data, etc.
|
||||
|
||||
The main idea is exactly the same you saw in that previous chapter.
|
||||
|
||||
## Add tests for the SQL app
|
||||
|
||||
Let's update the example from [SQL (Relational) Databases](../tutorial/sql-databases.md){.internal-link target=_blank} to use a testing database.
|
||||
|
||||
All the app code is the same, you can go back to that chapter check how it was.
|
||||
|
||||
The only changes here are in the new testing file.
|
||||
|
||||
Your normal dependency `get_db()` would return a database session.
|
||||
|
||||
In the test, you could use a dependency override to return your *custom* database session instead of the one that would be used normally.
|
||||
|
||||
In this example we'll create a temporary database only for the tests.
|
||||
|
||||
## File structure
|
||||
|
||||
We create a new file at `sql_app/tests/test_sql_app.py`.
|
||||
|
||||
So the new file structure looks like:
|
||||
|
||||
``` hl_lines="9 10 11"
|
||||
.
|
||||
└── sql_app
|
||||
├── __init__.py
|
||||
├── crud.py
|
||||
├── database.py
|
||||
├── main.py
|
||||
├── models.py
|
||||
├── schemas.py
|
||||
└── tests
|
||||
├── __init__.py
|
||||
└── test_sql_app.py
|
||||
```
|
||||
|
||||
## Create the new database session
|
||||
|
||||
First, we create a new database session with the new database.
|
||||
|
||||
For the tests we'll use a file `test.db` instead of `sql_app.db`.
|
||||
|
||||
But the rest of the session code is more or less the same, we just copy it.
|
||||
|
||||
```Python hl_lines="8 9 10 11 12 13"
|
||||
{!../../../docs_src/sql_databases/sql_app/tests/test_sql_app.py!}
|
||||
```
|
||||
|
||||
!!! tip
|
||||
You could reduce duplication in that code by putting it in a function and using it from both `database.py` and `tests/test_sql_app.py`.
|
||||
|
||||
For simplicity and to focus on the specific testing code, we are just copying it.
|
||||
|
||||
## Create the database
|
||||
|
||||
Because now we are going to use a new database in a new file, we need to make sure we create the database with:
|
||||
|
||||
```Python
|
||||
Base.metadata.create_all(bind=engine)
|
||||
```
|
||||
|
||||
That is normally called in `main.py`, but the line in `main.py` uses the database file `sql_app.db`, and we need to make sure we create `test.db` for the tests.
|
||||
|
||||
So we add that line here, with the new file.
|
||||
|
||||
```Python hl_lines="16"
|
||||
{!../../../docs_src/sql_databases/sql_app/tests/test_sql_app.py!}
|
||||
```
|
||||
|
||||
## Dependency override
|
||||
|
||||
Now we create the dependency override and add it to the overrides for our app.
|
||||
|
||||
```Python hl_lines="19 20 21 22 23 24 27"
|
||||
{!../../../docs_src/sql_databases/sql_app/tests/test_sql_app.py!}
|
||||
```
|
||||
|
||||
!!! tip
|
||||
The code for `override_get_db()` is almost exactly the same as for `get_db()`, but in `override_get_db()` we use the `TestingSessionLocal` for the testing database instead.
|
||||
|
||||
## Test the app
|
||||
|
||||
Then we can just test the app as normally.
|
||||
|
||||
```Python hl_lines="32 33 34 35 36 37 38 39 40 41 42 43 44 45 46 47"
|
||||
{!../../../docs_src/sql_databases/sql_app/tests/test_sql_app.py!}
|
||||
```
|
||||
|
||||
And all the modifications we made in the database during the tests will be in the `test.db` database instead of the main `sql_app.db`.
|
||||
@@ -20,18 +20,6 @@ You probably want to test the external provider once, but not necessarily call i
|
||||
|
||||
In this case, you can override the dependency that calls that provider, and use a custom dependency that returns a mock user, only for your tests.
|
||||
|
||||
### Use case: testing database
|
||||
|
||||
Other example could be that you are using a specific database only for testing.
|
||||
|
||||
Your normal dependency would return a database session.
|
||||
|
||||
But then, after each test, you could want to rollback all the operations or remove data.
|
||||
|
||||
Or you could want to alter the data before the tests run, etc.
|
||||
|
||||
In this case, you could use a dependency override to return your *custom* database session instead of the one that would be used normally.
|
||||
|
||||
### Use the `app.dependency_overrides` attribute
|
||||
|
||||
For these cases, your **FastAPI** application has an attribute `app.dependency_overrides`, it is a simple `dict`.
|
||||
|
||||
@@ -55,7 +55,7 @@ But by following the steps above, it will be able to do some performance optimiz
|
||||
|
||||
Modern versions of Python have support for **"asynchronous code"** using something called **"coroutines"**, with **`async` and `await`** syntax.
|
||||
|
||||
Let's see that phrase by parts in the sections below, below:
|
||||
Let's see that phrase by parts in the sections below:
|
||||
|
||||
* **Asynchronous Code**
|
||||
* **`async` and `await`**
|
||||
@@ -63,13 +63,13 @@ Let's see that phrase by parts in the sections below, below:
|
||||
|
||||
## Asynchronous Code
|
||||
|
||||
Asynchronous code just means that the language has a way to tell the computer / program that at some point in the code, he will have to wait for *something else* to finish somewhere else. Let's say that *something else* is called "slow-file".
|
||||
Asynchronous code just means that the language 💬 has a way to tell the computer / program 🤖 that at some point in the code, it 🤖 will have to wait for *something else* to finish somewhere else. Let's say that *something else* is called "slow-file" 📝.
|
||||
|
||||
So, during that time, the computer can go and do some other work, while "slow-file" finishes.
|
||||
So, during that time, the computer can go and do some other work, while "slow-file" 📝 finishes.
|
||||
|
||||
Then the computer / program will come back every time it has a chance because it's waiting again, or whenever he finished all the work he had at that point. And it will see if any of the tasks he was waiting for has already finished doing whatever it had to do.
|
||||
Then the computer / program 🤖 will come back every time it has a chance because it's waiting again, or whenever it 🤖 finished all the work it had at that point. And it 🤖 will see if any of the tasks it was waiting for have already finished, doing whatever it had to do.
|
||||
|
||||
And then it takes the first task to finish (let's say, our "slow-file") and continues whatever it had to do with it.
|
||||
Next, it 🤖 takes the first task to finish (let's say, our "slow-file" 📝) and continues whatever it had to do with it.
|
||||
|
||||
That "wait for something else" normally refers to <abbr title="Input and Output">I/O</abbr> operations that are relatively "slow" (compared to the speed of the processor and the RAM memory), like waiting for:
|
||||
|
||||
@@ -82,7 +82,7 @@ That "wait for something else" normally refers to <abbr title="Input and Output"
|
||||
* a database query to return the results
|
||||
* etc.
|
||||
|
||||
As the execution time is consumed mostly by waiting for <abbr title="Input and Output">I/O</abbr> operations, so they call them "I/O bound".
|
||||
As the execution time is consumed mostly by waiting for <abbr title="Input and Output">I/O</abbr> operations, they call them "I/O bound" operations.
|
||||
|
||||
It's called "asynchronous" because the computer / program doesn't have to be "synchronized" with the slow task, waiting for the exact moment that the task finishes, while doing nothing, to be able to take the task result and continue the work.
|
||||
|
||||
@@ -94,7 +94,7 @@ For "synchronous" (contrary to "asynchronous") they commonly also use the term "
|
||||
|
||||
This idea of **asynchronous** code described above is also sometimes called **"concurrency"**. It is different from **"parallelism"**.
|
||||
|
||||
**Concurrency** and **parallelism** both relate to "different things happening more or less at the same time".
|
||||
**Concurrency** and **parallelism** both relate to "different things happening more or less at the same time".
|
||||
|
||||
But the details between *concurrency* and *parallelism* are quite different.
|
||||
|
||||
@@ -102,107 +102,109 @@ To see the difference, imagine the following story about burgers:
|
||||
|
||||
### Concurrent Burgers
|
||||
|
||||
You go with your crush to get fast food, you stand in line while the cashier takes the orders from the people in front of you.
|
||||
You go with your crush 😍 to get fast food 🍔, you stand in line while the cashier 💁 takes the orders from the people in front of you.
|
||||
|
||||
Then it's your turn, you place your order of 2 very fancy burgers for your crush and you.
|
||||
Then it's your turn, you place your order of 2 very fancy burgers 🍔 for your crush 😍 and you.
|
||||
|
||||
You pay.
|
||||
You pay 💸.
|
||||
|
||||
The cashier says something to the guy in the kitchen so he knows he has to prepare your burgers (even though he is currently preparing the ones for the previous clients).
|
||||
The cashier 💁 says something to the guy in the kitchen 👨🍳 so he knows he has to prepare your burgers 🍔 (even though he is currently preparing the ones for the previous clients).
|
||||
|
||||
The cashier gives you the number of your turn.
|
||||
The cashier 💁 gives you the number of your turn.
|
||||
|
||||
While you are waiting, you go with your crush and pick a table, you sit and talk with your crush for a long time (as your burgers are very fancy and take some time to prepare).
|
||||
While you are waiting, you go with your crush 😍 and pick a table, you sit and talk with your crush 😍 for a long time (as your burgers are very fancy and take some time to prepare ✨🍔✨).
|
||||
|
||||
As you are seating on the table with your crush, while you wait for the burgers, you can spend that time admiring how awesome, cute and smart your crush is.
|
||||
As you are sitting on the table with your crush 😍, while you wait for the burgers 🍔, you can spend that time admiring how awesome, cute and smart your crush is ✨😍✨.
|
||||
|
||||
While waiting and talking to your crush, from time to time, you check the number displayed on the counter to see if it's your turn already.
|
||||
While waiting and talking to your crush 😍, from time to time, you check the number displayed on the counter to see if it's your turn already.
|
||||
|
||||
Then at some point, it finally is your turn. You go to the counter, get your burgers and come back to the table.
|
||||
Then at some point, it finally is your turn. You go to the counter, get your burgers 🍔 and come back to the table.
|
||||
|
||||
You and your crush eat the burgers and have a nice time.
|
||||
You and your crush 😍 eat the burgers 🍔 and have a nice time ✨.
|
||||
|
||||
---
|
||||
|
||||
Imagine you are the computer / program in that story.
|
||||
Imagine you are the computer / program 🤖 in that story.
|
||||
|
||||
While you are at the line, you are just idle, waiting for your turn, not doing anything very "productive". But the line is fast because the cashier is only taking the orders, so that's fine.
|
||||
While you are at the line, you are just idle 😴, waiting for your turn, not doing anything very "productive". But the line is fast because the cashier 💁 is only taking the orders (not preparing them), so that's fine.
|
||||
|
||||
Then, when it's your turn, you do actual "productive" work, you process the menu, decide what you want, get your crush's choice, pay, check that you give the correct bill or card, check that you are charged correctly, check that the order has the correct items, etc.
|
||||
Then, when it's your turn, you do actual "productive" work 🤓, you process the menu, decide what you want, get your crush's 😍 choice, pay 💸, check that you give the correct bill or card, check that you are charged correctly, check that the order has the correct items, etc.
|
||||
|
||||
But then, even though you still don't have your burgers, your work with the cashier is "on pause", because you have to wait for your burgers to be ready.
|
||||
But then, even though you still don't have your burgers 🍔, your work with the cashier 💁 is "on pause" ⏸, because you have to wait 🕙 for your burgers to be ready.
|
||||
|
||||
But as you go away from the counter and seat on the table with a number for your turn, you can switch your attention to your crush, and "work" on that. Then you are again doing something very "productive", as is flirting with your crush.
|
||||
But as you go away from the counter and sit on the table with a number for your turn, you can switch 🔀 your attention to your crush 😍, and "work" ⏯ 🤓 on that. Then you are again doing something very "productive" 🤓, as is flirting with your crush 😍.
|
||||
|
||||
Then the cashier says "I'm finished with doing the burgers" by putting your number on the counter display, but you don't jump like crazy immediately when the displayed number changes to your turn number. You know no one will steal your burgers because you have the number of your turn, and they have theirs.
|
||||
Then the cashier 💁 says "I'm finished with doing the burgers" 🍔 by putting your number on the counter's display, but you don't jump like crazy immediately when the displayed number changes to your turn number. You know no one will steal your burgers 🍔 because you have the number of your turn, and they have theirs.
|
||||
|
||||
So you wait for your crush to finish the story (finish the current work / task being processed), smile gently and say that you are going for the burgers.
|
||||
So you wait for your crush 😍 to finish the story (finish the current work ⏯ / task being processed 🤓), smile gently and say that you are going for the burgers ⏸.
|
||||
|
||||
Then you go to the counter, to the initial task that is now finished, pick the burgers, say thanks and take them to the table. That finishes that step / task of interaction with the counter. That in turn, creates a new task, of "eating burgers", but the previous one of "getting burgers" is finished.
|
||||
Then you go to the counter 🔀, to the initial task that is now finished ⏯, pick the burgers 🍔, say thanks and take them to the table. That finishes that step / task of interaction with the counter ⏹. That in turn, creates a new task, of "eating burgers" 🔀 ⏯, but the previous one of "getting burgers" is finished ⏹.
|
||||
|
||||
### Parallel Burgers
|
||||
|
||||
You go with your crush to get parallel fast food.
|
||||
Now let's imagine these aren't "Concurrent Burgers", but "Parallel Burgers".
|
||||
|
||||
You stand in line while several (let's say 8) cashiers take the orders from the people in front of you.
|
||||
You go with your crush 😍 to get parallel fast food 🍔.
|
||||
|
||||
Everyone before you is waiting for their burgers to be ready before leaving the counter because each of the 8 cashiers goes himself and prepares the burger right away before getting the next order.
|
||||
You stand in line while several (let's say 8) cashiers that at the same time are cooks 👨🍳👨🍳👨🍳👨🍳👨🍳👨🍳👨🍳👨🍳 take the orders from the people in front of you.
|
||||
|
||||
Then it's finally your turn, you place your order of 2 very fancy burgers for your crush and you.
|
||||
Everyone before you is waiting 🕙 for their burgers 🍔 to be ready before leaving the counter because each of the 8 cashiers goes himself and prepares the burger right away before getting the next order.
|
||||
|
||||
You pay.
|
||||
Then it's finally your turn, you place your order of 2 very fancy burgers 🍔 for your crush 😍 and you.
|
||||
|
||||
The cashier goes to the kitchen.
|
||||
You pay 💸.
|
||||
|
||||
You wait, standing in front of the counter, so that no one else takes your burgers before you, as there are no numbers for turns.
|
||||
The cashier goes to the kitchen 👨🍳.
|
||||
|
||||
As you and your crush are busy not letting anyone get in front of you and take your burgers whenever they arrive, you cannot pay attention to your crush.
|
||||
You wait, standing in front of the counter 🕙, so that no one else takes your burgers 🍔 before you do, as there are no numbers for turns.
|
||||
|
||||
This is "synchronous" work, you are "synchronized" with the cashier/cook. You have to wait and be there at the exact moment that the cashier/cook finishes the burgers and gives them to you, or otherwise, someone else might take them.
|
||||
As you and your crush 😍 are busy not letting anyone get in front of you and take your burgers whenever they arrive 🕙, you cannot pay attention to your crush 😞.
|
||||
|
||||
Then your cashier/cook finally comes back with your burgers, after a long time waiting there in front of the counter.
|
||||
This is "synchronous" work, you are "synchronized" with the cashier/cook 👨🍳. You have to wait 🕙 and be there at the exact moment that the cashier/cook 👨🍳 finishes the burgers 🍔 and gives them to you, or otherwise, someone else might take them.
|
||||
|
||||
You take your burgers and go to the table with your crush.
|
||||
Then your cashier/cook 👨🍳 finally comes back with your burgers 🍔, after a long time waiting 🕙 there in front of the counter.
|
||||
|
||||
You just eat them, and you are done.
|
||||
You take your burgers 🍔 and go to the table with your crush 😍.
|
||||
|
||||
There was not much talk or flirting as most of the time was spent waiting in front of the counter.
|
||||
You just eat them, and you are done 🍔 ⏹.
|
||||
|
||||
There was not much talk or flirting as most of the time was spent waiting 🕙 in front of the counter 😞.
|
||||
|
||||
---
|
||||
|
||||
In this scenario of the parallel burgers, you are a computer / program with two processors (you and your crush), both waiting and dedicating their attention to be "waiting on the counter" for a long time.
|
||||
In this scenario of the parallel burgers, you are a computer / program 🤖 with two processors (you and your crush 😍), both waiting 🕙 and dedicating their attention ⏯ to be "waiting on the counter" 🕙 for a long time.
|
||||
|
||||
The fast food store has 8 processors (cashiers/cooks). While the concurrent burgers store might have had only 2 (one cashier and one cook).
|
||||
The fast food store has 8 processors (cashiers/cooks) 👨🍳👨🍳👨🍳👨🍳👨🍳👨🍳👨🍳👨🍳. While the concurrent burgers store might have had only 2 (one cashier and one cook) 💁 👨🍳.
|
||||
|
||||
But still, the final experience is not the best.
|
||||
But still, the final experience is not the best 😞.
|
||||
|
||||
---
|
||||
|
||||
This would be the parallel equivalent story for burgers.
|
||||
This would be the parallel equivalent story for burgers 🍔.
|
||||
|
||||
For a more "real life" example of this, imagine a bank.
|
||||
|
||||
Up to recently, most of the banks had multiple cashiers and a big line.
|
||||
Up to recently, most of the banks had multiple cashiers 👨💼👨💼👨💼👨💼 and a big line 🕙🕙🕙🕙🕙🕙🕙🕙.
|
||||
|
||||
All of the cashiers doing all the work with one client after the other.
|
||||
All of the cashiers doing all the work with one client after the other 👨💼⏯.
|
||||
|
||||
And you have to wait in the line for a long time or you lose your turn.
|
||||
And you have to wait 🕙 in the line for a long time or you lose your turn.
|
||||
|
||||
You probably wouldn't want to take your crush with you to do errands at the bank.
|
||||
You probably wouldn't want to take your crush 😍 with you to do errands at the bank 🏦.
|
||||
|
||||
### Burger Conclusion
|
||||
|
||||
In this scenario of "fast food burgers with your crush", as there is a lot of waiting, it makes a lot more sense to have a concurrent system.
|
||||
In this scenario of "fast food burgers with your crush", as there is a lot of waiting 🕙, it makes a lot more sense to have a concurrent system ⏸🔀⏯.
|
||||
|
||||
This is the case for most of the web applications.
|
||||
|
||||
Many, many users, but your server is waiting for their not-so-good connection to send their requests.
|
||||
Many, many users, but your server is waiting 🕙 for their not-so-good connection to send their requests.
|
||||
|
||||
And then waiting again for the responses to come back.
|
||||
And then waiting 🕙 again for the responses to come back.
|
||||
|
||||
This "waiting" is measured in microseconds, but still, summing it all, it's a lot of waiting in the end.
|
||||
This "waiting" 🕙 is measured in microseconds, but still, summing it all, it's a lot of waiting in the end.
|
||||
|
||||
That's why it makes a lot of sense to use asynchronous code for web APIs.
|
||||
That's why it makes a lot of sense to use asynchronous ⏸🔀⏯ code for web APIs.
|
||||
|
||||
Most of the existing popular Python frameworks (including Flask and Django) were created before the new asynchronous features in Python existed. So, the ways they can be deployed support parallel execution and an older form of asynchronous execution that is not as powerful as the new capabilities.
|
||||
|
||||
@@ -210,7 +212,7 @@ Even though the main specification for asynchronous web Python (ASGI) was develo
|
||||
|
||||
That kind of asynchronicity is what made NodeJS popular (even though NodeJS is not parallel) and that's the strength of Go as a programing language.
|
||||
|
||||
And that's the same level of performance</a> you get with **FastAPI**.
|
||||
And that's the same level of performance you get with **FastAPI**.
|
||||
|
||||
And as you can have parallelism and asynchronicity at the same time, you get higher performance than most of the tested NodeJS frameworks and on par with Go, which is a compiled language closer to C <a href="https://www.techempower.com/benchmarks/#section=data-r17&hw=ph&test=query&l=zijmkf-1" class="external-link" target="_blank">(all thanks to Starlette)</a>.
|
||||
|
||||
@@ -228,15 +230,15 @@ So, to balance that out, imagine the following short story:
|
||||
|
||||
---
|
||||
|
||||
There's no waiting anywhere, just a lot of work to be done, on multiple places of the house.
|
||||
There's no waiting 🕙 anywhere, just a lot of work to be done, on multiple places of the house.
|
||||
|
||||
You could have turns as in the burgers example, first the living room, then the kitchen, but as you are not waiting for anything, just cleaning and cleaning, the turns wouldn't affect anything.
|
||||
You could have turns as in the burgers example, first the living room, then the kitchen, but as you are not waiting 🕙 for anything, just cleaning and cleaning, the turns wouldn't affect anything.
|
||||
|
||||
It would take the same amount of time to finish with or without turns (concurrency) and you would have done the same amount of work.
|
||||
|
||||
But in this case, if you could bring the 8 ex-cashier/cooks/now-cleaners, and each one of them (plus you) could take a zone of the house to clean it, you could do all the work in **parallel**, with the extra help, and finish much sooner.
|
||||
But in this case, if you could bring the 8 ex-cashier/cooks/now-cleaners 👨🍳👨🍳👨🍳👨🍳👨🍳👨🍳👨🍳👨🍳, and each one of them (plus you) could take a zone of the house to clean it, you could do all the work in **parallel**, with the extra help, and finish much sooner.
|
||||
|
||||
In this scenario, each one of the cleaners (including you) would be a processor, doing their part of the job.
|
||||
In this scenario, each one of the cleaners (including you) would be a processor, doing their part of the job.
|
||||
|
||||
And as most of the execution time is taken by actual work (instead of waiting), and the work in a computer is done by a <abbr title="Central Processing Unit">CPU</abbr>, they call these problems "CPU bound".
|
||||
|
||||
@@ -246,8 +248,8 @@ Common examples of CPU bound operations are things that require complex math pro
|
||||
|
||||
For example:
|
||||
|
||||
* **Audio** or **image processing**
|
||||
* **Computer vision**: an image is composed of millions of pixels, each pixel has 3 values / colors, processing that normally requires computing something on those pixels, all at the same time)
|
||||
* **Audio** or **image processing**.
|
||||
* **Computer vision**: an image is composed of millions of pixels, each pixel has 3 values / colors, processing that normally requires computing something on those pixels, all at the same time.
|
||||
* **Machine Learning**: it normally requires lots of "matrix" and "vector" multiplications. Think of a huge spreadsheet with numbers and multiplying all of them together at the same time.
|
||||
* **Deep Learning**: this is a sub-field of Machine Learning, so, the same applies. It's just that there is not a single spreadsheet of numbers to multiply, but a huge set of them, and in many cases, you use a special processor to build and / or use those models.
|
||||
|
||||
@@ -263,7 +265,7 @@ To see how to achieve this parallelism in production see the section about [Depl
|
||||
|
||||
## `async` and `await`
|
||||
|
||||
Modern versions of python have a very intuitive way to define asynchronous code. This makes it look just like normal "sequential" code and do the "awaiting" for you at the right moments.
|
||||
Modern versions of Python have a very intuitive way to define asynchronous code. This makes it look just like normal "sequential" code and do the "awaiting" for you at the right moments.
|
||||
|
||||
When there is an operation that will require waiting before giving the results and has support for these new Python features, you can code it like:
|
||||
|
||||
@@ -271,7 +273,7 @@ When there is an operation that will require waiting before giving the results a
|
||||
burgers = await get_burgers(2)
|
||||
```
|
||||
|
||||
The key here is the `await`. It tells Python that it has to wait for `get_burgers(2)` to finish doing its thing before storing the results in `burgers`. With that, Python will know that it can go and do something else in the meanwhile (like receiving another request).
|
||||
The key here is the `await`. It tells Python that it has to wait ⏸ for `get_burgers(2)` to finish doing its thing 🕙 before storing the results in `burgers`. With that, Python will know that it can go and do something else 🔀 ⏯ in the meanwhile (like receiving another request).
|
||||
|
||||
For `await` to work, it has to be inside a function that supports this asynchronicity. To do that, you just declare it with `async def`:
|
||||
|
||||
@@ -290,7 +292,7 @@ def get_sequential_burgers(number: int):
|
||||
return burgers
|
||||
```
|
||||
|
||||
With `async def`, Python knows that, inside that function, it has to be aware of `await` expressions, and that it can "pause" the execution of that function and go do something else before coming back.
|
||||
With `async def`, Python knows that, inside that function, it has to be aware of `await` expressions, and that it can "pause" ⏸ the execution of that function and go do something else 🔀 before coming back.
|
||||
|
||||
When you want to call an `async def` function, you have to "await" it. So, this won't work:
|
||||
|
||||
@@ -334,11 +336,11 @@ But before that, handling asynchronous code was quite more complex and difficult
|
||||
|
||||
In previous versions of Python, you could have used threads or <a href="http://www.gevent.org/" class="external-link" target="_blank">Gevent</a>. But the code is way more complex to understand, debug, and think about.
|
||||
|
||||
In previous versions of NodeJS / Browser JavaScript, you would have used "callbacks". Which lead to <a href="http://callbackhell.com/" class="external-link" target="_blank">callback hell</a>.
|
||||
In previous versions of NodeJS / Browser JavaScript, you would have used "callbacks". Which leads to <a href="http://callbackhell.com/" class="external-link" target="_blank">callback hell</a>.
|
||||
|
||||
## Coroutines
|
||||
|
||||
**Coroutine** is just the very fancy term for the thing returned by an `async def` function. Python knows that it is something like a function that it can start and that it will end at some point, but that it might be paused internally too, whenever there is an `await` inside of it.
|
||||
**Coroutine** is just the very fancy term for the thing returned by an `async def` function. Python knows that it is something like a function that it can start and that it will end at some point, but that it might be paused ⏸ internally too, whenever there is an `await` inside of it.
|
||||
|
||||
But all this functionality of using asynchronous code with `async` and `await` is many times summarized as using "coroutines". It is comparable to the main key feature of Go, the "Goroutines".
|
||||
|
||||
@@ -348,7 +350,7 @@ Let's see the same phrase from above:
|
||||
|
||||
> Modern versions of Python have support for **"asynchronous code"** using something called **"coroutines"**, with **`async` and `await`** syntax.
|
||||
|
||||
That should make more sense now.
|
||||
That should make more sense now. ✨
|
||||
|
||||
All that is what powers FastAPI (through Starlette) and what makes it have such an impressive performance.
|
||||
|
||||
@@ -356,16 +358,16 @@ All that is what powers FastAPI (through Starlette) and what makes it have such
|
||||
|
||||
!!! warning
|
||||
You can probably skip this.
|
||||
|
||||
|
||||
These are very technical details of how **FastAPI** works underneath.
|
||||
|
||||
|
||||
If you have quite some technical knowledge (co-routines, threads, blocking, etc) and are curious about how FastAPI handles `async def` vs normal `def`, go ahead.
|
||||
|
||||
### Path operation functions
|
||||
|
||||
When you declare a *path operation function* with normal `def` instead of `async def`, it is run in an external threadpool that is then awaited, instead of being called directly (as it would block the server).
|
||||
|
||||
If you are coming from another async framework that does not work in the way described above and you are used to define trivial compute-only *path operation functions* with plain `def` for a tiny performance gain (about 100 nanoseconds), please note that in **FastAPI** the effect would be quite opposite. In these cases, it's better to use `async def` unless your *path operation functions* use code that performs blocking <abbr title="Input/Output: disk reading or writing, network communications.">IO</abbr>.
|
||||
If you are coming from another async framework that does not work in the way described above and you are used to define trivial compute-only *path operation functions* with plain `def` for a tiny performance gain (about 100 nanoseconds), please note that in **FastAPI** the effect would be quite opposite. In these cases, it's better to use `async def` unless your *path operation functions* use code that performs blocking <abbr title="Input/Output: disk reading or writing, network communications.">I/O</abbr>.
|
||||
|
||||
Still, in both situations, chances are that **FastAPI** will [still be faster](/#performance){.internal-link target=_blank} than (or at least comparable to) your previous framework.
|
||||
|
||||
@@ -375,7 +377,7 @@ The same applies for dependencies. If a dependency is a standard `def` function
|
||||
|
||||
### Sub-dependencies
|
||||
|
||||
You can have multiple dependencies and sub-dependencies requiring each other (as parameters of the function definitions), some of them might be created with `async def` and some with normal `def`. It would still work, and the ones created with normal `def` would be called on an external thread instead of being "awaited".
|
||||
You can have multiple dependencies and sub-dependencies requiring each other (as parameters of the function definitions), some of them might be created with `async def` and some with normal `def`. It would still work, and the ones created with normal `def` would be called on an external thread (from the threadpool) instead of being "awaited".
|
||||
|
||||
### Other utility functions
|
||||
|
||||
@@ -383,7 +385,7 @@ Any other utility function that you call directly can be created with normal `de
|
||||
|
||||
This is in contrast to the functions that FastAPI calls for you: *path operation functions* and dependencies.
|
||||
|
||||
If your utility function is a normal function with `def`, it will be called directly (as you write it in your code), not in a threadpool, if the function is created with `async def` then you should await for that function when you call it in your code.
|
||||
If your utility function is a normal function with `def`, it will be called directly (as you write it in your code), not in a threadpool, if the function is created with `async def` then you should `await` for that function when you call it in your code.
|
||||
|
||||
---
|
||||
|
||||
|
||||
@@ -24,59 +24,67 @@ That will create a directory `./env/` with the Python binaries and then you will
|
||||
|
||||
Activate the new environment with:
|
||||
|
||||
<div class="termy">
|
||||
=== "Linux, macOS"
|
||||
|
||||
```console
|
||||
$ source ./env/bin/activate
|
||||
```
|
||||
<div class="termy">
|
||||
|
||||
</div>
|
||||
```console
|
||||
$ source ./env/bin/activate
|
||||
```
|
||||
|
||||
Or in Windows' PowerShell:
|
||||
</div>
|
||||
|
||||
<div class="termy">
|
||||
=== "Windows PowerShell"
|
||||
|
||||
```console
|
||||
$ .\env\Scripts\Activate.ps1
|
||||
```
|
||||
<div class="termy">
|
||||
|
||||
</div>
|
||||
```console
|
||||
$ .\env\Scripts\Activate.ps1
|
||||
```
|
||||
|
||||
Or if you use Bash for Windows (e.g. <a href="https://gitforwindows.org/" class="external-link" target="_blank">Git Bash</a>):
|
||||
</div>
|
||||
|
||||
<div class="termy">
|
||||
=== "Windows Bash"
|
||||
|
||||
```console
|
||||
$ source ./env/Scripts/activate
|
||||
```
|
||||
Or if you use Bash for Windows (e.g. <a href="https://gitforwindows.org/" class="external-link" target="_blank">Git Bash</a>):
|
||||
|
||||
</div>
|
||||
<div class="termy">
|
||||
|
||||
```console
|
||||
$ source ./env/Scripts/activate
|
||||
```
|
||||
|
||||
</div>
|
||||
|
||||
To check it worked, use:
|
||||
|
||||
<div class="termy">
|
||||
=== "Linux, macOS, Windows Bash"
|
||||
|
||||
```console
|
||||
$ which pip
|
||||
<div class="termy">
|
||||
|
||||
some/directory/fastapi/env/bin/pip
|
||||
```
|
||||
```console
|
||||
$ which pip
|
||||
|
||||
</div>
|
||||
some/directory/fastapi/env/bin/pip
|
||||
```
|
||||
|
||||
</div>
|
||||
|
||||
=== "Windows PowerShell"
|
||||
|
||||
<div class="termy">
|
||||
|
||||
```console
|
||||
$ Get-Command pip
|
||||
|
||||
some/directory/fastapi/env/bin/pip
|
||||
```
|
||||
|
||||
</div>
|
||||
|
||||
If it shows the `pip` binary at `env/bin/pip` then it worked. 🎉
|
||||
|
||||
Or in Windows PowerShell:
|
||||
|
||||
<div class="termy">
|
||||
|
||||
```console
|
||||
$ Get-Command pip
|
||||
|
||||
some/directory/fastapi/env/bin/pip
|
||||
```
|
||||
|
||||
</div>
|
||||
|
||||
!!! tip
|
||||
Every time you install a new package with `pip` under that environment, activate the environment again.
|
||||
@@ -103,27 +111,31 @@ Now re-activate the environment to make sure you are using the `flit` you just i
|
||||
|
||||
And now use `flit` to install the development dependencies:
|
||||
|
||||
<div class="termy">
|
||||
=== "Linux, macOS"
|
||||
|
||||
```console
|
||||
$ flit install --deps develop --symlink
|
||||
<div class="termy">
|
||||
|
||||
---> 100%
|
||||
```
|
||||
```console
|
||||
$ flit install --deps develop --symlink
|
||||
|
||||
</div>
|
||||
---> 100%
|
||||
```
|
||||
|
||||
If you are on Windows, use `--pth-file` instead of `--symlink`:
|
||||
</div>
|
||||
|
||||
<div class="termy">
|
||||
=== "Windows"
|
||||
|
||||
```console
|
||||
$ flit install --deps develop --pth-file
|
||||
If you are on Windows, use `--pth-file` instead of `--symlink`:
|
||||
|
||||
---> 100%
|
||||
```
|
||||
<div class="termy">
|
||||
|
||||
</div>
|
||||
```console
|
||||
$ flit install --deps develop --pth-file
|
||||
|
||||
---> 100%
|
||||
```
|
||||
|
||||
</div>
|
||||
|
||||
It will install all the dependencies and your local FastAPI in your local environment.
|
||||
|
||||
@@ -257,7 +269,16 @@ Here are the steps to help with translations.
|
||||
|
||||
#### Tips and guidelines
|
||||
|
||||
* Add a single Pull Request per page translated. That will make it much easier for others to review it.
|
||||
* Check the currently <a href="https://github.com/tiangolo/fastapi/pulls" class="external-link" target="_blank">existing pull requests</a> for your language and add reviews requesting changes or approving them.
|
||||
|
||||
!!! tip
|
||||
You can <a href="https://help.github.com/en/github/collaborating-with-issues-and-pull-requests/commenting-on-a-pull-request" class="external-link" target="_blank">add comments with change suggestions</a> to existing pull requests.
|
||||
|
||||
Check the docs about <a href="https://help.github.com/en/github/collaborating-with-issues-and-pull-requests/about-pull-request-reviews" class="external-link" target="_blank">adding a pull request review</a> to approve it or request changes.
|
||||
|
||||
* Check in the <a href="https://github.com/tiangolo/fastapi/issues" class="external-link" target="_blank">issues</a> to see if there's one coordinating translations for your language.
|
||||
|
||||
* Add a single pull request per page translated. That will make it much easier for others to review it.
|
||||
|
||||
For the languages I don't speak, I'll wait for several others to review the translation before merging.
|
||||
|
||||
@@ -385,6 +406,11 @@ Updating en
|
||||
|
||||
Now you can check in your code editor the newly created directory `docs/ht/`.
|
||||
|
||||
!!! tip
|
||||
Create a first pull request with just this, to set up the configuration for the new language, before adding translations.
|
||||
|
||||
That way others can help with other pages while you work on the first one. 🚀
|
||||
|
||||
Start by translating the main page, `docs/ht/index.md`.
|
||||
|
||||
Then you can continue with the previous instructions, for an "Existing Language".
|
||||
|
||||
@@ -329,55 +329,61 @@ You can deploy **FastAPI** directly without Docker too.
|
||||
|
||||
You just need to install an ASGI compatible server like:
|
||||
|
||||
* <a href="https://www.uvicorn.org/" class="external-link" target="_blank">Uvicorn</a>, a lightning-fast ASGI server, built on uvloop and httptools.
|
||||
=== "Uvicorn"
|
||||
|
||||
<div class="termy">
|
||||
* <a href="https://www.uvicorn.org/" class="external-link" target="_blank">Uvicorn</a>, a lightning-fast ASGI server, built on uvloop and httptools.
|
||||
|
||||
```console
|
||||
$ pip install uvicorn
|
||||
<div class="termy">
|
||||
|
||||
---> 100%
|
||||
```
|
||||
```console
|
||||
$ pip install uvicorn
|
||||
|
||||
</div>
|
||||
---> 100%
|
||||
```
|
||||
|
||||
* <a href="https://gitlab.com/pgjones/hypercorn" class="external-link" target="_blank">Hypercorn</a>, an ASGI server also compatible with HTTP/2.
|
||||
</div>
|
||||
|
||||
<div class="termy">
|
||||
=== "Hypercorn"
|
||||
|
||||
```console
|
||||
$ pip install hypercorn
|
||||
* <a href="https://gitlab.com/pgjones/hypercorn" class="external-link" target="_blank">Hypercorn</a>, an ASGI server also compatible with HTTP/2.
|
||||
|
||||
---> 100%
|
||||
```
|
||||
<div class="termy">
|
||||
|
||||
</div>
|
||||
```console
|
||||
$ pip install hypercorn
|
||||
|
||||
...or any other ASGI server.
|
||||
---> 100%
|
||||
```
|
||||
|
||||
</div>
|
||||
|
||||
...or any other ASGI server.
|
||||
|
||||
And run your application the same way you have done in the tutorials, but without the `--reload` option, e.g.:
|
||||
|
||||
<div class="termy">
|
||||
=== "Uvicorn"
|
||||
|
||||
```console
|
||||
$ uvicorn main:app --host 0.0.0.0 --port 80
|
||||
<div class="termy">
|
||||
|
||||
<span style="color: green;">INFO</span>: Uvicorn running on http://0.0.0.0:80 (Press CTRL+C to quit)
|
||||
```
|
||||
```console
|
||||
$ uvicorn main:app --host 0.0.0.0 --port 80
|
||||
|
||||
</div>
|
||||
<span style="color: green;">INFO</span>: Uvicorn running on http://0.0.0.0:80 (Press CTRL+C to quit)
|
||||
```
|
||||
|
||||
or with Hypercorn:
|
||||
</div>
|
||||
|
||||
<div class="termy">
|
||||
=== "Hypercorn"
|
||||
|
||||
```console
|
||||
$ hypercorn main:app --bind 0.0.0.0:80
|
||||
<div class="termy">
|
||||
|
||||
Running on 0.0.0.0:8080 over http (CTRL + C to quit)
|
||||
```
|
||||
```console
|
||||
$ hypercorn main:app --bind 0.0.0.0:80
|
||||
|
||||
</div>
|
||||
Running on 0.0.0.0:8080 over http (CTRL + C to quit)
|
||||
```
|
||||
|
||||
</div>
|
||||
|
||||
You might want to set up some tooling to make sure it is restarted automatically if it stops.
|
||||
|
||||
|
||||
@@ -71,7 +71,7 @@ my_second_user: User = User(**second_user_data)
|
||||
|
||||
### Editor support
|
||||
|
||||
All the framework was designed to be easy and intuitive to use, all the decisions where tested on multiple editors even before starting development, to ensure the best development experience.
|
||||
All the framework was designed to be easy and intuitive to use, all the decisions were tested on multiple editors even before starting development, to ensure the best development experience.
|
||||
|
||||
In the last Python developer survey it was clear <a href="https://www.jetbrains.com/research/python-developers-survey-2017/#tools-and-features" class="external-link" target="_blank">that the most used feature is "autocompletion"</a>.
|
||||
|
||||
|
||||
@@ -69,7 +69,6 @@ You can let me know:
|
||||
|
||||
## Vote for FastAPI
|
||||
|
||||
* <a href="https://github.com/vinta/awesome-python/pull/1209" class="external-link" target="_blank">Vote to include **FastAPI** in `awesome-python`</a>.
|
||||
* <a href="https://www.slant.co/options/34241/~fastapi-review" class="external-link" target="_blank">Vote for **FastAPI** in Slant</a>.
|
||||
|
||||
## Help others with issues in GitHub
|
||||
@@ -101,6 +100,12 @@ You can <a href="https://github.com/tiangolo/fastapi" class="external-link" targ
|
||||
* To fix an existing issue/bug.
|
||||
* To add a new feature.
|
||||
|
||||
## Sponsor the author
|
||||
|
||||
You can also financially support the author (me) through <a href="https://github.com/sponsors/tiangolo" class="external-link" target="_blank">GitHub sponsors</a>.
|
||||
|
||||
There you could buy me a coffee ☕️ to say thanks 😄.
|
||||
|
||||
---
|
||||
|
||||
Thanks!
|
||||
|
||||
|
Before Width: | Height: | Size: 37 KiB After Width: | Height: | Size: 37 KiB |
@@ -33,7 +33,7 @@ The key features are:
|
||||
|
||||
* **Fast**: Very high performance, on par with **NodeJS** and **Go** (thanks to Starlette and Pydantic). [One of the fastest Python frameworks available](#performance).
|
||||
|
||||
* **Fast to code**: Increase the speed to develop features by about 200% to 300% *.
|
||||
* **Fast to code**: Increase the speed to develop features by about 200% to 300%. *
|
||||
* **Fewer bugs**: Reduce about 40% of human (developer) induced errors. *
|
||||
* **Intuitive**: Great editor support. <abbr title="also known as auto-complete, autocompletion, IntelliSense">Completion</abbr> everywhere. Less time debugging.
|
||||
* **Easy**: Designed to be easy to use and learn. Less time reading docs.
|
||||
@@ -176,11 +176,11 @@ Run the server with:
|
||||
```console
|
||||
$ uvicorn main:app --reload
|
||||
|
||||
<span style="color: green;">INFO</span>: Uvicorn running on http://127.0.0.1:8000 (Press CTRL+C to quit)
|
||||
<span style="color: green;">INFO</span>: Started reloader process [28720]
|
||||
<span style="color: green;">INFO</span>: Started server process [28722]
|
||||
<span style="color: green;">INFO</span>: Waiting for application startup.
|
||||
<span style="color: green;">INFO</span>: Application startup complete.
|
||||
INFO: Uvicorn running on http://127.0.0.1:8000 (Press CTRL+C to quit)
|
||||
INFO: Started reloader process [28720]
|
||||
INFO: Started server process [28722]
|
||||
INFO: Waiting for application startup.
|
||||
INFO: Application startup complete.
|
||||
```
|
||||
|
||||
</div>
|
||||
|
||||
@@ -35,7 +35,7 @@ function setupTermynal() {
|
||||
|
||||
function createTermynals() {
|
||||
document
|
||||
.querySelectorAll(`.${termynalActivateClass} .codehilite`)
|
||||
.querySelectorAll(`.${termynalActivateClass} .highlight`)
|
||||
.forEach(node => {
|
||||
const text = node.textContent;
|
||||
const lines = text.split("\n");
|
||||
|
||||
@@ -1,16 +1,18 @@
|
||||
# Project Generation - Template
|
||||
|
||||
There is a project generator that you can use to get started, with a lot of the initial set up, security, database and first API endpoints already done for you.
|
||||
You can use a project generator to get started, as it includes a lot of the initial set up, security, database and first API endpoints already done for you.
|
||||
|
||||
## Full-Stack-FastAPI-PostgreSQL
|
||||
A project generator will always have a very opinionated setup that you should update and adapt for your own needs, but it might be a good starting point for your project.
|
||||
|
||||
## Full Stack FastAPI PostgreSQL
|
||||
|
||||
GitHub: <a href="https://github.com/tiangolo/full-stack-fastapi-postgresql" class="external-link" target="_blank">https://github.com/tiangolo/full-stack-fastapi-postgresql</a>
|
||||
|
||||
### Full-Stack-FastAPI-PostgreSQL Features
|
||||
### Full Stack FastAPI PostgreSQL - Features
|
||||
|
||||
* Full **Docker** integration (Docker based).
|
||||
* Docker Swarm Mode deployment.
|
||||
* **Docker Compose** integration and optimization for local development
|
||||
* **Docker Compose** integration and optimization for local development.
|
||||
* **Production ready** Python web server using Uvicorn and Gunicorn.
|
||||
* Python <a href="https://github.com/tiangolo/fastapi" class="external-link" target="_blank">**FastAPI**</a> backend:
|
||||
* **Fast**: Very high performance, on par with **NodeJS** and **Go** (thanks to Starlette and Pydantic).
|
||||
@@ -19,14 +21,14 @@ GitHub: <a href="https://github.com/tiangolo/full-stack-fastapi-postgresql" clas
|
||||
* **Short**: Minimize code duplication. Multiple features from each parameter declaration.
|
||||
* **Robust**: Get production-ready code. With automatic interactive documentation.
|
||||
* **Standards-based**: Based on (and fully compatible with) the open standards for APIs: <a href="https://github.com/OAI/OpenAPI-Specification" class="external-link" target="_blank">OpenAPI</a> and <a href="http://json-schema.org/" class="external-link" target="_blank">JSON Schema</a>.
|
||||
* Many other features including automatic validation, serialization, interactive documentation, authentication with OAuth2 JWT tokens, etc.
|
||||
* <a href="https://fastapi.tiangolo.com/features/" class="external-link" target="_blank">**Many other features**</a> including automatic validation, serialization, interactive documentation, authentication with OAuth2 JWT tokens, etc.
|
||||
* **Secure password** hashing by default.
|
||||
* **JWT token** authentication.
|
||||
* **SQLAlchemy** models (independent of Flask extensions, so they can be used with Celery workers directly).
|
||||
* Basic starting models for users (modify and remove as you need).
|
||||
* **Alembic** migrations.
|
||||
* **CORS** (Cross Origin Resource Sharing).
|
||||
* **Celery** worker that can import and use models and code from the rest of the backend selectively (you don't have to install the complete app in each worker).
|
||||
* **Celery** worker that can import and use models and code from the rest of the backend selectively.
|
||||
* REST backend tests based on **Pytest**, integrated with Docker, so you can test the full API interaction, independent on the database. As it runs in Docker, it can build a new data store from scratch each time (so you can use ElasticSearch, MongoDB, CouchDB, or whatever you want, and just test that the API works).
|
||||
* Easy Python integration with **Jupyter Kernels** for remote or in-Docker development with extensions like Atom Hydrogen or Visual Studio Code Jupyter.
|
||||
* **Vue** frontend:
|
||||
@@ -50,53 +52,20 @@ GitHub: <a href="https://github.com/tiangolo/full-stack-fastapi-postgresql" clas
|
||||
* Traefik integration, including Let's Encrypt **HTTPS** certificates automatic generation.
|
||||
* GitLab **CI** (continuous integration), including frontend and backend testing.
|
||||
|
||||
## Full-Stack-FastAPI-Couchbase
|
||||
## Full Stack FastAPI Couchbase
|
||||
|
||||
GitHub: <a href="https://github.com/tiangolo/full-stack-fastapi-couchbase" class="external-link" target="_blank">https://github.com/tiangolo/full-stack-fastapi-couchbase</a>
|
||||
|
||||
### Full-Stack-FastAPI-Couchbase Features
|
||||
⚠️ **WARNING** ⚠️
|
||||
|
||||
* Full **Docker** integration (Docker based).
|
||||
* Docker Swarm Mode deployment.
|
||||
* **Docker Compose** integration and optimization for local development.
|
||||
* **Production ready** Python web server using Uvicorn and Gunicorn.
|
||||
* Python <a href="https://github.com/tiangolo/fastapi" class="external-link" target="_blank">**FastAPI**</a> backend:
|
||||
* **Fast**: Very high performance, on par with **NodeJS** and **Go** (thanks to Starlette and Pydantic).
|
||||
* **Intuitive**: Great editor support. <abbr title="also known as auto-complete, autocompletion, IntelliSense">Completion</abbr> everywhere. Less time debugging.
|
||||
* **Easy**: Designed to be easy to use and learn. Less time reading docs.
|
||||
* **Short**: Minimize code duplication. Multiple features from each parameter declaration.
|
||||
* **Robust**: Get production-ready code. With automatic interactive documentation.
|
||||
* **Standards-based**: <a href="https://github.com/OAI/OpenAPI-Specification" class="external-link" target="_blank">OpenAPI</a> and <a href="http://json-schema.org/" class="external-link" target="_blank">JSON Schema</a>.
|
||||
* Many other features including automatic validation, serialization, interactive documentation, authentication with OAuth2 JWT tokens, etc.
|
||||
* **Secure password** hashing by default.
|
||||
* **JWT token** authentication.
|
||||
* **CORS** (Cross Origin Resource Sharing).
|
||||
* **Celery** worker that can import and use code from the rest of the backend selectively (you don't have to install the complete app in each worker).
|
||||
* **NoSQL Couchbase** database that supports direct synchronization via Couchbase Sync Gateway for offline-first applications.
|
||||
* **Full Text Search** integrated, using Couchbase.
|
||||
* REST backend tests based on Pytest, integrated with Docker, so you can test the full API interaction, independent on the database. As it runs in Docker, it can build a new data store from scratch each time (so you can use ElasticSearch, MongoDB, or whatever you want, and just test that the API works).
|
||||
* Easy Python integration with **Jupyter** Kernels for remote or in-Docker development with extensions like Atom Hydrogen or Visual Studio Code Jupyter.
|
||||
* **Email notifications** for account creation and password recovery, compatible with:
|
||||
* Mailgun
|
||||
* SparkPost
|
||||
* SendGrid
|
||||
* ...any other provider that can generate standard SMTP credentials.
|
||||
* **Vue** frontend:
|
||||
* Generated with Vue CLI.
|
||||
* **JWT Authentication** handling.
|
||||
* Login view.
|
||||
* After login, main dashboard view.
|
||||
* Main dashboard with user creation and edition.
|
||||
* Self user edition.
|
||||
* **Vuex**.
|
||||
* **Vue-router**.
|
||||
* **Vuetify** for beautiful material design components.
|
||||
* **TypeScript**.
|
||||
* Docker server based on **Nginx** (configured to play nicely with Vue-router).
|
||||
* Docker multi-stage building, so you don't need to save or commit compiled code.
|
||||
* Frontend tests ran at build time (can be disabled too).
|
||||
* Made as modular as possible, so it works out of the box, but you can re-generate with Vue CLI or create it as you need, and re-use what you want.
|
||||
* **Flower** for Celery jobs monitoring.
|
||||
* Load balancing between frontend and backend with **Traefik**, so you can have both under the same domain, separated by path, but served by different containers.
|
||||
* Traefik integration, including Let's Encrypt **HTTPS** certificates automatic generation.
|
||||
* GitLab **CI** (continuous integration), including frontend and backend testing.
|
||||
If you are starting a new project from scratch, check the alternatives here.
|
||||
|
||||
For example, the project generator <a href="https://github.com/tiangolo/full-stack-fastapi-postgresql" class="external-link" target="_blank">Full Stack FastAPI PostgreSQL</a> might be a better alternative, as it is actively maintained and used. And it includes all the new features and improvements.
|
||||
|
||||
You are still free to use the Couchbase-based generator if you want to, it should probably still work fine, and if you already have a project generated with it that's fine as well (and you probably already updated it to suit your needs).
|
||||
|
||||
You can read more about it in the docs for the repo.
|
||||
|
||||
## Full Stack FastAPI MongoDB
|
||||
|
||||
...might come later, depending on my time availability and other factors. 😅 🎉
|
||||
|
||||
@@ -194,7 +194,7 @@ You would do the same to declare `tuple`s and `set`s:
|
||||
|
||||
This means:
|
||||
|
||||
* The variable `items_t` is a `tuple`, and each of its items is an `int`.
|
||||
* The variable `items_t` is a `tuple` with 3 items, an `int`, another `int`, and a `str`.
|
||||
* The variable `items_s` is a `set`, and each of its items is of type `bytes`.
|
||||
|
||||
#### Dicts
|
||||
|
||||
@@ -2,6 +2,66 @@
|
||||
|
||||
## Latest changes
|
||||
|
||||
## 0.55.1
|
||||
|
||||
* Fix handling of enums with their own schema in path parameters. To support [samuelcolvin/pydantic#1432](https://github.com/samuelcolvin/pydantic/pull/1432) in FastAPI. PR [#1463](https://github.com/tiangolo/fastapi/pull/1463).
|
||||
|
||||
## 0.55.0
|
||||
|
||||
* Allow enums to allow them to have their own schemas in OpenAPI. To support [samuelcolvin/pydantic#1432](https://github.com/samuelcolvin/pydantic/pull/1432) in FastAPI. PR [#1461](https://github.com/tiangolo/fastapi/pull/1461).
|
||||
* Add links for funding through [GitHub sponsors](https://github.com/sponsors/tiangolo). PR [#1425](https://github.com/tiangolo/fastapi/pull/1425).
|
||||
* Update issue template for for questions. PR [#1344](https://github.com/tiangolo/fastapi/pull/1344) by [@retnikt](https://github.com/retnikt).
|
||||
* Update warning about storing passwords in docs. PR [#1336](https://github.com/tiangolo/fastapi/pull/1336) by [@skorokithakis](https://github.com/skorokithakis).
|
||||
* Fix typo. PR [#1326](https://github.com/tiangolo/fastapi/pull/1326) by [@chenl](https://github.com/chenl).
|
||||
* Add translation to Portuguese for [Alternatives, Inspiration and Comparisons - Alternativas, Inspiração e Comparações](https://fastapi.tiangolo.com/pt/alternatives/). PR [#1325](https://github.com/tiangolo/fastapi/pull/1325) by [@Serrones](https://github.com/Serrones).
|
||||
* Fix 2 typos in docs. PR [#1324](https://github.com/tiangolo/fastapi/pull/1324) by [@waynerv](https://github.com/waynerv).
|
||||
* Update CORS docs, fix correct default of `max_age=600`. PR [#1301](https://github.com/tiangolo/fastapi/pull/1301) by [@derekbekoe](https://github.com/derekbekoe).
|
||||
* Add translation of [main page to Portuguese](https://fastapi.tiangolo.com/pt/). PR [#1300](https://github.com/tiangolo/fastapi/pull/1300) by [@Serrones](https://github.com/Serrones).
|
||||
* Re-word and clarify docs for extra info in fields. PR [#1299](https://github.com/tiangolo/fastapi/pull/1299) by [@chris-allnutt](https://github.com/chris-allnutt).
|
||||
* Make sure the `*` in short features in the docs is consistent (after `.`) in all languages. PR [#1424](https://github.com/tiangolo/fastapi/pull/1424).
|
||||
* Update order of execution for `get_db` in SQLAlchemy tutorial. PR [#1293](https://github.com/tiangolo/fastapi/pull/1293) by [@bcb](https://github.com/bcb).
|
||||
* Fix typos in Async docs. PR [#1423](https://github.com/tiangolo/fastapi/pull/1423).
|
||||
|
||||
## 0.54.2
|
||||
|
||||
* Add translation to Spanish for [Concurrency and async / await - Concurrencia y async / await](https://fastapi.tiangolo.com/es/async/). PR [#1290](https://github.com/tiangolo/fastapi/pull/1290) by [@alvaropernas](https://github.com/alvaropernas).
|
||||
* Remove obsolete vote link. PR [#1289](https://github.com/tiangolo/fastapi/pull/1289) by [@donhui](https://github.com/donhui).
|
||||
* Allow disabling docs UIs by just disabling OpenAPI with `openapi_url=None`. New example in docs: [Advanced: Conditional OpenAPI](https://fastapi.tiangolo.com/advanced/conditional-openapi/). PR [#1421](https://github.com/tiangolo/fastapi/pull/1421).
|
||||
* Add translation to Portuguese for [Benchmarks - Comparações](https://fastapi.tiangolo.com/pt/benchmarks/). PR [#1274](https://github.com/tiangolo/fastapi/pull/1274) by [@Serrones](https://github.com/Serrones).
|
||||
* Add translation to Portuguese for [Tutorial - User Guide - Intro - Tutorial - Guia de Usuário - Introdução](https://fastapi.tiangolo.com/pt/tutorial/). PR [#1259](https://github.com/tiangolo/fastapi/pull/1259) by [@marcosmmb](https://github.com/marcosmmb).
|
||||
* Allow using Unicode in MkDocs for translations. PR [#1419](https://github.com/tiangolo/fastapi/pull/1419).
|
||||
* Add translation to Spanish for [Advanced User Guide - Intro - Guía de Usuario Avanzada - Introducción](https://fastapi.tiangolo.com/es/advanced/). PR [#1250](https://github.com/tiangolo/fastapi/pull/1250) by [@jfunez](https://github.com/jfunez).
|
||||
* Add translation to Portuguese for [History, Design and Future - História, Design e Futuro](https://fastapi.tiangolo.com/pt/history-design-future/). PR [#1249](https://github.com/tiangolo/fastapi/pull/1249) by [@marcosmmb](https://github.com/marcosmmb).
|
||||
* Add translation to Portuguese for [Features - Recursos](https://fastapi.tiangolo.com/pt/features/). PR [#1248](https://github.com/tiangolo/fastapi/pull/1248) by [@marcosmmb](https://github.com/marcosmmb).
|
||||
* Add translation to Spanish for [Tutorial - User Guide - Intro - Tutorial - Guía de Usuario - Introducción](https://fastapi.tiangolo.com/es/tutorial/). PR [#1244](https://github.com/tiangolo/fastapi/pull/1244) by [@MartinEliasQ](https://github.com/MartinEliasQ).
|
||||
* Add translation to Chinese for [Deployment - 部署](https://fastapi.tiangolo.com/zh/deployment/). PR [#1203](https://github.com/tiangolo/fastapi/pull/1203) by [@RunningIkkyu](https://github.com/RunningIkkyu).
|
||||
* Add translation to Chinese for [Tutorial - User Guide - Intro - 教程 - 用户指南 - 简介](https://fastapi.tiangolo.com/zh/tutorial/). PR [#1202](https://github.com/tiangolo/fastapi/pull/1202) by [@waynerv](https://github.com/waynerv).
|
||||
* Add translation to Chinese for [Features - 特性](https://fastapi.tiangolo.com/zh/features/). PR [#1192](https://github.com/tiangolo/fastapi/pull/1192) by [@Dustyposa](https://github.com/Dustyposa).
|
||||
* Add translation for [main page to Chinese](https://fastapi.tiangolo.com/zh/) PR [#1191](https://github.com/tiangolo/fastapi/pull/1191) by [@waynerv](https://github.com/waynerv).
|
||||
* Update docs for project generation. PR [#1287](https://github.com/tiangolo/fastapi/pull/1287).
|
||||
* Add Spanish translation for [Introducción a los Tipos de Python (Python Types Intro)](https://fastapi.tiangolo.com/es/python-types/). PR [#1237](https://github.com/tiangolo/fastapi/pull/1237) by [@mariacamilagl](https://github.com/mariacamilagl).
|
||||
* Add Spanish translation for [Características (Features)](https://fastapi.tiangolo.com/es/features/). PR [#1220](https://github.com/tiangolo/fastapi/pull/1220) by [@mariacamilagl](https://github.com/mariacamilagl).
|
||||
|
||||
## 0.54.1
|
||||
|
||||
* Update database test setup. PR [#1226](https://github.com/tiangolo/fastapi/pull/1226).
|
||||
* Improve test debugging by showing response text in failing tests. PR [#1222](https://github.com/tiangolo/fastapi/pull/1222) by [@samuelcolvin](https://github.com/samuelcolvin).
|
||||
|
||||
## 0.54.0
|
||||
|
||||
* Fix grammatical mistakes in async docs. PR [#1188](https://github.com/tiangolo/fastapi/pull/1188) by [@mickeypash](https://github.com/mickeypash).
|
||||
* Add support for `response_model_exclude_defaults` and `response_model_exclude_none`:
|
||||
* Deprecate the parameter `include_none` in `jsonable_encoder` and add the inverted `exclude_none`, to keep in sync with Pydantic.
|
||||
* PR [#1166](https://github.com/tiangolo/fastapi/pull/1166) by [@voegtlel](https://github.com/voegtlel).
|
||||
* Add example about [Testing a Database](https://fastapi.tiangolo.com/advanced/testing-database/). Initial PR [#1144](https://github.com/tiangolo/fastapi/pull/1144) by [@duganchen](https://github.com/duganchen).
|
||||
* Update docs for [Development - Contributing: Translations](https://fastapi.tiangolo.com/contributing/#translations) including note about reviewing translation PRs. [#1215](https://github.com/tiangolo/fastapi/pull/1215).
|
||||
* Update log style in README.md for GitHub Markdown compatibility. PR [#1200](https://github.com/tiangolo/fastapi/pull/1200) by [#geekgao](https://github.com/geekgao).
|
||||
* Add Python venv `env` to `.gitignore`. PR [#1212](https://github.com/tiangolo/fastapi/pull/1212) by [@cassiobotaro](https://github.com/cassiobotaro).
|
||||
* Start Portuguese translations. PR [#1210](https://github.com/tiangolo/fastapi/pull/1210) by [@cassiobotaro](https://github.com/cassiobotaro).
|
||||
* Update docs for Pydantic's `Settings` using a dependency with `@lru_cache()`. PR [#1214](https://github.com/tiangolo/fastapi/pull/1214).
|
||||
* Add first translation to Spanish [FastAPI](https://fastapi.tiangolo.com/es/). PR [#1201](https://github.com/tiangolo/fastapi/pull/1201) by [@mariacamilagl](https://github.com/mariacamilagl).
|
||||
* Add docs about [Settings and Environment Variables](https://fastapi.tiangolo.com/advanced/settings/). Initial PR [1118](https://github.com/tiangolo/fastapi/pull/1118) by [@alexmitelman](https://github.com/alexmitelman).
|
||||
|
||||
## 0.53.2
|
||||
|
||||
* Fix automatic embedding of body fields for dependencies and sub-dependencies. Original PR [#1079](https://github.com/tiangolo/fastapi/pull/1079) by [@Toad2186](https://github.com/Toad2186).
|
||||
|
||||
@@ -39,7 +39,7 @@ You can then use `Field` with model attributes:
|
||||
|
||||
You can declare extra information in `Field`, `Query`, `Body`, etc. And it will be included in the generated JSON Schema.
|
||||
|
||||
You will learn more about it later to declare examples examples.
|
||||
You will learn more about adding extra information later in the docs, when learning to declare examples.
|
||||
|
||||
## Recap
|
||||
|
||||
|
||||
@@ -60,7 +60,7 @@ The following arguments are supported:
|
||||
* `allow_headers` - A list of HTTP request headers that should be supported for cross-origin requests. Defaults to `[]`. You can use `['*']` to allow all headers. The `Accept`, `Accept-Language`, `Content-Language` and `Content-Type` headers are always allowed for CORS requests.
|
||||
* `allow_credentials` - Indicate that cookies should be supported for cross-origin requests. Defaults to `False`.
|
||||
* `expose_headers` - Indicate any response headers that should be made accessible to the browser. Defaults to `[]`.
|
||||
* `max_age` - Sets a maximum time in seconds for browsers to cache CORS responses. Defaults to `60`.
|
||||
* `max_age` - Sets a maximum time in seconds for browsers to cache CORS responses. Defaults to `600`.
|
||||
|
||||
The middleware responds to two particular types of HTTP request...
|
||||
|
||||
|
||||
@@ -239,7 +239,7 @@ So, in OpenAPI, each of the HTTP methods is called an "operation".
|
||||
|
||||
We are going to call them "**operations**" too.
|
||||
|
||||
#### Define a *path operation function*
|
||||
#### Define a *path operation decorator*
|
||||
|
||||
```Python hl_lines="6"
|
||||
{!../../../docs_src/first_steps/tutorial001.py!}
|
||||
|
||||
@@ -115,7 +115,7 @@ So, you will receive a clean error, with an HTTP status code of `418` and a JSON
|
||||
|
||||
**FastAPI** has some default exception handlers.
|
||||
|
||||
These handlers are in charge or returning the default JSON responses when you `raise` an `HTTPException` and when the request has invalid data.
|
||||
These handlers are in charge of returning the default JSON responses when you `raise` an `HTTPException` and when the request has invalid data.
|
||||
|
||||
You can override these exception handlers with your own.
|
||||
|
||||
|
||||
@@ -75,6 +75,6 @@ There is also an **Advanced User Guide** that you can read later after this **Tu
|
||||
|
||||
The **Advanced User Guide**, builds on this, uses the same concepts, and teaches you some extra features.
|
||||
|
||||
But you should first read the **Tutorial - User guide** (what you are reading right now).
|
||||
But you should first read the **Tutorial - User Guide** (what you are reading right now).
|
||||
|
||||
It's designed so that you can build a complete application with just the **Tutorial - User guide**, and then extend it in different ways, depending on your needs, using some of the additional ideas from the **Advanced User Guide**.
|
||||
It's designed so that you can build a complete application with just the **Tutorial - User Guide**, and then extend it in different ways, depending on your needs, using some of the additional ideas from the **Advanced User Guide**.
|
||||
|
||||
@@ -1,25 +1,25 @@
|
||||
# Application Configuration
|
||||
# Metadata and Docs URLs
|
||||
|
||||
There are several things that you can configure in your FastAPI application.
|
||||
You can customize several metadata configurations in your **FastAPI** application.
|
||||
|
||||
## Title, description, and version
|
||||
|
||||
You can set the:
|
||||
|
||||
* Title: used as your API's title/name, in OpenAPI and the automatic API docs UIs.
|
||||
* Description: the description of your API, in OpenAPI and the automatic API docs UIs.
|
||||
* Version: the version of your API, e.g. `v2` or `2.5.0`.
|
||||
* **Title**: used as your API's title/name, in OpenAPI and the automatic API docs UIs.
|
||||
* **Description**: the description of your API, in OpenAPI and the automatic API docs UIs.
|
||||
* **Version**: the version of your API, e.g. `v2` or `2.5.0`.
|
||||
* Useful for example if you had a previous version of the application, also using OpenAPI.
|
||||
|
||||
To set them, use the parameters `title`, `description`, and `version`:
|
||||
|
||||
```Python hl_lines="4 5 6"
|
||||
{!../../../docs_src/application_configuration/tutorial001.py!}
|
||||
{!../../../docs_src/metadata/tutorial001.py!}
|
||||
```
|
||||
|
||||
With this configuration, the automatic API docs would look like:
|
||||
|
||||
<img src="/img/tutorial/application-configuration/image01.png">
|
||||
<img src="/img/tutorial/metadata/image01.png">
|
||||
|
||||
## OpenAPI URL
|
||||
|
||||
@@ -30,10 +30,10 @@ But you can configure it with the parameter `openapi_url`.
|
||||
For example, to set it to be served at `/api/v1/openapi.json`:
|
||||
|
||||
```Python hl_lines="3"
|
||||
{!../../../docs_src/application_configuration/tutorial002.py!}
|
||||
{!../../../docs_src/metadata/tutorial002.py!}
|
||||
```
|
||||
|
||||
If you want to disable the OpenAPI schema completely you can set `openapi_url=None`.
|
||||
If you want to disable the OpenAPI schema completely you can set `openapi_url=None`, that will also disable the documentation user interfaces that use it.
|
||||
|
||||
## Docs URLs
|
||||
|
||||
@@ -49,5 +49,5 @@ You can configure the two documentation user interfaces included:
|
||||
For example, to set Swagger UI to be served at `/documentation` and disable ReDoc:
|
||||
|
||||
```Python hl_lines="3"
|
||||
{!../../../docs_src/application_configuration/tutorial003.py!}
|
||||
{!../../../docs_src/metadata/tutorial003.py!}
|
||||
```
|
||||
@@ -52,7 +52,7 @@ In this case, it might not be a problem, because the user himself is sending the
|
||||
But if we use the same model for another *path operation*, we could be sending our user's passwords to every client.
|
||||
|
||||
!!! danger
|
||||
Never send the plain password of a user in a response.
|
||||
Never store the plain password of a user or send it in a response.
|
||||
|
||||
## Add an output model
|
||||
|
||||
|
||||
@@ -98,9 +98,9 @@ Let's refer to the file `sql_app/database.py`.
|
||||
|
||||
In this example, we are "connecting" to a SQLite database (opening a file with the SQLite database).
|
||||
|
||||
The file will be located at the same directory in the file `test.db`.
|
||||
The file will be located at the same directory in the file `sql_app.db`.
|
||||
|
||||
That's why the last part is `./test.db`.
|
||||
That's why the last part is `./sql_app.db`.
|
||||
|
||||
If you were using a **PostgreSQL** database instead, you would just have to uncomment the line:
|
||||
|
||||
@@ -437,6 +437,8 @@ And you would also use Alembic for "migrations" (that's its main job).
|
||||
|
||||
A "migration" is the set of steps needed whenever you change the structure of your SQLAlchemy models, add a new attribute, etc. to replicate those changes in the database, add a new column, a new table, etc.
|
||||
|
||||
You can find an example of Alembic in a FastAPI project in the templates from [Project Generation - Template](../project-generation.md){.internal-link target=_blank}. Specifically in <a href="https://github.com/tiangolo/full-stack-fastapi-postgresql/tree/master/%7B%7Bcookiecutter.project_slug%7D%7D/backend/app/alembic/" class="external-link" target="_blank">the `alembic` directory in the source code</a>.
|
||||
|
||||
### Create a dependency
|
||||
|
||||
!!! info
|
||||
|
||||
@@ -6,6 +6,8 @@ theme:
|
||||
palette:
|
||||
primary: teal
|
||||
accent: amber
|
||||
icon:
|
||||
repo: fontawesome/brands/github-alt
|
||||
logo: img/icon-white.svg
|
||||
favicon: img/favicon.png
|
||||
language: en
|
||||
@@ -20,6 +22,7 @@ nav:
|
||||
- Languages:
|
||||
- en: /
|
||||
- es: /es/
|
||||
- pt: /pt/
|
||||
- zh: /zh/
|
||||
- features.md
|
||||
- python-types.md
|
||||
@@ -65,7 +68,7 @@ nav:
|
||||
- tutorial/sql-databases.md
|
||||
- tutorial/bigger-applications.md
|
||||
- tutorial/background-tasks.md
|
||||
- tutorial/application-configuration.md
|
||||
- tutorial/metadata.md
|
||||
- tutorial/static-files.md
|
||||
- tutorial/testing.md
|
||||
- tutorial/debugging.md
|
||||
@@ -98,6 +101,9 @@ nav:
|
||||
- advanced/testing-websockets.md
|
||||
- advanced/testing-events.md
|
||||
- advanced/testing-dependencies.md
|
||||
- advanced/testing-database.md
|
||||
- advanced/settings.md
|
||||
- advanced/conditional-openapi.md
|
||||
- advanced/extending-openapi.md
|
||||
- advanced/openapi-callbacks.md
|
||||
- advanced/wsgi.md
|
||||
@@ -126,19 +132,20 @@ markdown_extensions:
|
||||
- name: mermaid
|
||||
class: mermaid
|
||||
format: !!python/name:pymdownx.superfences.fence_div_format ''
|
||||
- pymdownx.tabbed
|
||||
extra:
|
||||
social:
|
||||
- type: github
|
||||
- icon: fontawesome/brands/github-alt
|
||||
link: https://github.com/tiangolo/typer
|
||||
- type: twitter
|
||||
- icon: fontawesome/brands/twitter
|
||||
link: https://twitter.com/tiangolo
|
||||
- type: linkedin
|
||||
- icon: fontawesome/brands/linkedin
|
||||
link: https://www.linkedin.com/in/tiangolo
|
||||
- type: rss
|
||||
- icon: fontawesome/brands/dev
|
||||
link: https://dev.to/tiangolo
|
||||
- type: medium
|
||||
- icon: fontawesome/brands/medium
|
||||
link: https://medium.com/@tiangolo
|
||||
- type: globe
|
||||
- icon: fontawesome/solid/globe
|
||||
link: https://tiangolo.com
|
||||
extra_css:
|
||||
- css/termynal.css
|
||||
|
||||
18
docs/es/docs/advanced/index.md
Normal file
18
docs/es/docs/advanced/index.md
Normal file
@@ -0,0 +1,18 @@
|
||||
# Guía de Usuario Avanzada - Introducción
|
||||
|
||||
## Características Adicionales
|
||||
|
||||
El [Tutorial - Guía de Usuario](../tutorial/){.internal-link target=_blank} principal debe ser suficiente para darte un paseo por todas las características principales de **FastAPI**
|
||||
|
||||
En las secciones siguientes verás otras opciones, configuraciones, y características adicionales.
|
||||
|
||||
!!! tip
|
||||
Las próximas secciones **no son necesariamente "avanzadas"**.
|
||||
|
||||
Y es posible que para tu caso, la solución se encuentre en una de estas.
|
||||
|
||||
## Lee primero el Tutorial
|
||||
|
||||
Puedes continuar usando la mayoría de las características de **FastAPI** con el conocimiento del [Tutorial - Guía de Usuario](../tutorial/){.internal-link target=_blank} principal.
|
||||
|
||||
En las siguientes secciones se asume que lo has leído y conoces esas ideas principales.
|
||||
394
docs/es/docs/async.md
Normal file
394
docs/es/docs/async.md
Normal file
@@ -0,0 +1,394 @@
|
||||
# Concurrencia y async / await
|
||||
|
||||
Detalles sobre la sintaxis `async def` para *path operation functions* y un poco de información sobre código asíncrono, concurrencia y paralelismo.
|
||||
|
||||
## ¿Tienes prisa?
|
||||
|
||||
<abbr title="too long; didn't read"><strong>TL;DR:</strong></abbr>
|
||||
|
||||
Si estás utilizando libraries de terceros que te dicen que las llames con `await`, del tipo:
|
||||
|
||||
```Python
|
||||
results = await some_library()
|
||||
```
|
||||
|
||||
Entonces declara tus *path operation functions* con `async def` de la siguiente manera:
|
||||
|
||||
```Python hl_lines="2"
|
||||
@app.get('/')
|
||||
async def read_results():
|
||||
results = await some_library()
|
||||
return results
|
||||
```
|
||||
|
||||
!!! note "Nota"
|
||||
Solo puedes usar `await` dentro de funciones creadas con `async def`.
|
||||
|
||||
---
|
||||
|
||||
Si estás utilizando libraries de terceros que se comunican con algo (una base de datos, una API, el sistema de archivos, etc.) y no tienes soporte para `await` (este es el caso para la mayoría de las libraries de bases de datos), declara tus *path operation functions* de forma habitual, con solo `def`, de la siguiente manera:
|
||||
|
||||
```Python hl_lines="2"
|
||||
@app.get('/')
|
||||
def results():
|
||||
results = some_library()
|
||||
return results
|
||||
```
|
||||
|
||||
---
|
||||
|
||||
Si tu aplicación (de alguna manera) no tiene que comunicarse con nada más y en consecuencia esperar a que responda, usa `async def`.
|
||||
|
||||
---
|
||||
|
||||
Si simplemente no lo sabes, usa `def` normal.
|
||||
|
||||
---
|
||||
|
||||
**Nota**: puedes mezclar `def` y `async def` en tus *path operation functions* tanto como lo necesites y definir cada una utilizando la mejor opción para ti. FastAPI hará lo correcto con ellos.
|
||||
|
||||
De todos modos, en cualquiera de los casos anteriores, FastAPI seguirá funcionando de forma asíncrona y será extremadamente rápido.
|
||||
|
||||
Pero siguiendo los pasos anteriores, FastAPI podrá hacer algunas optimizaciones de rendimiento.
|
||||
|
||||
## Detalles Técnicos
|
||||
|
||||
Las versiones modernas de Python tienen soporte para **"código asíncrono"** usando algo llamado **"coroutines"**, usando la sintaxis **`async` y `await`**.
|
||||
|
||||
Veamos esa frase por partes en las secciones siguientes:
|
||||
|
||||
* **Código Asíncrono**
|
||||
* **`async` y `await`**
|
||||
* **Coroutines**
|
||||
|
||||
## Código Asíncrono
|
||||
|
||||
El código asíncrono sólo significa que el lenguaje 💬 tiene una manera de decirle al sistema / programa 🤖 que, en algún momento del código, 🤖 tendrá que esperar a que *algo más* termine en otro sitio. Digamos que ese *algo más* se llama, por ejemplo, "archivo lento" 📝.
|
||||
|
||||
Durante ese tiempo, el sistema puede hacer otras cosas, mientras "archivo lento" 📝 termina.
|
||||
|
||||
Entonces el sistema / programa 🤖 volverá cada vez que pueda, sea porque está esperando otra vez, porque 🤖 ha terminado todo el trabajo que tenía en ese momento. Y 🤖 verá si alguna de las tareas por las que estaba esperando ha terminado, haciendo lo que tenía que hacer.
|
||||
|
||||
Luego, 🤖 cogerá la primera tarea finalizada (digamos, nuestro "archivo lento" 📝) y continuará con lo que tenía que hacer con esa tarea.
|
||||
|
||||
Esa "espera de otra cosa" normalmente se refiere a operaciones <abbr title = "Input and Output, en español: Entrada y Salida.">I/O</abbr> que son relativamente "lentas" (en relación a la velocidad del procesador y memoria RAM), como por ejemplo esperar por:
|
||||
|
||||
* los datos de cliente que se envían a través de la red
|
||||
* los datos enviados por tu programa para ser recibidos por el cliente a través de la red
|
||||
* el contenido de un archivo en disco para ser leído por el sistema y entregado al programa
|
||||
* los contenidos que tu programa da al sistema para ser escritos en disco
|
||||
* una operación relacionada con una API remota
|
||||
* una operación de base de datos
|
||||
* el retorno de resultados de una consulta de base de datos
|
||||
* etc.
|
||||
|
||||
Como el tiempo de ejecución se consume principalmente al esperar a operaciones de <abbr title = "Input and Output">I/O</abbr>, las llaman operaciones "<abbr title="atadas a Entrada y Salida">I/O bound</abbr>".
|
||||
|
||||
Se llama "asíncrono" porque el sistema / programa no tiene que estar "sincronizado" con la tarea lenta, esperando el momento exacto en que finaliza la tarea, sin hacer nada, para poder recoger el resultado de la tarea y continuar el trabajo.
|
||||
|
||||
En lugar de eso, al ser un sistema "asíncrono", una vez finalizada, la tarea puede esperar un poco en la cola (algunos microsegundos) para que la computadora / programa termine lo que estaba haciendo, y luego vuelva para recoger los resultados y seguir trabajando con ellos.
|
||||
|
||||
Por "síncrono" (contrario a "asíncrono") también se usa habitualmente el término "secuencial", porque el sistema / programa sigue todos los pasos secuencialmente antes de cambiar a una tarea diferente, incluso si esos pasos implican esperas.
|
||||
|
||||
### Concurrencia y Hamburguesas
|
||||
|
||||
El concepto de código **asíncrono** descrito anteriormente a veces también se llama **"concurrencia"**. Es diferente del **"paralelismo"**.
|
||||
|
||||
**Concurrencia** y **paralelismo** ambos se relacionan con "cosas diferentes que suceden más o menos al mismo tiempo".
|
||||
|
||||
Pero los detalles entre *concurrencia* y *paralelismo* son bastante diferentes.
|
||||
|
||||
Para entender las diferencias, imagina la siguiente historia sobre hamburguesas:
|
||||
|
||||
### Hamburguesas Concurrentes
|
||||
|
||||
Vas con la persona que te gusta 😍 a pedir comida rápida 🍔, haces cola mientras el cajero 💁 recoge los pedidos de las personas de delante tuyo.
|
||||
|
||||
Llega tu turno, haces tu pedido de 2 hamburguesas impresionantes para esa persona 😍 y para ti.
|
||||
|
||||
Pagas 💸.
|
||||
|
||||
El cajero 💁 le dice algo al chico de la cocina 👨🍳 para que sepa que tiene que preparar tus hamburguesas 🍔 (a pesar de que actualmente está preparando las de los clientes anteriores).
|
||||
|
||||
El cajero 💁 te da el número de tu turno.
|
||||
|
||||
Mientras esperas, vas con esa persona 😍 y eliges una mesa, se sientan y hablan durante un rato largo (ya que las hamburguesas son muy impresionantes y necesitan un rato para prepararse ✨🍔✨).
|
||||
|
||||
Mientras te sientas en la mesa con esa persona 😍, esperando las hamburguesas 🍔, puedes disfrutar ese tiempo admirando lo increíble, inteligente, y bien que se ve ✨😍✨.
|
||||
|
||||
Mientras esperas y hablas con esa persona 😍, de vez en cuando, verificas el número del mostrador para ver si ya es tu turno.
|
||||
|
||||
Al final, en algún momento, llega tu turno. Vas al mostrador, coges tus hamburguesas 🍔 y vuelves a la mesa.
|
||||
|
||||
Tú y esa persona 😍 se comen las hamburguesas 🍔 y la pasan genial ✨.
|
||||
|
||||
---
|
||||
|
||||
Imagina que eres el sistema / programa 🤖 en esa historia.
|
||||
|
||||
Mientras estás en la cola, estás quieto 😴, esperando tu turno, sin hacer nada muy "productivo". Pero la línea va rápida porque el cajero 💁 solo recibe los pedidos (no los prepara), así que está bien.
|
||||
|
||||
Luego, cuando llega tu turno, haces un trabajo "productivo" real 🤓, procesas el menú, decides lo que quieres, lo que quiere esa persona 😍, pagas 💸, verificas que das el billete o tarjeta correctos, verificas que te cobren correctamente, que el pedido tiene los artículos correctos, etc.
|
||||
|
||||
Pero entonces, aunque aún no tienes tus hamburguesas 🍔, el trabajo hecho con el cajero 💁 está "en pausa" ⏸, porque debes esperar 🕙 a que tus hamburguesas estén listas.
|
||||
|
||||
Pero como te alejas del mostrador y te sientas en la mesa con un número para tu turno, puedes cambiar tu atención 🔀 a esa persona 😍 y "trabajar" ⏯ 🤓 en eso. Entonces nuevamente estás haciendo algo muy "productivo" 🤓, como coquetear con esa persona 😍.
|
||||
|
||||
Después, el 💁 cajero dice "he terminado de hacer las hamburguesas" 🍔 poniendo tu número en la pantalla del mostrador, pero no saltas al momento que el número que se muestra es el tuyo. Sabes que nadie robará tus hamburguesas 🍔 porque tienes el número de tu turno y ellos tienen el suyo.
|
||||
|
||||
Así que esperas a que esa persona 😍 termine la historia (terminas el trabajo actual ⏯ / tarea actual que se está procesando 🤓), sonríes gentilmente y le dices que vas por las hamburguesas ⏸.
|
||||
|
||||
Luego vas al mostrador 🔀, a la tarea inicial que ya está terminada ⏯, recoges las hamburguesas 🍔, les dices gracias y las llevas a la mesa. Eso termina esa fase / tarea de interacción con el mostrador ⏹. Eso a su vez, crea una nueva tarea, "comer hamburguesas" 🔀 ⏯, pero la anterior de "conseguir hamburguesas" está terminada ⏹.
|
||||
|
||||
### Hamburguesas Paralelas
|
||||
|
||||
Ahora imagina que estas no son "Hamburguesas Concurrentes" sino "Hamburguesas Paralelas".
|
||||
|
||||
Vas con la persona que te gusta 😍 por comida rápida paralela 🍔.
|
||||
|
||||
Haces la cola mientras varios cajeros (digamos 8) que a la vez son cocineros 👨🍳👨🍳👨🍳👨🍳👨🍳👨🍳👨🍳👨🍳 toman los pedidos de las personas que están delante de ti.
|
||||
|
||||
Todos los que están antes de ti están esperando 🕙 que sus hamburguesas 🍔 estén listas antes de dejar el mostrador porque cada uno de los 8 cajeros prepara la hamburguesa de inmediato antes de recibir el siguiente pedido.
|
||||
|
||||
Entonces finalmente es tu turno, haces tu pedido de 2 hamburguesas 🍔 impresionantes para esa persona 😍 y para ti.
|
||||
|
||||
Pagas 💸.
|
||||
|
||||
El cajero va a la cocina 👨🍳.
|
||||
|
||||
Esperas, de pie frente al mostrador 🕙, para que nadie más recoja tus hamburguesas 🍔, ya que no hay números para los turnos.
|
||||
|
||||
Como tu y esa persona 😍 están ocupados en impedir que alguien se ponga delante y recoja tus hamburguesas apenas llegan 🕙, tampoco puedes prestarle atención a esa persona 😞.
|
||||
|
||||
Este es un trabajo "síncrono", estás "sincronizado" con el cajero / cocinero 👨🍳. Tienes que esperar y estar allí en el momento exacto en que el cajero / cocinero 👨🍳 termina las hamburguesas 🍔 y te las da, o de lo contrario, alguien más podría cogerlas.
|
||||
|
||||
Luego, el cajero / cocinero 👨🍳 finalmente regresa con tus hamburguesas 🍔, después de mucho tiempo esperando 🕙 frente al mostrador.
|
||||
|
||||
Cojes tus hamburguesas 🍔 y vas a la mesa con esa persona 😍.
|
||||
|
||||
Sólo las comes y listo 🍔 ⏹.
|
||||
|
||||
No has hablado ni coqueteado mucho, ya que has pasado la mayor parte del tiempo esperando 🕙 frente al mostrador 😞.
|
||||
|
||||
---
|
||||
|
||||
En este escenario de las hamburguesas paralelas, tú eres un sistema / programa 🤖 con dos procesadores (tú y la persona que te gusta 😍), ambos esperando 🕙 y dedicando su atención ⏯ a estar "esperando en el mostrador" 🕙 durante mucho tiempo.
|
||||
|
||||
La tienda de comida rápida tiene 8 procesadores (cajeros / cocineros) 👨🍳👨🍳👨🍳👨🍳👨🍳👨🍳👨🍳👨🍳. Mientras que la tienda de hamburguesas concurrentes podría haber tenido solo 2 (un cajero y un cocinero) 💁 👨🍳.
|
||||
|
||||
Pero aún así, la experiencia final no es la mejor 😞.
|
||||
|
||||
---
|
||||
|
||||
Esta sería la historia paralela equivalente de las hamburguesas 🍔.
|
||||
|
||||
Para un ejemplo más "real" de ésto, imagina un banco.
|
||||
|
||||
Hasta hace poco, la mayoría de los bancos tenían varios cajeros 👨💼👨💼👨💼👨💼 y una gran línea 🕙🕙🕙🕙🕙🕙🕙🕙.
|
||||
|
||||
Todos los cajeros haciendo todo el trabajo con un cliente tras otro 👨💼⏯.
|
||||
|
||||
Y tienes que esperar 🕙 en la fila durante mucho tiempo o perderás tu turno.
|
||||
|
||||
Probablemente no querrás llevar contigo a la persona que te gusta 😍 a hacer encargos al banco 🏦.
|
||||
|
||||
### Conclusión de las Hamburguesa
|
||||
|
||||
En este escenario de "hamburguesas de comida rápida con tu pareja", debido a que hay mucha espera 🕙, tiene mucho más sentido tener un sistema con concurrencia ⏸🔀⏯.
|
||||
|
||||
Este es el caso de la mayoría de las aplicaciones web.
|
||||
|
||||
Muchos, muchos usuarios, pero el servidor está esperando 🕙 el envío de las peticiones ya que su conexión no es buena.
|
||||
|
||||
Y luego esperando 🕙 nuevamente a que las respuestas retornen.
|
||||
|
||||
Esta "espera" 🕙 se mide en microsegundos, pero aun así, sumando todo, al final es mucha espera.
|
||||
|
||||
Es por eso que tiene mucho sentido usar código asíncrono ⏸🔀⏯ para las API web.
|
||||
|
||||
La mayoría de los framework populares de Python existentes (incluidos Flask y Django) se crearon antes de que existieran las nuevas funciones asíncronas en Python. Por lo tanto, las formas en que pueden implementarse admiten la ejecución paralela y una forma más antigua de ejecución asíncrona que no es tan potente como la actual.
|
||||
|
||||
A pesar de que la especificación principal para Python web asíncrono (ASGI) se desarrolló en Django, para agregar soporte para WebSockets.
|
||||
|
||||
Ese tipo de asincronía es lo que hizo popular a NodeJS (aunque NodeJS no es paralelo) y esa es la fortaleza de Go como lenguaje de programación.
|
||||
|
||||
Y ese es el mismo nivel de rendimiento que obtienes con **FastAPI**.
|
||||
|
||||
Y como puede tener paralelismo y asincronía al mismo tiempo, obtienes un mayor rendimiento que la mayoría de los frameworks de NodeJS probados y a la par con Go, que es un lenguaje compilado más cercano a C <a href="https://www.techempower.com/benchmarks/#section=data-r17&hw=ph&test=query&l=zijmkf-1" class="external-link" target="_blank">(todo gracias Starlette)</a>.
|
||||
|
||||
### ¿Es la concurrencia mejor que el paralelismo?
|
||||
|
||||
¡No! Esa no es la moraleja de la historia.
|
||||
|
||||
La concurrencia es diferente al paralelismo. Y es mejor en escenarios **específicos** que implican mucha espera. Debido a eso, generalmente es mucho mejor que el paralelismo para el desarrollo de aplicaciones web. Pero no para todo.
|
||||
|
||||
Entonces, para explicar eso, imagina la siguiente historia corta:
|
||||
|
||||
> Tienes que limpiar una casa grande y sucia.
|
||||
|
||||
*Sí, esa es toda la historia*.
|
||||
|
||||
---
|
||||
|
||||
No hay esperas 🕙, solo hay mucho trabajo por hacer, en varios lugares de la casa.
|
||||
|
||||
Podrías tener turnos como en el ejemplo de las hamburguesas, primero la sala de estar, luego la cocina, pero como no estás esperando nada, solo limpiando y limpiando, los turnos no afectarían nada.
|
||||
|
||||
Tomaría la misma cantidad de tiempo terminar con o sin turnos (concurrencia) y habrías hecho la misma cantidad de trabajo.
|
||||
|
||||
Pero en este caso, si pudieras traer a los 8 ex cajeros / cocineros / ahora limpiadores 👨🍳👨🍳👨🍳👨🍳👨🍳👨🍳👨🍳👨🍳, y cada uno de ellos (y tú) podría tomar una zona de la casa para limpiarla, podría hacer todo el trabajo en **paralelo**, con la ayuda adicional y terminar mucho antes.
|
||||
|
||||
En este escenario, cada uno de los limpiadores (incluido tú) sería un procesador, haciendo su parte del trabajo.
|
||||
|
||||
Y como la mayor parte del tiempo de ejecución lo coge el trabajo real (en lugar de esperar), y el trabajo en un sistema lo realiza una <abbr title = "Central Processing Unit. En español: Unidad Central de Procesamiento."> CPU </abbr>, a estos problemas se les llama "<abbr title="En español: atado a CPU.">CPU bond</abbr>".
|
||||
|
||||
---
|
||||
|
||||
Ejemplos típicos de operaciones dependientes de CPU son cosas que requieren un procesamiento matemático complejo.
|
||||
|
||||
Por ejemplo:
|
||||
|
||||
* **Audio** o **procesamiento de imágenes**.
|
||||
* **Visión por computadora**: una imagen está compuesta de millones de píxeles, cada píxel tiene 3 valores / colores, procesamiento que normalmente requiere calcular algo en esos píxeles, todo al mismo tiempo.
|
||||
* **Machine Learning**: normalmente requiere muchas multiplicaciones de "matrices" y "vectores". Imagina en una enorme hoja de cálculo con números y tener que multiplicarlos todos al mismo tiempo.
|
||||
* **Deep Learning**: este es un subcampo de Machine Learning, por lo tanto, aplica lo mismo. Es solo que no hay una sola hoja de cálculo de números para multiplicar, sino un gran conjunto de ellas, y en muchos casos, usa un procesador especial para construir y / o usar esos modelos.
|
||||
|
||||
### Concurrencia + Paralelismo: Web + Machine Learning
|
||||
|
||||
Con **FastAPI** puedes aprovechar la concurrencia que es muy común para el desarrollo web (atractivo principal de NodeJS).
|
||||
|
||||
Pero también puedes aprovechar los beneficios del paralelismo y el multiprocesamiento (tener múltiples procesos ejecutándose en paralelo) para cargas de trabajo **CPU bond** como las de los sistemas de Machine Learning.
|
||||
|
||||
Eso, más el simple hecho de que Python es el lenguaje principal para **Data Science**, Machine Learning y especialmente Deep Learning, hacen de FastAPI una muy buena combinación para las API y aplicaciones web de Data Science / Machine Learning (entre muchas otras).
|
||||
|
||||
Para ver cómo lograr este paralelismo en producción, consulta la sección sobre [Despliegue](deployment.md){.internal-link target=_blank}.
|
||||
|
||||
## `async` y `await`
|
||||
|
||||
Las versiones modernas de Python tienen una forma muy intuitiva de definir código asíncrono. Esto hace que se vea como un código "secuencial" normal y que haga la "espera" por ti en los momentos correctos.
|
||||
|
||||
Cuando hay una operación que requerirá esperar antes de dar los resultados y tiene soporte para estas nuevas características de Python, puedes programarlo como:
|
||||
|
||||
```Python
|
||||
burgers = await get_burgers(2)
|
||||
```
|
||||
|
||||
La clave aquí es `await`. Eso le dice a Python que tiene que esperar ⏸ a que `get_burgers (2)` termine de hacer lo suyo 🕙 antes de almacenar los resultados en `hamburguesas`. Con eso, Python sabrá que puede ir y hacer otra cosa 🔀 ⏯ mientras tanto (como recibir otra solicitud).
|
||||
|
||||
Para que `await` funcione, tiene que estar dentro de una función que admita esta asincronía. Para hacer eso, simplemente lo declaras con `async def`:
|
||||
|
||||
```Python hl_lines="1"
|
||||
async def get_burgers(number: int):
|
||||
# Do some asynchronous stuff to create the burgers
|
||||
return burgers
|
||||
```
|
||||
|
||||
...en vez de `def`:
|
||||
|
||||
```Python hl_lines="2"
|
||||
# This is not asynchronous
|
||||
def get_sequential_burgers(number: int):
|
||||
# Do some sequential stuff to create the burgers
|
||||
return burgers
|
||||
```
|
||||
|
||||
Con `async def`, Python sabe que, dentro de esa función, debe tener en cuenta las expresiones `wait` y que puede "pausar" ⏸ la ejecución de esa función e ir a hacer otra cosa 🔀 antes de regresar.
|
||||
|
||||
Cuando desees llamar a una función `async def`, debes "esperarla". Entonces, esto no funcionará:
|
||||
|
||||
```Python
|
||||
# Esto no funcionará, porque get_burgers se definió con: async def
|
||||
hamburguesas = get_burgers (2)
|
||||
```
|
||||
|
||||
---
|
||||
|
||||
Por lo tanto, si estás utilizando una library que te dice que puedes llamarla con `await`, debes crear las *path operation functions* que la usan con `async def`, como en:
|
||||
|
||||
```Python hl_lines="2 3"
|
||||
@app.get('/burgers')
|
||||
async def read_burgers():
|
||||
burgers = await get_burgers(2)
|
||||
return burgers
|
||||
```
|
||||
|
||||
### Más detalles técnicos
|
||||
|
||||
Es posible que hayas notado que `await` solo se puede usar dentro de las funciones definidas con `async def`.
|
||||
|
||||
Pero al mismo tiempo, las funciones definidas con `async def` deben ser "esperadas". Por lo tanto, las funciones con `async def` solo se pueden invocar dentro de las funciones definidas con `async def` también.
|
||||
|
||||
Entonces, relacionado con la paradoja del huevo y la gallina, ¿cómo se llama a la primera función `async`?
|
||||
|
||||
Si estás trabajando con **FastAPI** no tienes que preocuparte por eso, porque esa "primera" función será tu *path operation function*, y FastAPI sabrá cómo hacer lo pertinente.
|
||||
|
||||
En el caso de que desees usar `async` / `await` sin FastAPI, <a href="https://docs.python.org/3/library/asyncio-task.html#coroutine" class="external-link" target="_blank">revisa la documentación oficial de Python</a>.
|
||||
|
||||
### Otras formas de código asíncrono
|
||||
|
||||
Este estilo de usar `async` y `await` es relativamente nuevo en el lenguaje.
|
||||
|
||||
Pero hace que trabajar con código asíncrono sea mucho más fácil.
|
||||
|
||||
Esta misma sintaxis (o casi idéntica) también se incluyó recientemente en las versiones modernas de JavaScript (en Browser y NodeJS).
|
||||
|
||||
Pero antes de eso, manejar código asíncrono era bastante más complejo y difícil.
|
||||
|
||||
En versiones anteriores de Python, podrías haber utilizado <abbr title="En español: hilos.">threads</abbr> o <a href="http://www.gevent.org/" class="external-link" target="_blank">Gevent</a>. Pero el código es mucho más complejo de entender, depurar y desarrollar.
|
||||
|
||||
En versiones anteriores de NodeJS / Browser JavaScript, habrías utilizado "callbacks". Lo que conduce a <a href="http://callbackhell.com/" class="external-link" target="_blank">callback hell</a>.
|
||||
|
||||
## Coroutines
|
||||
|
||||
**Coroutine** es un término sofisticado para referirse a la cosa devuelta por una función `async def`. Python sabe que es algo así como una función que puede iniciar y que terminará en algún momento, pero que también podría pausarse ⏸ internamente, siempre que haya un `await` dentro de ella.
|
||||
|
||||
Pero toda esta funcionalidad de usar código asincrónico con `async` y `await` se resume muchas veces como usar "coroutines". Es comparable a la característica principal de Go, las "Goroutines".
|
||||
|
||||
## Conclusión
|
||||
|
||||
Veamos la misma frase de arriba:
|
||||
|
||||
> Las versiones modernas de Python tienen soporte para **"código asíncrono"** usando algo llamado **"coroutines"**, con la sintaxis **`async` y `await`**.
|
||||
|
||||
Eso ya debería tener más sentido ahora. ✨
|
||||
|
||||
Todo eso es lo que impulsa FastAPI (a través de Starlette) y lo que hace que tenga un rendimiento tan impresionante.
|
||||
|
||||
## Detalles muy técnicos
|
||||
|
||||
!!! warning "Advertencia"
|
||||
Probablemente puedas saltarte esto.
|
||||
|
||||
Estos son detalles muy técnicos de cómo **FastAPI** funciona a muy bajo nivel.
|
||||
|
||||
Si tienes bastante conocimiento técnico (coroutines, threads, bloqueos, etc.) y tienes curiosidad acerca de cómo FastAPI gestiona `async def` vs `def` normal, continúa.
|
||||
|
||||
### Path operation functions
|
||||
|
||||
Cuando declaras una *path operation function* con `def` normal en lugar de `async def`, se ejecuta en un threadpool externo que luego es "<abbr title="En español: esperado. Usando await.">awaited</abbr>", en lugar de ser llamado directamente (ya que bloquearía el servidor).
|
||||
|
||||
Si vienes de otro framework asíncrono que no funciona de la manera descrita anteriormente y estás acostumbrado a definir *path operation functions* del tipo sólo cálculo con `def` simple para una pequeña ganancia de rendimiento (aproximadamente 100 nanosegundos), ten en cuenta que en **FastAPI** el efecto sería bastante opuesto. En estos casos, es mejor usar `async def` a menos que tus *path operation functions* usen un código que realice el bloqueo <abbr title="Input/Output: disk reading or writing, network communications.">I/O</abbr>.
|
||||
|
||||
Aún así, en ambas situaciones, es probable que **FastAPI** sea [aún más rápido](/#rendimiento){.Internal-link target=_blank} que (o al menos comparable) a tu framework anterior.
|
||||
|
||||
### Dependencias
|
||||
|
||||
Lo mismo se aplica para las dependencias. Si una dependencia es una función estándar `def` en lugar de `async def`, se ejecuta en el threadpool externo.
|
||||
|
||||
### Subdependencias
|
||||
|
||||
Puedes tener múltiples dependencias y subdependencias que se requieren unas a otras (como parámetros de las definiciones de cada función), algunas de ellas pueden crearse con `async def` y otras con `def` normal. Igual todo seguiría funcionando correctamente, y las creadas con `def` normal se llamarían en un thread externo (del threadpool) en lugar de ser "awaited".
|
||||
|
||||
### Otras funciones de utilidades
|
||||
|
||||
Cualquier otra función de utilidad que llames directamente se puede crear con `def` o `async def` normales y FastAPI no afectará la manera en que la llames.
|
||||
|
||||
Esto contrasta con las funciones que FastAPI llama por ti: las *path operation functions* y dependencias.
|
||||
|
||||
Si tu función de utilidad es creada con `def` normal, se llamará directamente (tal cual la escribes en tu código), no en un threadpool, si la función se crea con `async def`, entonces debes usar `await` con esa función cuando la llamas en tu código.
|
||||
|
||||
---
|
||||
|
||||
Nuevamente, estos son detalles muy técnicos que probablemente sólo son útiles si los viniste a buscar expresamente.
|
||||
|
||||
De lo contrario, la guía de la sección anterior debería ser suficiente: <a href="#in-a-hurry">¿Tienes prisa?</a>.
|
||||
202
docs/es/docs/features.md
Normal file
202
docs/es/docs/features.md
Normal file
@@ -0,0 +1,202 @@
|
||||
# Características
|
||||
|
||||
## Características de FastAPI
|
||||
|
||||
**FastAPI** te provee lo siguiente:
|
||||
|
||||
### Basado en estándares abiertos
|
||||
|
||||
* <a href="https://github.com/OAI/OpenAPI-Specification" class="external-link" target="_blank"><strong>OpenAPI</strong></a> para la creación de APIs, incluyendo declaraciones de <abbr title="en español: ruta. En inglés también conocido cómo: endpoints, routes">path</abbr> <abbr title="también conocido como HTTP methods, cómo POST, GET, PUT, DELETE">operations</abbr>, parámetros, <abbr title="cuerpo del mensaje HTTP">body</abbr> requests, seguridad, etc.
|
||||
* Documentación automática del modelo de datos con <a href="http://json-schema.org/" class="external-link" target="_blank"><strong>JSON Schema</strong></a> (dado que OpenAPI mismo está basado en JSON Schema).
|
||||
* Diseñado alrededor de estos estándares después de un estudio meticuloso. En vez de ser una capa añadida a último momento.
|
||||
* Esto también permite la **generación automática de código de cliente** para muchos lenguajes.
|
||||
|
||||
### Documentación automática
|
||||
|
||||
Documentación interactiva de la API e interfaces web de exploración. Hay múltiples opciones, dos incluídas por defecto, porque el framework está basado en OpenAPI.
|
||||
|
||||
* <a href="https://github.com/swagger-api/swagger-ui" class="external-link" target="_blank"><strong>Swagger UI</strong></a>, con exploración interactiva, llama y prueba tu API directamente desde tu navegador.
|
||||
|
||||

|
||||
|
||||
* Documentación alternativa de la API con <a href="https://github.com/Rebilly/ReDoc" class="external-link" target="_blank"><strong>ReDoc</strong></a>.
|
||||
|
||||

|
||||
|
||||
### Simplemente Python moderno
|
||||
|
||||
Todo está basado en las declaraciones de tipo de **Python 3.6** estándar (gracias a Pydantic). No necesitas aprender una sintáxis nueva, solo Python moderno.
|
||||
|
||||
Si necesitas un repaso de 2 minutos de cómo usar los tipos de Python (así no uses FastAPI) prueba el tutorial corto: [Python Types](python-types.md){.internal-link target=_blank}.
|
||||
|
||||
Escribes Python estándar con tipos así:
|
||||
|
||||
```Python
|
||||
from typing import List, Dict
|
||||
from datetime import date
|
||||
|
||||
from pydantic import BaseModel
|
||||
|
||||
# Declaras la variable como un str
|
||||
# y obtienes soporte del editor dentro de la función
|
||||
def main(user_id: str):
|
||||
return user_id
|
||||
|
||||
|
||||
# Un modelo de Pydantic
|
||||
class User(BaseModel):
|
||||
id: int
|
||||
name: str
|
||||
joined: date
|
||||
```
|
||||
|
||||
Este puede ser usado como:
|
||||
|
||||
```Python
|
||||
my_user: User = User(id=3, name="John Doe", joined="2018-07-19")
|
||||
|
||||
second_user_data = {
|
||||
"id": 4,
|
||||
"name": "Mary",
|
||||
"joined": "2018-11-30",
|
||||
}
|
||||
|
||||
my_second_user: User = User(**second_user_data)
|
||||
```
|
||||
|
||||
!!! info
|
||||
`**second_user_data` significa:
|
||||
|
||||
Pasa las <abbr title="en español key se refiere a la guía de un diccionario">keys</abbr> y los valores del dict `second_user_data` directamente como argumentos de key-value, equivalente a: `User(id=4, name="Mary", joined="2018-11-30")`
|
||||
|
||||
### Soporte del editor
|
||||
|
||||
El framework fue diseñado en su totalidad para ser fácil e intuitivo de usar. Todas las decisiones fueron probadas en múltiples editores antes de comenzar el desarrollo para asegurar la mejor experiencia de desarrollo.
|
||||
|
||||
En la última encuesta a desarrolladores de Python fue claro que <a href="https://www.jetbrains.com/research/python-developers-survey-2017/#tools-and-features" class="external-link" target="_blank">la característica más usada es el "autocompletado"</a>.
|
||||
|
||||
El framework **FastAPI** está creado para satisfacer eso. El autocompletado funciona en todas partes.
|
||||
|
||||
No vas a tener que volver a la documentación seguido.
|
||||
|
||||
Así es como tu editor te puede ayudar:
|
||||
|
||||
* en <a href="https://code.visualstudio.com/" class="external-link" target="_blank">Visual Studio Code</a>:
|
||||
|
||||

|
||||
|
||||
* en <a href="https://www.jetbrains.com/pycharm/" class="external-link" target="_blank">PyCharm</a>:
|
||||
|
||||
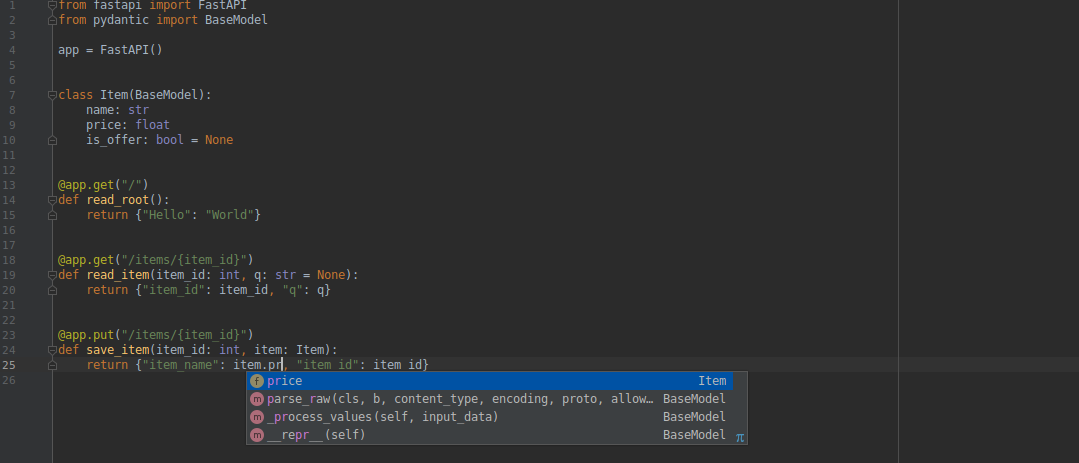
|
||||
|
||||
Obtendrás completado para tu código que podrías haber considerado imposible antes. Por ejemplo, el key `price` dentro del JSON body (que podría haber estado anidado) que viene de un request.
|
||||
|
||||
Ya no pasará que escribas los nombres de key equivocados, o que tengas que revisar constantemente la documentación o desplazarte arriba y abajo para saber si usaste `username` o `user_name`.
|
||||
|
||||
### Corto
|
||||
|
||||
Tiene **configuraciones por defecto** razonables para todo, con configuraciones opcionales en todas partes. Todos los parámetros pueden ser ajustados para tus necesidades y las de tu API.
|
||||
|
||||
Pero, todo **simplemente funciona** por defecto.
|
||||
|
||||
### Validación
|
||||
|
||||
* Validación para la mayoría (¿o todos?) los **tipos de datos** de Python incluyendo:
|
||||
* Objetos JSON (`dict`).
|
||||
* JSON array (`list`) definiendo tipos de ítem.
|
||||
* Campos de texto (`str`) definiendo longitudes mínimas y máximas.
|
||||
* Números (`int`, `float`) con valores mínimos y máximos, etc.
|
||||
|
||||
* Validación para tipos más exóticos como:
|
||||
* URL.
|
||||
* Email.
|
||||
* UUID.
|
||||
* ...y otros.
|
||||
|
||||
Toda la validación es manejada por **Pydantic**, que es robusto y sólidamente establecido.
|
||||
|
||||
### Seguridad y autenticación
|
||||
|
||||
La seguridad y la autenticación están integradas. Sin ningún compromiso con bases de datos ni modelos de datos.
|
||||
|
||||
Todos los schemes de seguridad están definidos en OpenAPI incluyendo:
|
||||
|
||||
* HTTP Basic.
|
||||
* **OAuth2** (también con **JWT tokens**). Prueba el tutorial en [OAuth2 with JWT](tutorial/security/oauth2-jwt.md){.internal-link target=_blank}.
|
||||
* API keys en:
|
||||
* Headers.
|
||||
* Parámetros de Query.
|
||||
* Cookies, etc.
|
||||
|
||||
Más todas las características de seguridad de Starlette (incluyendo **session cookies**).
|
||||
|
||||
Todo ha sido construido como herramientas y componentes reutilizables que son fácilmente integrados con tus sistemas, almacenamiento de datos, bases de datos relacionales y no relacionales, etc.
|
||||
|
||||
### Dependency Injection
|
||||
|
||||
FastAPI incluye un sistema de <abbr title='En español: Inyección de Dependencias. También conocido en inglés cómo: "components", "resources", "services", "providers"'><strong>Dependency Injection</strong></abbr> extremadamente poderoso y fácil de usar.
|
||||
|
||||
* Inclusive las dependencias pueden tener dependencias creando una jerarquía o un **"grafo" de dependencias**.
|
||||
* Todas son **manejadas automáticamente** por el framework.
|
||||
* Todas las dependencias pueden requerir datos de los requests y aumentar las restricciones del *path operation* y la documentación automática.
|
||||
* **Validación automática** inclusive para parámetros del *path operation* definidos en las dependencias.
|
||||
* Soporte para sistemas complejos de autenticación de usuarios, **conexiones con bases de datos**, etc.
|
||||
* **Sin comprometerse** con bases de datos, frontends, etc. Pero permitiendo integración fácil con todos ellos.
|
||||
|
||||
### "Plug-ins" ilimitados
|
||||
|
||||
O dicho de otra manera, no hay necesidad para "plug-ins". Importa y usa el código que necesites.
|
||||
|
||||
Cualquier integración está diseñada para que sea tan sencilla de usar (con dependencias) que puedas crear un "plug-in" para tu aplicación en dos líneas de código usando la misma estructura y sintáxis que usaste para tus *path operations*.
|
||||
|
||||
### Probado
|
||||
|
||||
* <abbr title="La cantidad de código que es probado automáticamente">Cobertura de pruebas</abbr> al 100%.
|
||||
* Base de código 100% <abbr title="Type annotations de Python, con esto tu editor y otras herramientas externas pueden darte mejor soporte">anotada con tipos</abbr>.
|
||||
* Usado en aplicaciones en producción.
|
||||
|
||||
## Características de Starlette
|
||||
|
||||
**FastAPI** está basado y es completamente compatible con <a href="https://www.starlette.io/" class="external-link" target="_blank"><strong>Starlette</strong></a>. Tanto así, que cualquier código de Starlette que tengas también funcionará.
|
||||
|
||||
`FastAPI` es realmente una sub-clase de `Starlette`. Así que, si ya conoces o usas Starlette, muchas de las características funcionarán de la misma manera.
|
||||
|
||||
Con **FastAPI** obtienes todas las características de **Starlette** (porque FastAPI es simplemente Starlette en esteroides):
|
||||
|
||||
* Desempeño realmente impresionante. Es uno <a href="https://github.com/encode/starlette#performance" class="external-link" target="_blank"> de los frameworks de Python más rápidos, a la par con **NodeJS** y **Go**</a>.
|
||||
* Soporte para **WebSocket**.
|
||||
* Soporte para **GraphQL**.
|
||||
* <abbr title="En español: tareas que se ejecutan en el fondo, sin frenar requests, en el mismo proceso. En ingles: In-process background tasks">Tareas en background</abbr>.
|
||||
* Eventos de startup y shutdown.
|
||||
* Cliente de pruebas construido con `requests`.
|
||||
* **CORS**, GZip, Static Files, Streaming responses.
|
||||
* Soporte para **Session and Cookie**.
|
||||
* Cobertura de pruebas al 100%.
|
||||
* Base de código 100% anotada con tipos.
|
||||
|
||||
## Características de Pydantic
|
||||
|
||||
**FastAPI** está basado y es completamente compatible con <a href="https://pydantic-docs.helpmanual.io" class="external-link" target="_blank"><strong>Pydantic</strong></a>. Tanto así, que cualquier código de Pydantic que tengas también funcionará.
|
||||
|
||||
Esto incluye a librerías externas basadas en Pydantic como <abbr title="Object-Relational Mapper">ORM</abbr>s y <abbr title="Object-Document Mapper">ODM</abbr>s para bases de datos.
|
||||
|
||||
Esto también significa que en muchos casos puedes pasar el mismo objeto que obtuviste de un request **directamente a la base de datos**, dado que todo es validado automáticamente.
|
||||
|
||||
Lo mismo aplica para el sentido contrario. En muchos casos puedes pasarle el objeto que obtienes de la base de datos **directamente al cliente**.
|
||||
|
||||
Con **FastAPI** obtienes todas las características de **Pydantic** (dado que FastAPI está basado en Pydantic para todo el manejo de datos):
|
||||
|
||||
* **Sin dificultades para entender**:
|
||||
* No necesitas aprender un nuevo micro-lenguaje de definición de schemas.
|
||||
* Si sabes tipos de Python, sabes cómo usar Pydantic.
|
||||
* Interactúa bien con tu **<abbr title="en inglés: Integrated Development Environment, similar a editor de código">IDE</abbr>/<abbr title="Un programa que chequea errores en el código">linter</abbr>/cerebro**:
|
||||
* Porque las estructuras de datos de Pydantic son solo <abbr title='En español: ejemplares. Aunque a veces los llaman incorrectamente "instancias"'>instances</abbr> de clases que tu defines, el auto-completado, el linting, mypy y tu intuición deberían funcionar bien con tus datos validados.
|
||||
* **Rápido**:
|
||||
* En <a href="https://pydantic-docs.helpmanual.io/#benchmarks-tag" class="external-link" target="_blank">benchmarks</a> Pydantic es más rápido que todas las otras <abbr title='Herramienta, paquete. A veces llamado "librería"'>libraries</abbr> probadas.
|
||||
* Valida **estructuras complejas**:
|
||||
* Usa modelos jerárquicos de modelos de Pydantic, `typing` de Python, `List` y `Dict`, etc.
|
||||
* Los validadores también permiten que se definan fácil y claramente schemas complejos de datos. Estos son chequeados y documentados como JSON Schema.
|
||||
* Puedes tener objetos de **JSON profundamente anidados** y que todos sean validados y anotados.
|
||||
* **Extensible**:
|
||||
* Pydantic permite que se definan tipos de datos a la medida o puedes extender la validación con métodos en un modelo decorado con el <abbr title="en inglés: validator decorator"> decorador de validación</abbr>.
|
||||
* Cobertura de pruebas al 100%.
|
||||
@@ -2,7 +2,7 @@
|
||||
<a href="https://fastapi.tiangolo.com"><img src="https://fastapi.tiangolo.com/img/logo-margin/logo-teal.png" alt="FastAPI"></a>
|
||||
</p>
|
||||
<p align="center">
|
||||
<em>FastAPI framework, high performance, easy to learn, fast to code, ready for production</em>
|
||||
<em>FastAPI framework, alto desempeño, fácil de aprender, rápido de programar, listo para producción</em>
|
||||
</p>
|
||||
<p align="center">
|
||||
<a href="https://travis-ci.com/tiangolo/fastapi" target="_blank">
|
||||
@@ -21,29 +21,28 @@
|
||||
|
||||
---
|
||||
|
||||
**Documentation**: <a href="https://fastapi.tiangolo.com" target="_blank">https://fastapi.tiangolo.com</a>
|
||||
**Documentación**: <a href="https://fastapi.tiangolo.com" target="_blank">https://fastapi.tiangolo.com</a>
|
||||
|
||||
**Source Code**: <a href="https://github.com/tiangolo/fastapi" target="_blank">https://github.com/tiangolo/fastapi</a>
|
||||
**Código Fuente**: <a href="https://github.com/tiangolo/fastapi" target="_blank">https://github.com/tiangolo/fastapi</a>
|
||||
|
||||
---
|
||||
FastAPI es un web framework moderno y rápido (de alto rendimiento) para construir APIs con Python 3.6+ basado en las anotaciones de tipos estándar de Python.
|
||||
|
||||
FastAPI is a modern, fast (high-performance), web framework for building APIs with Python 3.6+ based on standard Python type hints.
|
||||
Sus características principales son:
|
||||
|
||||
The key features are:
|
||||
* **Rapidez**: Alto rendimiento, a la par con **NodeJS** y **Go** (gracias a Starlette y Pydantic). [Uno de los frameworks de Python más rápidos](#rendimiento).
|
||||
|
||||
* **Fast**: Very high performance, on par with **NodeJS** and **Go** (thanks to Starlette and Pydantic). [One of the fastest Python frameworks available](#performance).
|
||||
* **Rápido de programar**: Incrementa la velocidad de desarrollo entre 200% y 300%. *
|
||||
* **Menos errores**: Reduce los errores humanos (de programador) aproximadamente un 40%. *
|
||||
* **Intuitivo**: Gran soporte en los editores con <abbr title="conocido en inglés como auto-complete, autocompletion, IntelliSense, completion">auto completado</abbr> en todas partes. Gasta menos tiempo <abbr title="buscando y corrigiendo errores">debugging</abbr>.
|
||||
* **Fácil**: Está diseñado para ser fácil de usar y aprender. Gastando menos tiempo leyendo documentación.
|
||||
* **Corto**: Minimiza la duplicación de código. Múltiples funcionalidades con cada declaración de parámetros. Menos errores.
|
||||
* **Robusto**: Crea código listo para producción con documentación automática interactiva.
|
||||
* **Basado en estándares**: Basado y totalmente compatible con los estándares abiertos para APIs: <a href="https://github.com/OAI/OpenAPI-Specification" class="external-link" target="_blank">OpenAPI</a> (conocido previamente como Swagger) y <a href="http://json-schema.org/" class="external-link" target="_blank">JSON Schema</a>.
|
||||
|
||||
* **Fast to code**: Increase the speed to develop features by about 200% to 300% *.
|
||||
* **Fewer bugs**: Reduce about 40% of human (developer) induced errors. *
|
||||
* **Intuitive**: Great editor support. <abbr title="also known as auto-complete, autocompletion, IntelliSense">Completion</abbr> everywhere. Less time debugging.
|
||||
* **Easy**: Designed to be easy to use and learn. Less time reading docs.
|
||||
* **Short**: Minimize code duplication. Multiple features from each parameter declaration. Fewer bugs.
|
||||
* **Robust**: Get production-ready code. With automatic interactive documentation.
|
||||
* **Standards-based**: Based on (and fully compatible with) the open standards for APIs: <a href="https://github.com/OAI/OpenAPI-Specification" class="external-link" target="_blank">OpenAPI</a> (previously known as Swagger) and <a href="http://json-schema.org/" class="external-link" target="_blank">JSON Schema</a>.
|
||||
<small>* Esta estimación está basada en pruebas con un equipo de desarrollo interno contruyendo aplicaciones listas para producción.</small>
|
||||
|
||||
<small>* estimation based on tests on an internal development team, building production applications.</small>
|
||||
|
||||
## Opinions
|
||||
## Opiniones
|
||||
|
||||
"*[...] I'm using **FastAPI** a ton these days. [...] I'm actually planning to use it for all of my team's **ML services at Microsoft**. Some of them are getting integrated into the core **Windows** product and some **Office** products.*"
|
||||
|
||||
@@ -77,24 +76,24 @@ The key features are:
|
||||
|
||||
---
|
||||
|
||||
## **Typer**, the FastAPI of CLIs
|
||||
## **Typer**, el FastAPI de las CLIs
|
||||
|
||||
<a href="https://typer.tiangolo.com" target="_blank"><img src="https://typer.tiangolo.com/img/logo-margin/logo-margin-vector.svg" style="width: 20%;"></a>
|
||||
|
||||
If you are building a <abbr title="Command Line Interface">CLI</abbr> app to be used in the terminal instead of a web API, check out <a href="https://typer.tiangolo.com/" class="external-link" target="_blank">**Typer**</a>.
|
||||
Si estás construyendo un app de <abbr title="Interfaz de línea de comandos en español">CLI</abbr> para ser usada en la terminal en vez de una API web, fíjate en <a href="https://typer.tiangolo.com/" class="external-link" target="_blank">**Typer**</a>.
|
||||
|
||||
**Typer** is FastAPI's little sibling. And it's intended to be the **FastAPI of CLIs**. ⌨️ 🚀
|
||||
**Typer** es el hermano menor de FastAPI. La intención es que sea el **FastAPI de las CLIs**. ⌨️ 🚀
|
||||
|
||||
## Requirements
|
||||
## Requisitos
|
||||
|
||||
Python 3.6+
|
||||
|
||||
FastAPI stands on the shoulders of giants:
|
||||
FastAPI está sobre los hombros de gigantes:
|
||||
|
||||
* <a href="https://www.starlette.io/" class="external-link" target="_blank">Starlette</a> for the web parts.
|
||||
* <a href="https://pydantic-docs.helpmanual.io/" class="external-link" target="_blank">Pydantic</a> for the data parts.
|
||||
* <a href="https://www.starlette.io/" class="external-link" target="_blank">Starlette</a> para las partes web.
|
||||
* <a href="https://pydantic-docs.helpmanual.io/" class="external-link" target="_blank">Pydantic</a> para las partes de datos.
|
||||
|
||||
## Installation
|
||||
## Instalación
|
||||
|
||||
<div class="termy">
|
||||
|
||||
@@ -106,7 +105,7 @@ $ pip install fastapi
|
||||
|
||||
</div>
|
||||
|
||||
You will also need an ASGI server, for production such as <a href="http://www.uvicorn.org" class="external-link" target="_blank">Uvicorn</a> or <a href="https://gitlab.com/pgjones/hypercorn" class="external-link" target="_blank">Hypercorn</a>.
|
||||
También vas a necesitar un servidor ASGI para producción cómo <a href="http://www.uvicorn.org" class="external-link" target="_blank">Uvicorn</a> o <a href="https://gitlab.com/pgjones/hypercorn" class="external-link" target="_blank">Hypercorn</a>.
|
||||
|
||||
<div class="termy">
|
||||
|
||||
@@ -118,11 +117,11 @@ $ pip install uvicorn
|
||||
|
||||
</div>
|
||||
|
||||
## Example
|
||||
## Ejemplo
|
||||
|
||||
### Create it
|
||||
### Créalo
|
||||
|
||||
* Create a file `main.py` with:
|
||||
* Crea un archivo `main.py` con:
|
||||
|
||||
```Python
|
||||
from fastapi import FastAPI
|
||||
@@ -141,9 +140,9 @@ def read_item(item_id: int, q: str = None):
|
||||
```
|
||||
|
||||
<details markdown="1">
|
||||
<summary>Or use <code>async def</code>...</summary>
|
||||
<summary>O usa <code>async def</code>...</summary>
|
||||
|
||||
If your code uses `async` / `await`, use `async def`:
|
||||
Si tu código usa `async` / `await`, usa `async def`:
|
||||
|
||||
```Python hl_lines="7 12"
|
||||
from fastapi import FastAPI
|
||||
@@ -161,79 +160,79 @@ async def read_item(item_id: int, q: str = None):
|
||||
return {"item_id": item_id, "q": q}
|
||||
```
|
||||
|
||||
**Note**:
|
||||
**Nota**:
|
||||
|
||||
If you don't know, check the _"In a hurry?"_ section about <a href="https://fastapi.tiangolo.com/async/#in-a-hurry" target="_blank">`async` and `await` in the docs</a>.
|
||||
Si no lo sabes, revisa la sección _"¿Con prisa?"_ sobre <a href="https://fastapi.tiangolo.com/es/async/#con-prisa" target="_blank">`async` y `await` en la documentación</a>.
|
||||
|
||||
</details>
|
||||
|
||||
### Run it
|
||||
### Córrelo
|
||||
|
||||
Run the server with:
|
||||
Corre el servidor con:
|
||||
|
||||
<div class="termy">
|
||||
|
||||
```console
|
||||
$ uvicorn main:app --reload
|
||||
|
||||
<span style="color: green;">INFO</span>: Uvicorn running on http://127.0.0.1:8000 (Press CTRL+C to quit)
|
||||
<span style="color: green;">INFO</span>: Started reloader process [28720]
|
||||
<span style="color: green;">INFO</span>: Started server process [28722]
|
||||
<span style="color: green;">INFO</span>: Waiting for application startup.
|
||||
<span style="color: green;">INFO</span>: Application startup complete.
|
||||
INFO: Uvicorn running on http://127.0.0.1:8000 (Press CTRL+C to quit)
|
||||
INFO: Started reloader process [28720]
|
||||
INFO: Started server process [28722]
|
||||
INFO: Waiting for application startup.
|
||||
INFO: Application startup complete.
|
||||
```
|
||||
|
||||
</div>
|
||||
|
||||
<details markdown="1">
|
||||
<summary>About the command <code>uvicorn main:app --reload</code>...</summary>
|
||||
<summary>Sobre el comando <code>uvicorn main:app --reload</code>...</summary>
|
||||
|
||||
The command `uvicorn main:app` refers to:
|
||||
El comando `uvicorn main:app` se refiere a:
|
||||
|
||||
* `main`: the file `main.py` (the Python "module").
|
||||
* `app`: the object created inside of `main.py` with the line `app = FastAPI()`.
|
||||
* `--reload`: make the server restart after code changes. Only do this for development.
|
||||
* `main`: el archivo `main.py` (el"modulo" de Python).
|
||||
* `app`: el objeto creado dentro de `main.py` con la línea `app = FastAPI()`.
|
||||
* `--reload`: hace que el servidor se reinicie después de cambios en el código. Esta opción solo debe ser usada en desarrollo.
|
||||
|
||||
</details>
|
||||
|
||||
### Check it
|
||||
### Revísalo
|
||||
|
||||
Open your browser at <a href="http://127.0.0.1:8000/items/5?q=somequery" class="external-link" target="_blank">http://127.0.0.1:8000/items/5?q=somequery</a>.
|
||||
Abre tu navegador en <a href="http://127.0.0.1:8000/items/5?q=somequery" class="external-link" target="_blank">http://127.0.0.1:8000/items/5?q=somequery</a>.
|
||||
|
||||
You will see the JSON response as:
|
||||
Verás la respuesta de JSON cómo:
|
||||
|
||||
```JSON
|
||||
{"item_id": 5, "q": "somequery"}
|
||||
```
|
||||
|
||||
You already created an API that:
|
||||
Ya creaste una API que:
|
||||
|
||||
* Receives HTTP requests in the _paths_ `/` and `/items/{item_id}`.
|
||||
* Both _paths_ take `GET` <em>operations</em> (also known as HTTP _methods_).
|
||||
* The _path_ `/items/{item_id}` has a _path parameter_ `item_id` that should be an `int`.
|
||||
* The _path_ `/items/{item_id}` has an optional `str` _query parameter_ `q`.
|
||||
* Recibe HTTP requests en los _paths_ `/` y `/items/{item_id}`.
|
||||
* Ambos _paths_ toman <em>operaciones</em> `GET` (también conocido como HTTP _methods_).
|
||||
* El _path_ `/items/{item_id}` tiene un _path parameter_ `item_id` que debería ser un `int`.
|
||||
* El _path_ `/items/{item_id}` tiene un `str` _query parameter_ `q` opcional.
|
||||
|
||||
### Interactive API docs
|
||||
### Documentación interactiva de APIs
|
||||
|
||||
Now go to <a href="http://127.0.0.1:8000/docs" class="external-link" target="_blank">http://127.0.0.1:8000/docs</a>.
|
||||
Ahora ve a <a href="http://127.0.0.1:8000/docs" class="external-link" target="_blank">http://127.0.0.1:8000/docs</a>.
|
||||
|
||||
You will see the automatic interactive API documentation (provided by <a href="https://github.com/swagger-api/swagger-ui" class="external-link" target="_blank">Swagger UI</a>):
|
||||
Verás la documentación automática e interactiva de la API (proveída por <a href="https://github.com/swagger-api/swagger-ui" class="external-link" target="_blank">Swagger UI</a>):
|
||||
|
||||

|
||||
|
||||
### Alternative API docs
|
||||
### Documentación alternativa de la API
|
||||
|
||||
And now, go to <a href="http://127.0.0.1:8000/redoc" class="external-link" target="_blank">http://127.0.0.1:8000/redoc</a>.
|
||||
Ahora, ve a <a href="http://127.0.0.1:8000/redoc" class="external-link" target="_blank">http://127.0.0.1:8000/redoc</a>.
|
||||
|
||||
You will see the alternative automatic documentation (provided by <a href="https://github.com/Rebilly/ReDoc" class="external-link" target="_blank">ReDoc</a>):
|
||||
Ahora verás la documentación automática alternativa (proveída por <a href="https://github.com/Rebilly/ReDoc" class="external-link" target="_blank">ReDoc</a>):
|
||||
|
||||

|
||||
|
||||
## Example upgrade
|
||||
## Mejora al ejemplo
|
||||
|
||||
Now modify the file `main.py` to receive a body from a `PUT` request.
|
||||
Ahora modifica el archivo `main.py` para recibir un <abbr title="cuerpo del mensaje HTTP">body</abbr> del `PUT` request.
|
||||
|
||||
Declare the body using standard Python types, thanks to Pydantic.
|
||||
Declara el body usando las declaraciones de tipo estándares de Python gracias a Pydantic.
|
||||
|
||||
```Python hl_lines="2 7 8 9 10 23 24 25"
|
||||
from fastapi import FastAPI
|
||||
@@ -263,175 +262,175 @@ def update_item(item_id: int, item: Item):
|
||||
return {"item_name": item.name, "item_id": item_id}
|
||||
```
|
||||
|
||||
The server should reload automatically (because you added `--reload` to the `uvicorn` command above).
|
||||
El servidor debería recargar automáticamente (porque añadiste `--reload` al comando `uvicorn` que está más arriba).
|
||||
|
||||
### Interactive API docs upgrade
|
||||
### Mejora a la documentación interactiva de APIs
|
||||
|
||||
Now go to <a href="http://127.0.0.1:8000/docs" class="external-link" target="_blank">http://127.0.0.1:8000/docs</a>.
|
||||
Ahora ve a <a href="http://127.0.0.1:8000/docs" class="external-link" target="_blank">http://127.0.0.1:8000/docs</a>.
|
||||
|
||||
* The interactive API documentation will be automatically updated, including the new body:
|
||||
* La documentación interactiva de la API se actualizará automáticamente, incluyendo el nuevo body:
|
||||
|
||||

|
||||
|
||||
* Click on the button "Try it out", it allows you to fill the parameters and directly interact with the API:
|
||||
* Haz clíck en el botón de "Try it out" que te permite llenar los parámetros e interactuar directamente con la API:
|
||||
|
||||

|
||||
|
||||
* Then click on the "Execute" button, the user interface will communicate with your API, send the parameters, get the results and show them on the screen:
|
||||
* Luego haz clíck en el botón de "Execute". La interfaz de usuario se comunicará con tu API, enviará los parámetros y recibirá los resultados para mostrarlos en pantalla:
|
||||
|
||||
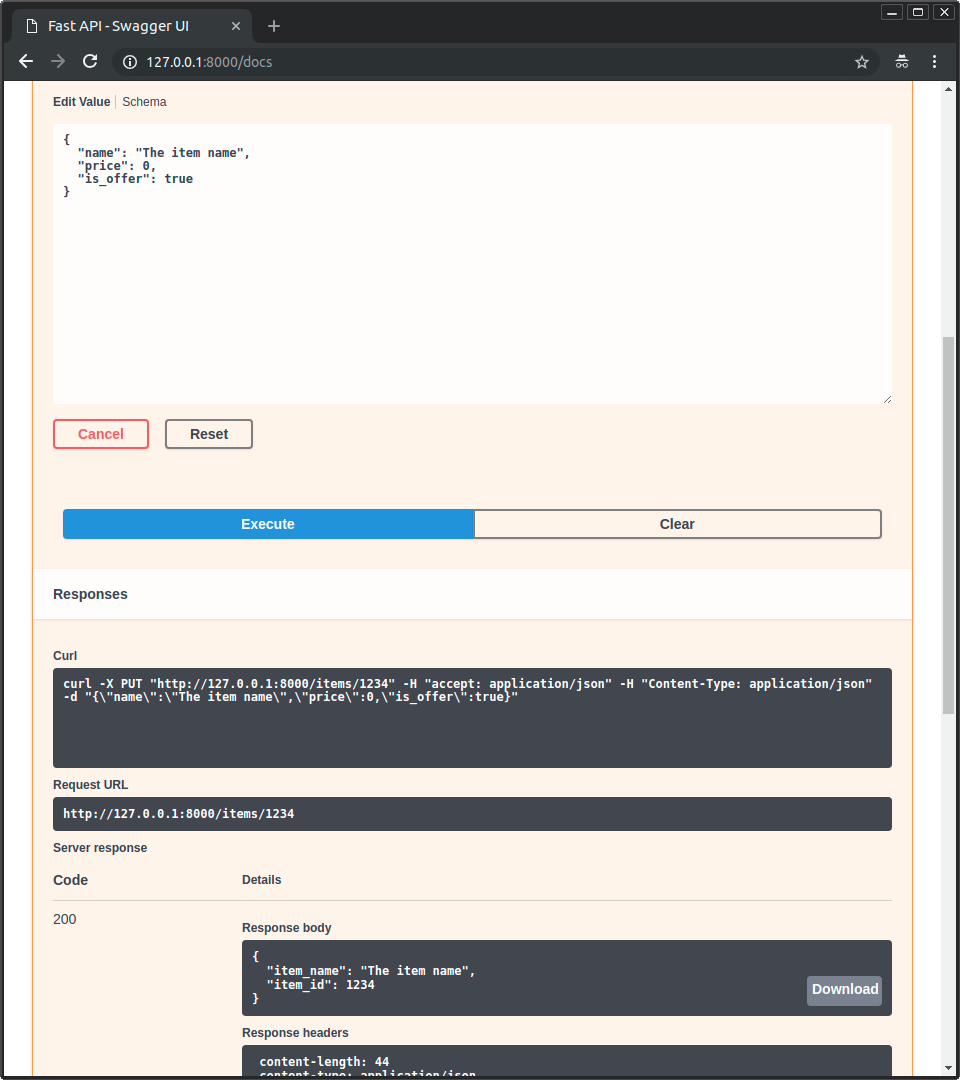
|
||||
|
||||
### Alternative API docs upgrade
|
||||
### Mejora a la documentación alternativa de la API
|
||||
|
||||
And now, go to <a href="http://127.0.0.1:8000/redoc" class="external-link" target="_blank">http://127.0.0.1:8000/redoc</a>.
|
||||
Ahora, ve a <a href="http://127.0.0.1:8000/redoc" class="external-link" target="_blank">http://127.0.0.1:8000/redoc</a>.
|
||||
|
||||
* The alternative documentation will also reflect the new query parameter and body:
|
||||
* La documentación alternativa también reflejará el nuevo parámetro de query y el body:
|
||||
|
||||

|
||||
|
||||
### Recap
|
||||
### Resumen
|
||||
|
||||
In summary, you declare **once** the types of parameters, body, etc. as function parameters.
|
||||
En resumen, declaras los tipos de parámetros, body, etc. **una vez** como parámetros de la función.
|
||||
|
||||
You do that with standard modern Python types.
|
||||
Lo haces con tipos modernos estándar de Python.
|
||||
|
||||
You don't have to learn a new syntax, the methods or classes of a specific library, etc.
|
||||
No tienes que aprender una sintáxis nueva, los métodos o clases de una library específica, etc.
|
||||
|
||||
Just standard **Python 3.6+**.
|
||||
Solo **Python 3.6+** estándar.
|
||||
|
||||
For example, for an `int`:
|
||||
Por ejemplo, para un `int`:
|
||||
|
||||
```Python
|
||||
item_id: int
|
||||
```
|
||||
|
||||
or for a more complex `Item` model:
|
||||
o para un modelo más complejo de `Item`:
|
||||
|
||||
```Python
|
||||
item: Item
|
||||
```
|
||||
|
||||
...and with that single declaration you get:
|
||||
...y con esa única declaración obtienes:
|
||||
|
||||
* Editor support, including:
|
||||
* Completion.
|
||||
* Type checks.
|
||||
* Validation of data:
|
||||
* Automatic and clear errors when the data is invalid.
|
||||
* Validation even for deeply nested JSON objects.
|
||||
* <abbr title="also known as: serialization, parsing, marshalling">Conversion</abbr> of input data: coming from the network to Python data and types. Reading from:
|
||||
* Soporte del editor incluyendo:
|
||||
* Auto completado.
|
||||
* Anotaciones de tipos.
|
||||
* Validación de datos:
|
||||
* Errores automáticos y claros cuándo los datos son inválidos.
|
||||
* Validación, incluso para objetos JSON profundamente anidados.
|
||||
* <abbr title="en inglés: serialization, parsing, marshalling">Conversión</abbr> de datos de input: viniendo de la red a datos y tipos de Python. Leyendo desde:
|
||||
* JSON.
|
||||
* Path parameters.
|
||||
* Query parameters.
|
||||
* Cookies.
|
||||
* Headers.
|
||||
* Forms.
|
||||
* Files.
|
||||
* <abbr title="also known as: serialization, parsing, marshalling">Conversion</abbr> of output data: converting from Python data and types to network data (as JSON):
|
||||
* Convert Python types (`str`, `int`, `float`, `bool`, `list`, etc).
|
||||
* `datetime` objects.
|
||||
* `UUID` objects.
|
||||
* Database models.
|
||||
* ...and many more.
|
||||
* Automatic interactive API documentation, including 2 alternative user interfaces:
|
||||
* Formularios.
|
||||
* Archivos.
|
||||
* <abbr title="en inglés: serialization, parsing, marshalling">Conversión</abbr> de datos de output: convirtiendo de datos y tipos de Python a datos para la red (como JSON):
|
||||
* Convertir tipos de Python (`str`, `int`, `float`, `bool`, `list`, etc).
|
||||
* Objetos `datetime`.
|
||||
* Objetos `UUID`.
|
||||
* Modelos de bases de datos.
|
||||
* ...y muchos más.
|
||||
* Documentación automática e interactiva incluyendo 2 interfaces de usuario alternativas:
|
||||
* Swagger UI.
|
||||
* ReDoc.
|
||||
|
||||
---
|
||||
|
||||
Coming back to the previous code example, **FastAPI** will:
|
||||
Volviendo al ejemplo de código anterior, **FastAPI** va a:
|
||||
|
||||
* Validate that there is an `item_id` in the path for `GET` and `PUT` requests.
|
||||
* Validate that the `item_id` is of type `int` for `GET` and `PUT` requests.
|
||||
* If it is not, the client will see a useful, clear error.
|
||||
* Check if there is an optional query parameter named `q` (as in `http://127.0.0.1:8000/items/foo?q=somequery`) for `GET` requests.
|
||||
* As the `q` parameter is declared with `= None`, it is optional.
|
||||
* Without the `None` it would be required (as is the body in the case with `PUT`).
|
||||
* For `PUT` requests to `/items/{item_id}`, Read the body as JSON:
|
||||
* Check that it has a required attribute `name` that should be a `str`.
|
||||
* Check that it has a required attribute `price` that has to be a `float`.
|
||||
* Check that it has an optional attribute `is_offer`, that should be a `bool`, if present.
|
||||
* All this would also work for deeply nested JSON objects.
|
||||
* Convert from and to JSON automatically.
|
||||
* Document everything with OpenAPI, that can be used by:
|
||||
* Interactive documentation systems.
|
||||
* Automatic client code generation systems, for many languages.
|
||||
* Provide 2 interactive documentation web interfaces directly.
|
||||
* Validar que existe un `item_id` en el path para requests usando `GET` y `PUT`.
|
||||
* Validar que el `item_id` es del tipo `int` para requests de tipo `GET` y `PUT`.
|
||||
* Si no lo es, el cliente verá un mensaje de error útil y claro.
|
||||
* Revisar si existe un query parameter opcional llamado `q` (cómo en `http://127.0.0.1:8000/items/foo?q=somequery`) para requests de tipo `GET`.
|
||||
* Como el parámetro `q` fue declarado con `= None` es opcional.
|
||||
* Sin el `None` sería obligatorio (cómo lo es el body en el caso con `PUT`).
|
||||
* Para requests de tipo `PUT` a `/items/{item_id}` leer el body como JSON:
|
||||
* Revisar si tiene un atributo requerido `name` que debe ser un `str`.
|
||||
* Revisar si tiene un atributo requerido `price` que debe ser un `float`.
|
||||
* Revisar si tiene un atributo opcional `is_offer`, que debe ser un `bool`si está presente.
|
||||
* Todo esto funcionaría para objetos JSON profundamente anidados.
|
||||
* Convertir de y a JSON automáticamente.
|
||||
* Documentar todo con OpenAPI que puede ser usado por:
|
||||
* Sistemas de documentación interactiva.
|
||||
* Sistemas de generación automática de código de cliente para muchos lenguajes.
|
||||
* Proveer directamente 2 interfaces de documentación web interactivas.
|
||||
|
||||
---
|
||||
|
||||
We just scratched the surface, but you already get the idea of how it all works.
|
||||
Hasta ahora, escasamente vimos lo básico pero ya tienes una idea de cómo funciona.
|
||||
|
||||
Try changing the line with:
|
||||
Intenta cambiando la línea a:
|
||||
|
||||
```Python
|
||||
return {"item_name": item.name, "item_id": item_id}
|
||||
```
|
||||
|
||||
...from:
|
||||
...de:
|
||||
|
||||
```Python
|
||||
... "item_name": item.name ...
|
||||
```
|
||||
|
||||
...to:
|
||||
...a:
|
||||
|
||||
```Python
|
||||
... "item_price": item.price ...
|
||||
```
|
||||
|
||||
...and see how your editor will auto-complete the attributes and know their types:
|
||||
... y mira como el editor va a auto-completar los atributos y sabrá sus tipos:
|
||||
|
||||

|
||||

|
||||
|
||||
For a more complete example including more features, see the <a href="https://fastapi.tiangolo.com/tutorial/">Tutorial - User Guide</a>.
|
||||
Para un ejemplo más completo que incluye más características ve el <a href="https://fastapi.tiangolo.com/tutorial/">Tutorial - Guía de Usuario</a>.
|
||||
|
||||
**Spoiler alert**: the tutorial - user guide includes:
|
||||
**Spoiler alert**: el Tutorial - Guía de Usuario incluye:
|
||||
|
||||
* Declaration of **parameters** from other different places as: **headers**, **cookies**, **form fields** and **files**.
|
||||
* How to set **validation constraints** as `maximum_length` or `regex`.
|
||||
* A very powerful and easy to use **<abbr title="also known as components, resources, providers, services, injectables">Dependency Injection</abbr>** system.
|
||||
* Security and authentication, including support for **OAuth2** with **JWT tokens** and **HTTP Basic** auth.
|
||||
* More advanced (but equally easy) techniques for declaring **deeply nested JSON models** (thanks to Pydantic).
|
||||
* Many extra features (thanks to Starlette) as:
|
||||
* Declaración de **parámetros** en otros lugares diferentes cómo los: **headers**, **cookies**, **formularios** y **archivos**.
|
||||
* Cómo agregar **requisitos de validación** cómo `maximum_length` o `regex`.
|
||||
* Un sistema de **<abbr title="también conocido en inglés cómo: components, resources, providers, services, injectables">Dependency Injection</abbr>** poderoso y fácil de usar.
|
||||
* Seguridad y autenticación incluyendo soporte para **OAuth2** con **JWT tokens** y **HTTP Basic** auth.
|
||||
* Técnicas más avanzadas, pero igual de fáciles, para declarar **modelos de JSON profundamente anidados** (gracias a Pydantic).
|
||||
* Muchas características extra (gracias a Starlette) como:
|
||||
* **WebSockets**
|
||||
* **GraphQL**
|
||||
* extremely easy tests based on `requests` and `pytest`
|
||||
* pruebas extremadamente fáciles con `requests` y `pytest`
|
||||
* **CORS**
|
||||
* **Cookie Sessions**
|
||||
* ...and more.
|
||||
* ...y mucho más.
|
||||
|
||||
## Performance
|
||||
## Rendimiento
|
||||
|
||||
Independent TechEmpower benchmarks show **FastAPI** applications running under Uvicorn as <a href="https://www.techempower.com/benchmarks/#section=test&runid=7464e520-0dc2-473d-bd34-dbdfd7e85911&hw=ph&test=query&l=zijzen-7" class="external-link" target="_blank">one of the fastest Python frameworks available</a>, only below Starlette and Uvicorn themselves (used internally by FastAPI). (*)
|
||||
Benchmarks independientes de TechEmpower muestran que aplicaciones de **FastAPI** corriendo con Uvicorn cómo <a href="https://www.techempower.com/benchmarks/#section=test&runid=7464e520-0dc2-473d-bd34-dbdfd7e85911&hw=ph&test=query&l=zijzen-7" class="external-link" target="_blank">uno de los frameworks de Python más rápidos</a>, únicamente debajo de Starlette y Uvicorn (usados internamente por FastAPI). (*)
|
||||
|
||||
To understand more about it, see the section <a href="https://fastapi.tiangolo.com/benchmarks/" class="internal-link" target="_blank">Benchmarks</a>.
|
||||
Para entender más al respecto revisa la sección <a href="https://fastapi.tiangolo.com/benchmarks/" class="internal-link" target="_blank">Benchmarks</a>.
|
||||
|
||||
## Optional Dependencies
|
||||
## Dependencias Opcionales
|
||||
|
||||
Used by Pydantic:
|
||||
Usadas por Pydantic:
|
||||
|
||||
* <a href="https://github.com/esnme/ultrajson" target="_blank"><code>ujson</code></a> - for faster JSON <abbr title="converting the string that comes from an HTTP request into Python data">"parsing"</abbr>.
|
||||
* <a href="https://github.com/JoshData/python-email-validator" target="_blank"><code>email_validator</code></a> - for email validation.
|
||||
* <a href="https://github.com/esnme/ultrajson" target="_blank"><code>ujson</code></a> - para <abbr title="convertir el string que viene de un HTTP request a datos de Python">"parsing"</abbr> de JSON más rápido.
|
||||
* <a href="https://github.com/JoshData/python-email-validator" target="_blank"><code>email_validator</code></a> - para validación de emails.
|
||||
|
||||
Used by Starlette:
|
||||
Usados por Starlette:
|
||||
|
||||
* <a href="http://docs.python-requests.org" target="_blank"><code>requests</code></a> - Required if you want to use the `TestClient`.
|
||||
* <a href="https://github.com/Tinche/aiofiles" target="_blank"><code>aiofiles</code></a> - Required if you want to use `FileResponse` or `StaticFiles`.
|
||||
* <a href="http://jinja.pocoo.org" target="_blank"><code>jinja2</code></a> - Required if you want to use the default template configuration.
|
||||
* <a href="https://andrew-d.github.io/python-multipart/" target="_blank"><code>python-multipart</code></a> - Required if you want to support form <abbr title="converting the string that comes from an HTTP request into Python data">"parsing"</abbr>, with `request.form()`.
|
||||
* <a href="https://pythonhosted.org/itsdangerous/" target="_blank"><code>itsdangerous</code></a> - Required for `SessionMiddleware` support.
|
||||
* <a href="https://pyyaml.org/wiki/PyYAMLDocumentation" target="_blank"><code>pyyaml</code></a> - Required for Starlette's `SchemaGenerator` support (you probably don't need it with FastAPI).
|
||||
* <a href="https://graphene-python.org/" target="_blank"><code>graphene</code></a> - Required for `GraphQLApp` support.
|
||||
* <a href="https://github.com/esnme/ultrajson" target="_blank"><code>ujson</code></a> - Required if you want to use `UJSONResponse`.
|
||||
* <a href="http://docs.python-requests.org" target="_blank"><code>requests</code></a> - Requerido si quieres usar el `TestClient`.
|
||||
* <a href="https://github.com/Tinche/aiofiles" target="_blank"><code>aiofiles</code></a> - Requerido si quieres usar `FileResponse` o `StaticFiles`.
|
||||
* <a href="http://jinja.pocoo.org" target="_blank"><code>jinja2</code></a> - Requerido si quieres usar la configuración por defecto de templates.
|
||||
* <a href="https://andrew-d.github.io/python-multipart/" target="_blank"><code>python-multipart</code></a> - Requerido si quieres dar soporte a <abbr title="convertir el string que viene de un HTTP request a datos de Python">"parsing"</abbr> de formularios, con `request.form()`.
|
||||
* <a href="https://pythonhosted.org/itsdangerous/" target="_blank"><code>itsdangerous</code></a> - Requerido para dar soporte a `SessionMiddleware`.
|
||||
* <a href="https://pyyaml.org/wiki/PyYAMLDocumentation" target="_blank"><code>pyyaml</code></a> - Requerido para dar soporte al `SchemaGenerator` de Starlette (probablemente no lo necesites con FastAPI).
|
||||
* <a href="https://graphene-python.org/" target="_blank"><code>graphene</code></a> - Requerido para dar soporte a `GraphQLApp`.
|
||||
* <a href="https://github.com/esnme/ultrajson" target="_blank"><code>ujson</code></a> - Requerido si quieres usar `UJSONResponse`.
|
||||
|
||||
Used by FastAPI / Starlette:
|
||||
Usado por FastAPI / Starlette:
|
||||
|
||||
* <a href="http://www.uvicorn.org" target="_blank"><code>uvicorn</code></a> - for the server that loads and serves your application.
|
||||
* <a href="https://github.com/ijl/orjson" target="_blank"><code>orjson</code></a> - Required if you want to use `ORJSONResponse`.
|
||||
* <a href="http://www.uvicorn.org" target="_blank"><code>uvicorn</code></a> - para el servidor que carga y sirve tu aplicación.
|
||||
* <a href="https://github.com/ijl/orjson" target="_blank"><code>orjson</code></a> - Requerido si quieres usar `ORJSONResponse`.
|
||||
|
||||
You can install all of these with `pip install fastapi[all]`.
|
||||
Puedes instalarlos con `pip install fastapi[all]`.
|
||||
|
||||
## License
|
||||
## Licencia
|
||||
|
||||
This project is licensed under the terms of the MIT license.
|
||||
Este proyecto está licenciado bajo los términos de la licencia del MIT.
|
||||
|
||||
286
docs/es/docs/python-types.md
Normal file
286
docs/es/docs/python-types.md
Normal file
@@ -0,0 +1,286 @@
|
||||
# Introducción a los Tipos de Python
|
||||
|
||||
**Python 3.6+** tiene soporte para <abbr title="en español, anotaciones de tipo. En inglés también se conocen como: type annotations">"type hints"</abbr> opcionales.
|
||||
|
||||
Estos **type hints** son una nueva sintáxis, desde Python 3.6+, que permite declarar el <abbr title="por ejemplo: str, int, float, bool">tipo</abbr> de una variable.
|
||||
|
||||
Usando las declaraciones de tipos para tus variables, los editores y otras herramientas pueden proveerte un soporte mejor.
|
||||
|
||||
Este es solo un **tutorial corto** sobre los Python type hints. Solo cubre lo mínimo necesario para usarlos con **FastAPI**... realmente es muy poco lo que necesitas.
|
||||
|
||||
Todo **FastAPI** está basado en estos type hints, lo que le da muchas ventajas y beneficios.
|
||||
|
||||
Pero, así nunca uses **FastAPI** te beneficiarás de aprender un poco sobre los type hints.
|
||||
|
||||
!!! note "Nota"
|
||||
Si eres un experto en Python y ya lo sabes todo sobre los type hints, salta al siguiente capítulo.
|
||||
|
||||
## Motivación
|
||||
|
||||
Comencemos con un ejemplo simple:
|
||||
|
||||
```Python
|
||||
{!../../../docs_src/python_types/tutorial001.py!}
|
||||
```
|
||||
|
||||
Llamar este programa nos muestra el siguiente <abbr title="en español: salida">output</abbr>:
|
||||
|
||||
```
|
||||
John Doe
|
||||
```
|
||||
|
||||
La función hace lo siguiente:
|
||||
|
||||
* Toma un `first_name` y un `last_name`.
|
||||
* Convierte la primera letra de cada uno en una letra mayúscula con `title()`.
|
||||
* Las <abbr title="las junta como si fuesen una. Con el contenido de una después de la otra. En inlgés: concatenate.">concatena</abbr> con un espacio en la mitad.
|
||||
|
||||
```Python hl_lines="2"
|
||||
{!../../../docs_src/python_types/tutorial001.py!}
|
||||
```
|
||||
|
||||
### Edítalo
|
||||
|
||||
Es un programa muy simple.
|
||||
|
||||
Ahora, imagina que lo estás escribiendo desde ceros.
|
||||
|
||||
En algún punto habrías comenzado con la definición de la función, tenías los parámetros listos...
|
||||
|
||||
Pero, luego tienes que llamar "ese método que convierte la primera letra en una mayúscula".
|
||||
|
||||
Era `upper`? O era `uppercase`? `first_uppercase`? `capitalize`?
|
||||
|
||||
Luego lo intentas con el viejo amigo de los programadores, el autocompletado del editor.
|
||||
|
||||
Escribes el primer parámetro de la función `first_name`, luego un punto (`.`) y luego presionas `Ctrl+Space` para iniciar el autocompletado.
|
||||
|
||||
Tristemente, no obtienes nada útil:
|
||||
|
||||
<img src="https://fastapi.tiangolo.com/img/python-types/image01.png">
|
||||
|
||||
### Añade tipos
|
||||
|
||||
Vamos a modificar una única línea de la versión previa.
|
||||
|
||||
Vamos a cambiar exactamente este fragmento, los parámetros de la función, de:
|
||||
|
||||
```Python
|
||||
first_name, last_name
|
||||
```
|
||||
|
||||
a:
|
||||
|
||||
```Python
|
||||
first_name: str, last_name: str
|
||||
```
|
||||
|
||||
Eso es todo.
|
||||
|
||||
Esos son los "type hints":
|
||||
|
||||
```Python hl_lines="1"
|
||||
{!../../../docs_src/python_types/tutorial002.py!}
|
||||
```
|
||||
|
||||
No es lo mismo a declarar valores por defecto, como sería con:
|
||||
|
||||
```Python
|
||||
first_name="john", last_name="doe"
|
||||
```
|
||||
|
||||
Es algo diferente.
|
||||
|
||||
Estamos usando los dos puntos (`:`), no un símbolo de igual (`=`).
|
||||
|
||||
Añadir los type hints normalmente no cambia lo que sucedería si ellos no estuviesen presentes.
|
||||
|
||||
Pero ahora imagina que nuevamente estás creando la función, pero con los type hints.
|
||||
|
||||
En el mismo punto intentas iniciar el autocompletado con `Ctrl+Space` y ves:
|
||||
|
||||
<img src="https://fastapi.tiangolo.com/img/python-types/image02.png">
|
||||
|
||||
Con esto puedes moverte hacia abajo viendo las opciones hasta que encuentras una que te suene:
|
||||
|
||||
<img src="https://fastapi.tiangolo.com/img/python-types/image03.png">
|
||||
|
||||
## Más motivación
|
||||
|
||||
Mira esta función que ya tiene type hints:
|
||||
|
||||
```Python hl_lines="1"
|
||||
{!../../../docs_src/python_types/tutorial003.py!}
|
||||
```
|
||||
|
||||
Como el editor conoce el tipo de las variables no solo obtienes autocompletado, si no que también obtienes chequeo de errores:
|
||||
|
||||
<img src="https://fastapi.tiangolo.com/img/python-types/image04.png">
|
||||
|
||||
Ahora que sabes que tienes que arreglarlo convierte `age` a un string con `str(age)`:
|
||||
|
||||
```Python hl_lines="2"
|
||||
{!../../../docs_src/python_types/tutorial004.py!}
|
||||
```
|
||||
|
||||
## Declarando tipos
|
||||
|
||||
Acabas de ver el lugar principal para declarar los type hints. Como parámetros de las funciones.
|
||||
|
||||
Este es también el lugar principal en que los usarías con **FastAPI**.
|
||||
|
||||
### Tipos simples
|
||||
|
||||
Puedes declarar todos los tipos estándar de Python, no solamente `str`.
|
||||
|
||||
Por ejemplo, puedes usar:
|
||||
|
||||
* `int`
|
||||
* `float`
|
||||
* `bool`
|
||||
* `bytes`
|
||||
|
||||
```Python hl_lines="1"
|
||||
{!../../../docs_src/python_types/tutorial005.py!}
|
||||
```
|
||||
|
||||
### Tipos con sub-tipos
|
||||
|
||||
Existen algunas estructuras de datos que pueden contener otros valores, como `dict`, `list`, `set` y `tuple`. Los valores internos pueden tener su propio tipo también.
|
||||
|
||||
Para declarar esos tipos y sub-tipos puedes usar el módulo estándar de Python `typing`.
|
||||
|
||||
Él existe específicamente para dar soporte a este tipo de type hints.
|
||||
|
||||
#### Listas
|
||||
|
||||
Por ejemplo, vamos a definir una variable para que sea una `list` compuesta de `str`.
|
||||
|
||||
De `typing`, importa `List` (con una `L` mayúscula):
|
||||
|
||||
```Python hl_lines="1"
|
||||
{!../../../docs_src/python_types/tutorial006.py!}
|
||||
```
|
||||
|
||||
Declara la variable con la misma sintáxis de los dos puntos (`:`).
|
||||
|
||||
Pon `List` como el tipo.
|
||||
|
||||
Como la lista es un tipo que permite tener un "sub-tipo" pones el sub-tipo en corchetes `[]`:
|
||||
|
||||
```Python hl_lines="4"
|
||||
{!../../../docs_src/python_types/tutorial006.py!}
|
||||
```
|
||||
|
||||
Esto significa: la variable `items` es una `list` y cada uno de los ítems en esta lista es un `str`.
|
||||
|
||||
Con esta declaración tu editor puede proveerte soporte inclusive mientras está procesando ítems de la lista.
|
||||
|
||||
Sin tipos el autocompletado en este tipo de estructura es casi imposible de lograr:
|
||||
|
||||
<img src="https://fastapi.tiangolo.com/img/python-types/image05.png">
|
||||
|
||||
Observa que la variable `item` es unos de los elementos en la lista `items`.
|
||||
|
||||
El editor aún sabe que es un `str` y provee soporte para ello.
|
||||
|
||||
#### Tuples y Sets
|
||||
|
||||
Harías lo mismo para declarar `tuple`s y `set`s:
|
||||
|
||||
```Python hl_lines="1 4"
|
||||
{!../../../docs_src/python_types/tutorial007.py!}
|
||||
```
|
||||
|
||||
Esto significa:
|
||||
|
||||
* La variable `items_t` es un `tuple` con 3 ítems, un `int`, otro `int`, y un `str`.
|
||||
* La variable `items_s` es un `set` y cada uno de sus ítems es de tipo `bytes`.
|
||||
|
||||
#### Diccionarios (Dicts)
|
||||
|
||||
Para definir un `dict` le pasas 2 sub-tipos separados por comas.
|
||||
|
||||
El primer sub-tipo es para los keys del `dict`.
|
||||
|
||||
El segundo sub-tipo es para los valores del `dict`:
|
||||
|
||||
```Python hl_lines="1 4"
|
||||
{!../../../docs_src/python_types/tutorial008.py!}
|
||||
```
|
||||
|
||||
Esto significa:
|
||||
|
||||
* La variable `prices` es un `dict`:
|
||||
* Los keys de este `dict` son de tipo `str` (Digamos que son el nombre de cada ítem).
|
||||
* Los valores de este `dict` son de tipo `float` (Digamos que son el precio de cada ítem).
|
||||
|
||||
### Clases como tipos
|
||||
|
||||
También puedes declarar una clase como el tipo de una variable.
|
||||
|
||||
Digamos que tienes una clase `Person`con un nombre:
|
||||
|
||||
```Python hl_lines="1 2 3"
|
||||
{!../../../docs_src/python_types/tutorial009.py!}
|
||||
```
|
||||
|
||||
Entonces puedes declarar una variable que sea de tipo `Person`:
|
||||
|
||||
```Python hl_lines="6"
|
||||
{!../../../docs_src/python_types/tutorial009.py!}
|
||||
```
|
||||
|
||||
Una vez más tendrás todo el soporte del editor:
|
||||
|
||||
<img src="https://fastapi.tiangolo.com/img/python-types/image06.png">
|
||||
|
||||
## Modelos de Pydantic
|
||||
|
||||
<a href="https://pydantic-docs.helpmanual.io/" class="external-link" target="_blank">Pydantic</a> es una library de Python para llevar a cabo validación de datos.
|
||||
|
||||
Tú declaras la "forma" de los datos mediante clases con atributos.
|
||||
|
||||
Cada atributo tiene un tipo.
|
||||
|
||||
Luego creas un instance de esa clase con algunos valores y Pydantic validará los valores, los convertirá al tipo apropiado (si ese es el caso) y te dará un objeto con todos los datos.
|
||||
|
||||
Y obtienes todo el soporte del editor con el objeto resultante.
|
||||
|
||||
Tomado de la documentación oficial de Pydantic:
|
||||
|
||||
```Python
|
||||
{!../../../docs_src/python_types/tutorial010.py!}
|
||||
```
|
||||
|
||||
!!! info "Información"
|
||||
Para aprender más sobre <a href="https://pydantic-docs.helpmanual.io/" class="external-link" target="_blank">Pydantic mira su documentación</a>.
|
||||
|
||||
**FastAPI** está todo basado en Pydantic.
|
||||
|
||||
Vas a ver mucho más de esto en práctica en el [Tutorial - User Guide](tutorial/index.md){.internal-link target=_blank}.
|
||||
|
||||
## Type hints en **FastAPI**
|
||||
|
||||
**FastAPI** aprovecha estos type hints para hacer varias cosas.
|
||||
|
||||
Con **FastAPI** declaras los parámetros con type hints y obtienes:
|
||||
|
||||
* **Soporte en el editor**.
|
||||
* **Type checks**.
|
||||
|
||||
...y **FastAPI** usa las mismas declaraciones para:
|
||||
|
||||
* **Definir requerimientos**: desde request path parameters, query parameters, headers, bodies, dependencies, etc.
|
||||
* **Convertir datos**: desde el request al tipo requerido.
|
||||
* **Validar datos**: viniendo de cada request:
|
||||
* Generando **errores automáticos** devueltos al cliente cuando los datos son inválidos.
|
||||
* **Documentar** la API usando OpenAPI:
|
||||
* que en su caso es usada por las interfaces de usuario de la documentación automática e interactiva.
|
||||
|
||||
Puede que todo esto suene abstracto. Pero no te preocupes que todo lo verás en acción en el [Tutorial - User Guide](tutorial/index.md){.internal-link target=_blank}.
|
||||
|
||||
Lo importante es que usando los tipos de Python estándar en un único lugar (en vez de añadir más clases, decorator, etc.) **FastAPI** hará mucho del trabajo por ti.
|
||||
|
||||
!!! info "Información"
|
||||
Si ya pasaste por todo el tutorial y volviste a la sección de los tipos, una buena referencia es <a href="https://mypy.readthedocs.io/en/latest/cheat_sheet_py3.html" class="external-link" target="_blank">la "cheat sheet" de `mypy`</a>.
|
||||
80
docs/es/docs/tutorial/index.md
Normal file
80
docs/es/docs/tutorial/index.md
Normal file
@@ -0,0 +1,80 @@
|
||||
# Tutorial - Guía de Usuario - Introducción
|
||||
|
||||
Este tutorial te muestra cómo usar **FastAPI** con la mayoría de sus características paso a paso.
|
||||
|
||||
Cada sección se basa gradualmente en las anteriores, pero está estructurada en temas separados, así puedes ir directamente a cualquier tema en concreto para resolver tus necesidades específicas sobre la API.
|
||||
|
||||
También está diseñado para funcionar como una referencia futura.
|
||||
|
||||
Para que puedas volver y ver exactamente lo que necesitas.
|
||||
|
||||
## Ejecuta el código
|
||||
|
||||
Todos los bloques de código se pueden copiar y usar directamente (en realidad son archivos Python probados).
|
||||
|
||||
Para ejecutar cualquiera de los ejemplos, copia el código en un archivo llamado `main.py`, y ejecuta `uvicorn` de la siguiente manera en tu terminal:
|
||||
|
||||
<div class="termy">
|
||||
|
||||
```console
|
||||
$ uvicorn main:app --reload
|
||||
|
||||
<span style="color: green;">INFO</span>: Uvicorn running on http://127.0.0.1:8000 (Press CTRL+C to quit)
|
||||
<span style="color: green;">INFO</span>: Started reloader process [28720]
|
||||
<span style="color: green;">INFO</span>: Started server process [28722]
|
||||
<span style="color: green;">INFO</span>: Waiting for application startup.
|
||||
<span style="color: green;">INFO</span>: Application startup complete.
|
||||
```
|
||||
|
||||
</div>
|
||||
|
||||
Se **RECOMIENDA** que escribas o copies el código, lo edites y lo ejecutes localmente.
|
||||
|
||||
Usarlo en tu editor de código es lo que realmente te muestra los beneficios de FastAPI, al ver la poca cantidad de código que tienes que escribir, todas las verificaciones de tipo, autocompletado, etc.
|
||||
|
||||
---
|
||||
|
||||
## Instala FastAPI
|
||||
|
||||
El primer paso es instalar FastAPI.
|
||||
|
||||
Para el tutorial, es posible que quieras instalarlo con todas las dependencias y características opcionales:
|
||||
|
||||
<div class="termy">
|
||||
|
||||
```console
|
||||
$ pip install fastapi[all]
|
||||
|
||||
---> 100%
|
||||
```
|
||||
|
||||
</div>
|
||||
|
||||
...eso también incluye `uvicorn` que puedes usar como el servidor que ejecuta tu código.
|
||||
|
||||
!!! nota
|
||||
También puedes instalarlo parte por parte.
|
||||
|
||||
Esto es lo que probablemente harías una vez que desees implementar tu aplicación en producción:
|
||||
|
||||
```
|
||||
pip install fastapi
|
||||
```
|
||||
|
||||
También debes instalar `uvicorn` para que funcione como tu servidor:
|
||||
|
||||
```
|
||||
pip install uvicorn
|
||||
```
|
||||
|
||||
Y lo mismo para cada una de las dependencias opcionales que quieras utilizar.
|
||||
|
||||
## Guía Avanzada de Usuario
|
||||
|
||||
También hay una **Guía Avanzada de Usuario** que puedes leer luego de este **Tutorial - Guía de Usuario**.
|
||||
|
||||
La **Guía Avanzada de Usuario**, se basa en este tutorial, utiliza los mismos conceptos y enseña algunas características adicionales.
|
||||
|
||||
Pero primero deberías leer el **Tutorial - Guía de Gsuario** (lo que estas leyendo ahora mismo).
|
||||
|
||||
La guía esa diseñada para que puedas crear una aplicación completa con solo el **Tutorial - Guía de Usuario**, y luego extenderlo de diferentes maneras, según tus necesidades, utilizando algunas de las ideas adicionales de la **Guía Avanzada de Usuario**.
|
||||
@@ -6,6 +6,8 @@ theme:
|
||||
palette:
|
||||
primary: teal
|
||||
accent: amber
|
||||
icon:
|
||||
repo: fontawesome/brands/github-alt
|
||||
logo: https://fastapi.tiangolo.com/img/icon-white.svg
|
||||
favicon: https://fastapi.tiangolo.com/img/favicon.png
|
||||
language: es
|
||||
@@ -20,7 +22,15 @@ nav:
|
||||
- Languages:
|
||||
- en: /
|
||||
- es: /es/
|
||||
- pt: /pt/
|
||||
- zh: /zh/
|
||||
- features.md
|
||||
- python-types.md
|
||||
- Tutorial - Guía de Usuario:
|
||||
- tutorial/index.md
|
||||
- Guía de Usuario Avanzada:
|
||||
- advanced/index.md
|
||||
- async.md
|
||||
markdown_extensions:
|
||||
- toc:
|
||||
permalink: true
|
||||
@@ -36,19 +46,20 @@ markdown_extensions:
|
||||
- name: mermaid
|
||||
class: mermaid
|
||||
format: !!python/name:pymdownx.superfences.fence_div_format ''
|
||||
- pymdownx.tabbed
|
||||
extra:
|
||||
social:
|
||||
- type: github
|
||||
- icon: fontawesome/brands/github-alt
|
||||
link: https://github.com/tiangolo/typer
|
||||
- type: twitter
|
||||
- icon: fontawesome/brands/twitter
|
||||
link: https://twitter.com/tiangolo
|
||||
- type: linkedin
|
||||
- icon: fontawesome/brands/linkedin
|
||||
link: https://www.linkedin.com/in/tiangolo
|
||||
- type: rss
|
||||
- icon: fontawesome/brands/dev
|
||||
link: https://dev.to/tiangolo
|
||||
- type: medium
|
||||
- icon: fontawesome/brands/medium
|
||||
link: https://medium.com/@tiangolo
|
||||
- type: globe
|
||||
- icon: fontawesome/solid/globe
|
||||
link: https://tiangolo.com
|
||||
extra_css:
|
||||
- https://fastapi.tiangolo.com/css/termynal.css
|
||||
@@ -57,3 +68,5 @@ extra_javascript:
|
||||
- https://unpkg.com/mermaid@8.4.6/dist/mermaid.min.js
|
||||
- https://fastapi.tiangolo.com/js/termynal.js
|
||||
- https://fastapi.tiangolo.com/js/custom.js
|
||||
- https://fastapi.tiangolo.com/js/chat.js
|
||||
- https://sidecar.gitter.im/dist/sidecar.v1.js
|
||||
|
||||
413
docs/pt/docs/alternatives.md
Normal file
413
docs/pt/docs/alternatives.md
Normal file
@@ -0,0 +1,413 @@
|
||||
# Alternativas, Inspiração e Comparações
|
||||
|
||||
O que inspirou **FastAPI**, como ele se compara a outras alternativas e o que FastAPI aprendeu delas.
|
||||
|
||||
## Introdução
|
||||
|
||||
**FastAPI** não poderia existir se não fosse pelos trabalhos anteriores de outras pessoas.
|
||||
|
||||
Houveram tantas ferramentas criadas que ajudaram a inspirar sua criação.
|
||||
|
||||
Tenho evitado criar um novo framework por anos. Primeiramente tentei resolver todos os recursos cobertos pelo **FastAPI** utilizando muitos frameworks diferentes, plug-ins e ferramentas.
|
||||
|
||||
Mas em algum ponto, não houve outra opção senão criar algo que fornecesse todos esses recursos, pegando as melhores idéias de ferramentas anteriores, e combinando eles da melhor forma possível, utilizando recursos da linguagem que não estavam disponíveis antes (_Type Hints_ no Python 3.6+).
|
||||
|
||||
## Ferramentas anteriores
|
||||
|
||||
### <a href="https://www.djangoproject.com/" class="external-link" target="_blank">Django</a>
|
||||
|
||||
É o framework mais popular e largamente confiável. É utilizado para construir sistemas como o _Instagram_.
|
||||
|
||||
É bem acoplado com banco de dados relacional (como MySQL ou PostgreSQL), então, tendo um banco de dados NoSQL (como Couchbase, MongoDB, Cassandra etc) como a principal ferramenta de armazenamento não é muito fácil.
|
||||
|
||||
Foi criado para gerar HTML no _backend_, não para criar APIs utilizando um _frontend_ moderno (como React, Vue.js e Angular) ou por outros sistemas (como dispositivos <abbr title="Internet das Coisas">IoT</abbr>) comunicando com ele.
|
||||
|
||||
### <a href="https://www.django-rest-framework.org/" class="external-link" target="_blank">Django REST Framework</a>
|
||||
|
||||
Django REST framework foi criado para ser uma caixa de ferramentas flexível para construção de APIs web utilizando Django por baixo, para melhorar suas capacidades de API.
|
||||
|
||||
Ele é utilizado por muitas companhias incluindo Mozilla, Red Hat e Eventbrite.
|
||||
|
||||
Ele foi um dos primeiros exemplos de **documentação automática de API**, e essa foi especificamente uma das primeiras idéias que inspirou "a busca por" **FastAPI**.
|
||||
|
||||
!!! note "Nota"
|
||||
Django REST Framework foi criado por Tom Christie. O mesmo criador de Starlette e Uvicorn, nos quais **FastAPI** é baseado.
|
||||
|
||||
!!! check "**FastAPI** inspirado para"
|
||||
Ter uma documentação automática da API em interface web.
|
||||
|
||||
### <a href="http://flask.pocoo.org/" class="external-link" target="_blank">Flask</a>
|
||||
|
||||
Flask é um "microframework", não inclui integração com banco de dados nem muitas das coisas que vêm por padrão no Django.
|
||||
|
||||
Sua simplicidade e flexibilidade permitem fazer coisas como utilizar bancos de dados NoSQL como principal sistema de armazenamento de dados.
|
||||
|
||||
Por ser tão simples, é relativamente intuitivo de aprender, embora a documentação esteja de forma mais técnica em alguns pontos.
|
||||
|
||||
Ele é comumente utilizado por outras aplicações que não necessariamente precisam de banco de dados, gerenciamento de usuários, ou algum dos muitos recursos que já vem instalados no Django. Embora muitos desses recursos possam ser adicionados com plug-ins.
|
||||
|
||||
Esse desacoplamento de partes, e sendo um "microframework" que pode ser extendido para cobrir exatamente o que é necessário era um recurso chave que eu queria manter.
|
||||
|
||||
Dada a simplicidade do Flask, parecia uma ótima opção para construção de APIs. A próxima coisa a procurar era um "Django REST Framework" para Flask.
|
||||
|
||||
!!! check "**FastAPI** inspirado para"
|
||||
Ser um microframework. Fazer ele fácil para misturar e combinar com ferramentas e partes necessárias.
|
||||
|
||||
Ser simples e com sistema de roteamento fácil de usar.
|
||||
|
||||
### <a href="http://docs.python-requests.org" class="external-link" target="_blank">Requests</a>
|
||||
|
||||
**FastAPI** não é uma alternativa para **Requests**. O escopo deles é muito diferente.
|
||||
|
||||
Na verdade é comum utilizar Requests *dentro* de uma aplicação FastAPI.
|
||||
|
||||
Ainda assim, FastAPI pegou alguma inspiração do Requests.
|
||||
|
||||
**Requests** é uma biblioteca para interagir com APIs (como um cliente), enquanto **FastAPI** é uma biblioteca para *construir* APIs (como um servidor).
|
||||
|
||||
Eles estão, mais ou menos, em pontas opostas, um complementando o outro.
|
||||
|
||||
Requests tem um projeto muito simples e intuitivo, fácil de usar, com padrões sensíveis. Mas ao mesmo tempo, é muito poderoso e customizável.
|
||||
|
||||
É por isso que, como dito no site oficial:
|
||||
|
||||
> Requests é um dos pacotes Python mais baixados de todos os tempos
|
||||
|
||||
O jeito de usar é muito simples. Por exemplo, para fazer uma requisição `GET`, você deveria escrever:
|
||||
|
||||
```Python
|
||||
response = requests.get("http://example.com/some/url")
|
||||
```
|
||||
|
||||
A contra-parte da aplicação FastAPI, *rota de operação*, poderia parecer como:
|
||||
|
||||
```Python hl_lines="1"
|
||||
@app.get("/some/url")
|
||||
def read_url():
|
||||
return {"message": "Hello World"}
|
||||
```
|
||||
|
||||
Veja as similaridades em `requests.get(...)` e `@app.get(...)`.
|
||||
|
||||
!!! check "**FastAPI** inspirado para"
|
||||
* Ter uma API simples e intuitiva.
|
||||
* Utilizar nomes de métodos HTTP (operações) diretamente, de um jeito direto e intuitivo.
|
||||
* Ter padrões sensíveis, mas customizações poderosas.
|
||||
|
||||
### <a href="https://swagger.io/" class="external-link" target="_blank">Swagger</a> / <a href="https://github.com/OAI/OpenAPI-Specification/" class="external-link" target="_blank">OpenAPI</a>
|
||||
|
||||
O principal recurso que eu queria do Django REST Framework era a documentação automática da API.
|
||||
|
||||
Então eu descobri que existia um padrão para documentar APIs, utilizando JSON (ou YAML, uma extensão do JSON) chamado Swagger.
|
||||
|
||||
E tinha uma interface web para APIs Swagger já criada. Então, sendo capaz de gerar documentação Swagger para uma API poderia permitir utilizar essa interface web automaticamente.
|
||||
|
||||
Em algum ponto, Swagger foi dado para a Fundação Linux, e foi renomeado OpenAPI.
|
||||
|
||||
Isso acontece porquê quando alguém fala sobre a versão 2.0 é comum dizer "Swagger", e para a versão 3+, "OpenAPI".
|
||||
|
||||
!!! check "**FastAPI** inspirado para"
|
||||
Adotar e usar um padrão aberto para especificações API, ao invés de algum esquema customizado.
|
||||
|
||||
E integrar ferramentas de interface para usuários baseado nos padrões:
|
||||
|
||||
* <a href="https://github.com/swagger-api/swagger-ui" class="external-link" target="_blank">Swagger UI</a>
|
||||
* <a href="https://github.com/Rebilly/ReDoc" class="external-link" target="_blank">ReDoc</a>
|
||||
|
||||
Esses dois foram escolhidos por serem bem populares e estáveis, mas fazendo uma pesquisa rápida, você pode encontrar dúzias de interfaces alternativas adicionais para OpenAPI (assim você poderá utilizar com **FastAPI**).
|
||||
|
||||
### Flask REST frameworks
|
||||
|
||||
Existem vários Flask REST frameworks, mas depois de investir tempo e trabalho investigando eles, eu descobri que muitos estão descontinuados ou abandonados, com alguns tendo questões que fizeram eles inadequados.
|
||||
|
||||
### <a href="https://marshmallow.readthedocs.io/en/3.0/" class="external-link" target="_blank">Marshmallow</a>
|
||||
|
||||
Um dos principais recursos necessários em sistemas API é "<abbr title="também chamado _ marshalling, conversão">serialização</abbr>" de dados, que é pegar dados do código (Python) e converter eles em alguma coisa que possa ser enviado através da rede. Por exemplo, converter um objeto contendo dados de um banco de dados em um objeto JSON. Converter objetos `datetime` em strings etc.
|
||||
|
||||
Outro grande recurso necessário nas APIs é validação de dados, certificando que os dados são válidos, dados certos parâmetros. Por exemplo, algum campo é `int`, e não alguma string aleatória. Isso é especialmente útil para dados que estão chegando.
|
||||
|
||||
Sem um sistema de validação de dados, você teria que realizar todas as verificações manualmente, no código.
|
||||
|
||||
Esses recursos são o que Marshmallow foi construído para fornecer. Ele é uma ótima biblioteca, e eu já utilizei muito antes.
|
||||
|
||||
Mas ele foi criado antes da existência do _type hints_ do Python. Então, para definir todo o <abbr title="definição de como os dados devem ser formados">_schema_</abbr> você precisa utilizar específicas ferramentas e classes fornecidas pelo Marshmallow.
|
||||
|
||||
!!! check "**FastAPI** inspirado para"
|
||||
Usar código para definir "schemas" que forneçam, automaticamente, tipos de dados e validação.
|
||||
|
||||
### <a href="https://webargs.readthedocs.io/en/latest/" class="external-link" target="_blank">Webargs</a>
|
||||
|
||||
Outro grande recurso necessário pelas APIs é a <abbr title="ler e converter para dados Python">análise</abbr> de dados vindos de requisições.
|
||||
|
||||
Webargs é uma ferramente feita para fornecer o que está no topo de vários frameworks, inclusive Flask.
|
||||
|
||||
Ele utiliza Marshmallow por baixo para validação de dados. E ele foi criado pelos mesmos desenvolvedores.
|
||||
|
||||
Ele é uma grande ferramenta e eu também a utilizei muito, antes de ter o **FastAPI**.
|
||||
|
||||
!!! info
|
||||
Webargs foi criado pelos mesmos desenvolvedores do Marshmallow.
|
||||
|
||||
!!! check "**FastAPI** inspirado para"
|
||||
Ter validação automática de dados vindos de requisições.
|
||||
|
||||
### <a href="https://apispec.readthedocs.io/en/stable/" class="external-link" target="_blank">APISpec</a>
|
||||
|
||||
Marshmallow e Webargs fornecem validação, análise e serialização como plug-ins.
|
||||
|
||||
Mas a documentação ainda está faltando. Então APISpec foi criado.
|
||||
|
||||
APISpec tem plug-ins para muitos frameworks (e tem um plug-in para Starlette também).
|
||||
|
||||
O jeito como ele funciona é que você escreve a definição do _schema_ usando formato YAML dentro da _docstring_ de cada função controlando uma rota.
|
||||
|
||||
E ele gera _schemas_ OpenAPI.
|
||||
|
||||
É assim como funciona no Flask, Starlette, Responder etc.
|
||||
|
||||
Mas então, nós temos novamente o problema de ter uma micro-sintaxe, dentro de uma string Python (um grande YAML).
|
||||
|
||||
O editor não poderá ajudar muito com isso. E se nós modificarmos os parâmetros dos _schemas_ do Marshmallow e esquecer de modificar também aquela _docstring_ YAML, o _schema_ gerado pode ficar obsoleto.
|
||||
|
||||
!!! info
|
||||
APISpec foi criado pelos mesmos desenvolvedores do Marshmallow.
|
||||
|
||||
!!! check "**FastAPI** inspirado para"
|
||||
Dar suporte a padrões abertos para APIs, OpenAPI.
|
||||
|
||||
### <a href="https://flask-apispec.readthedocs.io/en/latest/" class="external-link" target="_blank">Flask-apispec</a>
|
||||
|
||||
É um plug-in Flask, que amarra junto Webargs, Marshmallow e APISpec.
|
||||
|
||||
Ele utiliza a informação do Webargs e Marshmallow para gerar automaticamente _schemas_ OpenAPI, usando APISpec.
|
||||
|
||||
É uma grande ferramenta, mas muito subestimada. Ela deveria ser um pouco mais popular do que muitos outros plug-ins Flask. É de ser esperado que sua documentação seja bem concisa e abstrata.
|
||||
|
||||
Isso resolveu o problema de ter que escrever YAML (outra sintaxe) dentro das _docstrings_ Python.
|
||||
|
||||
Essa combinação de Flask, Flask-apispec com Marshmallow e Webargs foi meu _backend stack_ favorito até construir **FastAPI**.
|
||||
|
||||
Usando essa combinação levou a criação de vários geradores Flask _full-stack_. Há muitas _stacks_ que eu (e vários times externos) estou utilizando até agora:
|
||||
|
||||
* <a href="https://github.com/tiangolo/full-stack" class="external-link" target="_blank">https://github.com/tiangolo/full-stack</a>
|
||||
* <a href="https://github.com/tiangolo/full-stack-flask-couchbase" class="external-link" target="_blank">https://github.com/tiangolo/full-stack-flask-couchbase</a>
|
||||
* <a href="https://github.com/tiangolo/full-stack-flask-couchdb" class="external-link" target="_blank">https://github.com/tiangolo/full-stack-flask-couchdb</a>
|
||||
|
||||
E esses mesmos geradores _full-stack_ foram a base dos [Geradores de Projetos **FastAPI**](project-generation.md){.internal-link target=_blank}.
|
||||
|
||||
!!! info
|
||||
Flask-apispec foi criado pelos mesmos desenvolvedores do Marshmallow.
|
||||
|
||||
!!! check "**FastAPI** inspirado para"
|
||||
Gerar _schema_ OpenAPI automaticamente, a partir do mesmo código que define serialização e validação.
|
||||
|
||||
### <a href="https://nestjs.com/" class="external-link" target="_blank">NestJS</a> (and <a href="https://angular.io/" class="external-link" target="_blank">Angular</a>)
|
||||
|
||||
NestJS, que não é nem Python, é um framework NodeJS JavaScript (TypeScript) inspirado pelo Angular.
|
||||
|
||||
Ele alcança de uma forma similar ao que pode ser feito com o Flask-apispec.
|
||||
|
||||
Ele tem um sistema de injeção de dependência integrado, inspirado pelo Angular dois. É necessário fazer o pré-registro dos "injetáveis" (como todos os sistemas de injeção de dependência que conheço), então, adicionando verbosidade e repetição de código.
|
||||
|
||||
Como os parâmetros são descritos com tipos TypeScript (similar aos _type hints_ do Python), o suporte ao editor é muito bom.
|
||||
|
||||
Mas como os dados TypeScript não são preservados após a compilação para o JavaScript, ele não pode depender dos tipos para definir a validação, serialização e documentação ao mesmo tempo. Devido a isso e a algumas decisões de projeto, para pegar a validação, serialização e geração automática do _schema_, é necessário adicionar decoradores em muitos lugares. Então, ele se torna muito verboso.
|
||||
|
||||
Ele também não controla modelos aninhados muito bem. Então, se o corpo JSON na requisição for um objeto JSON que contém campos internos que contém objetos JSON aninhados, ele não consegue ser validado e documentado apropriadamente.
|
||||
|
||||
!!! check "**FastAPI** inspirado para"
|
||||
Usar tipos Python para ter um ótimo suporte do editor.
|
||||
|
||||
Ter um sistema de injeção de dependência poderoso. Achar um jeito de minimizar repetição de código.
|
||||
|
||||
### <a href="https://sanic.readthedocs.io/en/latest/" class="external-link" target="_blank">Sanic</a>
|
||||
|
||||
Ele foi um dos primeiros frameworks Python extremamente rápido baseado em `asyncio`. Ele foi feito para ser muito similar ao Flask.
|
||||
|
||||
!!! note "Detalhes técnicos"
|
||||
Ele utiliza <a href="https://github.com/MagicStack/uvloop" class="external-link" target="_blank">`uvloop`</a> ao invés do '_loop_' `asyncio` padrão do Python. É isso que deixa ele tão rápido.
|
||||
|
||||
Ele claramente inspirou Uvicorn e Starlette, que são atualmente mais rápidos que o Sanic em testes de performance abertos.
|
||||
|
||||
!!! check "**FastAPI** inspirado para"
|
||||
Achar um jeito de ter uma performance insana.
|
||||
|
||||
É por isso que o **FastAPI** é baseado em Starlette, para que ele seja o framework mais rápido disponível (performance testada por terceiros).
|
||||
|
||||
### <a href="https://falconframework.org/" class="external-link" target="_blank">Falcon</a>
|
||||
|
||||
Falcon é outro framework Python de alta performance, e é projetado para ser minimalista, e funciona como fundação de outros frameworks como Hug.
|
||||
|
||||
Ele usa o padrão anterior para frameworks web Python (WSGI) que é síncrono, então ele não pode controlar _WebSockets_ e outros casos de uso. No entanto, ele também tem uma boa performance.
|
||||
|
||||
Ele é projetado para ter funções que recebem dois parâmetros, uma "requisição" e uma "resposta". Então você "lê" as partes da requisição, e "escreve" partes para a resposta. Devido ao seu design, não é possível declarar parâmetros de requisição e corpos com _type hints_ Python padrão como parâmetros de funções.
|
||||
|
||||
Então, validação de dados, serialização e documentação tem que ser feitos no código, não automaticamente. Ou eles terão que ser implementados como um framework acima do Falcon, como o Hug. Essa mesma distinção acontece em outros frameworks que são inspirados pelo design do Falcon, tendo um objeto de requisição e um objeto de resposta como parâmetros.
|
||||
|
||||
!!! check "**FastAPI** inspirado para"
|
||||
Achar jeitos de conseguir melhor performance.
|
||||
|
||||
Juntamente com Hug (como Hug é baseado no Falcon) inspirou **FastAPI** para declarar um parâmetro de `resposta`nas funções.
|
||||
|
||||
Embora no FastAPI seja opcional, é utilizado principalmente para configurar cabeçalhos, cookies e códigos de status alternativos.
|
||||
|
||||
### <a href="https://moltenframework.com/" class="external-link" target="_blank">Molten</a>
|
||||
|
||||
Eu descobri Molten nos primeiros estágios da construção do **FastAPI**. E ele tem umas idéias bem similares:
|
||||
|
||||
* Baseado em _type hints_ Python.
|
||||
* Validação e documentação desses tipos.
|
||||
* Sistema de injeção de dependência.
|
||||
|
||||
Ele não utiliza validação de dados, seriallização e documentação de bibliotecas de terceiros como o Pydantic, ele tem seu prórpio. Então, essas definições de tipo de dados não podem ser reutilizados tão facilmente.
|
||||
|
||||
Ele exige um pouco mais de verbosidade nas configurações. E como é baseado no WSGI (ao invés de ASGI), ele não é projetado para ter a vantagem da alta performance fornecida por ferramentas como Uvicorn, Starlette e Sanic.
|
||||
|
||||
O sistema de injeção de dependência exige pré-registro das dependências e as dependências são resolvidas baseadas nos tipos declarados. Então, não é possível declarar mais do que um "componente" que fornece um certo tipo.
|
||||
|
||||
Rotas são declaradas em um único lugar, usando funções declaradas em outros lugares (ao invés de usar decoradores que possam ser colocados diretamente acima da função que controla o _endpoint_). Isso é mais perto de como o Django faz isso do que como Flask (e Starlette) faz. Ele separa no código coisas que são relativamente amarradas.
|
||||
|
||||
!!! check "**FastAPI** inspirado para"
|
||||
Definir validações extras para tipos de dados usando valores "padrão" de atributos dos modelos. Isso melhora o suporte do editor, e não estava disponível no Pydantic antes.
|
||||
|
||||
Isso na verdade inspirou a atualização de partes do Pydantic, para dar suporte ao mesmo estilo de declaração da validação (toda essa funcionalidade já está disponível no Pydantic).
|
||||
|
||||
### <a href="http://www.hug.rest/" class="external-link" target="_blank">Hug</a>
|
||||
|
||||
Hug foi um dos primeiros frameworks a implementar a declaração de tipos de parâmetros usando Python _type hints_. Isso foi uma ótima idéia que inspirou outras ferramentas a fazer o mesmo.
|
||||
|
||||
Ele usou tipos customizados em suas declarações ao invés dos tipos padrão Python, mas mesmo assim foi um grande passo.
|
||||
|
||||
Ele também foi um dos primeiros frameworks a gerar um _schema_ customizado declarando a API inteira em JSON.
|
||||
|
||||
Ele não era baseado em um padrão como OpenAPI e JSON Schema. Então não poderia ter interação direta com outras ferramentas, como Swagger UI. Mas novamente, era uma idéia muito inovadora.
|
||||
|
||||
Hug tinha um incomum, interessante recurso: usando o mesmo framework, é possível criar tanto APIs como CLIs.
|
||||
|
||||
Como é baseado nos padrões anteriores de frameworks web síncronos (WSGI), ele não pode controlar _Websockets_ e outras coisas, embora ele ainda tenha uma alta performance também.
|
||||
|
||||
!!! info
|
||||
Hug foi criado por Timothy Crosley, o mesmo criador do <a href="https://github.com/timothycrosley/isort" class="external-link" target="_blank">`isort`</a>, uma grande ferramenta para ordenação automática de _imports_ em arquivos Python.
|
||||
|
||||
!!! check "Idéias inspiradas para o **FastAPI**"
|
||||
Hug inspirou partes do APIStar, e foi uma das ferramentas que eu achei mais promissora, ao lado do APIStar.
|
||||
|
||||
Hug ajudou a inspirar o **FastAPI** a usar _type hints_ do Python para declarar parâmetros, e para gerar um _schema_ definindo a API automaticamente.
|
||||
|
||||
Hug inspirou **FastAPI** a declarar um parâmetro de `resposta` em funções para definir cabeçalhos e cookies.
|
||||
|
||||
### <a href="https://github.com/encode/apistar" class="external-link" target="_blank">APIStar</a> (<= 0.5)
|
||||
|
||||
Antes de decidir construir **FastAPI** eu encontrei o servidor **APIStar**. Tinha quase tudo que eu estava procurando e tinha um grande projeto.
|
||||
|
||||
Ele foi uma das primeiras implementações de um framework usando Python _type hints_ para declarar parâmetros e requisições que eu nunca vi (antes no NestJS e Molten). Eu encontrei ele mais ou menos na mesma época que o Hug. Mas o APIStar utilizava o padrão OpenAPI.
|
||||
|
||||
Ele tinha validação de dados automática, serialização de dados e geração de _schema_ OpenAPI baseado nos mesmos _type hints_ em vários locais.
|
||||
|
||||
Definições de _schema_ de corpo não utilizavam os mesmos Python _type hints_ como Pydantic, ele era um pouco mais similar ao Marshmallow, então, o suporte ao editor não seria tão bom, ainda assim, APIStar era a melhor opção disponível.
|
||||
|
||||
Ele obteve as melhores performances em testes na época (somente batido por Starlette).
|
||||
|
||||
A princípio, ele não tinha uma interface web com documentação automática da API, mas eu sabia que poderia adicionar o Swagger UI a ele.
|
||||
|
||||
Ele tinha um sistema de injeção de dependência. Ele exigia pré-registro dos componentes, como outras ferramentas já discutidas acima. Mas ainda era um grande recurso.
|
||||
|
||||
Eu nunca fui capaz de usar ele num projeto inteiro, por não ter integração de segurança, então, eu não pude substituir todos os recursos que eu tinha com os geradores _full-stack_ baseados no Flask-apispec. Eu tive em minha gaveta de projetos a idéia de criar um _pull request_ adicionando essa funcionalidade.
|
||||
|
||||
Mas então, o foco do projeto mudou.
|
||||
|
||||
Ele não era mais um framework web API, como o criador precisava focar no Starlette.
|
||||
|
||||
Agora APIStar é um conjunto de ferramentas para validar especificações OpenAPI, não um framework web.
|
||||
|
||||
!!! info
|
||||
APIStar foi criado por Tom Christie. O mesmo cara que criou:
|
||||
|
||||
* Django REST Framework
|
||||
* Starlette (no qual **FastAPI** é baseado)
|
||||
* Uvicorn (usado por Starlette e **FastAPI**)
|
||||
|
||||
!!! check "**FastAPI** inspirado para"
|
||||
Existir.
|
||||
|
||||
A idéia de declarar múltiplas coisas (validação de dados, serialização e documentação) com os mesmos tipos Python, que ao mesmo tempo fornecesse grande suporte ao editor, era algo que eu considerava uma brilhante idéia.
|
||||
|
||||
E após procurar por um logo tempo por um framework similar e testar muitas alternativas diferentes, APIStar foi a melhor opção disponível.
|
||||
|
||||
Então APIStar parou de existir como um servidor e Starlette foi criado, e foi uma nova melhor fundação para tal sistema. Essa foi a inspiração final para construir **FastAPI**.
|
||||
|
||||
Eu considero **FastAPI** um "sucessor espiritual" para o APIStar, evoluindo e melhorando os recursos, sistema de tipagem e outras partes, baseado na aprendizagem de todas essas ferramentas acima.
|
||||
|
||||
## Usados por **FastAPI**
|
||||
|
||||
### <a href="https://pydantic-docs.helpmanual.io/" class="external-link" target="_blank">Pydantic</a>
|
||||
|
||||
Pydantic é uma biblioteca para definir validação de dados, serialização e documentação (usando JSON Schema) baseado nos Python _type hints_.
|
||||
|
||||
Isso faz dele extremamente intuitivo.
|
||||
|
||||
Ele é comparável ao Marshmallow. Embora ele seja mais rápido que Marshmallow em testes de performance. E ele é baseado nos mesmos Python _type hints_, o suporte ao editor é ótimo.
|
||||
|
||||
!!! check "**FastAPI** usa isso para"
|
||||
Controlar toda a validação de dados, serialização de dados e modelo de documentação automática (baseado no JSON Schema).
|
||||
|
||||
**FastAPI** então pega dados do JSON Schema e coloca eles no OpenAPI, à parte de todas as outras coisas que ele faz.
|
||||
|
||||
### <a href="https://www.starlette.io/" class="external-link" target="_blank">Starlette</a>
|
||||
|
||||
Starlette é um framework/caixa de ferramentas <abbr title="O novo padrão para construção de Python web assíncrono">ASGI</abbr> peso leve, o que é ideal para construir serviços assíncronos de alta performance.
|
||||
|
||||
Ele é muito simples e intuitivo. É projetado para ser extensível facilmente, e ter componentes modulares.
|
||||
|
||||
Ele tem:
|
||||
|
||||
* Performance seriamente impressionante.
|
||||
* Suporte a WebSocket.
|
||||
* Suporte a GraphQL.
|
||||
* Tarefas de processamento interno por trás dos panos.
|
||||
* Eventos de inicialização e encerramento.
|
||||
* Cliente de testes construído com requests.
|
||||
* Respostas CORS, GZip, Arquivos Estáticos, Streaming.
|
||||
* Suporte para Sessão e Cookie.
|
||||
* 100% coberto por testes.
|
||||
* Código base 100% anotado com tipagem.
|
||||
* Dependências complexas Zero.
|
||||
|
||||
Starlette é atualmente o mais rápido framework Python testado. Somente ultrapassado pelo Uvicorn, que não é um framework, mas um servidor.
|
||||
|
||||
Starlette fornece toda a funcionalidade básica de um microframework web.
|
||||
|
||||
Mas ele não fornece validação de dados automática, serialização e documentação.
|
||||
|
||||
Essa é uma das principais coisas que **FastAPI** adiciona no topo, tudo baseado em Python _type hints_ (usando Pydantic). Isso, mais o sistema de injeção de dependência, utilidades de segurança, geração de _schema_ OpenAPI, etc.
|
||||
|
||||
!!! note "Detalhes Técnicos"
|
||||
ASGI é um novo "padrão" sendo desenvolvido pelos membros do time central do Django. Ele ainda não está como "Padrão Python" (PEP), embora eles estejam em processo de fazer isso.
|
||||
|
||||
No entanto, ele já está sendo utilizado como "padrão" por diversas ferramentas. Isso melhora enormemente a interoperabilidade, como você poderia trocar Uvicorn por qualquer outro servidor ASGI (como Daphne ou Hypercorn), ou você poderia adicionar ferramentas compatíveis com ASGI, como `python-socketio`.
|
||||
|
||||
!!! check "**FastAPI** usa isso para"
|
||||
Controlar todas as partes web centrais. Adiciona recursos no topo.
|
||||
|
||||
A classe `FastAPI` em si herda `Starlette`.
|
||||
|
||||
Então, qualquer coisa que você faz com Starlette, você pode fazer diretamente com **FastAPI**, pois ele é basicamente um Starlette com esteróides.
|
||||
|
||||
### <a href="https://www.uvicorn.org/" class="external-link" target="_blank">Uvicorn</a>
|
||||
|
||||
Uvicorn é um servidor ASGI peso leve, construído com uvloop e httptools.
|
||||
|
||||
Ele não é um framework web, mas sim um servidor. Por exemplo, ele não fornece ferramentas para roteamento por rotas. Isso é algo que um framework como Starlette (ou **FastAPI**) poderia fornecer por cima.
|
||||
|
||||
Ele é o servidor recomendado para Starlette e **FastAPI**.
|
||||
|
||||
!!! check "**FastAPI** recomenda isso para"
|
||||
O principal servidor web para rodar aplicações **FastAPI**.
|
||||
|
||||
Você pode combinar ele com o Gunicorn, para ter um servidor multi-processos assíncrono.
|
||||
|
||||
Verifique mais detalhes na seção [Deployment](deployment.md){.internal-link target=_blank}.
|
||||
|
||||
## Performance e velocidade
|
||||
|
||||
Para entender, comparar e ver a diferença entre Uvicorn, Starlette e FastAPI, verifique a seção sobre [Benchmarks](benchmarks.md){.internal-link target=_blank}.
|
||||
34
docs/pt/docs/benchmarks.md
Normal file
34
docs/pt/docs/benchmarks.md
Normal file
@@ -0,0 +1,34 @@
|
||||
# Comparações
|
||||
|
||||
As comparações independentes da TechEmpower mostram as aplicações **FastAPI** rodando com Uvicorn como <a href="https://www.techempower.com/benchmarks/#section=test&runid=7464e520-0dc2-473d-bd34-dbdfd7e85911&hw=ph&test=query&l=zijzen-7" class="external-link" target="_blank">um dos _frameworks_ Python mais rápidos disponíveis</a>, somente atrás dos próprios Starlette e Uvicorn (utilizados internamente pelo FastAPI). (*)
|
||||
|
||||
Mas quando se checa _benchmarks_ e comparações você deveria ter o seguinte em mente.
|
||||
|
||||
## Comparações e velocidade
|
||||
|
||||
Ao verificar os _benchmarks_, é comum observar algumas ferramentas de diferentes tipos comparadas como equivalentes.
|
||||
|
||||
Especificamente, observa-se Uvicorn, Starlette e FastAPI comparados juntos (entre muitas outras ferramentas).
|
||||
|
||||
Quanto mais simples o problema resolvido pela ferramenta, melhor a performance que ela terá. E a maioria dos _benchmarks_ não testam as características adicionais fornecidas pela ferramenta.
|
||||
|
||||
A hierarquia segue assim:
|
||||
|
||||
* **Uvicorn**: um servidor ASGI
|
||||
* **Starlette**: (utiliza Uvicorn) um _microframework web_
|
||||
* **FastAPI**: (utiliza Starlette) um _microframework_ de API com vários recursos adicionais para construção de APIs, com validação de dados, etc.
|
||||
|
||||
* **Uvicorn**:
|
||||
* Terá a melhor performance, já que ele não tem muito código extra além do servidor em si.
|
||||
* Você não conseguiria escrever uma aplicação em Uvicorn diretamente. Isso significa que seu código deveria conter, mais ou menos, todo o código fornecido pelo Starlette (ou **FastAPI**). E se você fizesse isso, sua aplicação final poderia ter a mesma sobrecarga que utilizar um _framework_ que minimiza o código e _bugs_ da sua aplicação.
|
||||
* Se você quer fazer comparações com o Uvicorn, compare com Daphne, Hypercorn, uWSGI, etc. Servidores de Aplicação.
|
||||
* **Starlette**:
|
||||
* Terá a melhor performance, depois do Uvicorn. De fato, Starlette utiliza Uvicorn para rodar. Então, ele provavelmente será "mais lento" que Uvicorn por ter que executar mais código.
|
||||
* Mas ele fornece a você as ferramentas para construir aplicações _web_ simples, com roteamento baseado em caminhos, etc.
|
||||
* Se você quer fazer comparações com o Starlette, compare com Sanic, Flask, Django, etc. _Frameworks Web_ (ou _microframeworks_).
|
||||
* **FastAPI**:
|
||||
* Do mesmo modo que Starlette utiliza Uvicorn e não pode ser mais rápido que ele, **FastAPI** utiliza o Starlette, então não tem como ser mais rápido do que o Starlette.
|
||||
* FastAPI fornece mais recursos acima do Starlette. Recursos que você quase sempre precisará quando construir APIs, como validação de dados e serialização. E utilizando eles, você terá uma documentação automática de graça (a documentação automática nem sequer adiciona peso para rodar as aplicações, ela é gerada na inicialização).
|
||||
* Se você nunca utilizou FastAPI mas utilizou diretamente o Starlette (ou outra ferramenta, como Sanic, Flask, Responder, etc) você teria que implementar toda validação de dados e serialização por conta. Então, sua aplicação final poderia ainda ter a mesma sobrecarga como se fosse desenvolvida com FastAPI. Em muitos casos, a validação de dados e serialização é o maior pedaço de código escrito em aplicações.
|
||||
* Então, ao utilizar o FastAPI você estará economizando tempo de desenvolvimento, evitará _bugs_, linhas de código, e você provavelmente terá a mesma performance (ou melhor) do que não utilizá-lo (já que você teria que implementar tudo isso em seu código).
|
||||
* Se você quer fazer comparações com o FastAPI, compare com um _framework_ (ou conjunto de ferramentas) para aplicações _web_ que forneça validação de dados, serialização e documentação, como Flask-apispec, NestJS, Molten, etc. _Frameworks_ com validação de dados automática, serialização e documentação integradas.
|
||||
202
docs/pt/docs/features.md
Normal file
202
docs/pt/docs/features.md
Normal file
@@ -0,0 +1,202 @@
|
||||
# Recursos
|
||||
|
||||
## Recursos do FastAPI
|
||||
|
||||
**FastAPI** te oferece o seguinte:
|
||||
|
||||
### Baseado em padrões abertos
|
||||
|
||||
* <a href="https://github.com/OAI/OpenAPI-Specification" class="external-link" target="_blank"><strong>OpenAPI</strong></a> para criação de APIs, incluindo declarações de <abbr title="também conhecido como métodos HTTP, como POST, GET, PUT, DELETE">operações</abbr> de <abbr title="também conhecido como: endpoints, routes">caminho</abbr>, parâmetros, requisições de corpo, segurança etc.
|
||||
* Modelo de documentação automática com <a href="http://json-schema.org/" class="external-link" target="_blank"><strong>JSON Schema</strong></a> (já que o OpenAPI em si é baseado no JSON Schema).
|
||||
* Projetado em cima desses padrões após um estudo meticuloso, em vez de uma reflexão breve.
|
||||
* Isso também permite o uso de **geração de código do cliente** automaticamente em muitas linguagens.
|
||||
|
||||
### Documentação automática
|
||||
|
||||
Documentação interativa da API e navegação _web_ da interface de usuário. Como o _framework_ é baseado no OpenAPI, há várias opções, 2 incluídas por padrão.
|
||||
|
||||
* <a href="https://github.com/swagger-api/swagger-ui" class="external-link" target="_blank"><strong>Swagger UI</strong></a>, com navegação interativa, chame e teste sua API diretamente do navegador.
|
||||
|
||||

|
||||
|
||||
* Documentação alternativa da API com <a href="https://github.com/Rebilly/ReDoc" class="external-link" target="_blank"><strong>ReDoc</strong></a>.
|
||||
|
||||

|
||||
|
||||
### Apenas Python moderno
|
||||
|
||||
Tudo é baseado no padrão das declarações de **tipos do Python 3.6** (graças ao Pydantic). Nenhuma sintaxe nova para aprender. Apenas o padrão moderno do Python.
|
||||
|
||||
Se você precisa refrescar a memória rapidamente sobre como usar tipos do Python (mesmo que você não use o FastAPI), confira esse rápido tutorial: [Tipos do Python](python-types.md){.internal-link target=_blank}.
|
||||
|
||||
Você escreve Python padrão com tipos:
|
||||
|
||||
```Python
|
||||
from typing import List, Dict
|
||||
from datetime import date
|
||||
|
||||
from pydantic import BaseModel
|
||||
|
||||
# Declare uma variável como str
|
||||
# e obtenha suporte do editor dentro da função
|
||||
def main(user_id: str):
|
||||
return user_id
|
||||
|
||||
|
||||
# Um modelo do Pydantic
|
||||
class User(BaseModel):
|
||||
id: int
|
||||
name: str
|
||||
joined: date
|
||||
```
|
||||
|
||||
Que então pode ser usado como:
|
||||
|
||||
```Python
|
||||
my_user: User = User(id=3, name="John Doe", joined="2018-07-19")
|
||||
|
||||
second_user_data = {
|
||||
"id": 4,
|
||||
"name": "Mary",
|
||||
"joined": "2018-11-30",
|
||||
}
|
||||
|
||||
my_second_user: User = User(**second_user_data)
|
||||
```
|
||||
|
||||
!!! info
|
||||
`**second_user_data` quer dizer:
|
||||
|
||||
Passe as chaves e valores do dicionário `second_user_data` diretamente como argumentos chave-valor, equivalente a: `User(id=4, name="Mary", joined="2018-11-30")`
|
||||
|
||||
### Suporte de editores
|
||||
|
||||
Todo o _framework_ foi projetado para ser fácil e intuitivo de usar, todas as decisões foram testadas em vários editores antes do início do desenvolvimento, para garantir a melhor experiência de desenvolvimento.
|
||||
|
||||
Na última pesquisa do desenvolvedor Python ficou claro <a href="https://www.jetbrains.com/research/python-developers-survey-2017/#tools-and-features" class="external-link" target="_blank">que o recurso mais utilizado é o "auto completar"</a>.
|
||||
|
||||
Todo o _framework_ **FastAPI** é feito para satisfazer isso. Auto completação funciona em todos os lugares.
|
||||
|
||||
Você raramente precisará voltar à documentação.
|
||||
|
||||
Aqui está como o editor poderá te ajudar:
|
||||
|
||||
* no <a href="https://code.visualstudio.com/" class="external-link" target="_blank">Visual Studio Code</a>:
|
||||
|
||||

|
||||
|
||||
* no <a href="https://www.jetbrains.com/pycharm/" class="external-link" target="_blank">PyCharm</a>:
|
||||
|
||||

|
||||
|
||||
Você terá completação do seu código que você poderia considerar impossível antes. Como por exemplo, a chave `price` dentro do corpo JSON (que poderia ter sido aninhado) que vem de uma requisição.
|
||||
|
||||
Sem a necessidade de digitar nomes de chaves erroneamente, ir e voltar entre documentações, ou rolar pela página para descobrir se você utilizou `username` or `user_name`.
|
||||
|
||||
### Breve
|
||||
|
||||
Há **padrões** sensíveis para tudo, com configurações adicionais em todos os lugares. Todos os parâmetros podem ser regulados para fazer o que você precisa e para definir a API que você necessita.
|
||||
|
||||
Por padrão, tudo **"simplesmente funciona"**.
|
||||
|
||||
### Validação
|
||||
|
||||
* Validação para a maioria dos (ou todos?) **tipos de dados** do Python, incluindo:
|
||||
* objetos JSON (`dict`).
|
||||
* arrays JSON (`list`), definindo tipos dos itens.
|
||||
* campos String (`str`), definindo tamanho mínimo e máximo.
|
||||
* Numbers (`int`, `float`) com valores mínimos e máximos, etc.
|
||||
|
||||
* Validação de tipos mais exóticos, como:
|
||||
* URL.
|
||||
* Email.
|
||||
* UUID.
|
||||
* ...e outros.
|
||||
|
||||
Toda a validação é controlada pelo robusto e bem estabelecido **Pydantic**.
|
||||
|
||||
### Segurança e autenticação
|
||||
|
||||
Segurança e autenticação integradas. Sem nenhum compromisso com bancos de dados ou modelos de dados.
|
||||
|
||||
Todos os esquemas de seguranças definidos no OpenAPI, incluindo:
|
||||
|
||||
* HTTP Basic.
|
||||
* **OAuth2** (também com **tokens JWT**). Confira o tutorial em [OAuth2 com JWT](tutorial/security/oauth2-jwt.md){.internal-link target=_blank}.
|
||||
* Chaves de API em:
|
||||
* Headers.
|
||||
* parâmetros da Query.
|
||||
* Cookies etc.
|
||||
|
||||
Além disso, todos os recursos de seguranças do Starlette (incluindo **cookies de sessão**).
|
||||
|
||||
Tudo construído como ferramentas e componentes reutilizáveis que são fáceis de integrar com seus sistemas, armazenamento de dados, banco de dados relacionais e não-relacionais etc.
|
||||
|
||||
### Injeção de dependência
|
||||
|
||||
FastAPI inclui um sistema de <abbr title='também conhecido como "components", "resources", "services", "providers"'><strong>injeção de dependência</strong></abbr> extremamente fácil de usar, mas extremamente poderoso.
|
||||
|
||||
* Mesmo dependências podem ter dependências, criando uma hierarquia ou **"grafo" de dependências**.
|
||||
* Tudo **automaticamente controlado** pelo _framework_.
|
||||
* Todas as dependências podem pedir dados das requisições e **ampliar** as restrições e documentação automática da **operação de caminho**.
|
||||
* **Validação automática** mesmo para parâmetros da *operação de caminho* definidos em dependências.
|
||||
* Suporte para sistemas de autenticação complexos, **conexões com banco de dados** etc.
|
||||
* **Sem comprometer** os bancos de dados, _frontends_ etc. Mas fácil integração com todos eles.
|
||||
|
||||
### "Plug-ins" ilimitados
|
||||
|
||||
Ou, de outra forma, sem a necessidade deles, importe e use o código que precisar.
|
||||
|
||||
Qualquer integração é projetada para ser tão simples de usar (com dependências) que você pode criar um "plug-in" para suas aplicações com 2 linhas de código usando a mesma estrutura e sintaxe para as suas *operações de caminho*.
|
||||
|
||||
### Testado
|
||||
|
||||
* 100% <abbr title="A quantidade de código que é testada automaticamente">de cobertura de testes</abbr>.
|
||||
* 100% do código utiliza <abbr title="Type annotations do Python, com isso seu editor e ferramentas externas podem te dar um suporte melhor">type annotations</abbr>.
|
||||
* Usado para aplicações em produção.
|
||||
|
||||
## Recursos do Starlette
|
||||
|
||||
**FastAPI** é totalmente compatível com (e baseado no) <a href="https://www.starlette.io/" class="external-link" target="_blank"><strong>Starlette</strong></a>. Então, qualquer código adicional Starlette que você tiver, também funcionará.
|
||||
|
||||
`FastAPI` é na verdade uma sub-classe do `Starlette`. Então, se você já conhece ou usa Starlette, a maioria das funcionalidades se comportará da mesma forma.
|
||||
|
||||
Com **FastAPI**, você terá todos os recursos do **Starlette** (já que FastAPI é apenas um Starlette com esteróides):
|
||||
|
||||
* Desempenho realmente impressionante. É <a href="https://github.com/encode/starlette#performance" class="external-link" target="_blank">um dos _frameworks_ Python disponíveis mais rápidos, a par com o **NodeJS** e **Go**</a>.
|
||||
* Suporte a **WebSocket**.
|
||||
* Suporte a **GraphQL**.
|
||||
* Tarefas em processo _background_.
|
||||
* Eventos na inicialização e encerramento.
|
||||
* Cliente de testes construído sobre `requests`.
|
||||
* Respostas em **CORS**, GZip, Static Files, Streaming.
|
||||
* Suporte a **Session e Cookie**.
|
||||
* 100% de cobertura de testes.
|
||||
* 100% do código utilizando _type annotations_.
|
||||
|
||||
## Recursos do Pydantic
|
||||
|
||||
**FastAPI** é totalmente compatível com (e baseado no) <a href="https://pydantic-docs.helpmanual.io" class="external-link" target="_blank"><strong>Pydantic</strong></a>. Então, qualquer código Pydantic adicional que você tiver, também funcionará.
|
||||
|
||||
Incluindo bibliotecas externas também baseadas no Pydantic, como <abbr title="Object-Relational Mapper">ORM</abbr>s e <abbr title="Object-Document Mapper">ODM</abbr>s para bancos de dados.
|
||||
|
||||
Isso também significa que em muitos casos você poderá passar o mesmo objeto que você receber de uma requisição **diretamente para o banco de dados**, já que tudo é validado automaticamente.
|
||||
|
||||
O mesmo se aplica no sentido inverso, em muitos casos você poderá simplesmente passar o objeto que você recebeu do banco de dados **diretamente para o cliente**.
|
||||
|
||||
Com **FastAPI** você terá todos os recursos do **Pydantic** (já que FastAPI utiliza o Pydantic para todo o controle dos dados):
|
||||
|
||||
* **Sem pegadinhas**:
|
||||
* Sem novas definições de esquema de micro-linguagem para aprender.
|
||||
* Se você conhece os tipos do Python, você sabe como usar o Pydantic.
|
||||
* Vai bem com o/a seu/sua **<abbr title="Ambiente de Desenvolvimento Integrado, similar a um editor de código">IDE</abbr>/<abbr title="Um programa que confere erros de código">linter</abbr>/cérebro**:
|
||||
* Como as estruturas de dados do Pydantic são apenas instâncias de classes que você define, a auto completação, _linting_, _mypy_ e a sua intuição devem funcionar corretamente com seus dados validados.
|
||||
* **Rápido**:
|
||||
* em <a href="https://pydantic-docs.helpmanual.io/#benchmarks-tag" class="external-link" target="_blank">_benchmarks_</a>, o Pydantic é mais rápido que todas as outras bibliotecas testadas.
|
||||
* Valida **estruturas complexas**:
|
||||
* Use modelos hierárquicos do Pydantic, `List` e `Dict` do `typing` do Python, etc.
|
||||
* Validadores permitem que esquemas de dados complexos sejam limpos e facilmente definidos, conferidos e documentados como JSON Schema.
|
||||
* Você pode ter **JSONs aninhados** profundamente e tê-los todos validados e anotados.
|
||||
* **Extensível**:
|
||||
* Pydantic permite que tipos de dados personalizados sejam definidos ou você pode estender a validação com métodos em um modelo decorado com seu decorador de validador.
|
||||
* 100% de cobertura de testes.
|
||||
79
docs/pt/docs/history-design-future.md
Normal file
79
docs/pt/docs/history-design-future.md
Normal file
@@ -0,0 +1,79 @@
|
||||
# História, Design e Futuro
|
||||
|
||||
Há algum tempo, <a href="https://github.com/tiangolo/fastapi/issues/3#issuecomment-454956920" class="external-link" target="_blank">um usuário **FastAPI** perguntou</a>:
|
||||
|
||||
> Qual é a história desse projeto? Parece que surgiu do nada e se tornou incrível em poucas semanas [...]
|
||||
|
||||
Aqui está um pouco dessa história.
|
||||
|
||||
## Alternativas
|
||||
|
||||
Eu tenho criado APIs com requisitos complexos por vários anos (Aprendizado de Máquina, sistemas distribuídos, tarefas assíncronas, banco de dados NoSQL etc.), liderando vários times de desenvolvedores.
|
||||
|
||||
Como parte disso, eu precisava investigar, testar e usar muitas alternativas.
|
||||
|
||||
A história do **FastAPI** é, em grande parte, a história de seus predecessores.
|
||||
|
||||
Como dito na seção [Alternativas](alternatives.md){.internal-link target=_blank}:
|
||||
|
||||
<blockquote markdown="1">
|
||||
|
||||
**FastAPI** não existiria se não pelo trabalho anterior de outros.
|
||||
|
||||
Há muitas ferramentas criadas antes que ajudaram a inspirar sua criação.
|
||||
|
||||
Eu estive evitando a criação de um novo _framework_ por vários anos. Primeiro tentei resolver todas as funcionalidades cobertas por **FastAPI** usando muitos _frameworks_, _plug-ins_ e ferramentas diferentes.
|
||||
|
||||
Mas em algum ponto, não havia outra opção senão criar algo que oferecia todas as funcionalidades, aproveitando as melhores ideias de ferramentas anteriores, e combinando-as da melhor maneira possível, usando funcionalidades da linguagem que nem estavam disponíveis antes (_type hints_ do Python 3.6+).
|
||||
|
||||
</blockquote>
|
||||
|
||||
## Investigação
|
||||
|
||||
Ao usar todas as alternativas anteriores, eu tive a chance de aprender com todas elas, aproveitar ideias e combiná-las da melhor maneira que encontrei para mim e para os times de desenvolvedores com os quais trabalhava.
|
||||
|
||||
Por exemplo, estava claro que idealmente ele deveria ser baseado nos _type hints_ padrões do Python.
|
||||
|
||||
Também, a melhor abordagem era usar padrões já existentes.
|
||||
|
||||
Então, antes mesmo de começar a codificar o **FastAPI**, eu investi vários meses estudando as especificações do OpenAPI, JSON Schema, OAuth2 etc. Entendendo suas relações, sobreposições e diferenças.
|
||||
|
||||
## Design
|
||||
|
||||
Eu então dediquei algum tempo projetando a "API" de desenvolvimento que eu queria como usuário (como um desenvolvedor usando o FastAPI).
|
||||
|
||||
Eu testei várias ideias nos editores Python mais populares: PyCharm, VS Code, e editores baseados no Jedi.
|
||||
|
||||
Pela última <a href="https://www.jetbrains.com/research/python-developers-survey-2018/#development-tools" class="external-link" target="_blank">Pesquisa do Desenvolvedor Python</a>, isso cobre cerca de 80% dos usuários.
|
||||
|
||||
Isso significa que o **FastAPI** foi testado especificamente com os editores usados por 80% dos desenvolvedores Python. Como a maioria dos outros editores tendem a funcionar de forma similar, todos os seus benefícios devem funcionar para virtualmente todos os editores.
|
||||
|
||||
Dessa forma eu pude encontrar a melhor maneira de reduzir duplicação de código o máximo possível, ter completação de texto em todos os lugares, conferência de tipos e erros etc.
|
||||
|
||||
Tudo de uma forma que oferecesse a melhor experiência de desenvolvimento para todos os desenvolvedores.
|
||||
|
||||
## Requisitos
|
||||
|
||||
Após testar várias alternativas, eu decidi que usaria o <a href="https://pydantic-docs.helpmanual.io/" class="external-link" target="_blank">**Pydantic**</a> por suas vantagens.
|
||||
|
||||
Então eu contribuí com ele, para deixá-lo completamente de acordo com o JSON Schema, para dar suporte a diferentes maneiras de definir declarações de restrições, e melhorar o suporte a editores (conferências de tipos, auto completações) baseado nos testes em vários editores.
|
||||
|
||||
Durante o desenvolvimento, eu também contribuí com o <a href="https://www.starlette.io/" class="external-link" target="_blank">**Starlette**</a>, outro requisito chave.
|
||||
|
||||
## Desenvolvimento
|
||||
|
||||
Quando comecei a criar o **FastAPI** de fato, a maior parte das peças já estavam encaixadas, o design estava definido, os requisitos e ferramentas já estavam prontos, e o conhecimento sobre os padrões e especificações estavam claros e frescos.
|
||||
|
||||
## Futuro
|
||||
|
||||
Nesse ponto, já está claro que o **FastAPI** com suas ideias está sendo útil para muitas pessoas.
|
||||
|
||||
Ele foi escolhido sobre outras alternativas anteriores por se adequar melhor em muitos casos.
|
||||
|
||||
Muitos desenvolvedores e times já dependem do **FastAPI** para seus projetos (incluindo eu e meu time).
|
||||
|
||||
Mas ainda há muitas melhorias e funcionalidades a vir.
|
||||
|
||||
**FastAPI** tem um grande futuro à frente.
|
||||
|
||||
E [sua ajuda](help-fastapi.md){.internal-link target=_blank} é muito bem-vinda.
|
||||
436
docs/pt/docs/index.md
Normal file
436
docs/pt/docs/index.md
Normal file
@@ -0,0 +1,436 @@
|
||||
<p align="center">
|
||||
<a href="https://fastapi.tiangolo.com"><img src="https://fastapi.tiangolo.com/img/logo-margin/logo-teal.png" alt="FastAPI"></a>
|
||||
</p>
|
||||
<p align="center">
|
||||
<em>Framework FastAPI, alta performance, fácil de aprender, fácil de codar, pronto para produção</em>
|
||||
</p>
|
||||
<p align="center">
|
||||
<a href="https://travis-ci.com/tiangolo/fastapi" target="_blank">
|
||||
<img src="https://travis-ci.com/tiangolo/fastapi.svg?branch=master" alt="Build Status">
|
||||
</a>
|
||||
<a href="https://codecov.io/gh/tiangolo/fastapi" target="_blank">
|
||||
<img src="https://img.shields.io/codecov/c/github/tiangolo/fastapi" alt="Coverage">
|
||||
</a>
|
||||
<a href="https://pypi.org/project/fastapi" target="_blank">
|
||||
<img src="https://badge.fury.io/py/fastapi.svg" alt="Package version">
|
||||
</a>
|
||||
<a href="https://gitter.im/tiangolo/fastapi?utm_source=badge&utm_medium=badge&utm_campaign=pr-badge&utm_content=badge" target="_blank">
|
||||
<img src="https://badges.gitter.im/tiangolo/fastapi.svg" alt="Join the chat at https://gitter.im/tiangolo/fastapi">
|
||||
</a>
|
||||
</p>
|
||||
|
||||
---
|
||||
|
||||
**Documentação**: <a href="https://fastapi.tiangolo.com" target="_blank">https://fastapi.tiangolo.com</a>
|
||||
|
||||
**Código fonte**: <a href="https://github.com/tiangolo/fastapi" target="_blank">https://github.com/tiangolo/fastapi</a>
|
||||
|
||||
---
|
||||
|
||||
FastAPI é um moderno e rápido (alta performance) _framework web_ para construção de APIs com Python 3.6 ou superior, baseado nos _type hints_ padrões do Python.
|
||||
|
||||
Os recursos chave são:
|
||||
|
||||
* **Rápido**: alta performance, equivalente a **NodeJS** e **Go** (graças ao Starlette e Pydantic). [Um dos frameworks mais rápidos disponíveis](#performance).
|
||||
* **Rápido para codar**: Aumenta a velocidade para desenvolver recursos entre 200% a 300%. *
|
||||
* **Poucos bugs**: Reduz cerca de 40% de erros iduzidos por humanos (desenvolvedores). *
|
||||
* **Intuitivo**: Grande suporte a _IDEs_. <abbr title="também conhecido como _auto-complete_, _autocompletion_, _IntelliSense_">_Auto-Complete_</abbr> em todos os lugares. Menos tempo debugando.
|
||||
* **Fácil**: Projetado para ser fácil de aprender e usar. Menos tempo lendo documentação.
|
||||
* **Enxuto**: Minimize duplicação de código. Múltiplos recursos para cada declaração de parâmetro. Menos bugs.
|
||||
* **Robusto**: Tenha código pronto para produção. E com documentação interativa automática.
|
||||
* **Baseado em padrões**: Baseado em (e totalmente compatível com) os padrões abertos para APIs: <a href="https://github.com/OAI/OpenAPI-Specification" class="external-link" target="_blank">OpenAPI</a> (anteriormente conhecido como Swagger) e <a href="http://json-schema.org/" class="external-link" target="_blank">_JSON Schema_</a>.
|
||||
|
||||
<small>* estimativas baseadas em testes realizados com equipe interna de desenvolvimento, construindo aplicações em produção.</small>
|
||||
|
||||
## Opiniões
|
||||
|
||||
"*[...] Estou usando **FastAPI** muito esses dias. [...] Estou na verdade planejando utilizar ele em todos os times de **serviços _Machine Learning_ na Microsoft**. Alguns deles estão sendo integrados no _core_ do produto **Windows** e alguns produtos **Office**.*"
|
||||
|
||||
<div style="text-align: right; margin-right: 10%;">Kabir Khan - <strong>Microsoft</strong> <a href="https://github.com/tiangolo/fastapi/pull/26" target="_blank"><small>(ref)</small></a></div>
|
||||
|
||||
---
|
||||
|
||||
"*Estou extremamente entusiasmado com o **FastAPI**. É tão divertido!*"
|
||||
|
||||
<div style="text-align: right; margin-right: 10%;">Brian Okken - <strong><a href="https://pythonbytes.fm/episodes/show/123/time-to-right-the-py-wrongs?time_in_sec=855" target="_blank">Python Bytes</a> podcaster</strong> <a href="https://twitter.com/brianokken/status/1112220079972728832" target="_blank"><small>(ref)</small></a></div>
|
||||
|
||||
---
|
||||
|
||||
"*Honestamente, o que você construiu parece super sólido e rebuscado. De muitas formas, eu queria que o **Hug** fosse assim - é realmente inspirador ver alguém que construiu ele.*"
|
||||
|
||||
<div style="text-align: right; margin-right: 10%;">Timothy Crosley - <strong>criador do<a href="http://www.hug.rest/" target="_blank">Hug</a></strong> <a href="https://news.ycombinator.com/item?id=19455465" target="_blank"><small>(ref)</small></a></div>
|
||||
|
||||
---
|
||||
|
||||
"*Se você está procurando aprender um **_framework_ moderno** para construir aplicações _REST_, dê uma olhada no **FastAPI** [...] É rápido, fácil de usar e fácil de aprender [...]*"
|
||||
|
||||
"*Nós trocamos nossas **APIs** por **FastAPI** [...] Acredito que vocês gostarão dele [...]*"
|
||||
|
||||
<div style="text-align: right; margin-right: 10%;">Ines Montani - Matthew Honnibal - <strong>fundadores da <a href="https://explosion.ai" target="_blank">Explosion AI</a> - criadores da <a href="https://spacy.io" target="_blank">spaCy</a></strong> <a href="https://twitter.com/_inesmontani/status/1144173225322143744" target="_blank"><small>(ref)</small></a> - <a href="https://twitter.com/honnibal/status/1144031421859655680" target="_blank"><small>(ref)</small></a></div>
|
||||
|
||||
---
|
||||
|
||||
"*Nós adotamos a biblioteca **FastAPI** para criar um servidor **REST** que possa ser chamado para obter **predições**. [para o Ludwig]*"
|
||||
|
||||
<div style="text-align: right; margin-right: 10%;">Piero Molino, Yaroslav Dudin e Sai Sumanth Miryala - <strong>Uber</strong> <a href="https://eng.uber.com/ludwig-v0-2/" target="_blank"><small>(ref)</small></a></div>
|
||||
|
||||
---
|
||||
|
||||
## **Typer**, o FastAPI das interfaces de linhas de comando
|
||||
|
||||
<a href="https://typer.tiangolo.com" target="_blank"><img src="https://typer.tiangolo.com/img/logo-margin/logo-margin-vector.svg" style="width: 20%;"></a>
|
||||
|
||||
Se você estiver construindo uma aplicação <abbr title="Command Line Interface">_CLI_</abbr> para ser utilizada em um terminal ao invés de uma aplicação web, dê uma olhada no <a href="https://typer.tiangolo.com/" class="external-link" target="_blank">**Typer**</a>.
|
||||
|
||||
**Typer** é o irmão menor do FastAPI. E seu propósito é ser o **FastAPI das _CLIs_**. ⌨️ 🚀
|
||||
|
||||
## Requisitos
|
||||
|
||||
Python 3.6+
|
||||
|
||||
FastAPI está nos ombros de gigantes:
|
||||
|
||||
* <a href="https://www.starlette.io/" class="external-link" target="_blank">Starlette</a> para as partes web.
|
||||
* <a href="https://pydantic-docs.helpmanual.io/" class="external-link" target="_blank">Pydantic</a> para a parte de dados.
|
||||
|
||||
## Instalação
|
||||
|
||||
<div class="termy">
|
||||
|
||||
```console
|
||||
$ pip install fastapi
|
||||
|
||||
---> 100%
|
||||
```
|
||||
|
||||
</div>
|
||||
|
||||
Você também precisará de um servidor ASGI para produção, tal como <a href="http://www.uvicorn.org" class="external-link" target="_blank">Uvicorn</a> ou <a href="https://gitlab.com/pgjones/hypercorn" class="external-link" target="_blank">Hypercorn</a>.
|
||||
|
||||
<div class="termy">
|
||||
|
||||
```console
|
||||
$ pip install uvicorn
|
||||
|
||||
---> 100%
|
||||
```
|
||||
|
||||
</div>
|
||||
|
||||
## Exemplo
|
||||
|
||||
### Crie
|
||||
|
||||
* Crie um arquivo `main.py` com:
|
||||
|
||||
```Python
|
||||
from fastapi import FastAPI
|
||||
|
||||
app = FastAPI()
|
||||
|
||||
|
||||
@app.get("/")
|
||||
def read_root():
|
||||
return {"Hello": "World"}
|
||||
|
||||
|
||||
@app.get("/items/{item_id}")
|
||||
def read_item(item_id: int, q: str = None):
|
||||
return {"item_id": item_id, "q": q}
|
||||
```
|
||||
|
||||
<details markdown="1">
|
||||
<summary>Ou use <code>async def</code>...</summary>
|
||||
|
||||
Se seu código utiliza `async` / `await`, use `async def`:
|
||||
|
||||
```Python hl_lines="7 12"
|
||||
from fastapi import FastAPI
|
||||
|
||||
app = FastAPI()
|
||||
|
||||
|
||||
@app.get("/")
|
||||
async def read_root():
|
||||
return {"Hello": "World"}
|
||||
|
||||
|
||||
@app.get("/items/{item_id}")
|
||||
async def read_item(item_id: int, q: str = None):
|
||||
return {"item_id": item_id, "q": q}
|
||||
```
|
||||
|
||||
**Nota**:
|
||||
|
||||
Se você não sabe, verifique a seção _"In a hurry?"_ sobre <a href="https://fastapi.tiangolo.com/async/#in-a-hurry" target="_blank">`async` e `await` nas docs</a>.
|
||||
|
||||
</details>
|
||||
|
||||
### Rode
|
||||
|
||||
Rode o servidor com:
|
||||
|
||||
<div class="termy">
|
||||
|
||||
```console
|
||||
$ uvicorn main:app --reload
|
||||
|
||||
INFO: Uvicorn running on http://127.0.0.1:8000 (Press CTRL+C to quit)
|
||||
INFO: Started reloader process [28720]
|
||||
INFO: Started server process [28722]
|
||||
INFO: Waiting for application startup.
|
||||
INFO: Application startup complete.
|
||||
```
|
||||
|
||||
</div>
|
||||
|
||||
<details markdown="1">
|
||||
<summary>Sobre o comando <code>uvicorn main:app --reload</code>...</summary>
|
||||
|
||||
O comando `uvicorn main:app` se refere a:
|
||||
|
||||
* `main`: o arquivo `main.py` (o "módulo" Python).
|
||||
* `app`: o objeto criado dentro de `main.py` com a linha `app = FastAPI()`.
|
||||
* `--reload`: faz o servidor recarregar após mudanças de código. Somente faça isso para desenvolvimento.
|
||||
|
||||
</details>
|
||||
|
||||
### Verifique
|
||||
|
||||
Abra seu navegador em <a href="http://127.0.0.1:8000/items/5?q=somequery" class="external-link" target="_blank">http://127.0.0.1:8000/items/5?q=somequery</a>.
|
||||
|
||||
Você verá a resposta JSON como:
|
||||
|
||||
```JSON
|
||||
{"item_id": 5, "q": "somequery"}
|
||||
```
|
||||
|
||||
Você acabou de criar uma API que:
|
||||
|
||||
* Recebe requisições HTTP nas _rotas_ `/` e `/items/{item_id}`.
|
||||
* Ambas _rotas_ fazem <em>operações</em> `GET` (também conhecido como _métodos_ HTTP).
|
||||
* A _rota_ `/items/{item_id}` tem um _parâmetro de rota_ `item_id` que deve ser um `int`.
|
||||
* A _rota_ `/items/{item_id}` tem um _parâmetro query_ `q` `str` opcional.
|
||||
|
||||
### Documentação Interativa da API
|
||||
|
||||
Agora vá para <a href="http://127.0.0.1:8000/docs" class="external-link" target="_blank">http://127.0.0.1:8000/docs</a>.
|
||||
|
||||
Você verá a documentação automática interativa da API (fornecida por <a href="https://github.com/swagger-api/swagger-ui" class="external-link" target="_blank">Swagger UI</a>):
|
||||
|
||||

|
||||
|
||||
### Documentação Alternativa da API
|
||||
|
||||
E agora, vá para <a href="http://127.0.0.1:8000/redoc" class="external-link" target="_blank">http://127.0.0.1:8000/redoc</a>.
|
||||
|
||||
Você verá a documentação automática alternativa (fornecida por <a href="https://github.com/Rebilly/ReDoc" class="external-link" target="_blank">ReDoc</a>):
|
||||
|
||||

|
||||
|
||||
## Evoluindo o Exemplo
|
||||
|
||||
Agora modifique o arquivo `main.py` para receber um corpo para uma requisição `PUT`.
|
||||
|
||||
Declare o corpo utilizando tipos padrão Python, graças ao Pydantic.
|
||||
|
||||
```Python hl_lines="2 7 8 9 10 23 24 25"
|
||||
from fastapi import FastAPI
|
||||
from pydantic import BaseModel
|
||||
|
||||
app = FastAPI()
|
||||
|
||||
|
||||
class Item(BaseModel):
|
||||
name: str
|
||||
price: float
|
||||
is_offer: bool = None
|
||||
|
||||
|
||||
@app.get("/")
|
||||
def read_root():
|
||||
return {"Hello": "World"}
|
||||
|
||||
|
||||
@app.get("/items/{item_id}")
|
||||
def read_item(item_id: int, q: str = None):
|
||||
return {"item_id": item_id, "q": q}
|
||||
|
||||
|
||||
@app.put("/items/{item_id}")
|
||||
def update_item(item_id: int, item: Item):
|
||||
return {"item_name": item.name, "item_id": item_id}
|
||||
```
|
||||
|
||||
O servidor deverá recarregar automaticamente (porquê você adicionou `--reload` ao comando `uvicorn` acima).
|
||||
|
||||
### Evoluindo a Documentação Interativa da API
|
||||
|
||||
Agora vá para <a href="http://127.0.0.1:8000/docs" class="external-link" target="_blank">http://127.0.0.1:8000/docs</a>.
|
||||
|
||||
* A documentação interativa da API será automaticamente atualizada, incluindo o novo corpo:
|
||||
|
||||

|
||||
|
||||
* Clique no botão "Try it out", ele permiirá que você preencha os parâmetros e interaja diretamente com a API:
|
||||
|
||||

|
||||
|
||||
* Então clique no botão "Execute", a interface do usuário irá se comunicar com a API, enviar os parâmetros, pegar os resultados e mostrá-los na tela:
|
||||
|
||||

|
||||
|
||||
### Evoluindo a Documentação Alternativa da API
|
||||
|
||||
E agora, vá para <a href="http://127.0.0.1:8000/redoc" class="external-link" target="_blank">http://127.0.0.1:8000/redoc</a>.
|
||||
|
||||
* A documentação alternativa também irá refletir o novo parâmetro da _query_ e o corpo:
|
||||
|
||||

|
||||
|
||||
### Recapitulando
|
||||
|
||||
Resumindo, você declara **uma vez** os tipos dos parâmetros, corpo etc. como parâmetros de função.
|
||||
|
||||
Você faz com tipos padrão do Python moderno.
|
||||
|
||||
Você não terá que aprender uma nova sintaxe, métodos ou classes de uma biblioteca específica etc.
|
||||
|
||||
Apenas **Python 3.6+** padrão.
|
||||
|
||||
Por exemplo, para um `int`:
|
||||
|
||||
```Python
|
||||
item_id: int
|
||||
```
|
||||
|
||||
ou para um modelo mais complexo, `Item`:
|
||||
|
||||
```Python
|
||||
item: Item
|
||||
```
|
||||
|
||||
...e com essa única declaração você tem:
|
||||
|
||||
* Suporte ao Editor, incluindo:
|
||||
* Completação.
|
||||
* Verificação de tipos.
|
||||
* Validação de dados:
|
||||
* Erros automáticos e claros quando o dado é inválido.
|
||||
* Validação até para objetos JSON profundamente aninhados.
|
||||
* <abbr title="também conhecido como: serialization, parsing, marshalling">Conversão</abbr> de dados de entrada: vindo da rede para dados e tipos Python. Consegue ler:
|
||||
* JSON.
|
||||
* Parâmetros de rota.
|
||||
* Parâmetros de _query_ .
|
||||
* _Cookies_.
|
||||
* Cabeçalhos.
|
||||
* Formulários.
|
||||
* Arquivos.
|
||||
* <abbr title="também conhecido como: serialization, parsing, marshalling">Conversão</abbr> de dados de saída de tipos e dados Python para dados de rede (como JSON):
|
||||
* Converte tipos Python (`str`, `int`, `float`, `bool`, `list` etc).
|
||||
* Objetos `datetime`.
|
||||
* Objetos `UUID`.
|
||||
* Modelos de Banco de Dados.
|
||||
* ...e muito mais.
|
||||
* Documentação interativa automática da API, incluindo 2 alternativas de interface de usuário:
|
||||
* Swagger UI.
|
||||
* ReDoc.
|
||||
|
||||
---
|
||||
|
||||
Voltando ao código do exemplo anterior, **FastAPI** irá:
|
||||
|
||||
* Validar que existe um `item_id` na rota para requisições `GET` e `PUT`.
|
||||
* Validar que `item_id` é do tipo `int` para requisições `GET` e `PUT`.
|
||||
* Se não é validado, o cliente verá um útil, claro erro.
|
||||
* Verificar se existe um parâmetro de _query_ opcional nomeado como `q` (como em `http://127.0.0.1:8000/items/foo?q=somequery`) para requisições `GET`.
|
||||
* Como o parâmetro `q` é declarado com `= None`, ele é opcional.
|
||||
* Sem o `None` ele poderia ser obrigatório (como o corpo no caso de `PUT`).
|
||||
* Para requisições `PUT` para `/items/{item_id}`, lerá o corpo como JSON e:
|
||||
* Verifica que tem um atributo obrigatório `name` que deve ser `str`.
|
||||
* Verifica que tem um atributo obrigatório `price` que deve ser `float`.
|
||||
* Verifica que tem an atributo opcional `is_offer`, que deve ser `bool`, se presente.
|
||||
* Tudo isso também funciona para objetos JSON profundamente aninhados.
|
||||
* Converter de e para JSON automaticamente.
|
||||
* Documentar tudo com OpenAPI, que poderá ser usado por:
|
||||
* Sistemas de documentação interativos.
|
||||
* Sistemas de clientes de geração de código automáticos, para muitas linguagens.
|
||||
* Fornecer diretamente 2 interfaces _web_ de documentação interativa.
|
||||
|
||||
---
|
||||
|
||||
Nós arranhamos apenas a superfície, mas você já tem idéia de como tudo funciona.
|
||||
|
||||
Experimente mudar a seguinte linha:
|
||||
|
||||
```Python
|
||||
return {"item_name": item.name, "item_id": item_id}
|
||||
```
|
||||
|
||||
...de:
|
||||
|
||||
```Python
|
||||
... "item_name": item.name ...
|
||||
```
|
||||
|
||||
...para:
|
||||
|
||||
```Python
|
||||
... "item_price": item.price ...
|
||||
```
|
||||
|
||||
...e veja como seu editor irá auto-completar os atributos e saberá os tipos:
|
||||
|
||||

|
||||
|
||||
Para um exemplo mais completo incluindo mais recursos, veja <a href="https://fastapi.tiangolo.com/tutorial/">Tutorial - Guia do Usuário</a>.
|
||||
|
||||
**Alerta de Spoiler**: o tutorial - guia do usuário inclui:
|
||||
|
||||
* Declaração de **parâmetetros** de diferentes lugares como: **cabeçalhos**, **cookies**, **campos de formulários** e **arquivos**.
|
||||
* Como configurar **Limitações de Validação** como `maximum_length` ou `regex`.
|
||||
* Um poderoso e fácil de usar sistema de **<abbr title="também conhecido como componentes, recursos, fornecedores, serviços, injetáveis">Injeção de Dependência</abbr>**.
|
||||
* Segurança e autenticação, incluindo suporte para **OAuth2** com autenticação **JWT tokens** e **HTTP Basic**.
|
||||
* Técnicas mais avançadas (mas igualmente fáceis) para declaração de **modelos JSON profundamente aninhados** (graças ao Pydantic).
|
||||
* Muitos recursos extras (graças ao Starlette) como:
|
||||
* **WebSockets**
|
||||
* **GraphQL**
|
||||
* testes extrememamente fáceis baseados em `requests` e `pytest`
|
||||
* **CORS**
|
||||
* **Cookie Sessions**
|
||||
* ...e mais.
|
||||
|
||||
## Performance
|
||||
|
||||
Testes de performance da _Independent TechEmpower_ mostram aplicações **FastAPI** rodando sob Uvicorn como <a href="https://www.techempower.com/benchmarks/#section=test&runid=7464e520-0dc2-473d-bd34-dbdfd7e85911&hw=ph&test=query&l=zijzen-7" class="external-link" target="_blank">um dos _frameworks_ Python mais rápidos disponíveis</a>, somente atrás de Starlette e Uvicorn (utilizados internamente pelo FastAPI). (*)
|
||||
|
||||
Para entender mais sobre performance, veja a seção <a href="https://fastapi.tiangolo.com/benchmarks/" class="internal-link" target="_blank">Benchmarks</a>.
|
||||
|
||||
## Dependências opcionais
|
||||
|
||||
Usados por Pydantic:
|
||||
|
||||
* <a href="https://github.com/esnme/ultrajson" target="_blank"><code>ujson</code></a> - para JSON mais rápido <abbr title="converte uma string que chega de uma requisição HTTP para dados Python">"parsing"</abbr>.
|
||||
* <a href="https://github.com/JoshData/python-email-validator" target="_blank"><code>email_validator</code></a> - para validação de email.
|
||||
|
||||
Usados por Starlette:
|
||||
|
||||
* <a href="http://docs.python-requests.org" target="_blank"><code>requests</code></a> - Necessário se você quiser utilizar o `TestClient`.
|
||||
* <a href="https://github.com/Tinche/aiofiles" target="_blank"><code>aiofiles</code></a> - Necessário se você quiser utilizar o `FileResponse` ou `StaticFiles`.
|
||||
* <a href="http://jinja.pocoo.org" target="_blank"><code>jinja2</code></a> - Necessário se você quiser utilizar a configuração padrão de templates.
|
||||
* <a href="https://andrew-d.github.io/python-multipart/" target="_blank"><code>python-multipart</code></a> - Necessário se você quiser suporte com <abbr title="converte uma string que chega de uma requisição HTTP para dados Python">"parsing"</abbr> de formulário, com `request.form()`.
|
||||
* <a href="https://pythonhosted.org/itsdangerous/" target="_blank"><code>itsdangerous</code></a> - Necessário para suporte a `SessionMiddleware`.
|
||||
* <a href="https://pyyaml.org/wiki/PyYAMLDocumentation" target="_blank"><code>pyyaml</code></a> - Necessário para suporte a `SchemaGenerator` da Starlette (você provavelmente não precisará disso com o FastAPI).
|
||||
* <a href="https://graphene-python.org/" target="_blank"><code>graphene</code></a> - Necessário para suporte a `GraphQLApp`.
|
||||
* <a href="https://github.com/esnme/ultrajson" target="_blank"><code>ujson</code></a> - Necessário se você quer utilizar `UJSONResponse`.
|
||||
|
||||
Usados por FastAPI / Starlette:
|
||||
|
||||
* <a href="http://www.uvicorn.org" target="_blank"><code>uvicorn</code></a> - para o servidor que carrega e serve sua aplicação.
|
||||
* <a href="https://github.com/ijl/orjson" target="_blank"><code>orjson</code></a> - Necessário se você quer utilizar `ORJSONResponse`.
|
||||
|
||||
Você pode instalar todas essas dependências com `pip install fastapi[all]`.
|
||||
|
||||
## Licença
|
||||
|
||||
Esse projeto é licenciado sob os termos da licença MIT.
|
||||
80
docs/pt/docs/tutorial/index.md
Normal file
80
docs/pt/docs/tutorial/index.md
Normal file
@@ -0,0 +1,80 @@
|
||||
# Tutorial - Guia de Usuário - Introdução
|
||||
|
||||
Esse tutorial mostra como usar o **FastAPI** com a maior parte de seus recursos, passo a passo.
|
||||
|
||||
Cada seção constrói, gradualmente, sobre as anteriores, mas sua estrutura são tópicos separados, para que você possa ir a qualquer um específico e resolver suas necessidades específicas de API.
|
||||
|
||||
Ele também foi feito como referência futura.
|
||||
|
||||
Então você poderá voltar e ver exatamente o que precisar.
|
||||
|
||||
## Rode o código
|
||||
|
||||
Todos os blocos de código podem ser copiados e utilizados diretamente (eles são, na verdade, arquivos Python testados).
|
||||
|
||||
Para rodar qualquer um dos exemplos, copie o codigo para um arquivo `main.py`, e inicie o `uvivorn` com:
|
||||
|
||||
<div class="termy">
|
||||
|
||||
```console
|
||||
$ uvicorn main:app --reload
|
||||
|
||||
<span style="color: green;">INFO</span>: Uvicorn running on http://127.0.0.1:8000 (Press CTRL+C to quit)
|
||||
<span style="color: green;">INFO</span>: Started reloader process [28720]
|
||||
<span style="color: green;">INFO</span>: Started server process [28722]
|
||||
<span style="color: green;">INFO</span>: Waiting for application startup.
|
||||
<span style="color: green;">INFO</span>: Application startup complete.
|
||||
```
|
||||
|
||||
</div>
|
||||
|
||||
É **ALTAMENTE recomendado** que você escreva ou copie o código, edite-o e rode-o localmente.
|
||||
|
||||
Usá-lo em seu editor é o que realmente te mostra os benefícios do FastAPI, ver quão pouco código você tem que escrever, todas as conferências de tipo, auto completações etc.
|
||||
|
||||
---
|
||||
|
||||
## Instale o FastAPI
|
||||
|
||||
O primeiro passo é instalar o FastAPI.
|
||||
|
||||
Para o tutorial, você deve querer instalá-lo com todas as dependências e recursos opicionais.
|
||||
|
||||
<div class="termy">
|
||||
|
||||
```console
|
||||
$ pip install fastapi[all]
|
||||
|
||||
---> 100%
|
||||
```
|
||||
|
||||
</div>
|
||||
|
||||
...isso também inclui o `uvicorn`, que você pode usar como o servidor que rodará seu código.
|
||||
|
||||
!!! nota
|
||||
Você também pode instalar parte por parte.
|
||||
|
||||
Isso é provavelmente o que você faria quando você quisesse lançar sua aplicação em produção:
|
||||
|
||||
```
|
||||
pip install fastapi
|
||||
```
|
||||
|
||||
Também instale o `uvicorn` para funcionar como servidor:
|
||||
|
||||
```
|
||||
pip install uvicorn
|
||||
```
|
||||
|
||||
E o mesmo para cada dependência opcional que você quiser usar.
|
||||
|
||||
## Guia Avançado de Usuário
|
||||
|
||||
Há também um **Guia Avançado de Usuário** que você pode ler após esse **Tutorial - Guia de Usuário**.
|
||||
|
||||
O **Guia Avançado de Usuário** constrói sobre esse, usa os mesmos conceitos e te ensina alguns recursos extras.
|
||||
|
||||
Mas você deveria ler primeiro o **Tutorial - Guia de Usuário** (que você está lendo agora).
|
||||
|
||||
Ele foi projetado para que você possa construir uma aplicação completa com apenas o **Tutorial - Guia de Usuário**, e então estendê-la de diferentes formas, dependendo das suas necessidades, usando algumas ideias adicionais do **Guia Avançado de Usuário**.
|
||||
71
docs/pt/mkdocs.yml
Normal file
71
docs/pt/mkdocs.yml
Normal file
@@ -0,0 +1,71 @@
|
||||
site_name: FastAPI
|
||||
site_description: FastAPI framework, high performance, easy to learn, fast to code, ready for production
|
||||
site_url: https://fastapi.tiangolo.com/pt/
|
||||
theme:
|
||||
name: material
|
||||
palette:
|
||||
primary: teal
|
||||
accent: amber
|
||||
icon:
|
||||
repo: fontawesome/brands/github-alt
|
||||
logo: https://fastapi.tiangolo.com/img/icon-white.svg
|
||||
favicon: https://fastapi.tiangolo.com/img/favicon.png
|
||||
language: pt
|
||||
repo_name: tiangolo/fastapi
|
||||
repo_url: https://github.com/tiangolo/fastapi
|
||||
edit_uri: ''
|
||||
google_analytics:
|
||||
- UA-133183413-1
|
||||
- auto
|
||||
nav:
|
||||
- FastAPI: index.md
|
||||
- Languages:
|
||||
- en: /
|
||||
- es: /es/
|
||||
- pt: /pt/
|
||||
- zh: /zh/
|
||||
- features.md
|
||||
- Tutorial - Guia de Usuário:
|
||||
- tutorial/index.md
|
||||
- alternatives.md
|
||||
- history-design-future.md
|
||||
- benchmarks.md
|
||||
markdown_extensions:
|
||||
- toc:
|
||||
permalink: true
|
||||
- markdown.extensions.codehilite:
|
||||
guess_lang: false
|
||||
- markdown_include.include:
|
||||
base_path: docs
|
||||
- admonition
|
||||
- codehilite
|
||||
- extra
|
||||
- pymdownx.superfences:
|
||||
custom_fences:
|
||||
- name: mermaid
|
||||
class: mermaid
|
||||
format: !!python/name:pymdownx.superfences.fence_div_format ''
|
||||
- pymdownx.tabbed
|
||||
extra:
|
||||
social:
|
||||
- icon: fontawesome/brands/github-alt
|
||||
link: https://github.com/tiangolo/typer
|
||||
- icon: fontawesome/brands/twitter
|
||||
link: https://twitter.com/tiangolo
|
||||
- icon: fontawesome/brands/linkedin
|
||||
link: https://www.linkedin.com/in/tiangolo
|
||||
- icon: fontawesome/brands/dev
|
||||
link: https://dev.to/tiangolo
|
||||
- icon: fontawesome/brands/medium
|
||||
link: https://medium.com/@tiangolo
|
||||
- icon: fontawesome/solid/globe
|
||||
link: https://tiangolo.com
|
||||
extra_css:
|
||||
- https://fastapi.tiangolo.com/css/termynal.css
|
||||
- https://fastapi.tiangolo.com/css/custom.css
|
||||
extra_javascript:
|
||||
- https://unpkg.com/mermaid@8.4.6/dist/mermaid.min.js
|
||||
- https://fastapi.tiangolo.com/js/termynal.js
|
||||
- https://fastapi.tiangolo.com/js/custom.js
|
||||
- https://fastapi.tiangolo.com/js/chat.js
|
||||
- https://sidecar.gitter.im/dist/sidecar.v1.js
|
||||
390
docs/zh/docs/deployment.md
Normal file
390
docs/zh/docs/deployment.md
Normal file
@@ -0,0 +1,390 @@
|
||||
# 部署
|
||||
|
||||
部署 **FastAPI** 应用相对比较简单。
|
||||
|
||||
根据特定使用情况和使用工具有几种不同的部署方式。
|
||||
|
||||
接下来的章节,你将了解到一些关于部署方式的内容。
|
||||
|
||||
## FastAPI 版本
|
||||
|
||||
许多应用和系统已经在生产环境使用 **FastAPI**。其测试覆盖率保持在 100%。但该项目仍在快速开发。
|
||||
|
||||
我们会经常加入新的功能,定期错误修复,同时也在不断的优化项目代码。
|
||||
|
||||
这也是为什么当前版本仍然是 `0.x.x`,我们以此表明每个版本都可能有重大改变。
|
||||
|
||||
现在就可以使用 **FastAPI** 创建生产应用(你可能已经使用一段时间了)。你只需要确保使用的版本和代码其他部分能够正常兼容。
|
||||
|
||||
### 指定你的 `FastAPI` 版本
|
||||
|
||||
你应该做的第一件事情,是为你正在使用的 **FastAPI** 指定一个能够正确运行你的应用的最新版本。
|
||||
|
||||
例如,假设你的应用中正在使用版本 `0.45.0`。
|
||||
|
||||
如果你使用 `requirements.txt` 文件,你可以这样指定版本:
|
||||
|
||||
```txt
|
||||
fastapi==0.45.0
|
||||
```
|
||||
|
||||
这表明你将使用 `0.45.0` 版本的 `FastAPI`。
|
||||
|
||||
或者你也可以这样指定:
|
||||
|
||||
```txt
|
||||
fastapi>=0.45.0,<0.46.0
|
||||
```
|
||||
|
||||
这表明你将使用 `0.45.0` 及以上,但低于 `0.46.0` 的版本,例如,`0.45.2` 依然可以接受。
|
||||
|
||||
如果使用其他工具管理你的安装,比如 Poetry,Pipenv,或者其他工具,它们都有各自指定包的版本的方式。
|
||||
|
||||
### 可用版本
|
||||
|
||||
你可以在 [发行说明](release-notes.md){.internal-link target=_blank} 中查看可用的版本(比如:检查最新版本是什么)。
|
||||
|
||||
|
||||
### 关于版本
|
||||
|
||||
FastAPI 遵循语义版本控制约定,`1.0.0` 以下的任何版本都可能加入重大变更。
|
||||
|
||||
FastAPI 也遵循这样的约定:任何 ”PATCH“ 版本变更都是用来修复 bug 和向下兼容的变更。
|
||||
|
||||
!!! tip
|
||||
"PATCH" 是指版本号的最后一个数字,例如,在 `0.2.3` 中,PATCH 版本是 `3`。
|
||||
|
||||
所以,你应该像这样指定版本:
|
||||
|
||||
```txt
|
||||
fastapi>=0.45.0,<0.46.0
|
||||
```
|
||||
|
||||
不兼容变更和新特性在 "MINOR" 版本中添加。
|
||||
|
||||
!!! tip
|
||||
"MINOR" 是版本号中间的数字,例如,在 `0.2.3` 中,MINOR 版本是 `2`。
|
||||
|
||||
### 更新 FaseAPI 版本
|
||||
|
||||
你应该为你的应用添加测试。
|
||||
|
||||
使用 **FastAPI** 测试应用非常容易(归功于 Starlette),查看文档:[测试](tutorial/testing.md){.internal-link target=_blank}
|
||||
|
||||
有了测试之后,就可以将 **FastAPI** 更新到最近的一个的版本,然后通过运行测试来确定你所有代码都可以正确工作。
|
||||
|
||||
如果一切正常,或者做了必要的修改之后,所有的测试都通过了,就可以把 `FastAPI` 版本指定为那个比较新的版本了。
|
||||
|
||||
### 关于 Starlette
|
||||
|
||||
不要指定 `starlette` 的版本。
|
||||
|
||||
不同版本的 **FastAPI** 会使用特定版本的 Starlette。
|
||||
|
||||
所以你只要让 **FastAPI** 自行选择正确的 Starlette 版本。
|
||||
|
||||
### 关于 Pydantic
|
||||
|
||||
Pydantic 自身的测试中已经包含了 **FastAPI** 的测试,所以最新版本的 Pydantic (`1.0.0` 以上版本)总是兼容 **FastAPI**。
|
||||
|
||||
你可以指定 Pydantic 为任意一个高于 `1.0.0` 且低于的 `2.0.0` 的版本。
|
||||
|
||||
例如:
|
||||
|
||||
```txt
|
||||
pydantic>=1.2.0,<2.0.0
|
||||
```
|
||||
|
||||
## Docker
|
||||
|
||||
这部分,你将通过指引和链接了解到:
|
||||
|
||||
* 如何将你的 **FastAPI** 应用制作成最高性能的 **Docker** 映像/容器。约需五分钟。
|
||||
* (可选)理解作为一个开发者需要知道的 HTTPS 相关知识。
|
||||
* 使用自动化 HTTPS 设置一个 Docker Swarm 模式的集群,即使是在一个简单的 $5 USD/month 的服务器上。约需要 20 分钟。
|
||||
* 使用 Docker Swarm 集群以及 HTTP 等等,生成和部署一个完整的 **FastAPI** 应用。约需 10 分钟。
|
||||
|
||||
可以使用 <a href="https://www.docker.com/" class="external-link" target="_blank">**Docker**</a> 进行部署。它具有安全性、可复制性、开发简单性等优点。
|
||||
|
||||
如果你正在使用 Docker,你可以使用官方 Docker 镜像:
|
||||
|
||||
### <a href="https://github.com/tiangolo/uvicorn-gunicorn-fastapi-docker" class="external-link" target="_blank">tiangolo/uvicorn-gunicorn-fastapi</a>
|
||||
|
||||
该映像包含一个「自动调优」的机制,这样就可以仅仅添加代码就能自动获得超高性能,而不用做出牺牲。
|
||||
|
||||
不过你仍然可以使用环境变量或配置文件更改和更新所有配置。
|
||||
|
||||
!!! tip
|
||||
查看全部配置和选项,请移步 Docker 镜像页面:<a href="https://github.com/tiangolo/uvicorn-gunicorn-fastapi-docker" class="external-link" target="_blank">tiangolo/uvicorn-gunicorn-fastapi</a>。
|
||||
|
||||
### 创建 `Dockerfile`
|
||||
|
||||
* 进入你的项目目录。
|
||||
* 使用如下命令创建一个 `Dockerfile`:
|
||||
|
||||
```Dockerfile
|
||||
FROM tiangolo/uvicorn-gunicorn-fastapi:python3.7
|
||||
|
||||
COPY ./app /app
|
||||
```
|
||||
|
||||
#### 大型应用
|
||||
|
||||
如果遵循创建 [多文件大型应用](tutorial/bigger-applications.md){.internal-link target=_blank} 的章节,你的 Dockerfile 可能看起来是这样:
|
||||
|
||||
```Dockerfile
|
||||
FROM tiangolo/uvicorn-gunicorn-fastapi:python3.7
|
||||
|
||||
COPY ./app /app/app
|
||||
```
|
||||
|
||||
#### 树莓派以及其他架构
|
||||
|
||||
如果你在树莓派或者任何其他架构中运行 Docker,可以基于 Python 基础镜像(它是多架构的)从头创建一个 `Dockerfile` 并单独使用 Uvicorn。
|
||||
|
||||
这种情况下,你的 `Dockerfile` 可能是这样的:
|
||||
|
||||
```Dockerfile
|
||||
FROM python:3.7
|
||||
|
||||
RUN pip install fastapi uvicorn
|
||||
|
||||
EXPOSE 80
|
||||
|
||||
COPY ./app /app
|
||||
|
||||
CMD ["uvicorn", "app.main:app", "--host", "0.0.0.0", "--port", "80"]
|
||||
```
|
||||
|
||||
### 创建 **FastAPI** 代码
|
||||
|
||||
* 创建一个 `app` 目录并进入该目录。
|
||||
* 创建一个 `main.py` 文件,内容如下:
|
||||
|
||||
```Python
|
||||
from fastapi import FastAPI
|
||||
|
||||
app = FastAPI()
|
||||
|
||||
|
||||
@app.get("/")
|
||||
def read_root():
|
||||
return {"Hello": "World"}
|
||||
|
||||
|
||||
@app.get("/items/{item_id}")
|
||||
def read_item(item_id: int, q: str = None):
|
||||
return {"item_id": item_id, "q": q}
|
||||
```
|
||||
|
||||
* 现在目录结构如下:
|
||||
|
||||
```
|
||||
.
|
||||
├── app
|
||||
│ └── main.py
|
||||
└── Dockerfile
|
||||
```
|
||||
|
||||
### 构建 Docker 镜像
|
||||
|
||||
* 进入项目目录(在 `Dockerfile` 所在的位置,包含 `app` 目录)
|
||||
* 构建 **FastAPI** 镜像
|
||||
|
||||
<div class="termy">
|
||||
|
||||
```console
|
||||
$ docker build -t myimage .
|
||||
|
||||
---> 100%
|
||||
```
|
||||
|
||||
</div>
|
||||
|
||||
### 启动 Docker 容器
|
||||
|
||||
* 运行基于你的镜像容器:
|
||||
|
||||
<div class="termy">
|
||||
|
||||
```console
|
||||
$ docker run -d --name mycontainer -p 80:80 myimage
|
||||
```
|
||||
|
||||
</div>
|
||||
|
||||
现在你在 Docker 容器中有了一个根据当前服务器(和CPU核心的数量)自动优化好的 FastAPI 服务器。
|
||||
|
||||
### 检查一下
|
||||
|
||||
你应该能够在 Docker 容器的 URL 中检查它。例如:<a href="http://192.168.99.100/items/5?q=somequery" class="external-link" target="_blank">http://192.168.99.100/items/5?q=somequery</a> 或者 <a href="http://127.0.0.1/items/5?q=somequery" class="external-link" target="_blank">http://127.0.0.1/items/5?q=somequery</a> (或者类似的,使用Docker主机)。
|
||||
|
||||
得到类似的输出:
|
||||
|
||||
```JSON
|
||||
{"item_id": 5, "q": "somequery"}
|
||||
```
|
||||
|
||||
### 交互式 API 文档
|
||||
|
||||
现在可以访问 <a href="http://192.168.99.100/docs" class="external-link" target="_blank">http://192.168.99.100/docs</a> 或者 <a href="http://127.0.0.1/docs" class="external-link" target="_blank">http://127.0.0.1/docs</a> (或者类似的,使用Docker主机)。
|
||||
|
||||
你会看到一个交互式的 API 文档 (由 <a href="https://github.com/swagger-api/swagger-ui" class="external-link" target="_blank">Swagger UI</a> 提供):
|
||||
|
||||

|
||||
|
||||
### 可选的 API 文档
|
||||
|
||||
你也可以访问 <a href="http://192.168.99.100/redoc" class="external-link" target="_blank">http://192.168.99.100/redoc</a> 或者 <a href="http://127.0.0.1/redoc" class="external-link" target="_blank">http://127.0.0.1/redoc</a> (或者类似的,使用Docker主机)。
|
||||
|
||||
你将看到一个可选的自动化文档(由 <a href="https://github.com/Rebilly/ReDoc" class="external-link" target="_blank">ReDoc</a> 提供)
|
||||
|
||||

|
||||
|
||||
## HTTPS
|
||||
|
||||
### 关于 HTTPS
|
||||
|
||||
我们当然可以假设 HTTPS 只是某种「启用」或「不启用」的东西。
|
||||
|
||||
但是事实比这要复杂的多。
|
||||
|
||||
!!! tip
|
||||
如果你着急或者不关心这部分内容,请继续按照下一章节的步骤进行配置。
|
||||
|
||||
要从用户的角度学习 HTTPS 的基础,请移步 <a href="https://howhttps.works/" class="external-link" target="_blank">https://howhttps.works/</a>。
|
||||
|
||||
从开发人员的角度来看,在考虑 HTTPS 时有以下几点需要注意:
|
||||
|
||||
* 对 HTTPS 来说,服务端需要有第三方生成的「证书」。
|
||||
* 实际上这些证书是从第三方获取的,而非「生成」的。
|
||||
* 证书有生命周期。
|
||||
* 证书会过期。
|
||||
* 证书过期之后需要更新,重新从第三方获取。
|
||||
* 连接的加密发生在 TCP 层。
|
||||
* TCP 层在 HTTP 之下一层。
|
||||
* 因此,证书和加密处理在 HTTP 之前完成。
|
||||
* TCP 不知道「域名」,只知道 IP 地址。
|
||||
* 指定域名的请求信息在 HTTP 的数据中。
|
||||
* HTTPS 证书「认证」某个特定域名,但是协议和加密在知道要处理哪个域名之前就已经在 TCP 层发生了。
|
||||
* 默认情况下,一个 IP 地址仅有一个 HTTPS 证书。
|
||||
* 无论你的服务器大小,都是如此。
|
||||
* 但是对此有解决办法。
|
||||
* TSL 协议(在 TCP 层处理加密的协议,发生在 HTTP 之前)有一个扩展,叫 <a href="https://en.wikipedia.org/wiki/Server_Name_Indication" class="external-link" target="_blank"><abbr title="Server Name Indication">SNI</abbr></a>。
|
||||
* SNI 扩展允许一个服务器(一个 IP 地址)有多个 HTTPS 证书,为多个 HTTPS 域名/应用 提供服务。
|
||||
* 要使其工作,服务器运行的单一组件(程序)监听公网 IP 地址,所有 HTTPS 证书必须都在该服务器上。
|
||||
* 在获得一个安全连接之后,通讯协议仍然是 HTTP。
|
||||
* HTTP 内容是加密的,即使这些内容使用 HTTP 协议传输。
|
||||
|
||||
常见的做法是在服务器(机器,主机等等)上运行一个程序或 HTTP 服务来管理所有的 HTTPS 部分:将解密后的 HTTP 请求发送给在同一服务器运行的真实 HTTP 应用(在这里是 **FastAPI** 应用),从应用获得 HTTP 响应,使用适当的证书加密响应然后使用 HTTPS 将其发回客户端。这个服务器常被称作 <a href="https://en.wikipedia.org/wiki/TLS_termination_proxy" class="external-link" target="_blank">TLS 终止代理</a>。
|
||||
|
||||
|
||||
### Let's Encrypt
|
||||
|
||||
在 Let's Encrypt 出现之前,这些 HTTPS 证书由受信任的第三方出售。
|
||||
|
||||
获取这些证书的过程曾经非常繁琐,需要大量的文书工作,而且证书的价格也相当昂贵。
|
||||
|
||||
但是紧接着 <a href="https://letsencrypt.org/" class="external-link" target="_blank">Let's Encrypt</a> 被创造了。
|
||||
|
||||
这是一个来自 Linux 基金会的项目。它以自动化的方式免费提供 HTTPS 证书。这些证书使用所有的标准加密措施,且证书生命周期很短(大约 3 个月),正是由于它们生命周期的减短,所以实际上安全性更高。
|
||||
|
||||
对域名进行安全验证并自动生成证书。同时也允许自动更新这些证书。
|
||||
|
||||
其想法是自动获取和更新这些证书,这样就可以一直免费获得安全的 HTTPS。
|
||||
|
||||
### Traefik
|
||||
|
||||
<a href="https://traefik.io/" class="external-link" target="_blank">Traefik</a> 是一个高性能的反向代理/负载均衡器。它能够完成「TLS 终止代理」的工作(其他特性除外)。
|
||||
|
||||
Traefik 集成了 Let's Encrypt,所以能够处理全部 HTTPS 的部分,包括证书获取与更新。
|
||||
|
||||
Traefik 也集成了 Docker,所以你也可以在每个应用的配置中声明你的域名并可以让它读取这些配置,生成 HTTPS 证书并自动将 HTTPS 提供给你的应用程序,而你不需要对其配置进行任何更改。
|
||||
|
||||
---
|
||||
|
||||
有了这些信息和工具,就可以进入下一节把所有内容结合到一起。
|
||||
|
||||
## 通过 Traefik 和 HTTPS 搭建 Docker Swarm mode 集群
|
||||
|
||||
通过一个主要的 Traefik 来处理 HTTPS (包括证书获取和更新),大约 20 分钟就可以搭建好一个 Docker Swarm mode 集群。
|
||||
|
||||
借助 Docker Swarm mode,你可以从单个机器的集群开始(甚至可以是 $5 /月的服务器),然后你可以根据需要添加更多的服务器来进行扩展。
|
||||
|
||||
要使用 Traefik 和 HTTPS 处理来构建 Docker Swarm Mode 集群,请遵循以下指南:
|
||||
|
||||
### <a href="https://medium.com/@tiangolo/docker-swarm-mode-and-traefik-for-a-https-cluster-20328dba6232" class="external-link" target="_blank">Docker Swarm Mode 和 Traefik 用于 HTTPS 集群</a>
|
||||
|
||||
### 部署一个 FastAPI 应用
|
||||
|
||||
部署的最简单方式就是使用 [**FastAPI** 项目生成器](project-generation.md){.internal-link target=_blank}。
|
||||
|
||||
它被设计成与上述带有 Traefik 和 HTTPS 的 Docker Swarm 集群整合到一起。
|
||||
|
||||
你可以在大概两分钟内生成一个项目。
|
||||
|
||||
生成的项目有部署说明,需要再花两分钟部署项目。
|
||||
|
||||
## 或者,不用 Docker 部署 **FastAPI**
|
||||
|
||||
你也可以不用 Docker 直接部署 **FastAPI**。
|
||||
|
||||
只需要安装一个兼容 ASGI 的服务器:
|
||||
|
||||
* <a href="https://www.uvicorn.org/" class="external-link" target="_blank">Uvicorn</a>,一个轻量快速的 ASGI 服务器,基于 uvloop 和 httptools 构建。
|
||||
|
||||
<div class="termy">
|
||||
|
||||
```console
|
||||
$ pip install uvicorn
|
||||
|
||||
---> 100%
|
||||
```
|
||||
|
||||
</div>
|
||||
|
||||
* <a href="https://gitlab.com/pgjones/hypercorn" class="external-link" target="_blank">Hypercorn</a>,一个也兼容 HTTP/2 的 ASGI 服务器。
|
||||
|
||||
<div class="termy">
|
||||
|
||||
```console
|
||||
$ pip install hypercorn
|
||||
|
||||
---> 100%
|
||||
```
|
||||
|
||||
</div>
|
||||
|
||||
...或者任何其他的 ASGI 服务器。
|
||||
|
||||
然后使用教程中同样的方式来运行你的应用,但是不要加 `--reload` 选项,比如:
|
||||
|
||||
<div class="termy">
|
||||
|
||||
```console
|
||||
$ uvicorn main:app --host 0.0.0.0 --port 80
|
||||
|
||||
<span style="color: green;">INFO</span>: Uvicorn running on http://0.0.0.0:80 (Press CTRL+C to quit)
|
||||
```
|
||||
|
||||
</div>
|
||||
|
||||
或者使用 Hypercorn:
|
||||
|
||||
<div class="termy">
|
||||
|
||||
```console
|
||||
$ hypercorn main:app --bind 0.0.0.0:80
|
||||
|
||||
Running on 0.0.0.0:8080 over http (CTRL + C to quit)
|
||||
```
|
||||
|
||||
</div>
|
||||
|
||||
也许你想编写一些工具来确保它停止时会自动重启。
|
||||
|
||||
或者安装 <a href="https://gunicorn.org/" class="external-link" target="_blank">Gunicorn</a> 并 <a href="https://www.uvicorn.org/#running-with-gunicorn" class="external-link" target="_blank">将其作为 Uvicorn 的管理器</a>,或者使用多职程(worker)的 Hypercorn。
|
||||
|
||||
或者保证精确调整职程的数量等等。
|
||||
|
||||
但是如果你正做这些,你可能只需要使用 Docker 镜像就能够自动做到这些了。
|
||||
206
docs/zh/docs/features.md
Normal file
206
docs/zh/docs/features.md
Normal file
@@ -0,0 +1,206 @@
|
||||
# 特性
|
||||
|
||||
## FastAPI 特性
|
||||
|
||||
**FastAPI** 提供了以下内容:
|
||||
|
||||
### 基于开放标准
|
||||
|
||||
|
||||
* 用于创建 API 的 <a href="https://github.com/OAI/OpenAPI-Specification" class="external-link" target="_blank"><strong>OpenAPI</strong></a> 包含了<abbr title="也被叫做: endpoints, routes">路径</abbr><abbr title="也叫做HTTP方法, 例如 POST, GET, PUT, DELETE">操作</abbr>,请求参数,请求体,安全性等的声明。
|
||||
* 使用 <a href="http://json-schema.org/" class="external-link" target="_blank"><strong>JSON Schema</strong></a> (因为 OpenAPI 本身就是基于 JSON Schema 的)自动生成数据模型文档。
|
||||
* 经过了缜密的研究后围绕这些标准而设计。并非狗尾续貂。
|
||||
* 这也允许了在很多语言中自动**生成客户端代码**。
|
||||
|
||||
### 自动生成文档
|
||||
|
||||
交互式 API 文档以及具探索性 web 界面。因为该框架是基于 OpenAPI,所以有很多可选项,FastAPI 默认自带两个交互式 API 文档。
|
||||
|
||||
* <a href="https://github.com/swagger-api/swagger-ui" class="external-link" target="_blank"><strong>Swagger UI</strong></a>,可交互式操作,能在浏览器中直接调用和测试你的 API 。
|
||||
|
||||

|
||||
|
||||
* 另外的 API 文档:<a href="https://github.com/Rebilly/ReDoc" class="external-link" target="_blank"><strong>ReDoc</strong></a>
|
||||
|
||||

|
||||
|
||||
### 更主流的 Python
|
||||
|
||||
全部都基于标准的 **Python 3.6 类型**声明(感谢 Pydantic )。没有新的语法需要学习。只需要标准的 Python 。
|
||||
|
||||
如果你需要2分钟来学习如何使用 Python 类型(即使你不使用 FastAPI ),看看这个简短的教程:[Python Types](python-types.md){.internal-link target=_blank}。
|
||||
|
||||
编写带有类型标注的标准 Python:
|
||||
|
||||
```Python
|
||||
from typing import List, Dict
|
||||
from datetime import date
|
||||
|
||||
from pydantic import BaseModel
|
||||
|
||||
# Declare a variable as a str
|
||||
# and get editor support inside the function
|
||||
def main(user_id: str):
|
||||
return user_id
|
||||
|
||||
|
||||
# A Pydantic model
|
||||
class User(BaseModel):
|
||||
id: int
|
||||
name: str
|
||||
joined: date
|
||||
```
|
||||
|
||||
可以像这样来使用:
|
||||
|
||||
```Python
|
||||
my_user: User = User(id=3, name="John Doe", joined="2018-07-19")
|
||||
|
||||
second_user_data = {
|
||||
"id": 4,
|
||||
"name": "Mary",
|
||||
"joined": "2018-11-30",
|
||||
}
|
||||
|
||||
my_second_user: User = User(**second_user_data)
|
||||
```
|
||||
|
||||
|
||||
!!! info
|
||||
`**second_user_data` 意思是:
|
||||
|
||||
直接将`second_user_data`字典的键和值直接作为key-value参数传递,等同于:`User(id=4, name="Mary", joined="2018-11-30")`
|
||||
|
||||
### 编辑器支持
|
||||
|
||||
整个框架都被设计得易于使用且直观,所有的决定都在开发之前就在多个编辑器上进行了测试,来确保最佳的开发体验。
|
||||
|
||||
在最近的 Python 开发者调查中,我们能看到 <a href="https://www.jetbrains.com/research/python-developers-survey-2017/#tools-and-features" class="external-link" target="_blank"> 被使用最多的功能是"自动补全"</a>。
|
||||
|
||||
整个 **FastAPI** 框架就是基于这一点的。任何地方都可以进行自动补全。
|
||||
|
||||
你几乎不需要经常回来看文档。
|
||||
|
||||
在这里,你的编辑器可能会这样帮助你:
|
||||
|
||||
* <a href="https://code.visualstudio.com/" class="external-link" target="_blank">Visual Studio Code</a> 中:
|
||||
|
||||

|
||||
|
||||
* <a href="https://www.jetbrains.com/pycharm/" class="external-link" target="_blank">PyCharm</a> 中:
|
||||
|
||||

|
||||
|
||||
你将能进行代码补全,这是在之前你可能曾认为不可能的事。例如,在来自请求 JSON 体(可能是嵌套的)中的键 `price`。
|
||||
|
||||
不会再输错键名,来回翻看文档,或者来回滚动寻找你最后使用的 `username` 或者 `user_name` 。
|
||||
|
||||
|
||||
|
||||
### 简洁
|
||||
|
||||
任何类型都有合理的**默认值**,任何和地方都有可选配置。所有的参数被微调,来满足你的需求,定义成你需要的 API。
|
||||
|
||||
但是默认情况下,一切都能**“顺利工作”**。
|
||||
|
||||
### 验证
|
||||
|
||||
* 校验大部分(甚至所有?)的 Python **数据类型**,包括:
|
||||
* JSON 对象 (`dict`).
|
||||
* JSON 数组 (`list`) 定义成员类型。
|
||||
* 字符串 (`str`) 字段, 定义最小或最大长度。
|
||||
* 数字 (`int`, `float`) 有最大值和最小值, 等等。
|
||||
|
||||
* 校验外来类型, 比如:
|
||||
* URL.
|
||||
* Email.
|
||||
* UUID.
|
||||
* ...及其他.
|
||||
|
||||
所有的校验都由完善且强大的 **Pydantic** 处理。
|
||||
|
||||
### 安全性及身份验证
|
||||
|
||||
集成了安全性和身份认证。杜绝数据库或者数据模型的渗透风险。
|
||||
|
||||
OpenAPI 中定义的安全模式,包括:
|
||||
|
||||
* HTTP 基本认证。
|
||||
* **OAuth2** (也使用 **JWT tokens**)。在 [OAuth2 with JWT](tutorial/security/oauth2-jwt.md){.internal-link target=_blank}查看教程。
|
||||
* API 密钥,在:
|
||||
* 请求头。
|
||||
* 查询参数。
|
||||
* Cookies, 等等。
|
||||
|
||||
加上来自 Starlette(包括 **session cookie**)的所有安全特性。
|
||||
|
||||
所有的这些都是可复用的工具和组件,可以轻松与你的系统,数据仓库,关系型以及 NoSQL 数据库等等集成。
|
||||
|
||||
|
||||
|
||||
### 依赖注入
|
||||
|
||||
FastAPI 有一个使用非常简单,但是非常强大的<abbr title='也叫做 "components", "resources", "services", "providers"'><strong>依赖注入</strong></abbr>系统。
|
||||
|
||||
* 甚至依赖也可以有依赖,创建一个层级或者**“图”依赖**。
|
||||
* 所有**自动化处理**都由框架完成。
|
||||
* 所有的依赖关系都可以从请求中获取数据,并且**增加了路径操作**约束和自动文档生成。
|
||||
* 即使在依赖项中被定义的*路径操作* 也会**自动验证**。
|
||||
* 支持复杂的用户身份认证系统,**数据库连接**等等。
|
||||
* **不依赖**数据库,前端等。 但是和它们集成很简单。
|
||||
|
||||
### 无限制"插件"
|
||||
|
||||
或者说,导入并使用你需要的代码,而不需要它们。
|
||||
|
||||
任何集成都被设计得被易于使用(用依赖关系),你可以用和*路径操作*相同的结构和语法,在两行代码中为你的应用创建一个“插件”。
|
||||
|
||||
### 测试
|
||||
|
||||
* 100% <abbr title="自动测试的代码量">测试覆盖</abbr>。
|
||||
* 代码库100% <abbr title="Python类型注解,有了这个你的编辑器和外部工具可以给你更好的支持">类型注释</abbr>。
|
||||
* 用于生产应用。
|
||||
|
||||
## Starlette 特性
|
||||
|
||||
**FastAPI** 和 <a href="https://www.starlette.io/" class="external-link" target="_blank"><strong>Starlette</strong></a> 完全兼容(并基于)。所以,你有的其他的 Starlette 代码也能正常工作。`FastAPI` 实际上是 `Starlette`的一个子类。所以,如果你已经知道或者使用 Starlette,大部分的功能会以相同的方式工作。
|
||||
|
||||
通过 **FastAPI** 你可以获得所有 **Starlette** 的特性 ( FastAPI 就像加强版的 Starlette ):
|
||||
|
||||
* 令人惊叹的性能。它是 <a href="https://github.com/encode/starlette#performance" class="external-link" target="_blank">Python 可用的最快的框架之一,和 **NodeJS** 及 **Go** 相当</a>。
|
||||
* **支持 WebSocket** 。
|
||||
* **支持 GraphQL** 。
|
||||
* 后台任务处理。
|
||||
* Startup 和 shutdown 事件。
|
||||
* 测试客户端基于 `requests`。
|
||||
* **CORS**, GZip, 静态文件, 流响应。
|
||||
* 支持 **Session 和 Cookie** 。
|
||||
* 100% 测试覆盖率。
|
||||
* 代码库 100% 类型注释。
|
||||
|
||||
## Pydantic 特性
|
||||
|
||||
**FastAPI** 和 <a href="https://pydantic-docs.helpmanual.io" class="external-link" target="_blank"><strong>Pydantic</strong></a> 完全兼容(并基于)。所以,你有的其他的 Pydantic 代码也能正常工作。
|
||||
|
||||
兼容包括基于 Pydantic 的外部库, 例如用与数据库的 <abbr title="对象关系映射">ORM</abbr>s, <abbr title="对象文档映射">ODM</abbr>s。
|
||||
|
||||
这也意味着在很多情况下,你可以将从请求中获得的相同对象**直接传到数据库**,因为所有的验证都是自动的。
|
||||
|
||||
反之亦然,在很多情况下,你也可以将从数据库中获取的对象**直接传到客户端**。
|
||||
|
||||
通过 **FastAPI** 你可以获得所有 **Pydantic** (FastAPI 基于 Pydantic 做了所有的数据处理):
|
||||
|
||||
* **更简单**:
|
||||
* 没有新的模式定义 micro-language 需要学习。
|
||||
* 如果你知道 Python types,你就知道如何使用 Pydantic。
|
||||
* 和你 **<abbr title="集成开发环境,和代码编辑器类似">IDE</abbr>/<abbr title="一个检查代码错误的程序">linter</abbr>/brain** 适配:
|
||||
* 因为 pydantic 数据结构仅仅是你定义的类的实例;自动补全,linting,mypy 以及你的直觉应该可以和你验证的数据一起正常工作。
|
||||
* **更快**:
|
||||
* 在 <a href="https://pydantic-docs.helpmanual.io/#benchmarks-tag" class="external-link" target="_blank">基准测试</a> 中,Pydantic 比其他被测试的库都要快。
|
||||
* 验证**复杂结构**:
|
||||
* 使用分层的 Pydantic 模型, Python `typing`的 `List` 和 `Dict` 等等。
|
||||
* 验证器使我们能够简单清楚的将复杂的数据模式定义、检查并记录为 JSON Schema。
|
||||
* 你可以拥有深度**嵌套的 JSON** 对象并对它们进行验证和注释。
|
||||
* **可扩展**:
|
||||
* Pydantic 允许定义自定义数据类型或者你可以用验证器装饰器对被装饰的模型上的方法扩展验证。
|
||||
* 100% 测试覆盖率。
|
||||
@@ -1,7 +1,3 @@
|
||||
|
||||
{!../../../docs/missing-translation.md!}
|
||||
|
||||
|
||||
<p align="center">
|
||||
<a href="https://fastapi.tiangolo.com"><img src="https://fastapi.tiangolo.com/img/logo-margin/logo-teal.png" alt="FastAPI"></a>
|
||||
</p>
|
||||
@@ -25,80 +21,80 @@
|
||||
|
||||
---
|
||||
|
||||
**Documentation**: <a href="https://fastapi.tiangolo.com" target="_blank">https://fastapi.tiangolo.com</a>
|
||||
**文档**: <a href="https://fastapi.tiangolo.com" target="_blank">https://fastapi.tiangolo.com</a>
|
||||
|
||||
**Source Code**: <a href="https://github.com/tiangolo/fastapi" target="_blank">https://github.com/tiangolo/fastapi</a>
|
||||
**源码**: <a href="https://github.com/tiangolo/fastapi" target="_blank">https://github.com/tiangolo/fastapi</a>
|
||||
|
||||
---
|
||||
|
||||
FastAPI is a modern, fast (high-performance), web framework for building APIs with Python 3.6+ based on standard Python type hints.
|
||||
FastAPI 是一个用于构建 API 的现代、快速(高性能)的 web 框架,使用基于类型提示的 Python 3.6 及更高版本。
|
||||
|
||||
The key features are:
|
||||
关键特性:
|
||||
|
||||
* **Fast**: Very high performance, on par with **NodeJS** and **Go** (thanks to Starlette and Pydantic). [One of the fastest Python frameworks available](#performance).
|
||||
* **快速**:可与 **NodeJS** 和 **Go** 比肩的极高性能(归功于 Starlette 和 Pydantic)。[最快的 Python web 框架之一](#_11)。
|
||||
|
||||
* **Fast to code**: Increase the speed to develop features by about 200% to 300% *.
|
||||
* **Fewer bugs**: Reduce about 40% of human (developer) induced errors. *
|
||||
* **Intuitive**: Great editor support. <abbr title="also known as auto-complete, autocompletion, IntelliSense">Completion</abbr> everywhere. Less time debugging.
|
||||
* **Easy**: Designed to be easy to use and learn. Less time reading docs.
|
||||
* **Short**: Minimize code duplication. Multiple features from each parameter declaration. Fewer bugs.
|
||||
* **Robust**: Get production-ready code. With automatic interactive documentation.
|
||||
* **Standards-based**: Based on (and fully compatible with) the open standards for APIs: <a href="https://github.com/OAI/OpenAPI-Specification" class="external-link" target="_blank">OpenAPI</a> (previously known as Swagger) and <a href="http://json-schema.org/" class="external-link" target="_blank">JSON Schema</a>.
|
||||
* **高效编码**:提高功能开发速度约 200% 至 300%。*
|
||||
* **更少 bug**:减少约 40% 的人为(开发者)导致错误。*
|
||||
* **智能**:极佳的编辑器支持。处处皆可<abbr title="也被称为自动完成、智能感知">自动补全</abbr>,减少调试时间。
|
||||
* **简单**:设计的易于使用和学习,减少阅读文档时间。
|
||||
* **简短**:减少代码重复。通过不同的参数声明实现丰富功能。bug 更少。
|
||||
* **健壮**:生产可用级别的代码。以及自动生成的交互式文档。
|
||||
* **标准化**:基于 API 的相关开放标准并完全兼容:<a href="https://github.com/OAI/OpenAPI-Specification" class="external-link" target="_blank">OpenAPI</a> (以前被称为 Swagger) 和 <a href="http://json-schema.org/" class="external-link" target="_blank">JSON Schema</a>。
|
||||
|
||||
<small>* estimation based on tests on an internal development team, building production applications.</small>
|
||||
<small>* 根据对某个构建线上应用的内部开发团队所进行的测试估算得出。</small>
|
||||
|
||||
## Opinions
|
||||
## 评价
|
||||
|
||||
"*[...] I'm using **FastAPI** a ton these days. [...] I'm actually planning to use it for all of my team's **ML services at Microsoft**. Some of them are getting integrated into the core **Windows** product and some **Office** products.*"
|
||||
"*[...] 最近我一直在使用 **FastAPI**。[...] 实际上我正在计划将其用于我所在的微软团队的所有**机器学习服务**。其中一些服务正被集成进 **Windows** 核心产品和一些 **Office** 产品。*"
|
||||
|
||||
<div style="text-align: right; margin-right: 10%;">Kabir Khan - <strong>Microsoft</strong> <a href="https://github.com/tiangolo/fastapi/pull/26" target="_blank"><small>(ref)</small></a></div>
|
||||
<div style="text-align: right; margin-right: 10%;">Kabir Khan - <strong>微软</strong> <a href="https://github.com/tiangolo/fastapi/pull/26" target="_blank"><small>(ref)</small></a></div>
|
||||
|
||||
---
|
||||
|
||||
"*I’m over the moon excited about **FastAPI**. It’s so fun!*"
|
||||
"***FastAPI** 让我兴奋的欣喜若狂。它太棒了!*"
|
||||
|
||||
<div style="text-align: right; margin-right: 10%;">Brian Okken - <strong><a href="https://pythonbytes.fm/episodes/show/123/time-to-right-the-py-wrongs?time_in_sec=855" target="_blank">Python Bytes</a> podcast host</strong> <a href="https://twitter.com/brianokken/status/1112220079972728832" target="_blank"><small>(ref)</small></a></div>
|
||||
<div style="text-align: right; margin-right: 10%;">Brian Okken - <strong><a href="https://pythonbytes.fm/episodes/show/123/time-to-right-the-py-wrongs?time_in_sec=855" target="_blank">Python Bytes</a> 播客主持人</strong> <a href="https://twitter.com/brianokken/status/1112220079972728832" target="_blank"><small>(ref)</small></a></div>
|
||||
|
||||
---
|
||||
|
||||
"*Honestly, what you've built looks super solid and polished. In many ways, it's what I wanted **Hug** to be - it's really inspiring to see someone build that.*"
|
||||
"*老实说,你的作品看起来非常可靠和优美。在很多方面,这就是我想让 **Hug** 成为的样子 - 看到有人实现了它真的很鼓舞人心。*"
|
||||
|
||||
<div style="text-align: right; margin-right: 10%;">Timothy Crosley - <strong><a href="http://www.hug.rest/" target="_blank">Hug</a> creator</strong> <a href="https://news.ycombinator.com/item?id=19455465" target="_blank"><small>(ref)</small></a></div>
|
||||
<div style="text-align: right; margin-right: 10%;">Timothy Crosley - <strong><a href="http://www.hug.rest/" target="_blank">Hug</a> 作者</strong> <a href="https://news.ycombinator.com/item?id=19455465" target="_blank"><small>(ref)</small></a></div>
|
||||
|
||||
---
|
||||
|
||||
"*If you're looking to learn one **modern framework** for building REST APIs, check out **FastAPI** [...] It's fast, easy to use and easy to learn [...]*"
|
||||
"*如果你正打算学习一个**现代框架**用来构建 REST API,来看下 **FastAPI** [...] 它快速、易用且易于学习 [...]*"
|
||||
|
||||
"*We've switched over to **FastAPI** for our **APIs** [...] I think you'll like it [...]*"
|
||||
"*我们已经将 **API** 服务切换到了 **FastAPI** [...] 我认为你会喜欢它的 [...]*"
|
||||
|
||||
<div style="text-align: right; margin-right: 10%;">Ines Montani - Matthew Honnibal - <strong><a href="https://explosion.ai" target="_blank">Explosion AI</a> founders - <a href="https://spacy.io" target="_blank">spaCy</a> creators</strong> <a href="https://twitter.com/_inesmontani/status/1144173225322143744" target="_blank"><small>(ref)</small></a> - <a href="https://twitter.com/honnibal/status/1144031421859655680" target="_blank"><small>(ref)</small></a></div>
|
||||
<div style="text-align: right; margin-right: 10%;">Ines Montani - Matthew Honnibal - <strong><a href="https://explosion.ai" target="_blank">Explosion AI</a> 创始人 - <a href="https://spacy.io" target="_blank">spaCy</a> 作者</strong> <a href="https://twitter.com/_inesmontani/status/1144173225322143744" target="_blank"><small>(ref)</small></a> - <a href="https://twitter.com/honnibal/status/1144031421859655680" target="_blank"><small>(ref)</small></a></div>
|
||||
|
||||
---
|
||||
|
||||
"*We adopted the **FastAPI** library to spawn a **REST** server that can be queried to obtain **predictions**. [for Ludwig]*"
|
||||
"*我们采用了 **FastAPI** 来创建用于获取**预测结果**的 **REST** 服务。[用于 Ludwig]*"
|
||||
|
||||
<div style="text-align: right; margin-right: 10%;">Piero Molino, Yaroslav Dudin, and Sai Sumanth Miryala - <strong>Uber</strong> <a href="https://eng.uber.com/ludwig-v0-2/" target="_blank"><small>(ref)</small></a></div>
|
||||
<div style="text-align: right; margin-right: 10%;">Piero Molino, Yaroslav Dudin 和 Sai Sumanth Miryala - <strong>Uber</strong> <a href="https://eng.uber.com/ludwig-v0-2/" target="_blank"><small>(ref)</small></a></div>
|
||||
|
||||
---
|
||||
|
||||
## **Typer**, the FastAPI of CLIs
|
||||
## **Typer**,命令行中的 Fast API
|
||||
|
||||
<a href="https://typer.tiangolo.com" target="_blank"><img src="https://typer.tiangolo.com/img/logo-margin/logo-margin-vector.svg" style="width: 20%;"></a>
|
||||
|
||||
If you are building a <abbr title="Command Line Interface">CLI</abbr> app to be used in the terminal instead of a web API, check out <a href="https://typer.tiangolo.com/" class="external-link" target="_blank">**Typer**</a>.
|
||||
如果你正在开发一个在终端中运行的<abbr title="Command Line Interface">命令行</abbr>应用而不是 web API,不妨试下 <a href="https://typer.tiangolo.com/" class="external-link" target="_blank">**Typer**</a>。
|
||||
|
||||
**Typer** is FastAPI's little sibling. And it's intended to be the **FastAPI of CLIs**. ⌨️ 🚀
|
||||
**Typer** 是 FastAPI 的小伙伴。它打算成为**命令行中的 FastAPI**。 ⌨️ 🚀
|
||||
|
||||
## Requirements
|
||||
## 依赖
|
||||
|
||||
Python 3.6+
|
||||
Python 3.6 及更高版本
|
||||
|
||||
FastAPI stands on the shoulders of giants:
|
||||
FastAPI 站在以下巨人的肩膀之上:
|
||||
|
||||
* <a href="https://www.starlette.io/" class="external-link" target="_blank">Starlette</a> for the web parts.
|
||||
* <a href="https://pydantic-docs.helpmanual.io/" class="external-link" target="_blank">Pydantic</a> for the data parts.
|
||||
* <a href="https://www.starlette.io/" class="external-link" target="_blank">Starlette</a>负责 web 部分。
|
||||
* <a href="https://pydantic-docs.helpmanual.io/" class="external-link" target="_blank">Pydantic</a>负责数据部分。
|
||||
|
||||
## Installation
|
||||
## 安装
|
||||
|
||||
<div class="termy">
|
||||
|
||||
@@ -110,7 +106,7 @@ $ pip install fastapi
|
||||
|
||||
</div>
|
||||
|
||||
You will also need an ASGI server, for production such as <a href="http://www.uvicorn.org" class="external-link" target="_blank">Uvicorn</a> or <a href="https://gitlab.com/pgjones/hypercorn" class="external-link" target="_blank">Hypercorn</a>.
|
||||
你还需要一个 ASGI 服务器,生产环境可以使用 <a href="http://www.uvicorn.org" class="external-link" target="_blank">Uvicorn</a> 或者 <a href="https://gitlab.com/pgjones/hypercorn" class="external-link" target="_blank">Hypercorn</a>。
|
||||
|
||||
<div class="termy">
|
||||
|
||||
@@ -122,11 +118,11 @@ $ pip install uvicorn
|
||||
|
||||
</div>
|
||||
|
||||
## Example
|
||||
## 示例
|
||||
|
||||
### Create it
|
||||
### 创建
|
||||
|
||||
* Create a file `main.py` with:
|
||||
* 创建一个 `main.py` 文件并写入以下内容:
|
||||
|
||||
```Python
|
||||
from fastapi import FastAPI
|
||||
@@ -145,9 +141,9 @@ def read_item(item_id: int, q: str = None):
|
||||
```
|
||||
|
||||
<details markdown="1">
|
||||
<summary>Or use <code>async def</code>...</summary>
|
||||
<summary>或者使用 <code>async def</code>...</summary>
|
||||
|
||||
If your code uses `async` / `await`, use `async def`:
|
||||
如果你的代码里会出现 `async` / `await`,应使用 `async def`:
|
||||
|
||||
```Python hl_lines="7 12"
|
||||
from fastapi import FastAPI
|
||||
@@ -167,13 +163,13 @@ async def read_item(item_id: int, q: str = None):
|
||||
|
||||
**Note**:
|
||||
|
||||
If you don't know, check the _"In a hurry?"_ section about <a href="https://fastapi.tiangolo.com/async/#in-a-hurry" target="_blank">`async` and `await` in the docs</a>.
|
||||
如果你不知道是否会用到,可以查看文档的 _"In a hurry?"_ 章节中 <a href="https://fastapi.tiangolo.com/async/#in-a-hurry" target="_blank">关于 `async` 和 `await` 的部分</a>。
|
||||
|
||||
</details>
|
||||
|
||||
### Run it
|
||||
### 运行
|
||||
|
||||
Run the server with:
|
||||
通过以下命令运行服务器:
|
||||
|
||||
<div class="termy">
|
||||
|
||||
@@ -190,54 +186,54 @@ $ uvicorn main:app --reload
|
||||
</div>
|
||||
|
||||
<details markdown="1">
|
||||
<summary>About the command <code>uvicorn main:app --reload</code>...</summary>
|
||||
<summary>关于 <code>uvicorn main:app --reload</code> 命令......</summary>
|
||||
|
||||
The command `uvicorn main:app` refers to:
|
||||
`uvicorn main:app` 命令含义如下:
|
||||
|
||||
* `main`: the file `main.py` (the Python "module").
|
||||
* `app`: the object created inside of `main.py` with the line `app = FastAPI()`.
|
||||
* `--reload`: make the server restart after code changes. Only do this for development.
|
||||
* `main`:`main.py` 文件(一个 Python "模块")。
|
||||
* `app`:在 `main.py` 文件中通过 `app = FastAPI()` 创建的对象。
|
||||
* `--reload`:让服务器在更新代码后重新启动。仅在开发时使用该选项。
|
||||
|
||||
</details>
|
||||
|
||||
### Check it
|
||||
### 检查
|
||||
|
||||
Open your browser at <a href="http://127.0.0.1:8000/items/5?q=somequery" class="external-link" target="_blank">http://127.0.0.1:8000/items/5?q=somequery</a>.
|
||||
使用浏览器访问 <a href="http://127.0.0.1:8000/items/5?q=somequery" class="external-link" target="_blank">http://127.0.0.1:8000/items/5?q=somequery</a>。
|
||||
|
||||
You will see the JSON response as:
|
||||
你将会看到如下 JSON 响应:
|
||||
|
||||
```JSON
|
||||
{"item_id": 5, "q": "somequery"}
|
||||
```
|
||||
|
||||
You already created an API that:
|
||||
你已经创建了一个具有以下功能的 API:
|
||||
|
||||
* Receives HTTP requests in the _paths_ `/` and `/items/{item_id}`.
|
||||
* Both _paths_ take `GET` <em>operations</em> (also known as HTTP _methods_).
|
||||
* The _path_ `/items/{item_id}` has a _path parameter_ `item_id` that should be an `int`.
|
||||
* The _path_ `/items/{item_id}` has an optional `str` _query parameter_ `q`.
|
||||
* 通过 _路径_ `/` 和 `/items/{item_id}` 接受 HTTP 请求。
|
||||
* 以上 _路径_ 都接受 `GET` <em>操作</em>(也被称为 HTTP _方法_)。
|
||||
* `/items/{item_id}` _路径_ 有一个 _路径参数_ `item_id` 并且应该为 `int` 类型。
|
||||
* `/items/{item_id}` _路径_ 有一个可选的 `str` 类型的 _查询参数_ `q`。
|
||||
|
||||
### Interactive API docs
|
||||
### 交互式 API 文档
|
||||
|
||||
Now go to <a href="http://127.0.0.1:8000/docs" class="external-link" target="_blank">http://127.0.0.1:8000/docs</a>.
|
||||
现在访问 <a href="http://127.0.0.1:8000/docs" class="external-link" target="_blank">http://127.0.0.1:8000/docs</a>。
|
||||
|
||||
You will see the automatic interactive API documentation (provided by <a href="https://github.com/swagger-api/swagger-ui" class="external-link" target="_blank">Swagger UI</a>):
|
||||
你会看到自动生成的交互式 API 文档(由 <a href="https://github.com/swagger-api/swagger-ui" class="external-link" target="_blank">Swagger UI</a>生成):
|
||||
|
||||

|
||||
|
||||
### Alternative API docs
|
||||
### 备选 API 文档
|
||||
|
||||
And now, go to <a href="http://127.0.0.1:8000/redoc" class="external-link" target="_blank">http://127.0.0.1:8000/redoc</a>.
|
||||
访问 <a href="http://127.0.0.1:8000/redoc" class="external-link" target="_blank">http://127.0.0.1:8000/redoc</a>。
|
||||
|
||||
You will see the alternative automatic documentation (provided by <a href="https://github.com/Rebilly/ReDoc" class="external-link" target="_blank">ReDoc</a>):
|
||||
你会看到另一个自动生成的文档(由 <a href="https://github.com/Rebilly/ReDoc" class="external-link" target="_blank">ReDoc</a>)生成:
|
||||
|
||||

|
||||
|
||||
## Example upgrade
|
||||
## 升级示例
|
||||
|
||||
Now modify the file `main.py` to receive a body from a `PUT` request.
|
||||
修改 `main.py` 文件来从 `PUT` 请求中接收请求体。
|
||||
|
||||
Declare the body using standard Python types, thanks to Pydantic.
|
||||
我们借助 Pydantic 来使用标准的 Python 类型声明请求体。
|
||||
|
||||
```Python hl_lines="2 7 8 9 10 23 24 25"
|
||||
from fastapi import FastAPI
|
||||
@@ -267,175 +263,176 @@ def update_item(item_id: int, item: Item):
|
||||
return {"item_name": item.name, "item_id": item_id}
|
||||
```
|
||||
|
||||
The server should reload automatically (because you added `--reload` to the `uvicorn` command above).
|
||||
服务器将会自动重载(因为在上面的步骤中你向 `uvicorn` 命令添加了 `--reload` 选项)。
|
||||
|
||||
### Interactive API docs upgrade
|
||||
### 升级交互式 API 文档
|
||||
|
||||
Now go to <a href="http://127.0.0.1:8000/docs" class="external-link" target="_blank">http://127.0.0.1:8000/docs</a>.
|
||||
访问 <a href="http://127.0.0.1:8000/docs" class="external-link" target="_blank">http://127.0.0.1:8000/docs</a>。
|
||||
|
||||
* The interactive API documentation will be automatically updated, including the new body:
|
||||
* 交互式 API 文档将会自动更新,并加入新的请求体:
|
||||
|
||||

|
||||
|
||||
* Click on the button "Try it out", it allows you to fill the parameters and directly interact with the API:
|
||||
* 点击 "Try it out" 按钮,之后你可以填写参数并直接调用 API:
|
||||
|
||||

|
||||
|
||||
* Then click on the "Execute" button, the user interface will communicate with your API, send the parameters, get the results and show them on the screen:
|
||||
* 然后点击 "Execute" 按钮,用户界面将会和 API 进行通信,发送参数,获取结果并在屏幕上展示:
|
||||
|
||||

|
||||
|
||||
### Alternative API docs upgrade
|
||||
### 升级备选文档
|
||||
|
||||
And now, go to <a href="http://127.0.0.1:8000/redoc" class="external-link" target="_blank">http://127.0.0.1:8000/redoc</a>.
|
||||
访问 <a href="http://127.0.0.1:8000/redoc" class="external-link" target="_blank">http://127.0.0.1:8000/redoc</a>。
|
||||
|
||||
* The alternative documentation will also reflect the new query parameter and body:
|
||||
* 备选文档同样会体现新加入的请求参数和请求体:
|
||||
|
||||

|
||||
|
||||
### Recap
|
||||
### 回顾
|
||||
|
||||
In summary, you declare **once** the types of parameters, body, etc. as function parameters.
|
||||
总的来说,你就像声明函数的参数类型一样只声明了**一次**请求参数、请求体等的类型。
|
||||
|
||||
You do that with standard modern Python types.
|
||||
你使用了标准的现代 Python 类型来完成声明。
|
||||
|
||||
You don't have to learn a new syntax, the methods or classes of a specific library, etc.
|
||||
你不需要去学习新的语法、了解特定库的方法或类,等等。
|
||||
|
||||
Just standard **Python 3.6+**.
|
||||
只需要使用标准的 **Python 3.6 及更高版本**。
|
||||
|
||||
For example, for an `int`:
|
||||
举个例子,比如声明 `int` 类型:
|
||||
|
||||
```Python
|
||||
item_id: int
|
||||
```
|
||||
|
||||
or for a more complex `Item` model:
|
||||
或者一个更复杂的 `Item` 模型:
|
||||
|
||||
```Python
|
||||
item: Item
|
||||
```
|
||||
|
||||
...and with that single declaration you get:
|
||||
......在进行一次声明之后,你将获得:
|
||||
|
||||
* Editor support, including:
|
||||
* Completion.
|
||||
* Type checks.
|
||||
* Validation of data:
|
||||
* Automatic and clear errors when the data is invalid.
|
||||
* Validation even for deeply nested JSON objects.
|
||||
* <abbr title="also known as: serialization, parsing, marshalling">Conversion</abbr> of input data: coming from the network to Python data and types. Reading from:
|
||||
* JSON.
|
||||
* Path parameters.
|
||||
* Query parameters.
|
||||
* Cookies.
|
||||
* Headers.
|
||||
* Forms.
|
||||
* Files.
|
||||
* <abbr title="also known as: serialization, parsing, marshalling">Conversion</abbr> of output data: converting from Python data and types to network data (as JSON):
|
||||
* Convert Python types (`str`, `int`, `float`, `bool`, `list`, etc).
|
||||
* `datetime` objects.
|
||||
* `UUID` objects.
|
||||
* Database models.
|
||||
* ...and many more.
|
||||
* Automatic interactive API documentation, including 2 alternative user interfaces:
|
||||
* Swagger UI.
|
||||
* ReDoc.
|
||||
* 编辑器支持,包括:
|
||||
* 自动补全
|
||||
* 类型检查
|
||||
* 数据校验:
|
||||
* 在校验失败时自动生成清晰的错误信息
|
||||
* 对多层嵌套的 JSON 对象依然执行校验
|
||||
* <abbr title="也被称为:序列化或解析">转换</abbr> 来自网络请求的输入数据为 Python 数据类型。包括以下数据:
|
||||
* JSON
|
||||
* 路径参数
|
||||
* 查询参数
|
||||
* Cookies
|
||||
* 请求头
|
||||
* 表单
|
||||
* 文件
|
||||
* <abbr title="也被称为:序列化或解析">转换</abbr> 输出的数据:转换 Python 数据类型为供网络传输的 JSON 数据:
|
||||
* 转换 Python 基础类型 (`str`、 `int`、 `float`、 `bool`、 `list` 等)
|
||||
* `datetime` 对象
|
||||
* `UUID` 对象
|
||||
* 数据库模型
|
||||
* ......以及更多其他类型
|
||||
* 自动生成的交互式 API 文档,包括两种可选的用户界面:
|
||||
* Swagger UI
|
||||
* ReDoc
|
||||
|
||||
---
|
||||
|
||||
Coming back to the previous code example, **FastAPI** will:
|
||||
回到前面的代码示例,**FastAPI** 将会:
|
||||
|
||||
* Validate that there is an `item_id` in the path for `GET` and `PUT` requests.
|
||||
* Validate that the `item_id` is of type `int` for `GET` and `PUT` requests.
|
||||
* If it is not, the client will see a useful, clear error.
|
||||
* Check if there is an optional query parameter named `q` (as in `http://127.0.0.1:8000/items/foo?q=somequery`) for `GET` requests.
|
||||
* As the `q` parameter is declared with `= None`, it is optional.
|
||||
* Without the `None` it would be required (as is the body in the case with `PUT`).
|
||||
* For `PUT` requests to `/items/{item_id}`, Read the body as JSON:
|
||||
* Check that it has a required attribute `name` that should be a `str`.
|
||||
* Check that it has a required attribute `price` that has to be a `float`.
|
||||
* Check that it has an optional attribute `is_offer`, that should be a `bool`, if present.
|
||||
* All this would also work for deeply nested JSON objects.
|
||||
* Convert from and to JSON automatically.
|
||||
* Document everything with OpenAPI, that can be used by:
|
||||
* Interactive documentation systems.
|
||||
* Automatic client code generation systems, for many languages.
|
||||
* Provide 2 interactive documentation web interfaces directly.
|
||||
* 校验 `GET` 和 `PUT` 请求的路径中是否含有 `item_id`。
|
||||
* 校验 `GET` 和 `PUT` 请求中的 `item_id` 是否为 `int` 类型。
|
||||
* 如果不是,客户端将会收到清晰有用的错误信息。
|
||||
* 检查 `GET` 请求中是否有命名为 `q` 的可选查询参数(比如 `http://127.0.0.1:8000/items/foo?q=somequery`)。
|
||||
* 因为 `q` 被声明为 `= None`,所以它是可选的。
|
||||
* 如果没有 `None` 它将会是必需的 (如 `PUT` 例子中的请求体)。
|
||||
* 对于访问 `/items/{item_id}` 的 `PUT` 请求,将请求体读取为 JSON 并:
|
||||
* 检查是否有必需属性 `name` 并且值为 `str` 类型 。
|
||||
* 检查是否有必需属性 `price` 并且值为 `float` 类型。
|
||||
* 检查是否有可选属性 `is_offer`, 如果有的话值应该为 `bool` 类型。
|
||||
* 以上过程对于多层嵌套的 JSON 对象同样也会执行
|
||||
* 自动对 JSON 进行转换或转换成 JSON。
|
||||
* 通过 OpenAPI 文档来记录所有内容,可被用于:
|
||||
* 交互式文档系统
|
||||
* 许多编程语言的客户端代码自动生成系统
|
||||
* 直接提供 2 种交互式文档 web 界面。
|
||||
|
||||
---
|
||||
|
||||
We just scratched the surface, but you already get the idea of how it all works.
|
||||
虽然我们才刚刚开始,但其实你已经了解了这一切是如何工作的。
|
||||
|
||||
Try changing the line with:
|
||||
尝试更改下面这行代码:
|
||||
|
||||
```Python
|
||||
return {"item_name": item.name, "item_id": item_id}
|
||||
```
|
||||
|
||||
...from:
|
||||
......从:
|
||||
|
||||
```Python
|
||||
... "item_name": item.name ...
|
||||
```
|
||||
|
||||
...to:
|
||||
......改为:
|
||||
|
||||
```Python
|
||||
... "item_price": item.price ...
|
||||
```
|
||||
|
||||
...and see how your editor will auto-complete the attributes and know their types:
|
||||
......注意观察编辑器是如何自动补全属性并且还知道它们的类型:
|
||||
|
||||

|
||||
|
||||
For a more complete example including more features, see the <a href="https://fastapi.tiangolo.com/tutorial/">Tutorial - User Guide</a>.
|
||||
<a href="https://fastapi.tiangolo.com/tutorial/">教程 - 用户指南</a> 中有包含更多特性的更完整示例。
|
||||
|
||||
**Spoiler alert**: the tutorial - user guide includes:
|
||||
**剧透警告**: 教程 - 用户指南中的内容有:
|
||||
|
||||
* Declaration of **parameters** from other different places as: **headers**, **cookies**, **form fields** and **files**.
|
||||
* How to set **validation constraints** as `maximum_length` or `regex`.
|
||||
* A very powerful and easy to use **<abbr title="also known as components, resources, providers, services, injectables">Dependency Injection</abbr>** system.
|
||||
* Security and authentication, including support for **OAuth2** with **JWT tokens** and **HTTP Basic** auth.
|
||||
* More advanced (but equally easy) techniques for declaring **deeply nested JSON models** (thanks to Pydantic).
|
||||
* Many extra features (thanks to Starlette) as:
|
||||
* 对来自不同地方的参数进行声明,如:**请求头**、**cookies**、**form 表单**以及**上传的文件**。
|
||||
* 如何设置**校验约束**如 `maximum_length` 或者 `regex`。
|
||||
* 一个强大并易于使用的 **<abbr title="也被称为 components, resources, providers, services, injectables">依赖注入</abbr>** 系统。
|
||||
* 安全性和身份验证,包括通过 **JWT 令牌**和 **HTTP 基本身份认证**来支持 **OAuth2**。
|
||||
* 更进阶(但同样简单)的技巧来声明 **多层嵌套 JSON 模型** (借助 Pydantic)。
|
||||
* 许多额外功能(归功于 Starlette)比如:
|
||||
* **WebSockets**
|
||||
* **GraphQL**
|
||||
* extremely easy tests based on `requests` and `pytest`
|
||||
* 基于 `requests` 和 `pytest` 的极其简单的测试
|
||||
* **CORS**
|
||||
* **Cookie Sessions**
|
||||
* ...and more.
|
||||
* ......以及更多
|
||||
|
||||
## Performance
|
||||
## 性能
|
||||
|
||||
Independent TechEmpower benchmarks show **FastAPI** applications running under Uvicorn as <a href="https://www.techempower.com/benchmarks/#section=test&runid=7464e520-0dc2-473d-bd34-dbdfd7e85911&hw=ph&test=query&l=zijzen-7" class="external-link" target="_blank">one of the fastest Python frameworks available</a>, only below Starlette and Uvicorn themselves (used internally by FastAPI). (*)
|
||||
|
||||
To understand more about it, see the section <a href="https://fastapi.tiangolo.com/benchmarks/" class="internal-link" target="_blank">Benchmarks</a>.
|
||||
独立机构 TechEmpower 所作的基准测试结果显示,基于 Uvicorn 运行的 **FastAPI** 程序是 <a href="https://www.techempower.com/benchmarks/#section=test&runid=7464e520-0dc2-473d-bd34-dbdfd7e85911&hw=ph&test=query&l=zijzen-7" class="external-link" target="_blank">最快的 Python web 框架之一</a>,仅次于 Starlette 和 Uvicorn 本身(FastAPI 内部使用了它们)。(*)
|
||||
|
||||
## Optional Dependencies
|
||||
想了解更多,请查阅 <a href="https://fastapi.tiangolo.com/benchmarks/" class="internal-link" target="_blank">基准测试</a> 章节。
|
||||
|
||||
Used by Pydantic:
|
||||
## 可选依赖
|
||||
|
||||
* <a href="https://github.com/esnme/ultrajson" target="_blank"><code>ujson</code></a> - for faster JSON <abbr title="converting the string that comes from an HTTP request into Python data">"parsing"</abbr>.
|
||||
* <a href="https://github.com/JoshData/python-email-validator" target="_blank"><code>email_validator</code></a> - for email validation.
|
||||
用于 Pydantic:
|
||||
|
||||
Used by Starlette:
|
||||
* <a href="https://github.com/esnme/ultrajson" target="_blank"><code>ujson</code></a> - 更快的 JSON <abbr title="将来自 HTTP 请求中的字符串转换为 Python 数据类型">"解析"</abbr>。
|
||||
* <a href="https://github.com/JoshData/python-email-validator" target="_blank"><code>email_validator</code></a> - 用于 email 校验。
|
||||
|
||||
* <a href="http://docs.python-requests.org" target="_blank"><code>requests</code></a> - Required if you want to use the `TestClient`.
|
||||
* <a href="https://github.com/Tinche/aiofiles" target="_blank"><code>aiofiles</code></a> - Required if you want to use `FileResponse` or `StaticFiles`.
|
||||
* <a href="http://jinja.pocoo.org" target="_blank"><code>jinja2</code></a> - Required if you want to use the default template configuration.
|
||||
* <a href="https://andrew-d.github.io/python-multipart/" target="_blank"><code>python-multipart</code></a> - Required if you want to support form <abbr title="converting the string that comes from an HTTP request into Python data">"parsing"</abbr>, with `request.form()`.
|
||||
* <a href="https://pythonhosted.org/itsdangerous/" target="_blank"><code>itsdangerous</code></a> - Required for `SessionMiddleware` support.
|
||||
* <a href="https://pyyaml.org/wiki/PyYAMLDocumentation" target="_blank"><code>pyyaml</code></a> - Required for Starlette's `SchemaGenerator` support (you probably don't need it with FastAPI).
|
||||
* <a href="https://graphene-python.org/" target="_blank"><code>graphene</code></a> - Required for `GraphQLApp` support.
|
||||
* <a href="https://github.com/esnme/ultrajson" target="_blank"><code>ujson</code></a> - Required if you want to use `UJSONResponse`.
|
||||
用于 Starlette:
|
||||
|
||||
Used by FastAPI / Starlette:
|
||||
* <a href="http://docs.python-requests.org" target="_blank"><code>requests</code></a> - 使用 `TestClient` 时安装。
|
||||
* <a href="https://github.com/Tinche/aiofiles" target="_blank"><code>aiofiles</code></a> - 使用 `FileResponse` 或 `StaticFiles` 时安装。
|
||||
* <a href="http://jinja.pocoo.org" target="_blank"><code>jinja2</code></a> - 使用默认模板配置时安装。
|
||||
* <a href="https://andrew-d.github.io/python-multipart/" target="_blank"><code>python-multipart</code></a> - 需要通过 `request.form()` 对表单进行<abbr title="将来自 HTTP 请求中的字符串转换为 Python 数据类型">"解析"</abbr>时安装。
|
||||
* <a href="https://pythonhosted.org/itsdangerous/" target="_blank"><code>itsdangerous</code></a> - 提供 `SessionMiddleware` 支持。
|
||||
* <a href="https://pyyaml.org/wiki/PyYAMLDocumentation" target="_blank"><code>pyyaml</code></a> - 使用 Starlette 提供的 `SchemaGenerator` 时安装(有 FastAPI 你可能并不需要它)。
|
||||
* <a href="https://graphene-python.org/" target="_blank"><code>graphene</code></a> - 需要 `GraphQLApp` 支持时安装。
|
||||
* <a href="https://github.com/esnme/ultrajson" target="_blank"><code>ujson</code></a> - 使用 `UJSONResponse` 时安装。
|
||||
|
||||
* <a href="http://www.uvicorn.org" target="_blank"><code>uvicorn</code></a> - for the server that loads and serves your application.
|
||||
* <a href="https://github.com/ijl/orjson" target="_blank"><code>orjson</code></a> - Required if you want to use `ORJSONResponse`.
|
||||
用于 FastAPI / Starlette:
|
||||
|
||||
You can install all of these with `pip install fastapi[all]`.
|
||||
* <a href="http://www.uvicorn.org" target="_blank"><code>uvicorn</code></a> - 用于加载和服务你的应用程序的服务器。
|
||||
* <a href="https://github.com/ijl/orjson" target="_blank"><code>orjson</code></a> - 使用 `ORJSONResponse` 时安装。
|
||||
|
||||
## License
|
||||
你可以通过 `pip install fastapi[all]` 命令来安装以上所有依赖。
|
||||
|
||||
This project is licensed under the terms of the MIT license.
|
||||
## 许可协议
|
||||
|
||||
该项目遵循 MIT 许可协议。
|
||||
|
||||
80
docs/zh/docs/tutorial/index.md
Normal file
80
docs/zh/docs/tutorial/index.md
Normal file
@@ -0,0 +1,80 @@
|
||||
# 教程 - 用户指南 - 简介
|
||||
|
||||
本教程将一步步向你展示如何使用 **FastAPI** 的绝大部分特性。
|
||||
|
||||
各个章节的内容循序渐进,但是又围绕着单独的主题,所以你可以直接跳转到某个章节以解决你的特定需求。
|
||||
|
||||
本教程同样可以作为将来的参考手册。
|
||||
|
||||
你可以随时回到本教程并查阅你需要的内容。
|
||||
|
||||
## 运行代码
|
||||
|
||||
所有代码片段都可以复制后直接使用(它们实际上是经过测试的 Python 文件)。
|
||||
|
||||
要运行任何示例,请将代码复制到 `main.py` 文件中,然后使用以下命令启动 `uvicorn`:
|
||||
|
||||
<div class="termy">
|
||||
|
||||
```console
|
||||
$ uvicorn main:app --reload
|
||||
|
||||
<span style="color: green;">INFO</span>: Uvicorn running on http://127.0.0.1:8000 (Press CTRL+C to quit)
|
||||
<span style="color: green;">INFO</span>: Started reloader process [28720]
|
||||
<span style="color: green;">INFO</span>: Started server process [28722]
|
||||
<span style="color: green;">INFO</span>: Waiting for application startup.
|
||||
<span style="color: green;">INFO</span>: Application startup complete.
|
||||
```
|
||||
|
||||
</div>
|
||||
|
||||
强烈建议你在本地编写或复制代码,对其进行编辑并运行。
|
||||
|
||||
在编辑器中使用 FastAPI 会真正地展现出它的优势:只需要编写很少的代码,所有的类型检查,代码补全等等。
|
||||
|
||||
---
|
||||
|
||||
## 安装 FastAPI
|
||||
|
||||
第一个步骤是安装 FastAPI。
|
||||
|
||||
为了使用本教程,你可能需要安装所有的可选依赖及对应功能:
|
||||
|
||||
<div class="termy">
|
||||
|
||||
```console
|
||||
$ pip install fastapi[all]
|
||||
|
||||
---> 100%
|
||||
```
|
||||
|
||||
</div>
|
||||
|
||||
......以上安装还包括了 `uvicorn`,你可以将其用作运行代码的服务器。
|
||||
|
||||
!!! note
|
||||
你也可以分开来安装。
|
||||
|
||||
假如你想将应用程序部署到生产环境,你可能要执行以下操作:
|
||||
|
||||
```
|
||||
pip install fastapi
|
||||
```
|
||||
|
||||
并且安装`uvicorn`来作为服务器:
|
||||
|
||||
```
|
||||
pip install uvicorn
|
||||
```
|
||||
|
||||
然后对你想使用的每个可选依赖项也执行相同的操作。
|
||||
|
||||
## 进阶用户指南
|
||||
|
||||
在本**教程-用户指南**之后,你可以阅读**进阶用户指南**。
|
||||
|
||||
**进阶用户指南**以本教程为基础,使用相同的概念,并教授一些额外的特性。
|
||||
|
||||
但是你应该先阅读**教程-用户指南**(即你现在正在阅读的内容)。
|
||||
|
||||
教程经过精心设计,使你可以仅通过**教程-用户指南**来开发一个完整的应用程序,然后根据你的需要,使用**进阶用户指南**中的一些其他概念,以不同的方式来扩展它。
|
||||
@@ -6,6 +6,8 @@ theme:
|
||||
palette:
|
||||
primary: teal
|
||||
accent: amber
|
||||
icon:
|
||||
repo: fontawesome/brands/github-alt
|
||||
logo: https://fastapi.tiangolo.com/img/icon-white.svg
|
||||
favicon: https://fastapi.tiangolo.com/img/favicon.png
|
||||
language: zh
|
||||
@@ -20,7 +22,12 @@ nav:
|
||||
- Languages:
|
||||
- en: /
|
||||
- es: /es/
|
||||
- pt: /pt/
|
||||
- zh: /zh/
|
||||
- features.md
|
||||
- 教程 - 用户指南:
|
||||
- tutorial/index.md
|
||||
- deployment.md
|
||||
markdown_extensions:
|
||||
- toc:
|
||||
permalink: true
|
||||
@@ -36,19 +43,20 @@ markdown_extensions:
|
||||
- name: mermaid
|
||||
class: mermaid
|
||||
format: !!python/name:pymdownx.superfences.fence_div_format ''
|
||||
- pymdownx.tabbed
|
||||
extra:
|
||||
social:
|
||||
- type: github
|
||||
- icon: fontawesome/brands/github-alt
|
||||
link: https://github.com/tiangolo/typer
|
||||
- type: twitter
|
||||
- icon: fontawesome/brands/twitter
|
||||
link: https://twitter.com/tiangolo
|
||||
- type: linkedin
|
||||
- icon: fontawesome/brands/linkedin
|
||||
link: https://www.linkedin.com/in/tiangolo
|
||||
- type: rss
|
||||
- icon: fontawesome/brands/dev
|
||||
link: https://dev.to/tiangolo
|
||||
- type: medium
|
||||
- icon: fontawesome/brands/medium
|
||||
link: https://medium.com/@tiangolo
|
||||
- type: globe
|
||||
- icon: fontawesome/solid/globe
|
||||
link: https://tiangolo.com
|
||||
extra_css:
|
||||
- https://fastapi.tiangolo.com/css/termynal.css
|
||||
|
||||
16
docs_src/conditional_openapi/tutorial001.py
Normal file
16
docs_src/conditional_openapi/tutorial001.py
Normal file
@@ -0,0 +1,16 @@
|
||||
from fastapi import FastAPI
|
||||
from pydantic import BaseSettings
|
||||
|
||||
|
||||
class Settings(BaseSettings):
|
||||
openapi_url: str = "/openapi.json"
|
||||
|
||||
|
||||
settings = Settings()
|
||||
|
||||
app = FastAPI(openapi_url=settings.openapi_url)
|
||||
|
||||
|
||||
@app.get("/")
|
||||
def root():
|
||||
return {"message": "Hello World"}
|
||||
@@ -1,5 +1,5 @@
|
||||
from typing import Set, Tuple
|
||||
|
||||
|
||||
def process_items(items_t: Tuple[int], items_s: Set[bytes]):
|
||||
def process_items(items_t: Tuple[int, int, str], items_s: Set[bytes]):
|
||||
return items_t, items_s
|
||||
|
||||
10
docs_src/settings/app01/config.py
Normal file
10
docs_src/settings/app01/config.py
Normal file
@@ -0,0 +1,10 @@
|
||||
from pydantic import BaseSettings
|
||||
|
||||
|
||||
class Settings(BaseSettings):
|
||||
app_name: str = "Awesome API"
|
||||
admin_email: str
|
||||
items_per_user: int = 50
|
||||
|
||||
|
||||
settings = Settings()
|
||||
14
docs_src/settings/app01/main.py
Normal file
14
docs_src/settings/app01/main.py
Normal file
@@ -0,0 +1,14 @@
|
||||
from fastapi import FastAPI
|
||||
|
||||
from . import config
|
||||
|
||||
app = FastAPI()
|
||||
|
||||
|
||||
@app.get("/info")
|
||||
async def info():
|
||||
return {
|
||||
"app_name": config.settings.app_name,
|
||||
"admin_email": config.settings.admin_email,
|
||||
"items_per_user": config.settings.items_per_user,
|
||||
}
|
||||
0
docs_src/settings/app02/__init__.py
Normal file
0
docs_src/settings/app02/__init__.py
Normal file
7
docs_src/settings/app02/config.py
Normal file
7
docs_src/settings/app02/config.py
Normal file
@@ -0,0 +1,7 @@
|
||||
from pydantic import BaseSettings
|
||||
|
||||
|
||||
class Settings(BaseSettings):
|
||||
app_name: str = "Awesome API"
|
||||
admin_email: str
|
||||
items_per_user: int = 50
|
||||
21
docs_src/settings/app02/main.py
Normal file
21
docs_src/settings/app02/main.py
Normal file
@@ -0,0 +1,21 @@
|
||||
from functools import lru_cache
|
||||
|
||||
from fastapi import Depends, FastAPI
|
||||
|
||||
from . import config
|
||||
|
||||
app = FastAPI()
|
||||
|
||||
|
||||
@lru_cache()
|
||||
def get_settings():
|
||||
return config.Settings()
|
||||
|
||||
|
||||
@app.get("/info")
|
||||
async def info(settings: config.Settings = Depends(get_settings)):
|
||||
return {
|
||||
"app_name": settings.app_name,
|
||||
"admin_email": settings.admin_email,
|
||||
"items_per_user": settings.items_per_user,
|
||||
}
|
||||
23
docs_src/settings/app02/test_main.py
Normal file
23
docs_src/settings/app02/test_main.py
Normal file
@@ -0,0 +1,23 @@
|
||||
from fastapi.testclient import TestClient
|
||||
|
||||
from . import config, main
|
||||
|
||||
client = TestClient(main.app)
|
||||
|
||||
|
||||
def get_settings_override():
|
||||
return config.Settings(admin_email="testing_admin@example.com")
|
||||
|
||||
|
||||
main.app.dependency_overrides[main.get_settings] = get_settings_override
|
||||
|
||||
|
||||
def test_app():
|
||||
|
||||
response = client.get("/info")
|
||||
data = response.json()
|
||||
assert data == {
|
||||
"app_name": "Awesome API",
|
||||
"admin_email": "testing_admin@example.com",
|
||||
"items_per_user": 50,
|
||||
}
|
||||
0
docs_src/settings/app03/__init__.py
Normal file
0
docs_src/settings/app03/__init__.py
Normal file
10
docs_src/settings/app03/config.py
Normal file
10
docs_src/settings/app03/config.py
Normal file
@@ -0,0 +1,10 @@
|
||||
from pydantic import BaseSettings
|
||||
|
||||
|
||||
class Settings(BaseSettings):
|
||||
app_name: str = "Awesome API"
|
||||
admin_email: str
|
||||
items_per_user: int = 50
|
||||
|
||||
class Config:
|
||||
env_file = ".env"
|
||||
21
docs_src/settings/app03/main.py
Normal file
21
docs_src/settings/app03/main.py
Normal file
@@ -0,0 +1,21 @@
|
||||
from functools import lru_cache
|
||||
|
||||
from fastapi import Depends, FastAPI
|
||||
|
||||
from . import config
|
||||
|
||||
app = FastAPI()
|
||||
|
||||
|
||||
@lru_cache()
|
||||
def get_settings():
|
||||
return config.Settings()
|
||||
|
||||
|
||||
@app.get("/info")
|
||||
async def info(settings: config.Settings = Depends(get_settings)):
|
||||
return {
|
||||
"app_name": settings.app_name,
|
||||
"admin_email": settings.admin_email,
|
||||
"items_per_user": settings.items_per_user,
|
||||
}
|
||||
21
docs_src/settings/tutorial001.py
Normal file
21
docs_src/settings/tutorial001.py
Normal file
@@ -0,0 +1,21 @@
|
||||
from fastapi import FastAPI
|
||||
from pydantic import BaseSettings
|
||||
|
||||
|
||||
class Settings(BaseSettings):
|
||||
app_name: str = "Awesome API"
|
||||
admin_email: str
|
||||
items_per_user: int = 50
|
||||
|
||||
|
||||
settings = Settings()
|
||||
app = FastAPI()
|
||||
|
||||
|
||||
@app.get("/info")
|
||||
async def info():
|
||||
return {
|
||||
"app_name": settings.app_name,
|
||||
"admin_email": settings.admin_email,
|
||||
"items_per_user": settings.items_per_user,
|
||||
}
|
||||
@@ -2,7 +2,7 @@ from sqlalchemy import create_engine
|
||||
from sqlalchemy.ext.declarative import declarative_base
|
||||
from sqlalchemy.orm import sessionmaker
|
||||
|
||||
SQLALCHEMY_DATABASE_URL = "sqlite:///./test.db"
|
||||
SQLALCHEMY_DATABASE_URL = "sqlite:///./sql_app.db"
|
||||
# SQLALCHEMY_DATABASE_URL = "postgresql://user:password@postgresserver/db"
|
||||
|
||||
engine = create_engine(
|
||||
|
||||
@@ -13,8 +13,8 @@ app = FastAPI()
|
||||
|
||||
# Dependency
|
||||
def get_db():
|
||||
db = SessionLocal()
|
||||
try:
|
||||
db = SessionLocal()
|
||||
yield db
|
||||
finally:
|
||||
db.close()
|
||||
|
||||
0
docs_src/sql_databases/sql_app/tests/__init__.py
Normal file
0
docs_src/sql_databases/sql_app/tests/__init__.py
Normal file
47
docs_src/sql_databases/sql_app/tests/test_sql_app.py
Normal file
47
docs_src/sql_databases/sql_app/tests/test_sql_app.py
Normal file
@@ -0,0 +1,47 @@
|
||||
from fastapi.testclient import TestClient
|
||||
from sqlalchemy import create_engine
|
||||
from sqlalchemy.orm import sessionmaker
|
||||
|
||||
from ..database import Base
|
||||
from ..main import app, get_db
|
||||
|
||||
SQLALCHEMY_DATABASE_URL = "sqlite:///./test.db"
|
||||
|
||||
engine = create_engine(
|
||||
SQLALCHEMY_DATABASE_URL, connect_args={"check_same_thread": False}
|
||||
)
|
||||
TestingSessionLocal = sessionmaker(autocommit=False, autoflush=False, bind=engine)
|
||||
|
||||
|
||||
Base.metadata.create_all(bind=engine)
|
||||
|
||||
|
||||
def override_get_db():
|
||||
try:
|
||||
db = TestingSessionLocal()
|
||||
yield db
|
||||
finally:
|
||||
db.close()
|
||||
|
||||
|
||||
app.dependency_overrides[get_db] = override_get_db
|
||||
|
||||
client = TestClient(app)
|
||||
|
||||
|
||||
def test_create_user():
|
||||
response = client.post(
|
||||
"/users/",
|
||||
json={"email": "deadpool@example.com", "password": "chimichangas4life"},
|
||||
)
|
||||
assert response.status_code == 200, response.text
|
||||
data = response.json()
|
||||
assert data["email"] == "deadpool@example.com"
|
||||
assert "id" in data
|
||||
user_id = data["id"]
|
||||
|
||||
response = client.get(f"/users/{user_id}")
|
||||
assert response.status_code == 200, response.text
|
||||
data = response.json()
|
||||
assert data["email"] == "deadpool@example.com"
|
||||
assert data["id"] == user_id
|
||||
@@ -1,6 +1,6 @@
|
||||
"""FastAPI framework, high performance, easy to learn, fast to code, ready for production"""
|
||||
|
||||
__version__ = "0.53.2"
|
||||
__version__ = "0.55.1"
|
||||
|
||||
from starlette import status
|
||||
|
||||
|
||||
@@ -81,9 +81,6 @@ class FastAPI(Starlette):
|
||||
if self.openapi_url:
|
||||
assert self.title, "A title must be provided for OpenAPI, e.g.: 'My API'"
|
||||
assert self.version, "A version must be provided for OpenAPI, e.g.: '2.1.0'"
|
||||
|
||||
if self.docs_url or self.redoc_url:
|
||||
assert self.openapi_url, "The openapi_url is required for the docs"
|
||||
self.openapi_schema: Optional[Dict[str, Any]] = None
|
||||
self.setup()
|
||||
|
||||
@@ -171,6 +168,8 @@ class FastAPI(Starlette):
|
||||
response_model_by_alias: bool = True,
|
||||
response_model_skip_defaults: bool = None,
|
||||
response_model_exclude_unset: bool = False,
|
||||
response_model_exclude_defaults: bool = False,
|
||||
response_model_exclude_none: bool = False,
|
||||
include_in_schema: bool = True,
|
||||
response_class: Type[Response] = None,
|
||||
name: str = None,
|
||||
@@ -197,6 +196,8 @@ class FastAPI(Starlette):
|
||||
response_model_exclude_unset=bool(
|
||||
response_model_exclude_unset or response_model_skip_defaults
|
||||
),
|
||||
response_model_exclude_defaults=response_model_exclude_defaults,
|
||||
response_model_exclude_none=response_model_exclude_none,
|
||||
include_in_schema=include_in_schema,
|
||||
response_class=response_class or self.default_response_class,
|
||||
name=name,
|
||||
@@ -222,6 +223,8 @@ class FastAPI(Starlette):
|
||||
response_model_by_alias: bool = True,
|
||||
response_model_skip_defaults: bool = None,
|
||||
response_model_exclude_unset: bool = False,
|
||||
response_model_exclude_defaults: bool = False,
|
||||
response_model_exclude_none: bool = False,
|
||||
include_in_schema: bool = True,
|
||||
response_class: Type[Response] = None,
|
||||
name: str = None,
|
||||
@@ -250,6 +253,8 @@ class FastAPI(Starlette):
|
||||
response_model_exclude_unset=bool(
|
||||
response_model_exclude_unset or response_model_skip_defaults
|
||||
),
|
||||
response_model_exclude_defaults=response_model_exclude_defaults,
|
||||
response_model_exclude_none=response_model_exclude_none,
|
||||
include_in_schema=include_in_schema,
|
||||
response_class=response_class or self.default_response_class,
|
||||
name=name,
|
||||
@@ -309,6 +314,8 @@ class FastAPI(Starlette):
|
||||
response_model_by_alias: bool = True,
|
||||
response_model_skip_defaults: bool = None,
|
||||
response_model_exclude_unset: bool = False,
|
||||
response_model_exclude_defaults: bool = False,
|
||||
response_model_exclude_none: bool = False,
|
||||
include_in_schema: bool = True,
|
||||
response_class: Type[Response] = None,
|
||||
name: str = None,
|
||||
@@ -334,6 +341,8 @@ class FastAPI(Starlette):
|
||||
response_model_exclude_unset=bool(
|
||||
response_model_exclude_unset or response_model_skip_defaults
|
||||
),
|
||||
response_model_exclude_defaults=response_model_exclude_defaults,
|
||||
response_model_exclude_none=response_model_exclude_none,
|
||||
include_in_schema=include_in_schema,
|
||||
response_class=response_class or self.default_response_class,
|
||||
name=name,
|
||||
@@ -359,6 +368,8 @@ class FastAPI(Starlette):
|
||||
response_model_by_alias: bool = True,
|
||||
response_model_skip_defaults: bool = None,
|
||||
response_model_exclude_unset: bool = False,
|
||||
response_model_exclude_defaults: bool = False,
|
||||
response_model_exclude_none: bool = False,
|
||||
include_in_schema: bool = True,
|
||||
response_class: Type[Response] = None,
|
||||
name: str = None,
|
||||
@@ -384,6 +395,8 @@ class FastAPI(Starlette):
|
||||
response_model_exclude_unset=bool(
|
||||
response_model_exclude_unset or response_model_skip_defaults
|
||||
),
|
||||
response_model_exclude_defaults=response_model_exclude_defaults,
|
||||
response_model_exclude_none=response_model_exclude_none,
|
||||
include_in_schema=include_in_schema,
|
||||
response_class=response_class or self.default_response_class,
|
||||
name=name,
|
||||
@@ -409,6 +422,8 @@ class FastAPI(Starlette):
|
||||
response_model_by_alias: bool = True,
|
||||
response_model_skip_defaults: bool = None,
|
||||
response_model_exclude_unset: bool = False,
|
||||
response_model_exclude_defaults: bool = False,
|
||||
response_model_exclude_none: bool = False,
|
||||
include_in_schema: bool = True,
|
||||
response_class: Type[Response] = None,
|
||||
name: str = None,
|
||||
@@ -434,6 +449,8 @@ class FastAPI(Starlette):
|
||||
response_model_exclude_unset=bool(
|
||||
response_model_exclude_unset or response_model_skip_defaults
|
||||
),
|
||||
response_model_exclude_defaults=response_model_exclude_defaults,
|
||||
response_model_exclude_none=response_model_exclude_none,
|
||||
include_in_schema=include_in_schema,
|
||||
response_class=response_class or self.default_response_class,
|
||||
name=name,
|
||||
@@ -459,6 +476,8 @@ class FastAPI(Starlette):
|
||||
response_model_by_alias: bool = True,
|
||||
response_model_skip_defaults: bool = None,
|
||||
response_model_exclude_unset: bool = False,
|
||||
response_model_exclude_defaults: bool = False,
|
||||
response_model_exclude_none: bool = False,
|
||||
include_in_schema: bool = True,
|
||||
response_class: Type[Response] = None,
|
||||
name: str = None,
|
||||
@@ -484,6 +503,8 @@ class FastAPI(Starlette):
|
||||
response_model_exclude_unset=bool(
|
||||
response_model_exclude_unset or response_model_skip_defaults
|
||||
),
|
||||
response_model_exclude_defaults=response_model_exclude_defaults,
|
||||
response_model_exclude_none=response_model_exclude_none,
|
||||
include_in_schema=include_in_schema,
|
||||
response_class=response_class or self.default_response_class,
|
||||
name=name,
|
||||
@@ -509,6 +530,8 @@ class FastAPI(Starlette):
|
||||
response_model_by_alias: bool = True,
|
||||
response_model_skip_defaults: bool = None,
|
||||
response_model_exclude_unset: bool = False,
|
||||
response_model_exclude_defaults: bool = False,
|
||||
response_model_exclude_none: bool = False,
|
||||
include_in_schema: bool = True,
|
||||
response_class: Type[Response] = None,
|
||||
name: str = None,
|
||||
@@ -534,6 +557,8 @@ class FastAPI(Starlette):
|
||||
response_model_exclude_unset=bool(
|
||||
response_model_exclude_unset or response_model_skip_defaults
|
||||
),
|
||||
response_model_exclude_defaults=response_model_exclude_defaults,
|
||||
response_model_exclude_none=response_model_exclude_none,
|
||||
include_in_schema=include_in_schema,
|
||||
response_class=response_class or self.default_response_class,
|
||||
name=name,
|
||||
@@ -559,6 +584,8 @@ class FastAPI(Starlette):
|
||||
response_model_by_alias: bool = True,
|
||||
response_model_skip_defaults: bool = None,
|
||||
response_model_exclude_unset: bool = False,
|
||||
response_model_exclude_defaults: bool = False,
|
||||
response_model_exclude_none: bool = False,
|
||||
include_in_schema: bool = True,
|
||||
response_class: Type[Response] = None,
|
||||
name: str = None,
|
||||
@@ -584,6 +611,8 @@ class FastAPI(Starlette):
|
||||
response_model_exclude_unset=bool(
|
||||
response_model_exclude_unset or response_model_skip_defaults
|
||||
),
|
||||
response_model_exclude_defaults=response_model_exclude_defaults,
|
||||
response_model_exclude_none=response_model_exclude_none,
|
||||
include_in_schema=include_in_schema,
|
||||
response_class=response_class or self.default_response_class,
|
||||
name=name,
|
||||
@@ -609,6 +638,8 @@ class FastAPI(Starlette):
|
||||
response_model_by_alias: bool = True,
|
||||
response_model_skip_defaults: bool = None,
|
||||
response_model_exclude_unset: bool = False,
|
||||
response_model_exclude_defaults: bool = False,
|
||||
response_model_exclude_none: bool = False,
|
||||
include_in_schema: bool = True,
|
||||
response_class: Type[Response] = None,
|
||||
name: str = None,
|
||||
@@ -634,6 +665,8 @@ class FastAPI(Starlette):
|
||||
response_model_exclude_unset=bool(
|
||||
response_model_exclude_unset or response_model_skip_defaults
|
||||
),
|
||||
response_model_exclude_defaults=response_model_exclude_defaults,
|
||||
response_model_exclude_none=response_model_exclude_none,
|
||||
include_in_schema=include_in_schema,
|
||||
response_class=response_class or self.default_response_class,
|
||||
name=name,
|
||||
@@ -659,6 +692,8 @@ class FastAPI(Starlette):
|
||||
response_model_by_alias: bool = True,
|
||||
response_model_skip_defaults: bool = None,
|
||||
response_model_exclude_unset: bool = False,
|
||||
response_model_exclude_defaults: bool = False,
|
||||
response_model_exclude_none: bool = False,
|
||||
include_in_schema: bool = True,
|
||||
response_class: Type[Response] = None,
|
||||
name: str = None,
|
||||
@@ -684,6 +719,8 @@ class FastAPI(Starlette):
|
||||
response_model_exclude_unset=bool(
|
||||
response_model_exclude_unset or response_model_skip_defaults
|
||||
),
|
||||
response_model_exclude_defaults=response_model_exclude_defaults,
|
||||
response_model_exclude_none=response_model_exclude_none,
|
||||
include_in_schema=include_in_schema,
|
||||
response_class=response_class or self.default_response_class,
|
||||
name=name,
|
||||
|
||||
@@ -188,6 +188,16 @@ def get_flat_dependant(
|
||||
return flat_dependant
|
||||
|
||||
|
||||
def get_flat_params(dependant: Dependant) -> List[ModelField]:
|
||||
flat_dependant = get_flat_dependant(dependant, skip_repeats=True)
|
||||
return (
|
||||
flat_dependant.path_params
|
||||
+ flat_dependant.query_params
|
||||
+ flat_dependant.header_params
|
||||
+ flat_dependant.cookie_params
|
||||
)
|
||||
|
||||
|
||||
def is_scalar_field(field: ModelField) -> bool:
|
||||
field_info = get_field_info(field)
|
||||
if not (
|
||||
|
||||
@@ -34,7 +34,8 @@ def jsonable_encoder(
|
||||
by_alias: bool = True,
|
||||
skip_defaults: bool = None,
|
||||
exclude_unset: bool = False,
|
||||
include_none: bool = True,
|
||||
exclude_defaults: bool = False,
|
||||
exclude_none: bool = False,
|
||||
custom_encoder: dict = {},
|
||||
sqlalchemy_safe: bool = True,
|
||||
) -> Any:
|
||||
@@ -58,8 +59,12 @@ def jsonable_encoder(
|
||||
exclude=exclude,
|
||||
by_alias=by_alias,
|
||||
exclude_unset=bool(exclude_unset or skip_defaults),
|
||||
exclude_none=exclude_none,
|
||||
exclude_defaults=exclude_defaults,
|
||||
)
|
||||
else: # pragma: nocover
|
||||
if exclude_defaults:
|
||||
raise ValueError("Cannot use exclude_defaults")
|
||||
obj_dict = obj.dict(
|
||||
include=include,
|
||||
exclude=exclude,
|
||||
@@ -68,7 +73,8 @@ def jsonable_encoder(
|
||||
)
|
||||
return jsonable_encoder(
|
||||
obj_dict,
|
||||
include_none=include_none,
|
||||
exclude_none=exclude_none,
|
||||
exclude_defaults=exclude_defaults,
|
||||
custom_encoder=encoder,
|
||||
sqlalchemy_safe=sqlalchemy_safe,
|
||||
)
|
||||
@@ -87,14 +93,14 @@ def jsonable_encoder(
|
||||
or (not isinstance(key, str))
|
||||
or (not key.startswith("_sa"))
|
||||
)
|
||||
and (value is not None or include_none)
|
||||
and (value is not None or not exclude_none)
|
||||
and ((include and key in include) or key not in exclude)
|
||||
):
|
||||
encoded_key = jsonable_encoder(
|
||||
key,
|
||||
by_alias=by_alias,
|
||||
exclude_unset=exclude_unset,
|
||||
include_none=include_none,
|
||||
exclude_none=exclude_none,
|
||||
custom_encoder=custom_encoder,
|
||||
sqlalchemy_safe=sqlalchemy_safe,
|
||||
)
|
||||
@@ -102,7 +108,7 @@ def jsonable_encoder(
|
||||
value,
|
||||
by_alias=by_alias,
|
||||
exclude_unset=exclude_unset,
|
||||
include_none=include_none,
|
||||
exclude_none=exclude_none,
|
||||
custom_encoder=custom_encoder,
|
||||
sqlalchemy_safe=sqlalchemy_safe,
|
||||
)
|
||||
@@ -118,7 +124,8 @@ def jsonable_encoder(
|
||||
exclude=exclude,
|
||||
by_alias=by_alias,
|
||||
exclude_unset=exclude_unset,
|
||||
include_none=include_none,
|
||||
exclude_defaults=exclude_defaults,
|
||||
exclude_none=exclude_none,
|
||||
custom_encoder=custom_encoder,
|
||||
sqlalchemy_safe=sqlalchemy_safe,
|
||||
)
|
||||
@@ -153,7 +160,8 @@ def jsonable_encoder(
|
||||
data,
|
||||
by_alias=by_alias,
|
||||
exclude_unset=exclude_unset,
|
||||
include_none=include_none,
|
||||
exclude_defaults=exclude_defaults,
|
||||
exclude_none=exclude_none,
|
||||
custom_encoder=custom_encoder,
|
||||
sqlalchemy_safe=sqlalchemy_safe,
|
||||
)
|
||||
|
||||
@@ -1,9 +1,10 @@
|
||||
import http.client
|
||||
from typing import Any, Dict, List, Optional, Sequence, Tuple, Type, cast
|
||||
from enum import Enum
|
||||
from typing import Any, Dict, List, Optional, Sequence, Set, Tuple, Type, Union, cast
|
||||
|
||||
from fastapi import routing
|
||||
from fastapi.dependencies.models import Dependant
|
||||
from fastapi.dependencies.utils import get_flat_dependant
|
||||
from fastapi.dependencies.utils import get_flat_dependant, get_flat_params
|
||||
from fastapi.encoders import jsonable_encoder
|
||||
from fastapi.openapi.constants import (
|
||||
METHODS_WITH_BODY,
|
||||
@@ -15,11 +16,14 @@ from fastapi.params import Body, Param
|
||||
from fastapi.utils import (
|
||||
generate_operation_id_for_path,
|
||||
get_field_info,
|
||||
get_flat_models_from_routes,
|
||||
get_model_definitions,
|
||||
)
|
||||
from pydantic import BaseModel
|
||||
from pydantic.schema import field_schema, get_model_name_map
|
||||
from pydantic.schema import (
|
||||
field_schema,
|
||||
get_flat_models_from_fields,
|
||||
get_model_name_map,
|
||||
)
|
||||
from pydantic.utils import lenient_issubclass
|
||||
from starlette.responses import JSONResponse
|
||||
from starlette.routing import BaseRoute
|
||||
@@ -64,16 +68,6 @@ status_code_ranges: Dict[str, str] = {
|
||||
}
|
||||
|
||||
|
||||
def get_openapi_params(dependant: Dependant) -> List[ModelField]:
|
||||
flat_dependant = get_flat_dependant(dependant, skip_repeats=True)
|
||||
return (
|
||||
flat_dependant.path_params
|
||||
+ flat_dependant.query_params
|
||||
+ flat_dependant.header_params
|
||||
+ flat_dependant.cookie_params
|
||||
)
|
||||
|
||||
|
||||
def get_openapi_security_definitions(flat_dependant: Dependant) -> Tuple[Dict, List]:
|
||||
security_definitions = {}
|
||||
operation_security = []
|
||||
@@ -81,7 +75,7 @@ def get_openapi_security_definitions(flat_dependant: Dependant) -> Tuple[Dict, L
|
||||
security_definition = jsonable_encoder(
|
||||
security_requirement.security_scheme.model,
|
||||
by_alias=True,
|
||||
include_none=False,
|
||||
exclude_none=True,
|
||||
)
|
||||
security_name = security_requirement.security_scheme.scheme_name
|
||||
security_definitions[security_name] = security_definition
|
||||
@@ -90,17 +84,22 @@ def get_openapi_security_definitions(flat_dependant: Dependant) -> Tuple[Dict, L
|
||||
|
||||
|
||||
def get_openapi_operation_parameters(
|
||||
*,
|
||||
all_route_params: Sequence[ModelField],
|
||||
model_name_map: Dict[Union[Type[BaseModel], Type[Enum]], str]
|
||||
) -> List[Dict[str, Any]]:
|
||||
parameters = []
|
||||
for param in all_route_params:
|
||||
field_info = get_field_info(param)
|
||||
field_info = cast(Param, field_info)
|
||||
# ignore mypy error until enum schemas are released
|
||||
parameter = {
|
||||
"name": param.alias,
|
||||
"in": field_info.in_.value,
|
||||
"required": param.required,
|
||||
"schema": field_schema(param, model_name_map={})[0],
|
||||
"schema": field_schema(
|
||||
param, model_name_map=model_name_map, ref_prefix=REF_PREFIX # type: ignore
|
||||
)[0],
|
||||
}
|
||||
if field_info.description:
|
||||
parameter["description"] = field_info.description
|
||||
@@ -111,13 +110,16 @@ def get_openapi_operation_parameters(
|
||||
|
||||
|
||||
def get_openapi_operation_request_body(
|
||||
*, body_field: Optional[ModelField], model_name_map: Dict[Type[BaseModel], str]
|
||||
*,
|
||||
body_field: Optional[ModelField],
|
||||
model_name_map: Dict[Union[Type[BaseModel], Type[Enum]], str]
|
||||
) -> Optional[Dict]:
|
||||
if not body_field:
|
||||
return None
|
||||
assert isinstance(body_field, ModelField)
|
||||
# ignore mypy error until enum schemas are released
|
||||
body_schema, _, _ = field_schema(
|
||||
body_field, model_name_map=model_name_map, ref_prefix=REF_PREFIX
|
||||
body_field, model_name_map=model_name_map, ref_prefix=REF_PREFIX # type: ignore
|
||||
)
|
||||
field_info = cast(Body, get_field_info(body_field))
|
||||
request_media_type = field_info.media_type
|
||||
@@ -176,8 +178,10 @@ def get_openapi_path(
|
||||
operation.setdefault("security", []).extend(operation_security)
|
||||
if security_definitions:
|
||||
security_schemes.update(security_definitions)
|
||||
all_route_params = get_openapi_params(route.dependant)
|
||||
operation_parameters = get_openapi_operation_parameters(all_route_params)
|
||||
all_route_params = get_flat_params(route.dependant)
|
||||
operation_parameters = get_openapi_operation_parameters(
|
||||
all_route_params=all_route_params, model_name_map=model_name_map
|
||||
)
|
||||
parameters.extend(operation_parameters)
|
||||
if parameters:
|
||||
operation["parameters"] = list(
|
||||
@@ -270,6 +274,38 @@ def get_openapi_path(
|
||||
return path, security_schemes, definitions
|
||||
|
||||
|
||||
def get_flat_models_from_routes(
|
||||
routes: Sequence[BaseRoute],
|
||||
) -> Set[Union[Type[BaseModel], Type[Enum]]]:
|
||||
body_fields_from_routes: List[ModelField] = []
|
||||
responses_from_routes: List[ModelField] = []
|
||||
request_fields_from_routes: List[ModelField] = []
|
||||
callback_flat_models: Set[Union[Type[BaseModel], Type[Enum]]] = set()
|
||||
for route in routes:
|
||||
if getattr(route, "include_in_schema", None) and isinstance(
|
||||
route, routing.APIRoute
|
||||
):
|
||||
if route.body_field:
|
||||
assert isinstance(
|
||||
route.body_field, ModelField
|
||||
), "A request body must be a Pydantic Field"
|
||||
body_fields_from_routes.append(route.body_field)
|
||||
if route.response_field:
|
||||
responses_from_routes.append(route.response_field)
|
||||
if route.response_fields:
|
||||
responses_from_routes.extend(route.response_fields.values())
|
||||
if route.callbacks:
|
||||
callback_flat_models |= get_flat_models_from_routes(route.callbacks)
|
||||
params = get_flat_params(route.dependant)
|
||||
request_fields_from_routes.extend(params)
|
||||
|
||||
flat_models = callback_flat_models | get_flat_models_from_fields(
|
||||
body_fields_from_routes + responses_from_routes + request_fields_from_routes,
|
||||
known_models=set(),
|
||||
)
|
||||
return flat_models
|
||||
|
||||
|
||||
def get_openapi(
|
||||
*,
|
||||
title: str,
|
||||
@@ -286,9 +322,11 @@ def get_openapi(
|
||||
components: Dict[str, Dict] = {}
|
||||
paths: Dict[str, Dict] = {}
|
||||
flat_models = get_flat_models_from_routes(routes)
|
||||
model_name_map = get_model_name_map(flat_models)
|
||||
# ignore mypy error until enum schemas are released
|
||||
model_name_map = get_model_name_map(flat_models) # type: ignore
|
||||
# ignore mypy error until enum schemas are released
|
||||
definitions = get_model_definitions(
|
||||
flat_models=flat_models, model_name_map=model_name_map
|
||||
flat_models=flat_models, model_name_map=model_name_map # type: ignore
|
||||
)
|
||||
for route in routes:
|
||||
if isinstance(route, routing.APIRoute):
|
||||
@@ -310,4 +348,4 @@ def get_openapi(
|
||||
if components:
|
||||
output["components"] = components
|
||||
output["paths"] = paths
|
||||
return jsonable_encoder(OpenAPI(**output), by_alias=True, include_none=False)
|
||||
return jsonable_encoder(OpenAPI(**output), by_alias=True, exclude_none=True)
|
||||
|
||||
@@ -49,22 +49,43 @@ except ImportError: # pragma: nocover
|
||||
|
||||
|
||||
def _prepare_response_content(
|
||||
res: Any, *, by_alias: bool = True, exclude_unset: bool
|
||||
res: Any,
|
||||
*,
|
||||
by_alias: bool = True,
|
||||
exclude_unset: bool,
|
||||
exclude_defaults: bool = False,
|
||||
exclude_none: bool = False,
|
||||
) -> Any:
|
||||
if isinstance(res, BaseModel):
|
||||
if PYDANTIC_1:
|
||||
return res.dict(by_alias=by_alias, exclude_unset=exclude_unset)
|
||||
return res.dict(
|
||||
by_alias=by_alias,
|
||||
exclude_unset=exclude_unset,
|
||||
exclude_defaults=exclude_defaults,
|
||||
exclude_none=exclude_none,
|
||||
)
|
||||
else:
|
||||
return res.dict(
|
||||
by_alias=by_alias, skip_defaults=exclude_unset
|
||||
by_alias=by_alias, skip_defaults=exclude_unset,
|
||||
) # pragma: nocover
|
||||
elif isinstance(res, list):
|
||||
return [
|
||||
_prepare_response_content(item, exclude_unset=exclude_unset) for item in res
|
||||
_prepare_response_content(
|
||||
item,
|
||||
exclude_unset=exclude_unset,
|
||||
exclude_defaults=exclude_defaults,
|
||||
exclude_none=exclude_none,
|
||||
)
|
||||
for item in res
|
||||
]
|
||||
elif isinstance(res, dict):
|
||||
return {
|
||||
k: _prepare_response_content(v, exclude_unset=exclude_unset)
|
||||
k: _prepare_response_content(
|
||||
v,
|
||||
exclude_unset=exclude_unset,
|
||||
exclude_defaults=exclude_defaults,
|
||||
exclude_none=exclude_none,
|
||||
)
|
||||
for k, v in res.items()
|
||||
}
|
||||
return res
|
||||
@@ -78,12 +99,18 @@ async def serialize_response(
|
||||
exclude: Union[SetIntStr, DictIntStrAny] = set(),
|
||||
by_alias: bool = True,
|
||||
exclude_unset: bool = False,
|
||||
exclude_defaults: bool = False,
|
||||
exclude_none: bool = False,
|
||||
is_coroutine: bool = True,
|
||||
) -> Any:
|
||||
if field:
|
||||
errors = []
|
||||
response_content = _prepare_response_content(
|
||||
response_content, by_alias=by_alias, exclude_unset=exclude_unset
|
||||
response_content,
|
||||
by_alias=by_alias,
|
||||
exclude_unset=exclude_unset,
|
||||
exclude_defaults=exclude_defaults,
|
||||
exclude_none=exclude_none,
|
||||
)
|
||||
if is_coroutine:
|
||||
value, errors_ = field.validate(response_content, {}, loc=("response",))
|
||||
@@ -103,6 +130,8 @@ async def serialize_response(
|
||||
exclude=exclude,
|
||||
by_alias=by_alias,
|
||||
exclude_unset=exclude_unset,
|
||||
exclude_defaults=exclude_defaults,
|
||||
exclude_none=exclude_none,
|
||||
)
|
||||
else:
|
||||
return jsonable_encoder(response_content)
|
||||
@@ -131,6 +160,8 @@ def get_request_handler(
|
||||
response_model_exclude: Union[SetIntStr, DictIntStrAny] = set(),
|
||||
response_model_by_alias: bool = True,
|
||||
response_model_exclude_unset: bool = False,
|
||||
response_model_exclude_defaults: bool = False,
|
||||
response_model_exclude_none: bool = False,
|
||||
dependency_overrides_provider: Any = None,
|
||||
) -> Callable:
|
||||
assert dependant.call is not None, "dependant.call must be a function"
|
||||
@@ -177,6 +208,8 @@ def get_request_handler(
|
||||
exclude=response_model_exclude,
|
||||
by_alias=response_model_by_alias,
|
||||
exclude_unset=response_model_exclude_unset,
|
||||
exclude_defaults=response_model_exclude_defaults,
|
||||
exclude_none=response_model_exclude_none,
|
||||
is_coroutine=is_coroutine,
|
||||
)
|
||||
response = response_class(
|
||||
@@ -255,6 +288,8 @@ class APIRoute(routing.Route):
|
||||
response_model_exclude: Union[SetIntStr, DictIntStrAny] = set(),
|
||||
response_model_by_alias: bool = True,
|
||||
response_model_exclude_unset: bool = False,
|
||||
response_model_exclude_defaults: bool = False,
|
||||
response_model_exclude_none: bool = False,
|
||||
include_in_schema: bool = True,
|
||||
response_class: Optional[Type[Response]] = None,
|
||||
dependency_overrides_provider: Any = None,
|
||||
@@ -326,6 +361,8 @@ class APIRoute(routing.Route):
|
||||
self.response_model_exclude = response_model_exclude
|
||||
self.response_model_by_alias = response_model_by_alias
|
||||
self.response_model_exclude_unset = response_model_exclude_unset
|
||||
self.response_model_exclude_defaults = response_model_exclude_defaults
|
||||
self.response_model_exclude_none = response_model_exclude_none
|
||||
self.include_in_schema = include_in_schema
|
||||
self.response_class = response_class
|
||||
|
||||
@@ -352,6 +389,8 @@ class APIRoute(routing.Route):
|
||||
response_model_exclude=self.response_model_exclude,
|
||||
response_model_by_alias=self.response_model_by_alias,
|
||||
response_model_exclude_unset=self.response_model_exclude_unset,
|
||||
response_model_exclude_defaults=self.response_model_exclude_defaults,
|
||||
response_model_exclude_none=self.response_model_exclude_none,
|
||||
dependency_overrides_provider=self.dependency_overrides_provider,
|
||||
)
|
||||
|
||||
@@ -400,6 +439,8 @@ class APIRouter(routing.Router):
|
||||
response_model_by_alias: bool = True,
|
||||
response_model_skip_defaults: bool = None,
|
||||
response_model_exclude_unset: bool = False,
|
||||
response_model_exclude_defaults: bool = False,
|
||||
response_model_exclude_none: bool = False,
|
||||
include_in_schema: bool = True,
|
||||
response_class: Type[Response] = None,
|
||||
name: str = None,
|
||||
@@ -429,6 +470,8 @@ class APIRouter(routing.Router):
|
||||
response_model_exclude_unset=bool(
|
||||
response_model_exclude_unset or response_model_skip_defaults
|
||||
),
|
||||
response_model_exclude_defaults=response_model_exclude_defaults,
|
||||
response_model_exclude_none=response_model_exclude_none,
|
||||
include_in_schema=include_in_schema,
|
||||
response_class=response_class or self.default_response_class,
|
||||
name=name,
|
||||
@@ -457,6 +500,8 @@ class APIRouter(routing.Router):
|
||||
response_model_by_alias: bool = True,
|
||||
response_model_skip_defaults: bool = None,
|
||||
response_model_exclude_unset: bool = False,
|
||||
response_model_exclude_defaults: bool = False,
|
||||
response_model_exclude_none: bool = False,
|
||||
include_in_schema: bool = True,
|
||||
response_class: Type[Response] = None,
|
||||
name: str = None,
|
||||
@@ -486,6 +531,8 @@ class APIRouter(routing.Router):
|
||||
response_model_exclude_unset=bool(
|
||||
response_model_exclude_unset or response_model_skip_defaults
|
||||
),
|
||||
response_model_exclude_defaults=response_model_exclude_defaults,
|
||||
response_model_exclude_none=response_model_exclude_none,
|
||||
include_in_schema=include_in_schema,
|
||||
response_class=response_class or self.default_response_class,
|
||||
name=name,
|
||||
@@ -560,6 +607,8 @@ class APIRouter(routing.Router):
|
||||
response_model_exclude=route.response_model_exclude,
|
||||
response_model_by_alias=route.response_model_by_alias,
|
||||
response_model_exclude_unset=route.response_model_exclude_unset,
|
||||
response_model_exclude_defaults=route.response_model_exclude_defaults,
|
||||
response_model_exclude_none=route.response_model_exclude_none,
|
||||
include_in_schema=route.include_in_schema,
|
||||
response_class=route.response_class or default_response_class,
|
||||
name=route.name,
|
||||
@@ -606,6 +655,8 @@ class APIRouter(routing.Router):
|
||||
response_model_by_alias: bool = True,
|
||||
response_model_skip_defaults: bool = None,
|
||||
response_model_exclude_unset: bool = False,
|
||||
response_model_exclude_defaults: bool = False,
|
||||
response_model_exclude_none: bool = False,
|
||||
include_in_schema: bool = True,
|
||||
response_class: Type[Response] = None,
|
||||
name: str = None,
|
||||
@@ -632,6 +683,8 @@ class APIRouter(routing.Router):
|
||||
response_model_exclude_unset=bool(
|
||||
response_model_exclude_unset or response_model_skip_defaults
|
||||
),
|
||||
response_model_exclude_defaults=response_model_exclude_defaults,
|
||||
response_model_exclude_none=response_model_exclude_none,
|
||||
include_in_schema=include_in_schema,
|
||||
response_class=response_class or self.default_response_class,
|
||||
name=name,
|
||||
@@ -657,6 +710,8 @@ class APIRouter(routing.Router):
|
||||
response_model_by_alias: bool = True,
|
||||
response_model_skip_defaults: bool = None,
|
||||
response_model_exclude_unset: bool = False,
|
||||
response_model_exclude_defaults: bool = False,
|
||||
response_model_exclude_none: bool = False,
|
||||
include_in_schema: bool = True,
|
||||
response_class: Type[Response] = None,
|
||||
name: str = None,
|
||||
@@ -683,6 +738,8 @@ class APIRouter(routing.Router):
|
||||
response_model_exclude_unset=bool(
|
||||
response_model_exclude_unset or response_model_skip_defaults
|
||||
),
|
||||
response_model_exclude_defaults=response_model_exclude_defaults,
|
||||
response_model_exclude_none=response_model_exclude_none,
|
||||
include_in_schema=include_in_schema,
|
||||
response_class=response_class or self.default_response_class,
|
||||
name=name,
|
||||
@@ -708,6 +765,8 @@ class APIRouter(routing.Router):
|
||||
response_model_by_alias: bool = True,
|
||||
response_model_skip_defaults: bool = None,
|
||||
response_model_exclude_unset: bool = False,
|
||||
response_model_exclude_defaults: bool = False,
|
||||
response_model_exclude_none: bool = False,
|
||||
include_in_schema: bool = True,
|
||||
response_class: Type[Response] = None,
|
||||
name: str = None,
|
||||
@@ -734,6 +793,8 @@ class APIRouter(routing.Router):
|
||||
response_model_exclude_unset=bool(
|
||||
response_model_exclude_unset or response_model_skip_defaults
|
||||
),
|
||||
response_model_exclude_defaults=response_model_exclude_defaults,
|
||||
response_model_exclude_none=response_model_exclude_none,
|
||||
include_in_schema=include_in_schema,
|
||||
response_class=response_class or self.default_response_class,
|
||||
name=name,
|
||||
@@ -759,6 +820,8 @@ class APIRouter(routing.Router):
|
||||
response_model_by_alias: bool = True,
|
||||
response_model_skip_defaults: bool = None,
|
||||
response_model_exclude_unset: bool = False,
|
||||
response_model_exclude_defaults: bool = False,
|
||||
response_model_exclude_none: bool = False,
|
||||
include_in_schema: bool = True,
|
||||
response_class: Type[Response] = None,
|
||||
name: str = None,
|
||||
@@ -785,6 +848,8 @@ class APIRouter(routing.Router):
|
||||
response_model_exclude_unset=bool(
|
||||
response_model_exclude_unset or response_model_skip_defaults
|
||||
),
|
||||
response_model_exclude_defaults=response_model_exclude_defaults,
|
||||
response_model_exclude_none=response_model_exclude_none,
|
||||
include_in_schema=include_in_schema,
|
||||
response_class=response_class or self.default_response_class,
|
||||
name=name,
|
||||
@@ -810,6 +875,8 @@ class APIRouter(routing.Router):
|
||||
response_model_by_alias: bool = True,
|
||||
response_model_skip_defaults: bool = None,
|
||||
response_model_exclude_unset: bool = False,
|
||||
response_model_exclude_defaults: bool = False,
|
||||
response_model_exclude_none: bool = False,
|
||||
include_in_schema: bool = True,
|
||||
response_class: Type[Response] = None,
|
||||
name: str = None,
|
||||
@@ -836,6 +903,8 @@ class APIRouter(routing.Router):
|
||||
response_model_exclude_unset=bool(
|
||||
response_model_exclude_unset or response_model_skip_defaults
|
||||
),
|
||||
response_model_exclude_defaults=response_model_exclude_defaults,
|
||||
response_model_exclude_none=response_model_exclude_none,
|
||||
include_in_schema=include_in_schema,
|
||||
response_class=response_class or self.default_response_class,
|
||||
name=name,
|
||||
@@ -861,6 +930,8 @@ class APIRouter(routing.Router):
|
||||
response_model_by_alias: bool = True,
|
||||
response_model_skip_defaults: bool = None,
|
||||
response_model_exclude_unset: bool = False,
|
||||
response_model_exclude_defaults: bool = False,
|
||||
response_model_exclude_none: bool = False,
|
||||
include_in_schema: bool = True,
|
||||
response_class: Type[Response] = None,
|
||||
name: str = None,
|
||||
@@ -887,6 +958,8 @@ class APIRouter(routing.Router):
|
||||
response_model_exclude_unset=bool(
|
||||
response_model_exclude_unset or response_model_skip_defaults
|
||||
),
|
||||
response_model_exclude_defaults=response_model_exclude_defaults,
|
||||
response_model_exclude_none=response_model_exclude_none,
|
||||
include_in_schema=include_in_schema,
|
||||
response_class=response_class or self.default_response_class,
|
||||
name=name,
|
||||
@@ -912,6 +985,8 @@ class APIRouter(routing.Router):
|
||||
response_model_by_alias: bool = True,
|
||||
response_model_skip_defaults: bool = None,
|
||||
response_model_exclude_unset: bool = False,
|
||||
response_model_exclude_defaults: bool = False,
|
||||
response_model_exclude_none: bool = False,
|
||||
include_in_schema: bool = True,
|
||||
response_class: Type[Response] = None,
|
||||
name: str = None,
|
||||
@@ -938,6 +1013,8 @@ class APIRouter(routing.Router):
|
||||
response_model_exclude_unset=bool(
|
||||
response_model_exclude_unset or response_model_skip_defaults
|
||||
),
|
||||
response_model_exclude_defaults=response_model_exclude_defaults,
|
||||
response_model_exclude_none=response_model_exclude_none,
|
||||
include_in_schema=include_in_schema,
|
||||
response_class=response_class or self.default_response_class,
|
||||
name=name,
|
||||
@@ -963,6 +1040,8 @@ class APIRouter(routing.Router):
|
||||
response_model_by_alias: bool = True,
|
||||
response_model_skip_defaults: bool = None,
|
||||
response_model_exclude_unset: bool = False,
|
||||
response_model_exclude_defaults: bool = False,
|
||||
response_model_exclude_none: bool = False,
|
||||
include_in_schema: bool = True,
|
||||
response_class: Type[Response] = None,
|
||||
name: str = None,
|
||||
@@ -989,6 +1068,8 @@ class APIRouter(routing.Router):
|
||||
response_model_exclude_unset=bool(
|
||||
response_model_exclude_unset or response_model_skip_defaults
|
||||
),
|
||||
response_model_exclude_defaults=response_model_exclude_defaults,
|
||||
response_model_exclude_none=response_model_exclude_none,
|
||||
include_in_schema=include_in_schema,
|
||||
response_class=response_class or self.default_response_class,
|
||||
name=name,
|
||||
|
||||
@@ -1,17 +1,16 @@
|
||||
import functools
|
||||
import re
|
||||
from dataclasses import is_dataclass
|
||||
from typing import Any, Dict, List, Optional, Sequence, Set, Type, Union, cast
|
||||
from enum import Enum
|
||||
from typing import Any, Dict, Optional, Set, Type, Union, cast
|
||||
|
||||
import fastapi
|
||||
from fastapi import routing
|
||||
from fastapi.logger import logger
|
||||
from fastapi.openapi.constants import REF_PREFIX
|
||||
from pydantic import BaseConfig, BaseModel, create_model
|
||||
from pydantic.class_validators import Validator
|
||||
from pydantic.schema import get_flat_models_from_fields, model_process_schema
|
||||
from pydantic.schema import model_process_schema
|
||||
from pydantic.utils import lenient_issubclass
|
||||
from starlette.routing import BaseRoute
|
||||
|
||||
try:
|
||||
from pydantic.fields import FieldInfo, ModelField, UndefinedType
|
||||
@@ -50,38 +49,16 @@ def warning_response_model_skip_defaults_deprecated() -> None:
|
||||
)
|
||||
|
||||
|
||||
def get_flat_models_from_routes(routes: Sequence[BaseRoute]) -> Set[Type[BaseModel]]:
|
||||
body_fields_from_routes: List[ModelField] = []
|
||||
responses_from_routes: List[ModelField] = []
|
||||
callback_flat_models: Set[Type[BaseModel]] = set()
|
||||
for route in routes:
|
||||
if getattr(route, "include_in_schema", None) and isinstance(
|
||||
route, routing.APIRoute
|
||||
):
|
||||
if route.body_field:
|
||||
assert isinstance(
|
||||
route.body_field, ModelField
|
||||
), "A request body must be a Pydantic Field"
|
||||
body_fields_from_routes.append(route.body_field)
|
||||
if route.response_field:
|
||||
responses_from_routes.append(route.response_field)
|
||||
if route.response_fields:
|
||||
responses_from_routes.extend(route.response_fields.values())
|
||||
if route.callbacks:
|
||||
callback_flat_models |= get_flat_models_from_routes(route.callbacks)
|
||||
flat_models = callback_flat_models | get_flat_models_from_fields(
|
||||
body_fields_from_routes + responses_from_routes, known_models=set()
|
||||
)
|
||||
return flat_models
|
||||
|
||||
|
||||
def get_model_definitions(
|
||||
*, flat_models: Set[Type[BaseModel]], model_name_map: Dict[Type[BaseModel], str]
|
||||
*,
|
||||
flat_models: Set[Union[Type[BaseModel], Type[Enum]]],
|
||||
model_name_map: Dict[Union[Type[BaseModel], Type[Enum]], str],
|
||||
) -> Dict[str, Any]:
|
||||
definitions: Dict[str, Dict] = {}
|
||||
for model in flat_models:
|
||||
# ignore mypy error until enum schemas are released
|
||||
m_schema, m_definitions, m_nested_models = model_process_schema(
|
||||
model, model_name_map=model_name_map, ref_prefix=REF_PREFIX
|
||||
model, model_name_map=model_name_map, ref_prefix=REF_PREFIX # type: ignore
|
||||
)
|
||||
definitions.update(m_definitions)
|
||||
model_name = model_name_map[model]
|
||||
|
||||
@@ -20,6 +20,12 @@ missing_translation_snippet = """
|
||||
"""
|
||||
|
||||
docs_path = Path("docs")
|
||||
en_docs_path = Path("docs/en")
|
||||
en_config_path: Path = en_docs_path / mkdocs_name
|
||||
|
||||
|
||||
def get_en_config() -> dict:
|
||||
return mkdocs.utils.yaml_load(en_config_path.read_text(encoding="utf-8"))
|
||||
|
||||
|
||||
def get_lang_paths():
|
||||
@@ -43,39 +49,15 @@ def complete_existing_lang(incomplete: str):
|
||||
yield lang_path.name
|
||||
|
||||
|
||||
@app.command()
|
||||
def new_lang(lang: str = typer.Argument(..., callback=lang_callback)):
|
||||
"""
|
||||
Generate a new docs translation directory for the language LANG.
|
||||
|
||||
LANG should be a 2-letter language code, like: en, es, de, pt, etc.
|
||||
"""
|
||||
new_path: Path = Path("docs") / lang
|
||||
if new_path.exists():
|
||||
typer.echo(f"The language was already created: {lang}")
|
||||
raise typer.Abort()
|
||||
new_path.mkdir()
|
||||
en_docs_path = Path("docs/en")
|
||||
en_config_path: Path = en_docs_path / mkdocs_name
|
||||
en_config: dict = mkdocs.utils.yaml_load(en_config_path.read_text(encoding="utf-8"))
|
||||
def get_base_lang_config(lang: str):
|
||||
en_config = get_en_config()
|
||||
fastapi_url_base = "https://fastapi.tiangolo.com/"
|
||||
new_config = {}
|
||||
new_config["site_name"] = en_config["site_name"]
|
||||
new_config["site_description"] = en_config["site_description"]
|
||||
new_config = en_config.copy()
|
||||
new_config["site_url"] = en_config["site_url"] + f"{lang}/"
|
||||
new_config["theme"] = en_config["theme"]
|
||||
new_config["theme"]["logo"] = fastapi_url_base + en_config["theme"]["logo"]
|
||||
new_config["theme"]["favicon"] = fastapi_url_base + en_config["theme"]["favicon"]
|
||||
new_config["theme"]["language"] = lang
|
||||
new_config["repo_name"] = en_config["repo_name"]
|
||||
new_config["repo_url"] = en_config["repo_url"]
|
||||
new_config["edit_uri"] = en_config["edit_uri"]
|
||||
new_config["google_analytics"] = en_config["google_analytics"]
|
||||
new_config["nav"] = en_config["nav"][:2]
|
||||
|
||||
new_config["markdown_extensions"] = en_config["markdown_extensions"]
|
||||
new_config["extra"] = en_config["extra"]
|
||||
|
||||
extra_css = []
|
||||
css: str
|
||||
for css in en_config["extra_css"]:
|
||||
@@ -93,9 +75,26 @@ def new_lang(lang: str = typer.Argument(..., callback=lang_callback)):
|
||||
else:
|
||||
extra_js.append(fastapi_url_base + js)
|
||||
new_config["extra_javascript"] = extra_js
|
||||
return new_config
|
||||
|
||||
|
||||
@app.command()
|
||||
def new_lang(lang: str = typer.Argument(..., callback=lang_callback)):
|
||||
"""
|
||||
Generate a new docs translation directory for the language LANG.
|
||||
|
||||
LANG should be a 2-letter language code, like: en, es, de, pt, etc.
|
||||
"""
|
||||
new_path: Path = Path("docs") / lang
|
||||
if new_path.exists():
|
||||
typer.echo(f"The language was already created: {lang}")
|
||||
raise typer.Abort()
|
||||
new_path.mkdir()
|
||||
new_config = get_base_lang_config(lang)
|
||||
new_config_path: Path = Path(new_path) / mkdocs_name
|
||||
new_config_path.write_text(
|
||||
yaml.dump(new_config, sort_keys=False, width=200), encoding="utf-8"
|
||||
yaml.dump(new_config, sort_keys=False, width=200, allow_unicode=True),
|
||||
encoding="utf-8",
|
||||
)
|
||||
new_config_docs_path: Path = new_path / "docs"
|
||||
new_config_docs_path.mkdir()
|
||||
@@ -179,7 +178,8 @@ def build_lang(
|
||||
lang_config["nav"] = export_lang_nav
|
||||
build_lang_config_path: Path = build_lang_path / mkdocs_name
|
||||
build_lang_config_path.write_text(
|
||||
yaml.dump(lang_config, sort_keys=False, width=200), encoding="utf-8"
|
||||
yaml.dump(lang_config, sort_keys=False, width=200, allow_unicode=True),
|
||||
encoding="utf-8",
|
||||
)
|
||||
current_dir = os.getcwd()
|
||||
os.chdir(build_lang_path)
|
||||
@@ -280,7 +280,15 @@ def live(
|
||||
def update_config(lang: str):
|
||||
lang_path: Path = docs_path / lang
|
||||
config_path = lang_path / mkdocs_name
|
||||
config: dict = mkdocs.utils.yaml_load(config_path.read_text(encoding="utf-8"))
|
||||
current_config: dict = mkdocs.utils.yaml_load(
|
||||
config_path.read_text(encoding="utf-8")
|
||||
)
|
||||
if lang == "en":
|
||||
config = get_en_config()
|
||||
else:
|
||||
config = get_base_lang_config(lang)
|
||||
config["nav"] = current_config["nav"]
|
||||
config["theme"]["language"] = current_config["theme"]["language"]
|
||||
languages = [{"en": "/"}]
|
||||
for lang in get_lang_paths():
|
||||
if lang.name == "en" or not lang.is_dir():
|
||||
@@ -289,7 +297,8 @@ def update_config(lang: str):
|
||||
languages.append({name: f"/{name}/"})
|
||||
config["nav"][1] = {"Languages": languages}
|
||||
config_path.write_text(
|
||||
yaml.dump(config, sort_keys=False, width=200), encoding="utf-8"
|
||||
yaml.dump(config, sort_keys=False, width=200, allow_unicode=True),
|
||||
encoding="utf-8",
|
||||
)
|
||||
|
||||
|
||||
|
||||
@@ -3,4 +3,4 @@ set -x
|
||||
|
||||
autoflake --remove-all-unused-imports --recursive --remove-unused-variables --in-place docs_src fastapi tests scripts --exclude=__init__.py
|
||||
black fastapi tests docs_src scripts
|
||||
isort --multi-line=3 --trailing-comma --force-grid-wrap=0 --combine-as --line-width 88 --recursive --thirdparty fastapi --apply fastapi tests docs_src scripts
|
||||
isort --multi-line=3 --trailing-comma --force-grid-wrap=0 --combine-as --line-width 88 --recursive --thirdparty fastapi --thirdparty pydantic --thirdparty starlette --apply fastapi tests docs_src scripts
|
||||
|
||||
@@ -5,4 +5,4 @@ set -x
|
||||
|
||||
mypy fastapi
|
||||
black fastapi tests --check
|
||||
isort --multi-line=3 --trailing-comma --force-grid-wrap=0 --combine-as --line-width 88 --recursive --check-only --thirdparty fastapi fastapi tests
|
||||
isort --multi-line=3 --trailing-comma --force-grid-wrap=0 --combine-as --line-width 88 --recursive --check-only --thirdparty fastapi --thirdparty fastapi --thirdparty pydantic --thirdparty starlette fastapi tests
|
||||
|
||||
@@ -3,10 +3,6 @@
|
||||
set -e
|
||||
set -x
|
||||
|
||||
# Remove temporary DB
|
||||
if [ -f ./test.db ]; then
|
||||
rm ./test.db
|
||||
fi
|
||||
bash ./scripts/lint.sh
|
||||
# Check README.md is up to date
|
||||
diff --brief docs/en/docs/index.md README.md
|
||||
|
||||
@@ -100,11 +100,11 @@ openapi_schema = {
|
||||
|
||||
def test_additional_properties_schema():
|
||||
response = client.get("/openapi.json")
|
||||
assert response.status_code == 200
|
||||
assert response.status_code == 200, response.text
|
||||
assert response.json() == openapi_schema
|
||||
|
||||
|
||||
def test_additional_properties_post():
|
||||
response = client.post("/foo", json={"items": {"foo": 1, "bar": 2}})
|
||||
assert response.status_code == 200
|
||||
assert response.status_code == 200, response.text
|
||||
assert response.json() == {"foo": 1, "bar": 2}
|
||||
|
||||
@@ -42,11 +42,11 @@ client = TestClient(app)
|
||||
|
||||
def test_openapi_schema():
|
||||
response = client.get("/openapi.json")
|
||||
assert response.status_code == 200
|
||||
assert response.status_code == 200, response.text
|
||||
assert response.json() == openapi_schema
|
||||
|
||||
|
||||
def test_path_operation():
|
||||
response = client.get("/items/")
|
||||
assert response.status_code == 200
|
||||
assert response.status_code == 200, response.text
|
||||
assert response.json() == {"id": "foo"}
|
||||
|
||||
@@ -96,5 +96,5 @@ client = TestClient(app)
|
||||
|
||||
def test_openapi_schema():
|
||||
response = client.get("/openapi.json")
|
||||
assert response.status_code == 200
|
||||
assert response.status_code == 200, response.text
|
||||
assert response.json() == openapi_schema
|
||||
|
||||
@@ -81,5 +81,5 @@ client = TestClient(app)
|
||||
|
||||
def test_openapi_schema():
|
||||
response = client.get("/openapi.json")
|
||||
assert response.status_code == 200
|
||||
assert response.status_code == 200, response.text
|
||||
assert response.json() == openapi_schema
|
||||
|
||||
@@ -113,5 +113,5 @@ client = TestClient(app)
|
||||
|
||||
def test_openapi_schema():
|
||||
response = client.get("/openapi.json")
|
||||
assert response.status_code == 200
|
||||
assert response.status_code == 200, response.text
|
||||
assert response.json() == openapi_schema
|
||||
|
||||
@@ -89,23 +89,23 @@ client = TestClient(app)
|
||||
|
||||
def test_openapi_schema():
|
||||
response = client.get("/openapi.json")
|
||||
assert response.status_code == 200
|
||||
assert response.status_code == 200, response.text
|
||||
assert response.json() == openapi_schema
|
||||
|
||||
|
||||
def test_a():
|
||||
response = client.get("/a")
|
||||
assert response.status_code == 200
|
||||
assert response.status_code == 200, response.text
|
||||
assert response.json() == "a"
|
||||
|
||||
|
||||
def test_b():
|
||||
response = client.get("/b")
|
||||
assert response.status_code == 200
|
||||
assert response.status_code == 200, response.text
|
||||
assert response.json() == "b"
|
||||
|
||||
|
||||
def test_c():
|
||||
response = client.get("/c")
|
||||
assert response.status_code == 200
|
||||
assert response.status_code == 200, response.text
|
||||
assert response.json() == "c"
|
||||
|
||||
@@ -1128,7 +1128,7 @@ def test_get_path(path, expected_status, expected_response):
|
||||
|
||||
def test_swagger_ui():
|
||||
response = client.get("/docs")
|
||||
assert response.status_code == 200
|
||||
assert response.status_code == 200, response.text
|
||||
assert response.headers["content-type"] == "text/html; charset=utf-8"
|
||||
assert "swagger-ui-dist" in response.text
|
||||
assert (
|
||||
@@ -1139,13 +1139,13 @@ def test_swagger_ui():
|
||||
|
||||
def test_swagger_ui_oauth2_redirect():
|
||||
response = client.get("/docs/oauth2-redirect")
|
||||
assert response.status_code == 200
|
||||
assert response.status_code == 200, response.text
|
||||
assert response.headers["content-type"] == "text/html; charset=utf-8"
|
||||
assert "window.opener.swaggerUIRedirectOauth2" in response.text
|
||||
|
||||
|
||||
def test_redoc():
|
||||
response = client.get("/redoc")
|
||||
assert response.status_code == 200
|
||||
assert response.status_code == 200, response.text
|
||||
assert response.headers["content-type"] == "text/html; charset=utf-8"
|
||||
assert "redoc@next" in response.text
|
||||
|
||||
@@ -16,7 +16,7 @@ client = TestClient(app)
|
||||
|
||||
def test_swagger_ui():
|
||||
response = client.get("/docs")
|
||||
assert response.status_code == 200
|
||||
assert response.status_code == 200, response.text
|
||||
assert response.headers["content-type"] == "text/html; charset=utf-8"
|
||||
assert "swagger-ui-dist" in response.text
|
||||
print(client.base_url)
|
||||
@@ -28,7 +28,7 @@ def test_swagger_ui():
|
||||
|
||||
def test_swagger_ui_oauth2_redirect():
|
||||
response = client.get(swagger_ui_oauth2_redirect_url)
|
||||
assert response.status_code == 200
|
||||
assert response.status_code == 200, response.text
|
||||
assert response.headers["content-type"] == "text/html; charset=utf-8"
|
||||
assert "window.opener.swaggerUIRedirectOauth2" in response.text
|
||||
|
||||
|
||||
@@ -41,28 +41,28 @@ client = TestClient(app)
|
||||
def test_normal_counter():
|
||||
counter_holder["counter"] = 0
|
||||
response = client.get("/counter/")
|
||||
assert response.status_code == 200
|
||||
assert response.status_code == 200, response.text
|
||||
assert response.json() == {"counter": 1}
|
||||
response = client.get("/counter/")
|
||||
assert response.status_code == 200
|
||||
assert response.status_code == 200, response.text
|
||||
assert response.json() == {"counter": 2}
|
||||
|
||||
|
||||
def test_sub_counter():
|
||||
counter_holder["counter"] = 0
|
||||
response = client.get("/sub-counter/")
|
||||
assert response.status_code == 200
|
||||
assert response.status_code == 200, response.text
|
||||
assert response.json() == {"counter": 1, "subcounter": 1}
|
||||
response = client.get("/sub-counter/")
|
||||
assert response.status_code == 200
|
||||
assert response.status_code == 200, response.text
|
||||
assert response.json() == {"counter": 2, "subcounter": 2}
|
||||
|
||||
|
||||
def test_sub_counter_no_cache():
|
||||
counter_holder["counter"] = 0
|
||||
response = client.get("/sub-counter-no-cache/")
|
||||
assert response.status_code == 200
|
||||
assert response.status_code == 200, response.text
|
||||
assert response.json() == {"counter": 2, "subcounter": 1}
|
||||
response = client.get("/sub-counter-no-cache/")
|
||||
assert response.status_code == 200
|
||||
assert response.status_code == 200, response.text
|
||||
assert response.json() == {"counter": 4, "subcounter": 3}
|
||||
|
||||
@@ -66,5 +66,5 @@ client = TestClient(app)
|
||||
)
|
||||
def test_class_dependency(route, value):
|
||||
response = client.get(route, params={"value": value})
|
||||
assert response.status_code == 200
|
||||
assert response.status_code == 200, response.text
|
||||
assert response.json() == value
|
||||
|
||||
@@ -206,7 +206,7 @@ client = TestClient(app)
|
||||
def test_async_state():
|
||||
assert state["/async"] == f"asyncgen not started"
|
||||
response = client.get("/async")
|
||||
assert response.status_code == 200
|
||||
assert response.status_code == 200, response.text
|
||||
assert response.json() == f"asyncgen started"
|
||||
assert state["/async"] == f"asyncgen completed"
|
||||
|
||||
@@ -214,7 +214,7 @@ def test_async_state():
|
||||
def test_sync_state():
|
||||
assert state["/sync"] == f"generator not started"
|
||||
response = client.get("/sync")
|
||||
assert response.status_code == 200
|
||||
assert response.status_code == 200, response.text
|
||||
assert response.json() == f"generator started"
|
||||
assert state["/sync"] == f"generator completed"
|
||||
|
||||
@@ -237,7 +237,7 @@ def test_sync_raise_other():
|
||||
|
||||
def test_async_raise():
|
||||
response = client.get("/async_raise")
|
||||
assert response.status_code == 500
|
||||
assert response.status_code == 500, response.text
|
||||
assert state["/async_raise"] == "asyncgen raise finalized"
|
||||
assert "/async_raise" in errors
|
||||
errors.clear()
|
||||
@@ -272,7 +272,7 @@ def test_background_tasks():
|
||||
|
||||
def test_sync_raise():
|
||||
response = client.get("/sync_raise")
|
||||
assert response.status_code == 500
|
||||
assert response.status_code == 500, response.text
|
||||
assert state["/sync_raise"] == "generator raise finalized"
|
||||
assert "/sync_raise" in errors
|
||||
errors.clear()
|
||||
@@ -280,14 +280,14 @@ def test_sync_raise():
|
||||
|
||||
def test_sync_async_state():
|
||||
response = client.get("/sync_async")
|
||||
assert response.status_code == 200
|
||||
assert response.status_code == 200, response.text
|
||||
assert response.json() == f"asyncgen started"
|
||||
assert state["/async"] == f"asyncgen completed"
|
||||
|
||||
|
||||
def test_sync_sync_state():
|
||||
response = client.get("/sync_sync")
|
||||
assert response.status_code == 200
|
||||
assert response.status_code == 200, response.text
|
||||
assert response.json() == f"generator started"
|
||||
assert state["/sync"] == f"generator completed"
|
||||
|
||||
@@ -308,7 +308,7 @@ def test_sync_sync_raise_other():
|
||||
|
||||
def test_sync_async_raise():
|
||||
response = client.get("/sync_async_raise")
|
||||
assert response.status_code == 500
|
||||
assert response.status_code == 500, response.text
|
||||
assert state["/async_raise"] == "asyncgen raise finalized"
|
||||
assert "/async_raise" in errors
|
||||
errors.clear()
|
||||
@@ -316,7 +316,7 @@ def test_sync_async_raise():
|
||||
|
||||
def test_sync_sync_raise():
|
||||
response = client.get("/sync_sync_raise")
|
||||
assert response.status_code == 500
|
||||
assert response.status_code == 500, response.text
|
||||
assert state["/sync_raise"] == "generator raise finalized"
|
||||
assert "/sync_raise" in errors
|
||||
errors.clear()
|
||||
|
||||
@@ -190,13 +190,13 @@ openapi_schema = {
|
||||
|
||||
def test_openapi_schema():
|
||||
response = client.get("/openapi.json")
|
||||
assert response.status_code == 200
|
||||
assert response.status_code == 200, response.text
|
||||
assert response.json() == openapi_schema
|
||||
|
||||
|
||||
def test_no_duplicates_invalid():
|
||||
response = client.post("/no-duplicates", json={"item": {"data": "myitem"}})
|
||||
assert response.status_code == 422
|
||||
assert response.status_code == 422, response.text
|
||||
assert response.json() == {
|
||||
"detail": [
|
||||
{
|
||||
@@ -213,19 +213,19 @@ def test_no_duplicates():
|
||||
"/no-duplicates",
|
||||
json={"item": {"data": "myitem"}, "item2": {"data": "myitem2"}},
|
||||
)
|
||||
assert response.status_code == 200
|
||||
assert response.status_code == 200, response.text
|
||||
assert response.json() == [{"data": "myitem"}, {"data": "myitem2"}]
|
||||
|
||||
|
||||
def test_duplicates():
|
||||
response = client.post("/with-duplicates", json={"data": "myitem"})
|
||||
assert response.status_code == 200
|
||||
assert response.status_code == 200, response.text
|
||||
assert response.json() == [{"data": "myitem"}, {"data": "myitem"}]
|
||||
|
||||
|
||||
def test_sub_duplicates():
|
||||
response = client.post("/with-duplicates-sub", json={"data": "myitem"})
|
||||
assert response.status_code == 200
|
||||
assert response.status_code == 200, response.text
|
||||
assert response.json() == [
|
||||
{"data": "myitem"},
|
||||
[{"data": "myitem"}, {"data": "myitem"}],
|
||||
|
||||
@@ -21,11 +21,11 @@ client = TestClient(app)
|
||||
def test_use_empty():
|
||||
with client:
|
||||
response = client.get("/prefix")
|
||||
assert response.status_code == 200
|
||||
assert response.status_code == 200, response.text
|
||||
assert response.json() == ["OK"]
|
||||
|
||||
response = client.get("/prefix/")
|
||||
assert response.status_code == 200
|
||||
assert response.status_code == 200, response.text
|
||||
assert response.json() == ["OK"]
|
||||
|
||||
|
||||
|
||||
@@ -314,47 +314,47 @@ openapi_schema = {
|
||||
|
||||
def test_openapi_schema():
|
||||
response = client.get("/openapi.json")
|
||||
assert response.status_code == 200
|
||||
assert response.status_code == 200, response.text
|
||||
assert response.json() == openapi_schema
|
||||
|
||||
|
||||
def test_get_api_route():
|
||||
response = client.get("/items/foo")
|
||||
assert response.status_code == 200
|
||||
assert response.status_code == 200, response.text
|
||||
assert response.json() == {"item_id": "foo"}
|
||||
|
||||
|
||||
def test_get_api_route_not_decorated():
|
||||
response = client.get("/items-not-decorated/foo")
|
||||
assert response.status_code == 200
|
||||
assert response.status_code == 200, response.text
|
||||
assert response.json() == {"item_id": "foo"}
|
||||
|
||||
|
||||
def test_delete():
|
||||
response = client.delete("/items/foo", json={"name": "Foo"})
|
||||
assert response.status_code == 200
|
||||
assert response.status_code == 200, response.text
|
||||
assert response.json() == {"item_id": "foo", "item": {"name": "Foo", "price": None}}
|
||||
|
||||
|
||||
def test_head():
|
||||
response = client.head("/items/foo")
|
||||
assert response.status_code == 200
|
||||
assert response.status_code == 200, response.text
|
||||
assert response.headers["x-fastapi-item-id"] == "foo"
|
||||
|
||||
|
||||
def test_options():
|
||||
response = client.options("/items/foo")
|
||||
assert response.status_code == 200
|
||||
assert response.status_code == 200, response.text
|
||||
assert response.headers["x-fastapi-item-id"] == "foo"
|
||||
|
||||
|
||||
def test_patch():
|
||||
response = client.patch("/items/foo", json={"name": "Foo"})
|
||||
assert response.status_code == 200
|
||||
assert response.status_code == 200, response.text
|
||||
assert response.json() == {"item_id": "foo", "item": {"name": "Foo", "price": None}}
|
||||
|
||||
|
||||
def test_trace():
|
||||
response = client.request("trace", "/items/foo")
|
||||
assert response.status_code == 200
|
||||
assert response.status_code == 200, response.text
|
||||
assert response.headers["content-type"] == "message/http"
|
||||
|
||||
@@ -127,13 +127,13 @@ openapi_schema = {
|
||||
|
||||
def test_openapi_schema():
|
||||
response = client.get("/openapi.json")
|
||||
assert response.status_code == 200
|
||||
assert response.status_code == 200, response.text
|
||||
assert response.json() == openapi_schema
|
||||
|
||||
|
||||
def test_filter_sub_model():
|
||||
response = client.get("/model/modelA")
|
||||
assert response.status_code == 200
|
||||
assert response.status_code == 200, response.text
|
||||
assert response.json() == {
|
||||
"name": "modelA",
|
||||
"description": "model-a-desc",
|
||||
|
||||
@@ -26,7 +26,7 @@ def test_python_list_param_as_form():
|
||||
response = client.post(
|
||||
"/form/python-list", data={"items": ["first", "second", "third"]}
|
||||
)
|
||||
assert response.status_code == 200
|
||||
assert response.status_code == 200, response.text
|
||||
assert response.json() == ["first", "second", "third"]
|
||||
|
||||
|
||||
@@ -34,7 +34,7 @@ def test_python_set_param_as_form():
|
||||
response = client.post(
|
||||
"/form/python-set", data={"items": ["first", "second", "third"]}
|
||||
)
|
||||
assert response.status_code == 200
|
||||
assert response.status_code == 200, response.text
|
||||
assert set(response.json()) == {"first", "second", "third"}
|
||||
|
||||
|
||||
@@ -42,5 +42,5 @@ def test_python_tuple_param_as_form():
|
||||
response = client.post(
|
||||
"/form/python-tuple", data={"items": ["first", "second", "third"]}
|
||||
)
|
||||
assert response.status_code == 200
|
||||
assert response.status_code == 200, response.text
|
||||
assert response.json() == ["first", "second", "third"]
|
||||
|
||||
@@ -18,5 +18,5 @@ client = TestClient(app)
|
||||
|
||||
def test_sub_router():
|
||||
response = client.get("/items/")
|
||||
assert response.status_code == 200
|
||||
assert response.status_code == 200, response.text
|
||||
assert response.json() == {"hello": "world"}
|
||||
|
||||
@@ -46,21 +46,21 @@ client = TestClient(app)
|
||||
def test_get_users():
|
||||
"""Check that /users returns expected data"""
|
||||
response = client.get("/users")
|
||||
assert response.status_code == 200
|
||||
assert response.status_code == 200, response.text
|
||||
assert response.json() == [{"user_id": "u1"}, {"user_id": "u2"}]
|
||||
|
||||
|
||||
def test_get_user():
|
||||
"""Check that /users/{user_id} returns expected data"""
|
||||
response = client.get("/users/abc123")
|
||||
assert response.status_code == 200
|
||||
assert response.status_code == 200, response.text
|
||||
assert response.json() == {"user_id": "abc123"}
|
||||
|
||||
|
||||
def test_get_items_1():
|
||||
"""Check that /items returns expected data"""
|
||||
response = client.get("/items")
|
||||
assert response.status_code == 200
|
||||
assert response.status_code == 200, response.text
|
||||
assert response.json() == [
|
||||
{"item_id": "i1", "user_id": "u1"},
|
||||
{"item_id": "i2", "user_id": "u2"},
|
||||
@@ -70,42 +70,42 @@ def test_get_items_1():
|
||||
def test_get_items_2():
|
||||
"""Check that /items returns expected data with user_id specified"""
|
||||
response = client.get("/items?user_id=abc123")
|
||||
assert response.status_code == 200
|
||||
assert response.status_code == 200, response.text
|
||||
assert response.json() == [{"item_id": "i2", "user_id": "abc123"}]
|
||||
|
||||
|
||||
def test_get_item_1():
|
||||
"""Check that /items/{item_id} returns expected data"""
|
||||
response = client.get("/items/item01")
|
||||
assert response.status_code == 200
|
||||
assert response.status_code == 200, response.text
|
||||
assert response.json() == {"item_id": "item01"}
|
||||
|
||||
|
||||
def test_get_item_2():
|
||||
"""Check that /items/{item_id} returns expected data with user_id specified"""
|
||||
response = client.get("/items/item01?user_id=abc123")
|
||||
assert response.status_code == 200
|
||||
assert response.status_code == 200, response.text
|
||||
assert response.json() == {"item_id": "item01", "user_id": "abc123"}
|
||||
|
||||
|
||||
def test_get_users_items():
|
||||
"""Check that /users/{user_id}/items returns expected data"""
|
||||
response = client.get("/users/abc123/items")
|
||||
assert response.status_code == 200
|
||||
assert response.status_code == 200, response.text
|
||||
assert response.json() == [{"item_id": "i2", "user_id": "abc123"}]
|
||||
|
||||
|
||||
def test_get_users_item():
|
||||
"""Check that /users/{user_id}/items returns expected data"""
|
||||
response = client.get("/users/abc123/items/item01")
|
||||
assert response.status_code == 200
|
||||
assert response.status_code == 200, response.text
|
||||
assert response.json() == {"item_id": "item01", "user_id": "abc123"}
|
||||
|
||||
|
||||
def test_schema_1():
|
||||
"""Check that the user_id is a required path parameter under /users"""
|
||||
response = client.get("/openapi.json")
|
||||
assert response.status_code == 200
|
||||
assert response.status_code == 200, response.text
|
||||
r = response.json()
|
||||
|
||||
d = {
|
||||
@@ -122,7 +122,7 @@ def test_schema_1():
|
||||
def test_schema_2():
|
||||
"""Check that the user_id is an optional query parameter under /items"""
|
||||
response = client.get("/openapi.json")
|
||||
assert response.status_code == 200
|
||||
assert response.status_code == 200, response.text
|
||||
r = response.json()
|
||||
|
||||
d = {
|
||||
|
||||
@@ -70,6 +70,12 @@ class ModelWithAlias(BaseModel):
|
||||
foo: str = Field(..., alias="Foo")
|
||||
|
||||
|
||||
class ModelWithDefault(BaseModel):
|
||||
foo: str = ...
|
||||
bar: str = "bar"
|
||||
bla: str = "bla"
|
||||
|
||||
|
||||
@pytest.fixture(
|
||||
name="model_with_path", params=[PurePath, PurePosixPath, PureWindowsPath]
|
||||
)
|
||||
@@ -121,6 +127,16 @@ def test_encode_model_with_alias():
|
||||
assert jsonable_encoder(model) == {"Foo": "Bar"}
|
||||
|
||||
|
||||
def test_encode_model_with_default():
|
||||
model = ModelWithDefault(foo="foo", bar="bar")
|
||||
assert jsonable_encoder(model) == {"foo": "foo", "bar": "bar", "bla": "bla"}
|
||||
assert jsonable_encoder(model, exclude_unset=True) == {"foo": "foo", "bar": "bar"}
|
||||
assert jsonable_encoder(model, exclude_defaults=True) == {"foo": "foo"}
|
||||
assert jsonable_encoder(model, exclude_unset=True, exclude_defaults=True) == {
|
||||
"foo": "foo"
|
||||
}
|
||||
|
||||
|
||||
def test_custom_encoders():
|
||||
class safe_datetime(datetime):
|
||||
pass
|
||||
|
||||
@@ -125,31 +125,31 @@ openapi_schema = {
|
||||
|
||||
def test_openapi_schema():
|
||||
response = client.get("/openapi.json")
|
||||
assert response.status_code == 200
|
||||
assert response.status_code == 200, response.text
|
||||
assert response.json() == openapi_schema
|
||||
|
||||
|
||||
def test_post_a():
|
||||
data = {"a": 2, "b": "foo"}
|
||||
response = client.post("/a/compute", json=data)
|
||||
assert response.status_code == 200
|
||||
assert response.status_code == 200, response.text
|
||||
data = response.json()
|
||||
|
||||
|
||||
def test_post_a_invalid():
|
||||
data = {"a": "bar", "b": "foo"}
|
||||
response = client.post("/a/compute", json=data)
|
||||
assert response.status_code == 422
|
||||
assert response.status_code == 422, response.text
|
||||
|
||||
|
||||
def test_post_b():
|
||||
data = {"a": 2, "b": "foo"}
|
||||
response = client.post("/b/compute/", json=data)
|
||||
assert response.status_code == 200
|
||||
assert response.status_code == 200, response.text
|
||||
data = response.json()
|
||||
|
||||
|
||||
def test_post_b_invalid():
|
||||
data = {"a": "bar", "b": "foo"}
|
||||
response = client.post("/b/compute/", json=data)
|
||||
assert response.status_code == 422
|
||||
assert response.status_code == 422, response.text
|
||||
|
||||
@@ -139,23 +139,23 @@ multiple_errors = {
|
||||
|
||||
def test_openapi_schema():
|
||||
response = client.get("/openapi.json")
|
||||
assert response.status_code == 200
|
||||
assert response.status_code == 200, response.text
|
||||
assert response.json() == openapi_schema
|
||||
|
||||
|
||||
def test_put_correct_body():
|
||||
response = client.post("/items/", json=[{"name": "Foo", "age": 5}])
|
||||
assert response.status_code == 200
|
||||
assert response.status_code == 200, response.text
|
||||
assert response.json() == {"item": [{"name": "Foo", "age": 5}]}
|
||||
|
||||
|
||||
def test_jsonable_encoder_requiring_error():
|
||||
response = client.post("/items/", json=[{"name": "Foo", "age": -1.0}])
|
||||
assert response.status_code == 422
|
||||
assert response.status_code == 422, response.text
|
||||
assert response.json() == single_error
|
||||
|
||||
|
||||
def test_put_incorrect_body_multiple():
|
||||
response = client.post("/items/", json=[{"age": "five"}, {"age": "six"}])
|
||||
assert response.status_code == 422
|
||||
assert response.status_code == 422, response.text
|
||||
assert response.json() == multiple_errors
|
||||
|
||||
@@ -102,17 +102,17 @@ multiple_errors = {
|
||||
|
||||
def test_openapi_schema():
|
||||
response = client.get("/openapi.json")
|
||||
assert response.status_code == 200
|
||||
assert response.status_code == 200, response.text
|
||||
assert response.json() == openapi_schema
|
||||
|
||||
|
||||
def test_multi_query():
|
||||
response = client.get("/items/?q=5&q=6")
|
||||
assert response.status_code == 200
|
||||
assert response.status_code == 200, response.text
|
||||
assert response.json() == {"q": [5, 6]}
|
||||
|
||||
|
||||
def test_multi_query_incorrect():
|
||||
response = client.get("/items/?q=five&q=six")
|
||||
assert response.status_code == 422
|
||||
assert response.status_code == 422, response.text
|
||||
assert response.json() == multiple_errors
|
||||
|
||||
Some files were not shown because too many files have changed in this diff Show More
Reference in New Issue
Block a user