mirror of
https://github.com/fastapi/fastapi.git
synced 2026-02-05 20:01:44 -05:00
Compare commits
1 Commits
translate-
...
update-out
| Author | SHA1 | Date | |
|---|---|---|---|
|
|
2d46372a6f |
6
.github/workflows/translate.yml
vendored
6
.github/workflows/translate.yml
vendored
@@ -35,11 +35,6 @@ on:
|
||||
type: boolean
|
||||
required: false
|
||||
default: false
|
||||
max:
|
||||
description: Maximum number of items to translate (e.g. 10)
|
||||
type: number
|
||||
required: false
|
||||
default: 10
|
||||
|
||||
jobs:
|
||||
langs:
|
||||
@@ -120,4 +115,3 @@ jobs:
|
||||
EN_PATH: ${{ github.event.inputs.en_path }}
|
||||
COMMAND: ${{ matrix.command }}
|
||||
COMMIT_IN_PLACE: ${{ github.event.inputs.commit_in_place }}
|
||||
MAX: ${{ github.event.inputs.max }}
|
||||
|
||||
@@ -7,15 +7,6 @@ hide:
|
||||
|
||||
## Latest Changes
|
||||
|
||||
### Features
|
||||
|
||||
* ✨ Add support for PEP695 `TypeAliasType`. PR [#13920](https://github.com/fastapi/fastapi/pull/13920) by [@cstruct](https://github.com/cstruct).
|
||||
* ✨ Allow `Response` type hint as dependency annotation. PR [#14794](https://github.com/fastapi/fastapi/pull/14794) by [@jonathan-fulton](https://github.com/jonathan-fulton).
|
||||
|
||||
### Fixes
|
||||
|
||||
* 🐛 Fix using `Json[list[str]]` type (issue #10997). PR [#14616](https://github.com/fastapi/fastapi/pull/14616) by [@mkanetsuna](https://github.com/mkanetsuna).
|
||||
|
||||
### Docs
|
||||
|
||||
* 📝 Update docs for translations. PR [#14830](https://github.com/fastapi/fastapi/pull/14830) by [@tiangolo](https://github.com/tiangolo).
|
||||
@@ -23,7 +14,6 @@ hide:
|
||||
|
||||
### Translations
|
||||
|
||||
* 🌐 Enable French docs translations. PR [#14841](https://github.com/fastapi/fastapi/pull/14841) by [@tiangolo](https://github.com/tiangolo).
|
||||
* 🌐 Update translations for fr (translate-page). PR [#14837](https://github.com/fastapi/fastapi/pull/14837) by [@tiangolo](https://github.com/tiangolo).
|
||||
* 🌐 Update translations for de (update-outdated). PR [#14836](https://github.com/fastapi/fastapi/pull/14836) by [@tiangolo](https://github.com/tiangolo).
|
||||
* 🌐 Update translations for pt (update-outdated). PR [#14833](https://github.com/fastapi/fastapi/pull/14833) by [@tiangolo](https://github.com/tiangolo).
|
||||
@@ -36,10 +26,6 @@ hide:
|
||||
* 🌐 Update translations for uk (update-outdated). PR [#14822](https://github.com/fastapi/fastapi/pull/14822) by [@tiangolo](https://github.com/tiangolo).
|
||||
* 🔨 Update docs and translations scripts, enable Turkish. PR [#14824](https://github.com/fastapi/fastapi/pull/14824) by [@tiangolo](https://github.com/tiangolo).
|
||||
|
||||
### Internal
|
||||
|
||||
* 🔨 Add max pages to translate to configs. PR [#14840](https://github.com/fastapi/fastapi/pull/14840) by [@tiangolo](https://github.com/tiangolo).
|
||||
|
||||
## 0.128.1
|
||||
|
||||
### Features
|
||||
|
||||
@@ -317,8 +317,6 @@ extra:
|
||||
name: de - Deutsch
|
||||
- link: /es/
|
||||
name: es - español
|
||||
- link: /fr/
|
||||
name: fr - français
|
||||
- link: /ja/
|
||||
name: ja - 日本語
|
||||
- link: /ko/
|
||||
|
||||
@@ -2,23 +2,23 @@
|
||||
|
||||
Maintenant que nous avons vu comment utiliser `Path` et `Query`, voyons des usages plus avancés des déclarations de paramètres du corps de la requête.
|
||||
|
||||
## Mélanger les paramètres `Path`, `Query` et body { #mix-path-query-and-body-parameters }
|
||||
## Mélanger les paramètres `Path`, `Query` et du corps de la requête { #mix-path-query-and-body-parameters }
|
||||
|
||||
Tout d'abord, sachez que vous pouvez mélanger librement les déclarations des paramètres `Path`, `Query` et du body, **FastAPI** saura quoi faire.
|
||||
Tout d'abord, sachez que vous pouvez mélanger librement les déclarations des paramètres `Path`, `Query` et du corps de la requête, **FastAPI** saura quoi faire.
|
||||
|
||||
Et vous pouvez également déclarer des paramètres du body comme étant optionnels, en leur assignant une valeur par défaut à `None` :
|
||||
Et vous pouvez également déclarer des paramètres du corps de la requête comme étant optionnels, en leur assignant une valeur par défaut à `None` :
|
||||
|
||||
{* ../../docs_src/body_multiple_params/tutorial001_an_py310.py hl[18:20] *}
|
||||
|
||||
/// note | Remarque
|
||||
|
||||
Notez que, dans ce cas, l'élément `item` récupéré depuis le body est optionnel. Comme sa valeur par défaut est `None`.
|
||||
Notez que, dans ce cas, l'élément `item` récupéré depuis le corps de la requête est optionnel. Comme sa valeur par défaut est `None`.
|
||||
|
||||
///
|
||||
|
||||
## Paramètres multiples du body { #multiple-body-parameters }
|
||||
## Paramètres multiples du corps de la requête { #multiple-body-parameters }
|
||||
|
||||
Dans l'exemple précédent, les chemins d'accès attendraient un body JSON avec les attributs d'un `Item`, par exemple :
|
||||
Dans l'exemple précédent, les chemins d'accès attendraient un corps de la requête JSON avec les attributs d'un `Item`, par exemple :
|
||||
|
||||
```JSON
|
||||
{
|
||||
@@ -29,13 +29,13 @@ Dans l'exemple précédent, les chemins d'accès attendraient un body JSON avec
|
||||
}
|
||||
```
|
||||
|
||||
Mais vous pouvez également déclarer plusieurs paramètres provenant du body, par exemple `item` et `user` :
|
||||
Mais vous pouvez également déclarer plusieurs paramètres provenant du corps de la requête, par exemple `item` et `user` :
|
||||
|
||||
{* ../../docs_src/body_multiple_params/tutorial002_py310.py hl[20] *}
|
||||
|
||||
Dans ce cas, **FastAPI** détectera qu'il y a plus d'un paramètre du body dans la fonction (il y a deux paramètres qui sont des modèles Pydantic).
|
||||
Dans ce cas, **FastAPI** détectera qu'il y a plus d'un paramètre du corps de la requête dans la fonction (il y a deux paramètres qui sont des modèles Pydantic).
|
||||
|
||||
Il utilisera alors les noms des paramètres comme clés (noms de champs) dans le body, et s'attendra à recevoir un body semblable à :
|
||||
Il utilisera alors les noms des paramètres comme clés (noms de champs) dans le corps de la requête, et s'attendra à recevoir un corps de la requête semblable à :
|
||||
|
||||
```JSON
|
||||
{
|
||||
@@ -54,7 +54,7 @@ Il utilisera alors les noms des paramètres comme clés (noms de champs) dans le
|
||||
|
||||
/// note | Remarque
|
||||
|
||||
Notez que, bien que `item` ait été déclaré de la même manière qu'auparavant, il est désormais attendu à l'intérieur du body sous la clé `item`.
|
||||
Notez que, bien que `item` ait été déclaré de la même manière qu'auparavant, il est désormais attendu à l'intérieur du corps de la requête sous la clé `item`.
|
||||
|
||||
///
|
||||
|
||||
@@ -62,19 +62,19 @@ Notez que, bien que `item` ait été déclaré de la même manière qu'auparavan
|
||||
|
||||
Il effectuera la validation des données composées, et les documentera ainsi pour le schéma OpenAPI et la documentation automatique.
|
||||
|
||||
## Valeurs singulières dans le body { #singular-values-in-body }
|
||||
## Valeurs singulières dans le corps de la requête { #singular-values-in-body }
|
||||
|
||||
De la même façon qu'il existe `Query` et `Path` pour définir des données supplémentaires pour les paramètres de requête et de chemin, **FastAPI** fournit un équivalent `Body`.
|
||||
|
||||
Par exemple, en étendant le modèle précédent, vous pourriez décider d'avoir une autre clé `importance` dans le même body, en plus de `item` et `user`.
|
||||
Par exemple, en étendant le modèle précédent, vous pourriez décider d'avoir une autre clé `importance` dans le même corps de la requête, en plus de `item` et `user`.
|
||||
|
||||
Si vous le déclarez tel quel, comme c'est une valeur singulière, **FastAPI** supposera qu'il s'agit d'un paramètre de requête.
|
||||
|
||||
Mais vous pouvez indiquer à **FastAPI** de la traiter comme une autre clé du body en utilisant `Body` :
|
||||
Mais vous pouvez indiquer à **FastAPI** de la traiter comme une autre clé du corps de la requête en utilisant `Body` :
|
||||
|
||||
{* ../../docs_src/body_multiple_params/tutorial003_an_py310.py hl[23] *}
|
||||
|
||||
Dans ce cas, **FastAPI** s'attendra à un body semblable à :
|
||||
Dans ce cas, **FastAPI** s'attendra à un corps de la requête semblable à :
|
||||
|
||||
```JSON
|
||||
{
|
||||
@@ -94,9 +94,9 @@ Dans ce cas, **FastAPI** s'attendra à un body semblable à :
|
||||
|
||||
Encore une fois, il convertira les types de données, validera, documentera, etc.
|
||||
|
||||
## Paramètres multiples du body et paramètres de requête { #multiple-body-params-and-query }
|
||||
## Paramètres multiples du corps de la requête et paramètres de requête { #multiple-body-params-and-query }
|
||||
|
||||
Bien entendu, vous pouvez également déclarer des paramètres de requête supplémentaires quand vous en avez besoin, en plus de tout paramètre du body.
|
||||
Bien entendu, vous pouvez également déclarer des paramètres de requête supplémentaires quand vous en avez besoin, en plus de tout paramètre du corps de la requête.
|
||||
|
||||
Comme, par défaut, les valeurs singulières sont interprétées comme des paramètres de requête, vous n'avez pas besoin d'ajouter explicitement `Query`, vous pouvez simplement écrire :
|
||||
|
||||
@@ -120,13 +120,13 @@ Par exemple :
|
||||
|
||||
///
|
||||
|
||||
## Intégrer un seul paramètre du body { #embed-a-single-body-parameter }
|
||||
## Intégrer un seul paramètre du corps de la requête { #embed-a-single-body-parameter }
|
||||
|
||||
Supposons que vous n'ayez qu'un seul paramètre `item` dans le body, provenant d'un modèle Pydantic `Item`.
|
||||
Supposons que vous n'ayez qu'un seul paramètre `item` dans le corps de la requête, provenant d'un modèle Pydantic `Item`.
|
||||
|
||||
Par défaut, **FastAPI** attendra alors son contenu directement.
|
||||
|
||||
Mais si vous voulez qu'il attende un JSON avec une clé `item` contenant le contenu du modèle, comme lorsqu'on déclare des paramètres supplémentaires du body, vous pouvez utiliser le paramètre spécial `embed` de `Body` :
|
||||
Mais si vous voulez qu'il attende un JSON avec une clé `item` contenant le contenu du modèle, comme lorsqu'on déclare des paramètres supplémentaires du corps de la requête, vous pouvez utiliser le paramètre spécial `embed` de `Body` :
|
||||
|
||||
```Python
|
||||
item: Item = Body(embed=True)
|
||||
@@ -136,7 +136,7 @@ comme dans :
|
||||
|
||||
{* ../../docs_src/body_multiple_params/tutorial005_an_py310.py hl[17] *}
|
||||
|
||||
Dans ce cas **FastAPI** s'attendra à un body semblable à :
|
||||
Dans ce cas **FastAPI** s'attendra à un corps de la requête semblable à :
|
||||
|
||||
```JSON hl_lines="2"
|
||||
{
|
||||
@@ -162,10 +162,10 @@ au lieu de :
|
||||
|
||||
## Récapitulatif { #recap }
|
||||
|
||||
Vous pouvez ajouter plusieurs paramètres du body à votre fonction de chemin d'accès, même si une requête ne peut avoir qu'un seul body.
|
||||
Vous pouvez ajouter plusieurs paramètres du corps de la requête à votre fonction de chemin d'accès, même si une requête ne peut avoir qu'un seul corps de la requête.
|
||||
|
||||
Mais **FastAPI** s'en chargera, vous fournira les bonnes données dans votre fonction, et validera et documentera le schéma correct dans le chemin d'accès.
|
||||
|
||||
Vous pouvez également déclarer des valeurs singulières à recevoir dans le body.
|
||||
Vous pouvez également déclarer des valeurs singulières à recevoir dans le corps de la requête.
|
||||
|
||||
Et vous pouvez indiquer à **FastAPI** d'intégrer le body sous une clé même lorsqu'un seul paramètre est déclaré.
|
||||
Et vous pouvez indiquer à **FastAPI** d'intégrer le corps de la requête sous une clé même lorsqu'un seul paramètre est déclaré.
|
||||
|
||||
@@ -1,10 +1,10 @@
|
||||
# 基准测试 { #benchmarks }
|
||||
# 基准测试
|
||||
|
||||
第三方机构 TechEmpower 的基准测试表明在 Uvicorn 下运行的 **FastAPI** 应用程序是 <a href="https://www.techempower.com/benchmarks/#section=test&runid=7464e520-0dc2-473d-bd34-dbdfd7e85911&hw=ph&test=query&l=zijzen-7" class="external-link" target="_blank">可用的最快的 Python 框架之一</a>,仅次于 Starlette 和 Uvicorn 本身(由 FastAPI 内部使用)。
|
||||
第三方机构 TechEmpower 的基准测试表明在 Uvicorn 下运行的 **FastAPI** 应用程序是 <a href="https://www.techempower.com/benchmarks/#section=test&runid=7464e520-0dc2-473d-bd34-dbdfd7e85911&hw=ph&test=query&l=zijzen-7" class="external-link" target="_blank">可用的最快的 Python 框架之一</a>,仅次于 Starlette 和 Uvicorn 本身 (由 FastAPI 内部使用)。(*)
|
||||
|
||||
但是在查看基准得分和对比时,请注意以下几点。
|
||||
|
||||
## 基准测试和速度 { #benchmarks-and-speed }
|
||||
## 基准测试和速度
|
||||
|
||||
当你查看基准测试时,几个不同类型的工具被等效地做比较是很常见的情况。
|
||||
|
||||
@@ -20,15 +20,15 @@
|
||||
|
||||
* **Uvicorn**:
|
||||
* 具有最佳性能,因为除了服务器本身外,它没有太多额外的代码。
|
||||
* 你不会直接在 Uvicorn 中编写应用程序。这意味着你的代码至少必须包含 Starlette(或 **FastAPI**)提供的代码。如果你这样做了(即直接在 Uvicorn 中编写应用程序),最终的应用程序会和使用了框架并且最小化了应用代码和 bug 的情况具有相同的性能损耗。
|
||||
* 如果你要对比 Uvicorn,请将其与 Daphne,Hypercorn,uWSGI 等应用服务器进行比较。
|
||||
* 您不会直接在 Uvicorn 中编写应用程序。这意味着您的代码至少必须包含 Starlette(或 **FastAPI**)提供的代码。如果您这样做了(即直接在 Uvicorn 中编写应用程序),最终的应用程序会和使用了框架并且最小化了应用代码和 bug 的情况具有相同的性能损耗。
|
||||
* 如果要对比与 Uvicorn 对标的服务器,请将其与 Daphne,Hypercorn,uWSGI等应用服务器进行比较。
|
||||
* **Starlette**:
|
||||
* 在 Uvicorn 后使用 Starlette,性能会略有下降。实际上,Starlette 使用 Uvicorn 运行。因此,由于必须执行更多的代码,它只会比 Uvicorn 更慢。
|
||||
* 但它为你提供了构建简单的网络程序的工具,并具有基于路径的路由等功能。
|
||||
* 在 Uvicorn 后使用 Starlette,性能会略有下降。实际上,Starlette 使用 Uvicorn运行。因此,由于必须执行更多的代码,它只会比 Uvicorn 更慢。
|
||||
* 但它为您提供了构建简单的网络程序的工具,并具有基于路径的路由等功能。
|
||||
* 如果想对比与 Starlette 对标的开发框架,请将其与 Sanic,Flask,Django 等网络框架(或微框架)进行比较。
|
||||
* **FastAPI**:
|
||||
* 与 Starlette 使用 Uvicorn 一样,由于 **FastAPI** 使用 Starlette,因此 FastAPI 不能比 Starlette 更快。
|
||||
* FastAPI 在 Starlette 基础上提供了更多功能。例如在开发 API 时,所需的数据验证和序列化功能。FastAPI 可以帮助你自动生成 API文档,(文档在应用程序启动时自动生成,所以不会增加应用程序运行时的开销)。
|
||||
* 如果你不使用 FastAPI 而直接使用 Starlette(或诸如 Sanic,Flask,Responder 等其它工具),你则要自己实现所有的数据验证和序列化。那么最终你的应用程序会和使用 FastAPI 构建的程序有相同的开销。一般这种数据验证和序列化的操作在你应用程序的代码中会占很大比重。
|
||||
* 因此,通过使用 FastAPI 意味着你可以节省开发时间,减少编码错误,用更少的编码实现其功能,并且相比不使用 FastAPI 你很大可能会获得相同或更好的性能(因为那样你必须在代码中实现所有相同的功能)。
|
||||
* 如果你想对比 FastAPI,请与能够提供数据验证、序列化和文档的网络应用程序框架(或工具集)进行对比,例如具有集成自动数据验证、序列化和自动化文档的 Flask-apispec,NestJS,Molten 等。
|
||||
* FastAPI 在 Starlette 基础上提供了更多功能。例如在开发 API 时,所需的数据验证和序列化功能。FastAPI 可以帮助您自动生成 API文档,(文档在应用程序启动时自动生成,所以不会增加应用程序运行时的开销)。
|
||||
* 如果您不使用 FastAPI 而直接使用 Starlette(或诸如 Sanic,Flask,Responder 等其它工具),您则要自己实现所有的数据验证和序列化。那么最终您的应用程序会和使用 FastAPI 构建的程序有相同的开销。一般这种数据验证和序列化的操作在您应用程序的代码中会占很大比重。
|
||||
* 因此,通过使用 FastAPI 意味着您可以节省开发时间,减少编码错误,用更少的编码实现其功能,并且相比不使用 FastAPI 您很大可能会获得相同或更好的性能(因为那样您必须在代码中实现所有相同的功能)。
|
||||
* 如果您想对比与 FastAPI 对标的开发框架,请与能够提供数据验证,序列化和带有自动文档生成的网络应用程序框架(或工具集)进行对比,例如具有集成自动数据验证,序列化和自动化文档的 Flask-apispec,NestJS,Molten 等。
|
||||
|
||||
@@ -1,6 +1,6 @@
|
||||
# 环境变量 { #environment-variables }
|
||||
# 环境变量
|
||||
|
||||
/// tip | 提示
|
||||
/// tip
|
||||
|
||||
如果你已经知道什么是“环境变量”并且知道如何使用它们,你可以放心跳过这一部分。
|
||||
|
||||
@@ -10,7 +10,7 @@
|
||||
|
||||
环境变量对于处理应用程序**设置**、作为 Python **安装**的一部分等方面非常有用。
|
||||
|
||||
## 创建和使用环境变量 { #create-and-use-env-vars }
|
||||
## 创建和使用环境变量
|
||||
|
||||
你在 **shell(终端)**中就可以**创建**和使用环境变量,并不需要用到 Python:
|
||||
|
||||
@@ -50,7 +50,7 @@ Hello Wade Wilson
|
||||
|
||||
////
|
||||
|
||||
## 在 Python 中读取环境变量 { #read-env-vars-in-python }
|
||||
## 在 Python 中读取环境变量
|
||||
|
||||
你也可以在 Python **之外**的终端中创建环境变量(或使用任何其他方法),然后在 Python 中**读取**它们。
|
||||
|
||||
@@ -63,9 +63,9 @@ name = os.getenv("MY_NAME", "World")
|
||||
print(f"Hello {name} from Python")
|
||||
```
|
||||
|
||||
/// tip | 提示
|
||||
/// tip
|
||||
|
||||
第二个参数是 <a href="https://docs.python.org/3.8/library/os.html#os.getenv" class="external-link" target="_blank">`os.getenv()`</a> 的默认返回值。
|
||||
第二个参数是 <a href="https://docs.python.org/zh-cn/3.8/library/os.html#os.getenv" class="external-link" target="_blank">`os.getenv()`</a> 的默认返回值。
|
||||
|
||||
如果没有提供,默认值为 `None`,这里我们提供 `"World"` 作为默认值。
|
||||
|
||||
@@ -151,21 +151,21 @@ Hello World from Python
|
||||
|
||||
</div>
|
||||
|
||||
/// tip | 提示
|
||||
/// tip
|
||||
|
||||
你可以在 <a href="https://12factor.net/config" class="external-link" target="_blank">The Twelve-Factor App: 配置</a>中了解更多信息。
|
||||
你可以在 <a href="https://12factor.net/zh_cn/config" class="external-link" target="_blank">The Twelve-Factor App: 配置</a>中了解更多信息。
|
||||
|
||||
///
|
||||
|
||||
## 类型和验证 { #types-and-validation }
|
||||
## 类型和验证
|
||||
|
||||
这些环境变量只能处理**文本字符串**,因为它们是处于 Python 范畴之外的,必须与其他程序和操作系统的其余部分兼容(甚至与不同的操作系统兼容,如 Linux、Windows、macOS)。
|
||||
|
||||
这意味着从环境变量中读取的**任何值**在 Python 中都将是一个 `str`,任何类型转换或验证都必须在代码中完成。
|
||||
|
||||
你将在[高级用户指南 - 设置和环境变量](./advanced/settings.md){.internal-link target=_blank}中了解更多关于使用环境变量处理**应用程序设置**的信息。
|
||||
你将在[高级用户指南 - 设置和环境变量](./advanced/settings.md)中了解更多关于使用环境变量处理**应用程序设置**的信息。
|
||||
|
||||
## `PATH` 环境变量 { #path-environment-variable }
|
||||
## `PATH` 环境变量
|
||||
|
||||
有一个**特殊的**环境变量称为 **`PATH`**,操作系统(Linux、macOS、Windows)用它来查找要运行的程序。
|
||||
|
||||
@@ -209,7 +209,7 @@ C:\Program Files\Python312\Scripts;C:\Program Files\Python312;C:\Windows\System3
|
||||
|
||||
如果找到了,那么操作系统将**使用它**;否则,操作系统会继续在**其他目录**中查找。
|
||||
|
||||
### 安装 Python 和更新 `PATH` { #installing-python-and-updating-the-path }
|
||||
### 安装 Python 和更新 `PATH`
|
||||
|
||||
安装 Python 时,可能会询问你是否要更新 `PATH` 环境变量。
|
||||
|
||||
@@ -233,7 +233,7 @@ C:\Program Files\Python312\Scripts;C:\Program Files\Python312;C:\Windows\System3
|
||||
|
||||
假设你安装 Python 并最终将其安装在了目录 `C:\opt\custompython\bin` 中。
|
||||
|
||||
如果你同意更新 `PATH` 环境变量,那么安装程序将会将 `C:\opt\custompython\bin` 添加到 `PATH` 环境变量中。
|
||||
如果你同意更新 `PATH` 环境变量 (在 Python 安装程序中,这个操作是名为 `Add Python x.xx to PATH` 的复选框 —— 译者注),那么安装程序将会将 `C:\opt\custompython\bin` 添加到 `PATH` 环境变量中。
|
||||
|
||||
```plaintext
|
||||
C:\Program Files\Python312\Scripts;C:\Program Files\Python312;C:\Windows\System32;C:\opt\custompython\bin
|
||||
@@ -285,13 +285,13 @@ $ C:\opt\custompython\bin\python
|
||||
|
||||
////
|
||||
|
||||
当学习[虚拟环境](virtual-environments.md){.internal-link target=_blank}时,这些信息将会很有用。
|
||||
当学习[虚拟环境](virtual-environments.md)时,这些信息将会很有用。
|
||||
|
||||
## 结论 { #conclusion }
|
||||
## 结论
|
||||
|
||||
通过这个教程,你应该对**环境变量**是什么以及如何在 Python 中使用它们有了基本的了解。
|
||||
|
||||
你也可以在<a href="https://en.wikipedia.org/wiki/Environment_variable" class="external-link" target="_blank">环境变量 - 维基百科</a>中了解更多关于它们的信息。
|
||||
你也可以在<a href="https://zh.wikipedia.org/wiki/%E7%8E%AF%E5%A2%83%E5%8F%98%E9%87%8F" class="external-link" target="_blank">环境变量 - 维基百科</a> (<a href="https://en.wikipedia.org/wiki/Environment_variable" class="external-link" target="_blank">Wikipedia for Environment Variable</a>) 中了解更多关于它们的信息。
|
||||
|
||||
在许多情况下,环境变量的用途和适用性并不是很明显。但是在开发过程中,它们会在许多不同的场景中出现,因此了解它们是很有必要的。
|
||||
|
||||
|
||||
@@ -1,11 +1,11 @@
|
||||
# FastAPI { #fastapi }
|
||||
# FastAPI
|
||||
|
||||
<style>
|
||||
.md-content .md-typeset h1 { display: none; }
|
||||
</style>
|
||||
|
||||
<p align="center">
|
||||
<a href="https://fastapi.tiangolo.com/zh"><img src="https://fastapi.tiangolo.com/img/logo-margin/logo-teal.png" alt="FastAPI"></a>
|
||||
<a href="https://fastapi.tiangolo.com"><img src="https://fastapi.tiangolo.com/img/logo-margin/logo-teal.png" alt="FastAPI"></a>
|
||||
</p>
|
||||
<p align="center">
|
||||
<em>FastAPI 框架,高性能,易于学习,高效编码,生产可用</em>
|
||||
@@ -27,140 +27,135 @@
|
||||
|
||||
---
|
||||
|
||||
**文档**: <a href="https://fastapi.tiangolo.com/zh" target="_blank">https://fastapi.tiangolo.com</a>
|
||||
**文档**: <a href="https://fastapi.tiangolo.com" target="_blank">https://fastapi.tiangolo.com</a>
|
||||
|
||||
**源码**: <a href="https://github.com/fastapi/fastapi" target="_blank">https://github.com/fastapi/fastapi</a>
|
||||
|
||||
---
|
||||
|
||||
FastAPI 是一个用于构建 API 的现代、快速(高性能)的 Web 框架,使用 Python 并基于标准的 Python 类型提示。
|
||||
FastAPI 是一个用于构建 API 的现代、快速(高性能)的 web 框架,使用 Python 并基于标准的 Python 类型提示。
|
||||
|
||||
关键特性:
|
||||
关键特性:
|
||||
|
||||
* **快速**:极高性能,可与 **NodeJS** 和 **Go** 并肩(归功于 Starlette 和 Pydantic)。[最快的 Python 框架之一](#performance)。
|
||||
* **高效编码**:功能开发速度提升约 200% ~ 300%。*
|
||||
* **更少 bug**:人为(开发者)错误减少约 40%。*
|
||||
* **直观**:极佳的编辑器支持。处处皆可<abbr title="也被称为:自动完成、自动补全、IntelliSense">自动补全</abbr>。更少的调试时间。
|
||||
* **易用**:为易用和易学而设计。更少的文档阅读时间。
|
||||
* **简短**:最小化代码重复。一次参数声明即可获得多种功能。更少的 bug。
|
||||
* **健壮**:生产可用级代码。并带有自动生成的交互式文档。
|
||||
* **标准化**:基于(并完全兼容)API 的开放标准:<a href="https://github.com/OAI/OpenAPI-Specification" class="external-link" target="_blank">OpenAPI</a>(以前称为 Swagger)和 <a href="https://json-schema.org/" class="external-link" target="_blank">JSON Schema</a>。
|
||||
* **快速**:可与 **NodeJS** 和 **Go** 并肩的极高性能(归功于 Starlette 和 Pydantic)。[最快的 Python web 框架之一](#_11)。
|
||||
|
||||
<small>* 基于某内部开发团队在构建生产应用时的测试估算。</small>
|
||||
* **高效编码**:提高功能开发速度约 200% 至 300%。*
|
||||
* **更少 bug**:减少约 40% 的人为(开发者)导致错误。*
|
||||
* **智能**:极佳的编辑器支持。处处皆可<abbr title="也被称为自动完成、智能感知">自动补全</abbr>,减少调试时间。
|
||||
* **简单**:设计的易于使用和学习,阅读文档的时间更短。
|
||||
* **简短**:使代码重复最小化。通过不同的参数声明实现丰富功能。bug 更少。
|
||||
* **健壮**:生产可用级别的代码。还有自动生成的交互式文档。
|
||||
* **标准化**:基于(并完全兼容)API 的相关开放标准:<a href="https://github.com/OAI/OpenAPI-Specification" class="external-link" target="_blank">OpenAPI</a> (以前被称为 Swagger) 和 <a href="https://json-schema.org/" class="external-link" target="_blank">JSON Schema</a>。
|
||||
|
||||
## 赞助商 { #sponsors }
|
||||
<small>* 根据对某个构建线上应用的内部开发团队所进行的测试估算得出。</small>
|
||||
|
||||
## Sponsors
|
||||
|
||||
<!-- sponsors -->
|
||||
|
||||
### Keystone 赞助商 { #keystone-sponsor }
|
||||
|
||||
{% for sponsor in sponsors.keystone -%}
|
||||
<a href="{{ sponsor.url }}" target="_blank" title="{{ sponsor.title }}"><img src="{{ sponsor.img }}" style="border-radius:15px"></a>
|
||||
{% endfor -%}
|
||||
|
||||
### 金牌和银牌赞助商 { #gold-and-silver-sponsors }
|
||||
|
||||
{% if sponsors %}
|
||||
{% for sponsor in sponsors.gold -%}
|
||||
<a href="{{ sponsor.url }}" target="_blank" title="{{ sponsor.title }}"><img src="{{ sponsor.img }}" style="border-radius:15px"></a>
|
||||
{% endfor -%}
|
||||
{%- for sponsor in sponsors.silver -%}
|
||||
<a href="{{ sponsor.url }}" target="_blank" title="{{ sponsor.title }}"><img src="{{ sponsor.img }}" style="border-radius:15px"></a>
|
||||
{% endfor %}
|
||||
{% endif %}
|
||||
|
||||
<!-- /sponsors -->
|
||||
|
||||
<a href="https://fastapi.tiangolo.com/zh/fastapi-people/#sponsors" class="external-link" target="_blank">其他赞助商</a>
|
||||
<a href="https://fastapi.tiangolo.com/fastapi-people/#sponsors" class="external-link" target="_blank">Other sponsors</a>
|
||||
|
||||
## 评价 { #opinions }
|
||||
## 评价
|
||||
|
||||
「_[...] 最近我大量使用 **FastAPI**。[...] 我实际上计划把它用于我团队在 **微软** 的所有 **机器学习服务**。其中一些正在集成进核心 **Windows** 产品以及一些 **Office** 产品。_」
|
||||
「_[...] 最近我一直在使用 **FastAPI**。[...] 实际上我正在计划将其用于我所在的**微软**团队的所有**机器学习服务**。其中一些服务正被集成进核心 **Windows** 产品和一些 **Office** 产品。_」
|
||||
|
||||
<div style="text-align: right; margin-right: 10%;">Kabir Khan - <strong>Microsoft</strong> <a href="https://github.com/fastapi/fastapi/pull/26" target="_blank"><small>(ref)</small></a></div>
|
||||
<div style="text-align: right; margin-right: 10%;">Kabir Khan - <strong>微软</strong> <a href="https://github.com/fastapi/fastapi/pull/26" target="_blank"><small>(ref)</small></a></div>
|
||||
|
||||
---
|
||||
|
||||
「_我们采用 **FastAPI** 来构建可查询以获取**预测结果**的 **REST** 服务器。[用于 Ludwig]_」
|
||||
「_我们选择了 **FastAPI** 来创建用于获取**预测结果**的 **REST** 服务。[用于 Ludwig]_」
|
||||
|
||||
<div style="text-align: right; margin-right: 10%;">Piero Molino,Yaroslav Dudin,Sai Sumanth Miryala - <strong>Uber</strong> <a href="https://eng.uber.com/ludwig-v0-2/" target="_blank"><small>(ref)</small></a></div>
|
||||
<div style="text-align: right; margin-right: 10%;">Piero Molino,Yaroslav Dudin 和 Sai Sumanth Miryala - <strong>Uber</strong> <a href="https://eng.uber.com/ludwig-v0-2/" target="_blank"><small>(ref)</small></a></div>
|
||||
|
||||
---
|
||||
|
||||
「_**Netflix** 很高兴宣布开源我们的**危机管理**编排框架:**Dispatch**![使用 **FastAPI** 构建]_」
|
||||
「_**Netflix** 非常高兴地宣布,正式开源我们的**危机管理**编排框架:**Dispatch**![使用 **FastAPI** 构建]_」
|
||||
|
||||
<div style="text-align: right; margin-right: 10%;">Kevin Glisson,Marc Vilanova,Forest Monsen - <strong>Netflix</strong> <a href="https://netflixtechblog.com/introducing-dispatch-da4b8a2a8072" target="_blank"><small>(ref)</small></a></div>
|
||||
|
||||
---
|
||||
|
||||
「_我对 **FastAPI** 兴奋到飞起。它太有趣了!_」
|
||||
「_**FastAPI** 让我兴奋的欣喜若狂。它太棒了!_」
|
||||
|
||||
<div style="text-align: right; margin-right: 10%;">Brian Okken - <strong><a href="https://pythonbytes.fm/episodes/show/123/time-to-right-the-py-wrongs?time_in_sec=855" target="_blank">Python Bytes</a> 播客主持人</strong> <a href="https://x.com/brianokken/status/1112220079972728832" target="_blank"><small>(ref)</small></a></div>
|
||||
|
||||
---
|
||||
|
||||
「_老实说,你构建的东西非常稳健而且打磨得很好。从很多方面看,这就是我想让 **Hug** 成为的样子 —— 看到有人把它做出来真的很鼓舞人心。_」
|
||||
「_老实说,你的作品看起来非常可靠和优美。在很多方面,这就是我想让 **Hug** 成为的样子 - 看到有人实现了它真的很鼓舞人心。_」
|
||||
|
||||
<div style="text-align: right; margin-right: 10%;">Timothy Crosley - <strong><a href="https://github.com/hugapi/hug" target="_blank">Hug</a> 作者</strong> <a href="https://news.ycombinator.com/item?id=19455465" target="_blank"><small>(ref)</small></a></div>
|
||||
|
||||
---
|
||||
|
||||
「_如果你想学一个用于构建 REST API 的**现代框架**,看看 **FastAPI** [...] 它快速、易用且易学 [...]_」
|
||||
「_如果你正打算学习一个**现代框架**用来构建 REST API,来看下 **FastAPI** [...] 它快速、易用且易于学习 [...]_」
|
||||
|
||||
「_我们已经把我们的 **API** 切换到 **FastAPI** [...] 我想你会喜欢它 [...]_」
|
||||
「_我们已经将 **API** 服务切换到了 **FastAPI** [...] 我认为你会喜欢它的 [...]_」
|
||||
|
||||
<div style="text-align: right; margin-right: 10%;">Ines Montani - Matthew Honnibal - <strong><a href="https://explosion.ai" target="_blank">Explosion AI</a> 创始人 - <a href="https://spacy.io" target="_blank">spaCy</a> 作者</strong> <a href="https://x.com/_inesmontani/status/1144173225322143744" target="_blank"><small>(ref)</small></a> - <a href="https://x.com/honnibal/status/1144031421859655680" target="_blank"><small>(ref)</small></a></div>
|
||||
|
||||
---
|
||||
|
||||
「_如果有人正在构建生产级的 Python API,我强烈推荐 **FastAPI**。它**设计优雅**、**使用简单**且**高度可扩展**,已经成为我们 API 优先开发战略中的**关键组件**,并驱动了许多自动化和服务,比如我们的 Virtual TAC Engineer。_」
|
||||
|
||||
<div style="text-align: right; margin-right: 10%;">Deon Pillsbury - <strong>Cisco</strong> <a href="https://www.linkedin.com/posts/deonpillsbury_cisco-cx-python-activity-6963242628536487936-trAp/" target="_blank"><small>(ref)</small></a></div>
|
||||
|
||||
---
|
||||
|
||||
## FastAPI 迷你纪录片 { #fastapi-mini-documentary }
|
||||
|
||||
在 2025 年末发布了一部<a href="https://www.youtube.com/watch?v=mpR8ngthqiE" class="external-link" target="_blank">FastAPI 迷你纪录片</a>,你可以在线观看:
|
||||
|
||||
<a href="https://www.youtube.com/watch?v=mpR8ngthqiE" target="_blank"><img src="https://fastapi.tiangolo.com/img/fastapi-documentary.jpg" alt="FastAPI Mini Documentary"></a>
|
||||
|
||||
## **Typer**,命令行中的 FastAPI { #typer-the-fastapi-of-clis }
|
||||
## **Typer**,命令行中的 FastAPI
|
||||
|
||||
<a href="https://typer.tiangolo.com" target="_blank"><img src="https://typer.tiangolo.com/img/logo-margin/logo-margin-vector.svg" style="width: 20%;"></a>
|
||||
|
||||
如果你要开发一个用于终端的 <abbr title="Command Line Interface">命令行</abbr>应用而不是 Web API,看看 <a href="https://typer.tiangolo.com/" class="external-link" target="_blank">**Typer**</a>。
|
||||
如果你正在开发一个在终端中运行的<abbr title="Command Line Interface">命令行</abbr>应用而不是 web API,不妨试下 <a href="https://typer.tiangolo.com/" class="external-link" target="_blank">**Typer**</a>。
|
||||
|
||||
**Typer** 是 FastAPI 的小同胞。它的目标是成为**命令行中的 FastAPI**。⌨️ 🚀
|
||||
**Typer** 是 FastAPI 的小同胞。它想要成为**命令行中的 FastAPI**。 ⌨️ 🚀
|
||||
|
||||
## 依赖 { #requirements }
|
||||
## 依赖
|
||||
|
||||
FastAPI 站在巨人的肩膀之上:
|
||||
Python 及更高版本
|
||||
|
||||
* <a href="https://www.starlette.dev/" class="external-link" target="_blank">Starlette</a> 负责 Web 部分。
|
||||
FastAPI 站在以下巨人的肩膀之上:
|
||||
|
||||
* <a href="https://www.starlette.dev/" class="external-link" target="_blank">Starlette</a> 负责 web 部分。
|
||||
* <a href="https://docs.pydantic.dev/" class="external-link" target="_blank">Pydantic</a> 负责数据部分。
|
||||
|
||||
## 安装 { #installation }
|
||||
|
||||
创建并激活一个<a href="https://fastapi.tiangolo.com/zh/virtual-environments/" class="external-link" target="_blank">虚拟环境</a>,然后安装 FastAPI:
|
||||
## 安装
|
||||
|
||||
<div class="termy">
|
||||
|
||||
```console
|
||||
$ pip install "fastapi[standard]"
|
||||
$ pip install fastapi
|
||||
|
||||
---> 100%
|
||||
```
|
||||
|
||||
</div>
|
||||
|
||||
**Note**: 请确保把 `"fastapi[standard]"` 用引号包起来,以保证在所有终端中都能正常工作。
|
||||
你还会需要一个 ASGI 服务器,生产环境可以使用 <a href="https://www.uvicorn.dev" class="external-link" target="_blank">Uvicorn</a> 或者 <a href="https://github.com/pgjones/hypercorn" class="external-link" target="_blank">Hypercorn</a>。
|
||||
|
||||
## 示例 { #example }
|
||||
<div class="termy">
|
||||
|
||||
### 创建 { #create-it }
|
||||
```console
|
||||
$ pip install "uvicorn[standard]"
|
||||
|
||||
创建文件 `main.py`,内容如下:
|
||||
---> 100%
|
||||
```
|
||||
|
||||
</div>
|
||||
|
||||
## 示例
|
||||
|
||||
### 创建
|
||||
|
||||
* 创建一个 `main.py` 文件并写入以下内容:
|
||||
|
||||
```Python
|
||||
from typing import Union
|
||||
|
||||
from fastapi import FastAPI
|
||||
|
||||
app = FastAPI()
|
||||
@@ -172,16 +167,18 @@ def read_root():
|
||||
|
||||
|
||||
@app.get("/items/{item_id}")
|
||||
def read_item(item_id: int, q: str | None = None):
|
||||
def read_item(item_id: int, q: Union[str, None] = None):
|
||||
return {"item_id": item_id, "q": q}
|
||||
```
|
||||
|
||||
<details markdown="1">
|
||||
<summary>或者使用 <code>async def</code>...</summary>
|
||||
|
||||
如果你的代码里会用到 `async` / `await`,请使用 `async def`:
|
||||
如果你的代码里会出现 `async` / `await`,请使用 `async def`:
|
||||
|
||||
```Python hl_lines="9 14"
|
||||
from typing import Union
|
||||
|
||||
```Python hl_lines="7 12"
|
||||
from fastapi import FastAPI
|
||||
|
||||
app = FastAPI()
|
||||
@@ -193,41 +190,28 @@ async def read_root():
|
||||
|
||||
|
||||
@app.get("/items/{item_id}")
|
||||
async def read_item(item_id: int, q: str | None = None):
|
||||
async def read_item(item_id: int, q: Union[str, None] = None):
|
||||
return {"item_id": item_id, "q": q}
|
||||
```
|
||||
|
||||
**Note**:
|
||||
|
||||
如果你不确定,请查看文档中 _"In a hurry?"_ 章节的<a href="https://fastapi.tiangolo.com/zh/async/#in-a-hurry" target="_blank">`async` 和 `await`</a>部分。
|
||||
如果你不知道是否会用到,可以查看文档的 _"In a hurry?"_ 章节中 <a href="https://fastapi.tiangolo.com/zh/async/#in-a-hurry" target="_blank">关于 `async` 和 `await` 的部分</a>。
|
||||
|
||||
</details>
|
||||
|
||||
### 运行 { #run-it }
|
||||
### 运行
|
||||
|
||||
用下面的命令运行服务器:
|
||||
通过以下命令运行服务器:
|
||||
|
||||
<div class="termy">
|
||||
|
||||
```console
|
||||
$ fastapi dev main.py
|
||||
$ uvicorn main:app --reload
|
||||
|
||||
╭────────── FastAPI CLI - Development mode ───────────╮
|
||||
│ │
|
||||
│ Serving at: http://127.0.0.1:8000 │
|
||||
│ │
|
||||
│ API docs: http://127.0.0.1:8000/docs │
|
||||
│ │
|
||||
│ Running in development mode, for production use: │
|
||||
│ │
|
||||
│ fastapi run │
|
||||
│ │
|
||||
╰─────────────────────────────────────────────────────╯
|
||||
|
||||
INFO: Will watch for changes in these directories: ['/home/user/code/awesomeapp']
|
||||
INFO: Uvicorn running on http://127.0.0.1:8000 (Press CTRL+C to quit)
|
||||
INFO: Started reloader process [2248755] using WatchFiles
|
||||
INFO: Started server process [2248757]
|
||||
INFO: Started reloader process [28720]
|
||||
INFO: Started server process [28722]
|
||||
INFO: Waiting for application startup.
|
||||
INFO: Application startup complete.
|
||||
```
|
||||
@@ -235,56 +219,58 @@ INFO: Application startup complete.
|
||||
</div>
|
||||
|
||||
<details markdown="1">
|
||||
<summary>关于命令 <code>fastapi dev main.py</code>...</summary>
|
||||
<summary>关于 <code>uvicorn main:app --reload</code> 命令......</summary>
|
||||
|
||||
`fastapi dev` 命令会读取你的 `main.py` 文件,检测其中的 **FastAPI** 应用,并使用 <a href="https://www.uvicorn.dev" class="external-link" target="_blank">Uvicorn</a> 启动服务器。
|
||||
`uvicorn main:app` 命令含义如下:
|
||||
|
||||
默认情况下,`fastapi dev` 会在本地开发时启用自动重载。
|
||||
|
||||
你可以在 <a href="https://fastapi.tiangolo.com/zh/fastapi-cli/" target="_blank">FastAPI CLI 文档</a>中了解更多。
|
||||
* `main`:`main.py` 文件(一个 Python "模块")。
|
||||
* `app`:在 `main.py` 文件中通过 `app = FastAPI()` 创建的对象。
|
||||
* `--reload`:让服务器在更新代码后重新启动。仅在开发时使用该选项。
|
||||
|
||||
</details>
|
||||
|
||||
### 检查 { #check-it }
|
||||
### 检查
|
||||
|
||||
用浏览器打开 <a href="http://127.0.0.1:8000/items/5?q=somequery" class="external-link" target="_blank">http://127.0.0.1:8000/items/5?q=somequery</a>。
|
||||
使用浏览器访问 <a href="http://127.0.0.1:8000/items/5?q=somequery" class="external-link" target="_blank">http://127.0.0.1:8000/items/5?q=somequery</a>。
|
||||
|
||||
你会看到如下 JSON 响应:
|
||||
你将会看到如下 JSON 响应:
|
||||
|
||||
```JSON
|
||||
{"item_id": 5, "q": "somequery"}
|
||||
```
|
||||
|
||||
你已经创建了一个 API,它可以:
|
||||
你已经创建了一个具有以下功能的 API:
|
||||
|
||||
* 在路径 `/` 和 `/items/{item_id}` 接收 HTTP 请求。
|
||||
* 以上两个路径都接受 `GET` <em>操作</em>(也称为 HTTP <em>方法</em>)。
|
||||
* 路径 `/items/{item_id}` 有一个应为 `int` 的<em>路径参数</em> `item_id`。
|
||||
* 路径 `/items/{item_id}` 有一个可选的 `str` 类型<em>查询参数</em> `q`。
|
||||
* 通过 _路径_ `/` 和 `/items/{item_id}` 接受 HTTP 请求。
|
||||
* 以上 _路径_ 都接受 `GET` <em>操作</em>(也被称为 HTTP _方法_)。
|
||||
* `/items/{item_id}` _路径_ 有一个 _路径参数_ `item_id` 并且应该为 `int` 类型。
|
||||
* `/items/{item_id}` _路径_ 有一个可选的 `str` 类型的 _查询参数_ `q`。
|
||||
|
||||
### 交互式 API 文档 { #interactive-api-docs }
|
||||
### 交互式 API 文档
|
||||
|
||||
现在访问 <a href="http://127.0.0.1:8000/docs" class="external-link" target="_blank">http://127.0.0.1:8000/docs</a>。
|
||||
|
||||
你会看到自动生成的交互式 API 文档(由 <a href="https://github.com/swagger-api/swagger-ui" class="external-link" target="_blank">Swagger UI</a> 提供):
|
||||
你会看到自动生成的交互式 API 文档(由 <a href="https://github.com/swagger-api/swagger-ui" class="external-link" target="_blank">Swagger UI</a>生成):
|
||||
|
||||

|
||||
|
||||
### 可选的 API 文档 { #alternative-api-docs }
|
||||
### 可选的 API 文档
|
||||
|
||||
然后访问 <a href="http://127.0.0.1:8000/redoc" class="external-link" target="_blank">http://127.0.0.1:8000/redoc</a>。
|
||||
访问 <a href="http://127.0.0.1:8000/redoc" class="external-link" target="_blank">http://127.0.0.1:8000/redoc</a>。
|
||||
|
||||
你会看到另一个自动生成的文档(由 <a href="https://github.com/Rebilly/ReDoc" class="external-link" target="_blank">ReDoc</a> 提供):
|
||||
你会看到另一个自动生成的文档(由 <a href="https://github.com/Rebilly/ReDoc" class="external-link" target="_blank">ReDoc</a> 生成):
|
||||
|
||||

|
||||
|
||||
## 示例升级 { #example-upgrade }
|
||||
## 示例升级
|
||||
|
||||
现在修改 `main.py` 文件来接收来自 `PUT` 请求的请求体。
|
||||
现在修改 `main.py` 文件来从 `PUT` 请求中接收请求体。
|
||||
|
||||
借助 Pydantic,使用标准的 Python 类型来声明请求体。
|
||||
我们借助 Pydantic 来使用标准的 Python 类型声明请求体。
|
||||
|
||||
```Python hl_lines="4 9-12 25-27"
|
||||
from typing import Union
|
||||
|
||||
```Python hl_lines="2 7-10 23-25"
|
||||
from fastapi import FastAPI
|
||||
from pydantic import BaseModel
|
||||
|
||||
@@ -294,7 +280,7 @@ app = FastAPI()
|
||||
class Item(BaseModel):
|
||||
name: str
|
||||
price: float
|
||||
is_offer: bool | None = None
|
||||
is_offer: Union[bool, None] = None
|
||||
|
||||
|
||||
@app.get("/")
|
||||
@@ -303,7 +289,7 @@ def read_root():
|
||||
|
||||
|
||||
@app.get("/items/{item_id}")
|
||||
def read_item(item_id: int, q: str | None = None):
|
||||
def read_item(item_id: int, q: Union[str, None] = None):
|
||||
return {"item_id": item_id, "q": q}
|
||||
|
||||
|
||||
@@ -312,248 +298,173 @@ def update_item(item_id: int, item: Item):
|
||||
return {"item_name": item.name, "item_id": item_id}
|
||||
```
|
||||
|
||||
`fastapi dev` 服务器会自动重载。
|
||||
服务器将会自动重载(因为在上面的步骤中你向 `uvicorn` 命令添加了 `--reload` 选项)。
|
||||
|
||||
### 交互式 API 文档升级 { #interactive-api-docs-upgrade }
|
||||
### 交互式 API 文档升级
|
||||
|
||||
现在访问 <a href="http://127.0.0.1:8000/docs" class="external-link" target="_blank">http://127.0.0.1:8000/docs</a>。
|
||||
访问 <a href="http://127.0.0.1:8000/docs" class="external-link" target="_blank">http://127.0.0.1:8000/docs</a>。
|
||||
|
||||
* 交互式 API 文档会自动更新,并包含新的请求体:
|
||||
* 交互式 API 文档将会自动更新,并加入新的请求体:
|
||||
|
||||

|
||||
|
||||
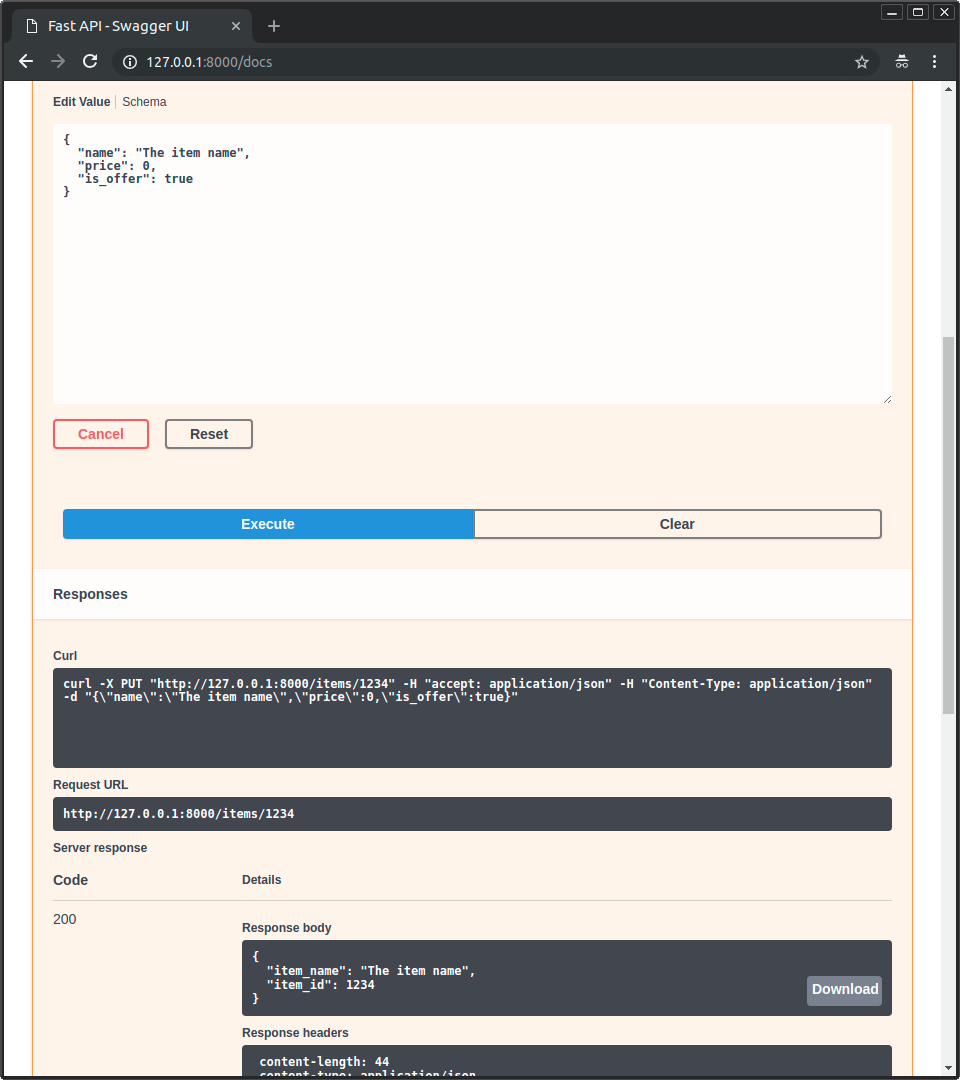
* 点击「Try it out」按钮,它允许你填写参数并直接与 API 交互:
|
||||
* 点击「Try it out」按钮,之后你可以填写参数并直接调用 API:
|
||||
|
||||

|
||||
|
||||
* 然后点击「Execute」按钮,界面会与你的 API 通信、发送参数、获取结果并在屏幕上展示:
|
||||
* 然后点击「Execute」按钮,用户界面将会和 API 进行通信,发送参数,获取结果并在屏幕上展示:
|
||||
|
||||
|
||||
|
||||
### 可选文档升级 { #alternative-api-docs-upgrade }
|
||||
### 可选文档升级
|
||||
|
||||
再访问 <a href="http://127.0.0.1:8000/redoc" class="external-link" target="_blank">http://127.0.0.1:8000/redoc</a>。
|
||||
访问 <a href="http://127.0.0.1:8000/redoc" class="external-link" target="_blank">http://127.0.0.1:8000/redoc</a>。
|
||||
|
||||
* 可选文档同样会体现新的查询参数和请求体:
|
||||
* 可选文档同样会体现新加入的请求参数和请求体:
|
||||
|
||||

|
||||
|
||||
### 总结 { #recap }
|
||||
### 总结
|
||||
|
||||
总之,你只需要把参数、请求体等的类型作为函数参数**声明一次**。
|
||||
总的来说,你就像声明函数的参数类型一样只声明了**一次**请求参数、请求体等的类型。
|
||||
|
||||
这些都使用标准的现代 Python 类型即可。
|
||||
你使用了标准的现代 Python 类型来完成声明。
|
||||
|
||||
你不需要学习新的语法、某个特定库的方法或类等。
|
||||
你不需要去学习新的语法、了解特定库的方法或类,等等。
|
||||
|
||||
只需要标准的 **Python**。
|
||||
只需要使用标准的 **Python 及更高版本**。
|
||||
|
||||
例如,一个 `int`:
|
||||
举个例子,比如声明 `int` 类型:
|
||||
|
||||
```Python
|
||||
item_id: int
|
||||
```
|
||||
|
||||
或者更复杂的 `Item` 模型:
|
||||
或者一个更复杂的 `Item` 模型:
|
||||
|
||||
```Python
|
||||
item: Item
|
||||
```
|
||||
|
||||
……通过一次声明,你将获得:
|
||||
......在进行一次声明之后,你将获得:
|
||||
|
||||
* 编辑器支持,包括:
|
||||
* 自动补全。
|
||||
* 类型检查。
|
||||
* 自动补全
|
||||
* 类型检查
|
||||
* 数据校验:
|
||||
* 当数据无效时自动生成清晰的错误信息。
|
||||
* 即便是多层嵌套的 JSON 对象也会进行校验。
|
||||
* 输入数据的<abbr title="也被称为:序列化、解析、编组">转换</abbr>:从网络读取到 Python 数据和类型。读取来源:
|
||||
* JSON。
|
||||
* 路径参数。
|
||||
* 查询参数。
|
||||
* Cookies。
|
||||
* Headers。
|
||||
* Forms。
|
||||
* Files。
|
||||
* 输出数据的<abbr title="也被称为:序列化、解析、编组">转换</abbr>:从 Python 数据和类型转换为网络数据(JSON):
|
||||
* 转换 Python 类型(`str`、`int`、`float`、`bool`、`list` 等)。
|
||||
* `datetime` 对象。
|
||||
* `UUID` 对象。
|
||||
* 数据库模型。
|
||||
* ……以及更多。
|
||||
* 在校验失败时自动生成清晰的错误信息
|
||||
* 对多层嵌套的 JSON 对象依然执行校验
|
||||
* <abbr title="也被称为:序列化或解析">转换</abbr> 来自网络请求的输入数据为 Python 数据类型。包括以下数据:
|
||||
* JSON
|
||||
* 路径参数
|
||||
* 查询参数
|
||||
* Cookies
|
||||
* 请求头
|
||||
* 表单
|
||||
* 文件
|
||||
* <abbr title="也被称为:序列化或解析">转换</abbr> 输出的数据:转换 Python 数据类型为供网络传输的 JSON 数据:
|
||||
* 转换 Python 基础类型 (`str`、 `int`、 `float`、 `bool`、 `list` 等)
|
||||
* `datetime` 对象
|
||||
* `UUID` 对象
|
||||
* 数据库模型
|
||||
* ......以及更多其他类型
|
||||
* 自动生成的交互式 API 文档,包括两种可选的用户界面:
|
||||
* Swagger UI。
|
||||
* ReDoc。
|
||||
* Swagger UI
|
||||
* ReDoc
|
||||
|
||||
---
|
||||
|
||||
回到之前的代码示例,**FastAPI** 将会:
|
||||
回到前面的代码示例,**FastAPI** 将会:
|
||||
|
||||
* 校验 `GET` 和 `PUT` 请求的路径中是否包含 `item_id`。
|
||||
* 校验 `GET` 和 `PUT` 请求的路径中是否含有 `item_id`。
|
||||
* 校验 `GET` 和 `PUT` 请求中的 `item_id` 是否为 `int` 类型。
|
||||
* 如果不是,客户端会看到清晰有用的错误信息。
|
||||
* 对于 `GET` 请求,检查是否存在名为 `q` 的可选查询参数(如 `http://127.0.0.1:8000/items/foo?q=somequery`)。
|
||||
* 因为参数 `q` 被声明为 `= None`,所以它是可选的。
|
||||
* 如果没有 `None`,它就是必需的(就像 `PUT` 情况下的请求体)。
|
||||
* 对于发送到 `/items/{item_id}` 的 `PUT` 请求,把请求体作为 JSON 读取:
|
||||
* 检查是否存在必需属性 `name`,且为 `str`。
|
||||
* 检查是否存在必需属性 `price`,且为 `float`。
|
||||
* 检查是否存在可选属性 `is_offer`,如果存在则应为 `bool`。
|
||||
* 对于多层嵌套的 JSON 对象,同样适用。
|
||||
* 自动完成 JSON 的读取与输出转换。
|
||||
* 使用 OpenAPI 记录所有内容,可用于:
|
||||
* 交互式文档系统。
|
||||
* 多语言的客户端代码自动生成系统。
|
||||
* 直接提供 2 种交互式文档 Web 界面。
|
||||
* 如果不是,客户端将会收到清晰有用的错误信息。
|
||||
* 检查 `GET` 请求中是否有命名为 `q` 的可选查询参数(比如 `http://127.0.0.1:8000/items/foo?q=somequery`)。
|
||||
* 因为 `q` 被声明为 `= None`,所以它是可选的。
|
||||
* 如果没有 `None` 它将会是必需的 (如 `PUT` 例子中的请求体)。
|
||||
* 对于访问 `/items/{item_id}` 的 `PUT` 请求,将请求体读取为 JSON 并:
|
||||
* 检查是否有必需属性 `name` 并且值为 `str` 类型 。
|
||||
* 检查是否有必需属性 `price` 并且值为 `float` 类型。
|
||||
* 检查是否有可选属性 `is_offer`, 如果有的话值应该为 `bool` 类型。
|
||||
* 以上过程对于多层嵌套的 JSON 对象同样也会执行
|
||||
* 自动对 JSON 进行转换或转换成 JSON。
|
||||
* 通过 OpenAPI 文档来记录所有内容,可被用于:
|
||||
* 交互式文档系统
|
||||
* 许多编程语言的客户端代码自动生成系统
|
||||
* 直接提供 2 种交互式文档 web 界面。
|
||||
|
||||
---
|
||||
|
||||
我们只是浅尝辄止,但你已经大致了解其工作方式了。
|
||||
虽然我们才刚刚开始,但其实你已经了解了这一切是如何工作的。
|
||||
|
||||
尝试把这一行:
|
||||
尝试更改下面这行代码:
|
||||
|
||||
```Python
|
||||
return {"item_name": item.name, "item_id": item_id}
|
||||
```
|
||||
|
||||
……从:
|
||||
......从:
|
||||
|
||||
```Python
|
||||
... "item_name": item.name ...
|
||||
```
|
||||
|
||||
……改为:
|
||||
......改为:
|
||||
|
||||
```Python
|
||||
... "item_price": item.price ...
|
||||
```
|
||||
|
||||
……看看你的编辑器如何自动补全属性并知道它们的类型:
|
||||
......注意观察编辑器是如何自动补全属性并且还知道它们的类型:
|
||||
|
||||

|
||||
|
||||
更多包含更多特性的完整示例,请参阅 <a href="https://fastapi.tiangolo.com/zh/tutorial/">教程 - 用户指南</a>。
|
||||
<a href="https://fastapi.tiangolo.com/zh/tutorial/">教程 - 用户指南</a> 中有包含更多特性的更完整示例。
|
||||
|
||||
**剧透警告**:教程 - 用户指南包括:
|
||||
**剧透警告**: 教程 - 用户指南中的内容有:
|
||||
|
||||
* 来自不同位置的**参数**声明:**headers**、**cookies**、**form 字段**和**文件**。
|
||||
* 如何设置**校验约束**,如 `maximum_length` 或 `regex`。
|
||||
* 功能强大且易用的 **<abbr title="也被称为 components、resources、providers、services、injectables">依赖注入</abbr>** 系统。
|
||||
* 安全与认证,包括对 **OAuth2**、**JWT tokens** 和 **HTTP Basic** 认证的支持。
|
||||
* 更高级(但同样简单)的 **多层嵌套 JSON 模型** 声明技巧(得益于 Pydantic)。
|
||||
* 通过 <a href="https://strawberry.rocks" class="external-link" target="_blank">Strawberry</a> 等库进行 **GraphQL** 集成。
|
||||
* 许多额外特性(归功于 Starlette),例如:
|
||||
* 对来自不同地方的参数进行声明,如:**请求头**、**cookies**、**form 表单**以及**上传的文件**。
|
||||
* 如何设置**校验约束**如 `maximum_length` 或者 `regex`。
|
||||
* 一个强大并易于使用的 **<abbr title="也被称为 components, resources, providers, services, injectables">依赖注入</abbr>** 系统。
|
||||
* 安全性和身份验证,包括通过 **JWT 令牌**和 **HTTP 基本身份认证**来支持 **OAuth2**。
|
||||
* 更进阶(但同样简单)的技巧来声明 **多层嵌套 JSON 模型** (借助 Pydantic)。
|
||||
* 许多额外功能(归功于 Starlette)比如:
|
||||
* **WebSockets**
|
||||
* **GraphQL**
|
||||
* 基于 HTTPX 和 `pytest` 的极其简单的测试
|
||||
* **CORS**
|
||||
* **Cookie Sessions**
|
||||
* ……以及更多。
|
||||
* ......以及更多
|
||||
|
||||
### 部署你的应用(可选) { #deploy-your-app-optional }
|
||||
## 性能
|
||||
|
||||
你可以选择把 FastAPI 应用部署到 <a href="https://fastapicloud.com" class="external-link" target="_blank">FastAPI Cloud</a>,如果还没有的话去加入候补名单吧。🚀
|
||||
独立机构 TechEmpower 所作的基准测试结果显示,基于 Uvicorn 运行的 **FastAPI** 程序是 <a href="https://www.techempower.com/benchmarks/#section=test&runid=7464e520-0dc2-473d-bd34-dbdfd7e85911&hw=ph&test=query&l=zijzen-7" class="external-link" target="_blank">最快的 Python web 框架之一</a>,仅次于 Starlette 和 Uvicorn 本身(FastAPI 内部使用了它们)。(*)
|
||||
|
||||
如果你已经有 **FastAPI Cloud** 账号(我们从候补名单邀请了你 😉),你可以用一个命令部署你的应用。
|
||||
想了解更多,请查阅 <a href="https://fastapi.tiangolo.com/zh/benchmarks/" class="internal-link" target="_blank">基准测试</a> 章节。
|
||||
|
||||
部署前,先确认已登录:
|
||||
## 可选依赖
|
||||
|
||||
<div class="termy">
|
||||
|
||||
```console
|
||||
$ fastapi login
|
||||
|
||||
You are logged in to FastAPI Cloud 🚀
|
||||
```
|
||||
|
||||
</div>
|
||||
|
||||
然后部署你的应用:
|
||||
|
||||
<div class="termy">
|
||||
|
||||
```console
|
||||
$ fastapi deploy
|
||||
|
||||
Deploying to FastAPI Cloud...
|
||||
|
||||
✅ Deployment successful!
|
||||
|
||||
🐔 Ready the chicken! Your app is ready at https://myapp.fastapicloud.dev
|
||||
```
|
||||
|
||||
</div>
|
||||
|
||||
就这样!现在你可以通过该 URL 访问你的应用了。✨
|
||||
|
||||
#### 关于 FastAPI Cloud { #about-fastapi-cloud }
|
||||
|
||||
**<a href="https://fastapicloud.com" class="external-link" target="_blank">FastAPI Cloud</a>** 由 **FastAPI** 的同一位作者和团队打造。
|
||||
|
||||
它让你以最小的工作量就能**构建**、**部署**并**访问**一个 API。
|
||||
|
||||
它把用 FastAPI 构建应用时的**开发者体验**带到了部署到云上的过程。🎉
|
||||
|
||||
FastAPI Cloud 是「FastAPI and friends」开源项目的主要赞助方和资金提供者。✨
|
||||
|
||||
#### 部署到其他云厂商 { #deploy-to-other-cloud-providers }
|
||||
|
||||
FastAPI 是开源且基于标准的。你可以部署 FastAPI 应用到你选择的任意云厂商。
|
||||
|
||||
按照你的云厂商的指南部署 FastAPI 应用即可。🤓
|
||||
|
||||
## 性能 { #performance }
|
||||
|
||||
独立机构 TechEmpower 的基准测试显示,运行在 Uvicorn 下的 **FastAPI** 应用是<a href="https://www.techempower.com/benchmarks/#section=test&runid=7464e520-0dc2-473d-bd34-dbdfd7e85911&hw=ph&test=query&l=zijzen-7" class="external-link" target="_blank">最快的 Python 框架之一</a>,仅次于 Starlette 和 Uvicorn 本身(FastAPI 内部使用它们)。(*)
|
||||
|
||||
想了解更多,请参阅<a href="https://fastapi.tiangolo.com/zh/benchmarks/" class="internal-link" target="_blank">基准测试</a>章节。
|
||||
|
||||
## 依赖项 { #dependencies }
|
||||
|
||||
FastAPI 依赖 Pydantic 和 Starlette。
|
||||
|
||||
### `standard` 依赖 { #standard-dependencies }
|
||||
|
||||
当你通过 `pip install "fastapi[standard]"` 安装 FastAPI 时,会包含 `standard` 组的一些可选依赖:
|
||||
|
||||
Pydantic 使用:
|
||||
用于 Pydantic:
|
||||
|
||||
* <a href="https://github.com/JoshData/python-email-validator" target="_blank"><code>email-validator</code></a> - 用于 email 校验。
|
||||
|
||||
Starlette 使用:
|
||||
用于 Starlette:
|
||||
|
||||
* <a href="https://www.python-httpx.org" target="_blank"><code>httpx</code></a> - 使用 `TestClient` 时需要。
|
||||
* <a href="https://jinja.palletsprojects.com" target="_blank"><code>jinja2</code></a> - 使用默认模板配置时需要。
|
||||
* <a href="https://github.com/Kludex/python-multipart" target="_blank"><code>python-multipart</code></a> - 使用 `request.form()` 支持表单<abbr title="将 HTTP 请求中的字符串转换为 Python 数据">「解析」</abbr>时需要。
|
||||
* <a href="https://www.python-httpx.org" target="_blank"><code>httpx</code></a> - 使用 `TestClient` 时安装。
|
||||
* <a href="https://jinja.palletsprojects.com" target="_blank"><code>jinja2</code></a> - 使用默认模板配置时安装。
|
||||
* <a href="https://github.com/Kludex/python-multipart" target="_blank"><code>python-multipart</code></a> - 需要通过 `request.form()` 对表单进行<abbr title="将来自 HTTP 请求中的字符串转换为 Python 数据类型">「解析」</abbr>时安装。
|
||||
* <a href="https://pythonhosted.org/itsdangerous/" target="_blank"><code>itsdangerous</code></a> - 需要 `SessionMiddleware` 支持时安装。
|
||||
* <a href="https://pyyaml.org/wiki/PyYAMLDocumentation" target="_blank"><code>pyyaml</code></a> - 使用 Starlette 提供的 `SchemaGenerator` 时安装(有 FastAPI 你可能并不需要它)。
|
||||
* <a href="https://graphene-python.org/" target="_blank"><code>graphene</code></a> - 需要 `GraphQLApp` 支持时安装。
|
||||
|
||||
FastAPI 使用:
|
||||
用于 FastAPI / Starlette:
|
||||
|
||||
* <a href="https://www.uvicorn.dev" target="_blank"><code>uvicorn</code></a> - 加载并提供你的应用的服务器。包含 `uvicorn[standard]`,其中包含高性能服务所需的一些依赖(例如 `uvloop`)。
|
||||
* `fastapi-cli[standard]` - 提供 `fastapi` 命令。
|
||||
* 其中包含 `fastapi-cloud-cli`,它允许你将 FastAPI 应用部署到 <a href="https://fastapicloud.com" class="external-link" target="_blank">FastAPI Cloud</a>。
|
||||
* <a href="https://www.uvicorn.dev" target="_blank"><code>uvicorn</code></a> - 用于加载和运行你的应用程序的服务器。
|
||||
* <a href="https://github.com/ijl/orjson" target="_blank"><code>orjson</code></a> - 使用 `ORJSONResponse` 时安装。
|
||||
* <a href="https://github.com/esnme/ultrajson" target="_blank"><code>ujson</code></a> - 使用 `UJSONResponse` 时安装。
|
||||
|
||||
### 不包含 `standard` 依赖 { #without-standard-dependencies }
|
||||
你可以通过 `pip install "fastapi[all]"` 命令来安装以上所有依赖。
|
||||
|
||||
如果你不想包含这些 `standard` 可选依赖,可以使用 `pip install fastapi`,而不是 `pip install "fastapi[standard]"`。
|
||||
|
||||
### 不包含 `fastapi-cloud-cli` { #without-fastapi-cloud-cli }
|
||||
|
||||
如果你想安装带有 standard 依赖但不包含 `fastapi-cloud-cli` 的 FastAPI,可以使用 `pip install "fastapi[standard-no-fastapi-cloud-cli]"`。
|
||||
|
||||
### 其他可选依赖 { #additional-optional-dependencies }
|
||||
|
||||
还有一些你可能想安装的可选依赖。
|
||||
|
||||
额外的 Pydantic 可选依赖:
|
||||
|
||||
* <a href="https://docs.pydantic.dev/latest/usage/pydantic_settings/" target="_blank"><code>pydantic-settings</code></a> - 用于配置管理。
|
||||
* <a href="https://docs.pydantic.dev/latest/usage/types/extra_types/extra_types/" target="_blank"><code>pydantic-extra-types</code></a> - 用于在 Pydantic 中使用的额外类型。
|
||||
|
||||
额外的 FastAPI 可选依赖:
|
||||
|
||||
* <a href="https://github.com/ijl/orjson" target="_blank"><code>orjson</code></a> - 使用 `ORJSONResponse` 时需要。
|
||||
* <a href="https://github.com/esnme/ultrajson" target="_blank"><code>ujson</code></a> - 使用 `UJSONResponse` 时需要。
|
||||
|
||||
## 许可协议 { #license }
|
||||
## 许可协议
|
||||
|
||||
该项目遵循 MIT 许可协议。
|
||||
|
||||
@@ -1,4 +1,4 @@
|
||||
# 学习 { #learn }
|
||||
# 学习
|
||||
|
||||
以下是学习 **FastAPI** 的介绍部分和教程。
|
||||
|
||||
|
||||
@@ -1,28 +1,28 @@
|
||||
# FastAPI全栈模板 { #full-stack-fastapi-template }
|
||||
# FastAPI全栈模板
|
||||
|
||||
模板通常带有特定的设置,但它们被设计为灵活且可定制。这样你可以根据项目需求进行修改和调整,使其成为很好的起点。🏁
|
||||
模板通常带有特定的设置,而且被设计为灵活和可定制的。这允许您根据项目的需求修改和调整它们,使它们成为一个很好的起点。🏁
|
||||
|
||||
你可以使用此模板开始,它已经为你完成了大量的初始设置、安全性、数据库以及一些 API 端点。
|
||||
您可以使用此模板开始,因为它包含了许多已经为您完成的初始设置、安全性、数据库和一些API端点。
|
||||
|
||||
GitHub 仓库: <a href="https://github.com/tiangolo/full-stack-fastapi-template" class="external-link" target="_blank">Full Stack FastAPI Template</a>
|
||||
代码仓: <a href="https://github.com/fastapi/full-stack-fastapi-template" class="external-link" target="_blank">Full Stack FastAPI Template</a>
|
||||
|
||||
## FastAPI全栈模板 - 技术栈和特性 { #full-stack-fastapi-template-technology-stack-and-features }
|
||||
## FastAPI全栈模板 - 技术栈和特性
|
||||
|
||||
- ⚡ [**FastAPI**](https://fastapi.tiangolo.com/zh) 用于 Python 后端 API。
|
||||
- 🧰 [SQLModel](https://sqlmodel.tiangolo.com) 用于 Python 与 SQL 数据库的交互(ORM)。
|
||||
- 🔍 [Pydantic](https://docs.pydantic.dev),FastAPI 使用,用于数据验证与配置管理。
|
||||
- 💾 [PostgreSQL](https://www.postgresql.org) 作为 SQL 数据库。
|
||||
- ⚡ [**FastAPI**](https://fastapi.tiangolo.com) 用于Python后端API.
|
||||
- 🧰 [SQLModel](https://sqlmodel.tiangolo.com) 用于Python和SQL数据库的集成(ORM)。
|
||||
- 🔍 [Pydantic](https://docs.pydantic.dev) FastAPI的依赖项之一,用于数据验证和配置管理。
|
||||
- 💾 [PostgreSQL](https://www.postgresql.org) 作为SQL数据库。
|
||||
- 🚀 [React](https://react.dev) 用于前端。
|
||||
- 💃 使用 TypeScript、hooks、Vite 以及现代前端技术栈的其他部分。
|
||||
- 🎨 [Tailwind CSS](https://tailwindcss.com) 与 [shadcn/ui](https://ui.shadcn.com) 用于前端组件。
|
||||
- 🤖 自动生成的前端客户端。
|
||||
- 🧪 [Playwright](https://playwright.dev) 用于端到端测试。
|
||||
- 🦇 支持暗黑模式。
|
||||
- 🐋 [Docker Compose](https://www.docker.com) 用于开发与生产。
|
||||
- 🔒 默认启用安全的密码哈希。
|
||||
- 🔑 JWT(JSON Web Token)认证。
|
||||
- 📫 基于邮箱的密码找回。
|
||||
- ✅ 使用 [Pytest](https://pytest.org) 进行测试。
|
||||
- 📞 [Traefik](https://traefik.io) 用作反向代理/负载均衡。
|
||||
- 🚢 使用 Docker Compose 的部署指南,包括如何设置前端 Traefik 代理以自动处理 HTTPS 证书。
|
||||
- 🏭 基于 GitHub Actions 的 CI(持续集成)与 CD(持续部署)。
|
||||
- 💃 使用了TypeScript、hooks、[Vite](https://vitejs.dev)和其他一些现代化的前端技术栈。
|
||||
- 🎨 [Chakra UI](https://chakra-ui.com) 用于前端组件。
|
||||
- 🤖 一个自动化生成的前端客户端。
|
||||
- 🧪 [Playwright](https://playwright.dev)用于端到端测试。
|
||||
- 🦇 支持暗黑主题(Dark mode)。
|
||||
- 🐋 [Docker Compose](https://www.docker.com) 用于开发环境和生产环境。
|
||||
- 🔒 默认使用密码哈希来保证安全。
|
||||
- 🔑 JWT令牌用于权限验证。
|
||||
- 📫 使用邮箱来进行密码恢复。
|
||||
- ✅ 单元测试用了[Pytest](https://pytest.org).
|
||||
- 📞 [Traefik](https://traefik.io) 用于反向代理和负载均衡。
|
||||
- 🚢 部署指南(Docker Compose)包含了如何起一个Traefik前端代理来自动化HTTPS认证。
|
||||
- 🏭 CI(持续集成)和 CD(持续部署)基于GitHub Actions。
|
||||
|
||||
@@ -1,30 +1,31 @@
|
||||
# Python 类型提示简介 { #python-types-intro }
|
||||
# Python 类型提示简介
|
||||
|
||||
Python 支持可选的“类型提示”(也叫“类型注解”)。
|
||||
**Python 3.6+ 版本**加入了对"类型提示"的支持。
|
||||
|
||||
这些“类型提示”或注解是一种特殊语法,用来声明变量的<abbr title="例如:str、int、float、bool">类型</abbr>。
|
||||
这些**"类型提示"**是一种新的语法(在 Python 3.6 版本加入)用来声明一个变量的<abbr title="例如:str、int、float、bool">类型</abbr>。
|
||||
|
||||
通过为变量声明类型,编辑器和工具可以为你提供更好的支持。
|
||||
通过声明变量的类型,编辑器和一些工具能给你提供更好的支持。
|
||||
|
||||
这只是一个关于 Python 类型提示的快速入门/复习。它只涵盖与 **FastAPI** 一起使用所需的最少部分……实际上非常少。
|
||||
这只是一个关于 Python 类型提示的**快速入门 / 复习**。它仅涵盖与 **FastAPI** 一起使用所需的最少部分...实际上只有很少一点。
|
||||
|
||||
**FastAPI** 完全基于这些类型提示构建,它们带来了许多优势和好处。
|
||||
整个 **FastAPI** 都基于这些类型提示构建,它们带来了许多优点和好处。
|
||||
|
||||
但即使你从不使用 **FastAPI**,了解一些类型提示也会让你受益。
|
||||
但即使你不会用到 **FastAPI**,了解一下类型提示也会让你从中受益。
|
||||
|
||||
/// note | 注意
|
||||
/// note
|
||||
|
||||
如果你已经是 Python 专家,并且对类型提示了如指掌,可以跳到下一章。
|
||||
如果你已经精通 Python,并且了解关于类型提示的一切知识,直接跳到下一章节吧。
|
||||
|
||||
///
|
||||
|
||||
## 动机 { #motivation }
|
||||
## 动机
|
||||
|
||||
让我们从一个简单的例子开始:
|
||||
|
||||
{* ../../docs_src/python_types/tutorial001_py39.py *}
|
||||
{* ../../docs_src/python_types/tutorial001.py *}
|
||||
|
||||
运行这个程序会输出:
|
||||
|
||||
运行这段程序将输出:
|
||||
|
||||
```
|
||||
John Doe
|
||||
@@ -32,37 +33,38 @@ John Doe
|
||||
|
||||
这个函数做了下面这些事情:
|
||||
|
||||
* 接收 `first_name` 和 `last_name`。
|
||||
* 通过 `title()` 将每个参数的第一个字母转换为大写。
|
||||
* 用一个空格将它们<abbr title="把它们合在一起成为一个,内容一个接在另一个后面。">拼接</abbr>起来。
|
||||
* 接收 `first_name` 和 `last_name` 参数。
|
||||
* 通过 `title()` 将每个参数的第一个字母转换为大写形式。
|
||||
* 中间用一个空格来<abbr title="将它们按顺序放置组合成一个整体。">拼接</abbr>它们。
|
||||
|
||||
{* ../../docs_src/python_types/tutorial001_py39.py hl[2] *}
|
||||
{* ../../docs_src/python_types/tutorial001.py hl[2] *}
|
||||
|
||||
### 修改它 { #edit-it }
|
||||
|
||||
### 修改示例
|
||||
|
||||
这是一个非常简单的程序。
|
||||
|
||||
但现在想象你要从零开始写它。
|
||||
现在假设你将从头开始编写这段程序。
|
||||
|
||||
在某个时刻你开始定义函数,并且准备好了参数……
|
||||
在某一时刻,你开始定义函数,并且准备好了参数...。
|
||||
|
||||
接下来你需要调用“那个把首字母变大写的方法”。
|
||||
现在你需要调用一个"将第一个字母转换为大写形式的方法"。
|
||||
|
||||
是 `upper`?是 `uppercase`?`first_uppercase`?还是 `capitalize`?
|
||||
等等,那个方法是什么来着?`upper`?还是 `uppercase`?`first_uppercase`?`capitalize`?
|
||||
|
||||
然后,你试试程序员的老朋友——编辑器的自动补全。
|
||||
然后你尝试向程序员老手的朋友——编辑器自动补全寻求帮助。
|
||||
|
||||
你输入函数的第一个参数 `first_name`,再输入一个点(`.`),然后按下 `Ctrl+Space` 触发补全。
|
||||
输入函数的第一个参数 `first_name`,输入点号(`.`)然后敲下 `Ctrl+Space` 来触发代码补全。
|
||||
|
||||
但很遗憾,没有什么有用的提示:
|
||||
但遗憾的是并没有起什么作用:
|
||||
|
||||
<img src="/img/python-types/image01.png">
|
||||
<img src="https://fastapi.tiangolo.com/img/python-types/image01.png">
|
||||
|
||||
### 添加类型 { #add-types }
|
||||
### 添加类型
|
||||
|
||||
我们来改前一个版本的一行代码。
|
||||
让我们来修改上面例子的一行代码。
|
||||
|
||||
把函数参数从:
|
||||
我们将把下面这段代码中的函数参数从:
|
||||
|
||||
```Python
|
||||
first_name, last_name
|
||||
@@ -76,389 +78,227 @@ John Doe
|
||||
|
||||
就是这样。
|
||||
|
||||
这些就是“类型提示”:
|
||||
这些就是"类型提示":
|
||||
|
||||
{* ../../docs_src/python_types/tutorial002_py39.py hl[1] *}
|
||||
{* ../../docs_src/python_types/tutorial002.py hl[1] *}
|
||||
|
||||
这和声明默认值不同,比如:
|
||||
|
||||
这和声明默认值是不同的,例如:
|
||||
|
||||
```Python
|
||||
first_name="john", last_name="doe"
|
||||
```
|
||||
|
||||
这是两码事。
|
||||
这两者不一样。
|
||||
|
||||
我们用的是冒号(`:`),不是等号(`=`)。
|
||||
|
||||
而且添加类型提示通常不会改变代码本来的行为。
|
||||
而且添加类型提示一般不会改变原来的运行结果。
|
||||
|
||||
现在,再想象你又在编写这个函数了,不过这次加上了类型提示。
|
||||
现在假设我们又一次正在创建这个函数,这次添加了类型提示。
|
||||
|
||||
在同样的位置,你用 `Ctrl+Space` 触发自动补全,就能看到:
|
||||
在同样的地方,通过 `Ctrl+Space` 触发自动补全,你会发现:
|
||||
|
||||
<img src="/img/python-types/image02.png">
|
||||
<img src="https://fastapi.tiangolo.com/img/python-types/image02.png">
|
||||
|
||||
这样,你可以滚动查看选项,直到找到那个“看着眼熟”的:
|
||||
这样,你可以滚动查看选项,直到你找到看起来眼熟的那个:
|
||||
|
||||
<img src="/img/python-types/image03.png">
|
||||
<img src="https://fastapi.tiangolo.com/img/python-types/image03.png">
|
||||
|
||||
## 更多动机 { #more-motivation }
|
||||
## 更多动机
|
||||
|
||||
看这个已经带有类型提示的函数:
|
||||
下面是一个已经有类型提示的函数:
|
||||
|
||||
{* ../../docs_src/python_types/tutorial003_py39.py hl[1] *}
|
||||
{* ../../docs_src/python_types/tutorial003.py hl[1] *}
|
||||
|
||||
因为编辑器知道变量的类型,你不仅能得到补全,还能获得错误检查:
|
||||
|
||||
<img src="/img/python-types/image04.png">
|
||||
因为编辑器已经知道了这些变量的类型,所以不仅能对代码进行补全,还能检查其中的错误:
|
||||
|
||||
现在你知道需要修复它,用 `str(age)` 把 `age` 转成字符串:
|
||||
<img src="https://fastapi.tiangolo.com/img/python-types/image04.png">
|
||||
|
||||
{* ../../docs_src/python_types/tutorial004_py39.py hl[2] *}
|
||||
现在你知道了必须先修复这个问题,通过 `str(age)` 把 `age` 转换成字符串:
|
||||
|
||||
## 声明类型 { #declaring-types }
|
||||
{* ../../docs_src/python_types/tutorial004.py hl[2] *}
|
||||
|
||||
你刚刚看到的是声明类型提示的主要位置:函数参数。
|
||||
|
||||
这也是你在 **FastAPI** 中使用它们的主要场景。
|
||||
## 声明类型
|
||||
|
||||
### 简单类型 { #simple-types }
|
||||
你刚刚看到的就是声明类型提示的主要场景。用于函数的参数。
|
||||
|
||||
你不仅可以声明 `str`,还可以声明所有标准的 Python 类型。
|
||||
这也是你将在 **FastAPI** 中使用它们的主要场景。
|
||||
|
||||
例如:
|
||||
### 简单类型
|
||||
|
||||
不只是 `str`,你能够声明所有的标准 Python 类型。
|
||||
|
||||
比如以下类型:
|
||||
|
||||
* `int`
|
||||
* `float`
|
||||
* `bool`
|
||||
* `bytes`
|
||||
|
||||
{* ../../docs_src/python_types/tutorial005_py39.py hl[1] *}
|
||||
{* ../../docs_src/python_types/tutorial005.py hl[1] *}
|
||||
|
||||
### 带类型参数的泛型类型 { #generic-types-with-type-parameters }
|
||||
|
||||
有些数据结构可以包含其他值,比如 `dict`、`list`、`set` 和 `tuple`。而内部的值也会有自己的类型。
|
||||
### 嵌套类型
|
||||
|
||||
这些带有内部类型的类型称为“泛型”(generic)类型。可以把它们连同内部类型一起声明出来。
|
||||
有些容器数据结构可以包含其他的值,比如 `dict`、`list`、`set` 和 `tuple`。它们内部的值也会拥有自己的类型。
|
||||
|
||||
要声明这些类型以及内部类型,你可以使用 Python 标准库模块 `typing`。它就是为支持这些类型提示而存在的。
|
||||
你可以使用 Python 的 `typing` 标准库来声明这些类型以及子类型。
|
||||
|
||||
#### 更新的 Python 版本 { #newer-versions-of-python }
|
||||
它专门用来支持这些类型提示。
|
||||
|
||||
使用 `typing` 的语法与所有版本兼容,从 Python 3.6 到最新版本(包括 Python 3.9、Python 3.10 等)。
|
||||
#### 列表
|
||||
|
||||
随着 Python 的发展,更新的版本对这些类型注解的支持更好,在很多情况下你甚至不需要导入和使用 `typing` 模块来声明类型注解。
|
||||
例如,让我们来定义一个由 `str` 组成的 `list` 变量。
|
||||
|
||||
如果你可以为项目选择更高版本的 Python,你将能享受到这种额外的简化。
|
||||
从 `typing` 模块导入 `List`(注意是大写的 `L`):
|
||||
|
||||
在整个文档中,会根据不同 Python 版本提供相应的示例(当存在差异时)。
|
||||
{* ../../docs_src/python_types/tutorial006.py hl[1] *}
|
||||
|
||||
比如“Python 3.6+”表示兼容 Python 3.6 及以上(包括 3.7、3.8、3.9、3.10 等)。而“Python 3.9+”表示兼容 Python 3.9 及以上(包括 3.10 等)。
|
||||
|
||||
如果你可以使用最新的 Python 版本,请使用最新版本的示例,它们将拥有最简洁的语法,例如“Python 3.10+”。
|
||||
同样以冒号(`:`)来声明这个变量。
|
||||
|
||||
#### 列表 { #list }
|
||||
输入 `List` 作为类型。
|
||||
|
||||
例如,我们来定义一个由 `str` 组成的 `list` 变量。
|
||||
由于列表是带有"子类型"的类型,所以我们把子类型放在方括号中:
|
||||
|
||||
用同样的冒号(`:`)语法声明变量。
|
||||
{* ../../docs_src/python_types/tutorial006.py hl[4] *}
|
||||
|
||||
类型写 `list`。
|
||||
|
||||
因为 list 是一种包含内部类型的类型,把内部类型写在方括号里:
|
||||
这表示:"变量 `items` 是一个 `list`,并且这个列表里的每一个元素都是 `str`"。
|
||||
|
||||
{* ../../docs_src/python_types/tutorial006_py39.py hl[1] *}
|
||||
这样,即使在处理列表中的元素时,你的编辑器也可以提供支持。
|
||||
|
||||
/// info | 信息
|
||||
没有类型,几乎是不可能实现下面这样:
|
||||
|
||||
方括号中的这些内部类型称为“类型参数”(type parameters)。
|
||||
<img src="https://fastapi.tiangolo.com/img/python-types/image05.png">
|
||||
|
||||
在这个例子中,`str` 是传给 `list` 的类型参数。
|
||||
注意,变量 `item` 是列表 `items` 中的元素之一。
|
||||
|
||||
///
|
||||
而且,编辑器仍然知道它是一个 `str`,并为此提供了支持。
|
||||
|
||||
这表示:“变量 `items` 是一个 `list`,并且列表中的每一个元素都是 `str`”。
|
||||
#### 元组和集合
|
||||
|
||||
这样,即使是在处理列表中的元素时,编辑器也能给你提供支持:
|
||||
声明 `tuple` 和 `set` 的方法也是一样的:
|
||||
|
||||
<img src="/img/python-types/image05.png">
|
||||
{* ../../docs_src/python_types/tutorial007.py hl[1,4] *}
|
||||
|
||||
没有类型的话,这几乎是不可能做到的。
|
||||
|
||||
注意,变量 `item` 是列表 `items` 中的一个元素。
|
||||
|
||||
即便如此,编辑器仍然知道它是 `str`,并为此提供支持。
|
||||
|
||||
#### 元组和集合 { #tuple-and-set }
|
||||
|
||||
声明 `tuple` 和 `set` 的方式类似:
|
||||
|
||||
{* ../../docs_src/python_types/tutorial007_py39.py hl[1] *}
|
||||
|
||||
这表示:
|
||||
|
||||
* 变量 `items_t` 是一个含有 3 个元素的 `tuple`,分别是一个 `int`、另一个 `int`,以及一个 `str`。
|
||||
* 变量 `items_s` 是一个 `set`,其中每个元素的类型是 `bytes`。
|
||||
* 变量 `items_t` 是一个 `tuple`,其中的前两个元素都是 `int` 类型, 最后一个元素是 `str` 类型。
|
||||
* 变量 `items_s` 是一个 `set`,其中的每个元素都是 `bytes` 类型。
|
||||
|
||||
#### 字典 { #dict }
|
||||
#### 字典
|
||||
|
||||
定义 `dict` 时,需要传入 2 个类型参数,用逗号分隔。
|
||||
定义 `dict` 时,需要传入两个子类型,用逗号进行分隔。
|
||||
|
||||
第一个类型参数用于字典的键。
|
||||
第一个子类型声明 `dict` 的所有键。
|
||||
|
||||
第二个类型参数用于字典的值:
|
||||
第二个子类型声明 `dict` 的所有值:
|
||||
|
||||
{* ../../docs_src/python_types/tutorial008.py hl[1,4] *}
|
||||
|
||||
{* ../../docs_src/python_types/tutorial008_py39.py hl[1] *}
|
||||
|
||||
这表示:
|
||||
|
||||
* 变量 `prices` 是一个 `dict`:
|
||||
* 这个 `dict` 的键是 `str` 类型(比如,每个条目的名称)。
|
||||
* 这个 `dict` 的值是 `float` 类型(比如,每个条目的价格)。
|
||||
* 这个 `dict` 的所有键为 `str` 类型(可以看作是字典内每个元素的名称)。
|
||||
* 这个 `dict` 的所有值为 `float` 类型(可以看作是字典内每个元素的价格)。
|
||||
|
||||
#### Union { #union }
|
||||
### 类作为类型
|
||||
|
||||
你可以声明一个变量可以是若干种类型中的任意一种,比如既可以是 `int` 也可以是 `str`。
|
||||
你也可以将类声明为变量的类型。
|
||||
|
||||
在 Python 3.6 及以上(包括 Python 3.10),你可以使用 `typing` 中的 `Union`,把可能的类型放到方括号里。
|
||||
假设你有一个名为 `Person` 的类,拥有 name 属性:
|
||||
|
||||
在 Python 3.10 中还有一种新的语法,可以用<abbr title='也叫“按位或运算符(bitwise or operator)”,但这里与该含义无关'>竖线(`|`)</abbr>把可能的类型分隔开。
|
||||
{* ../../docs_src/python_types/tutorial010.py hl[1:3] *}
|
||||
|
||||
|
||||
接下来,你可以将一个变量声明为 `Person` 类型:
|
||||
|
||||
{* ../../docs_src/python_types/tutorial010.py hl[6] *}
|
||||
|
||||
|
||||
然后,你将再次获得所有的编辑器支持:
|
||||
|
||||
<img src="https://fastapi.tiangolo.com/img/python-types/image06.png">
|
||||
|
||||
## Pydantic 模型
|
||||
|
||||
<a href="https://docs.pydantic.dev/" class="external-link" target="_blank">Pydantic</a> 是一个用来执行数据校验的 Python 库。
|
||||
|
||||
你可以将数据的"结构"声明为具有属性的类。
|
||||
|
||||
每个属性都拥有类型。
|
||||
|
||||
接着你用一些值来创建这个类的实例,这些值会被校验,并被转换为适当的类型(在需要的情况下),返回一个包含所有数据的对象。
|
||||
|
||||
然后,你将获得这个对象的所有编辑器支持。
|
||||
|
||||
下面的例子来自 Pydantic 官方文档:
|
||||
|
||||
//// tab | Python 3.10+
|
||||
|
||||
```Python hl_lines="1"
|
||||
{!> ../../docs_src/python_types/tutorial008b_py310.py!}
|
||||
```
|
||||
|
||||
////
|
||||
|
||||
//// tab | Python 3.9+
|
||||
|
||||
```Python hl_lines="1 4"
|
||||
{!> ../../docs_src/python_types/tutorial008b_py39.py!}
|
||||
```
|
||||
|
||||
////
|
||||
|
||||
两种方式的含义一致:`item` 可以是 `int` 或 `str`。
|
||||
|
||||
#### 可能为 `None` { #possibly-none }
|
||||
|
||||
你可以声明一个值的类型是某种类型(比如 `str`),但它也可能是 `None`。
|
||||
|
||||
在 Python 3.6 及以上(包括 Python 3.10),你可以通过从 `typing` 模块导入并使用 `Optional` 来声明:
|
||||
|
||||
```Python hl_lines="1 4"
|
||||
{!../../docs_src/python_types/tutorial009_py39.py!}
|
||||
```
|
||||
|
||||
使用 `Optional[str]` 而不是仅仅 `str`,可以让编辑器帮助你发现把值当成总是 `str` 的错误(实际上它也可能是 `None`)。
|
||||
|
||||
`Optional[Something]` 实际上是 `Union[Something, None]` 的简写,它们等价。
|
||||
|
||||
这也意味着在 Python 3.10 中,你可以使用 `Something | None`:
|
||||
|
||||
//// tab | Python 3.10+
|
||||
|
||||
```Python hl_lines="1"
|
||||
{!> ../../docs_src/python_types/tutorial009_py310.py!}
|
||||
```
|
||||
|
||||
////
|
||||
|
||||
//// tab | Python 3.9+
|
||||
|
||||
```Python hl_lines="1 4"
|
||||
{!> ../../docs_src/python_types/tutorial009_py39.py!}
|
||||
```
|
||||
|
||||
////
|
||||
|
||||
//// tab | Python 3.9+ 另一种写法
|
||||
|
||||
```Python hl_lines="1 4"
|
||||
{!> ../../docs_src/python_types/tutorial009b_py39.py!}
|
||||
```
|
||||
|
||||
////
|
||||
|
||||
#### 使用 `Union` 或 `Optional` { #using-union-or-optional }
|
||||
|
||||
如果你使用的是 3.10 以下的 Python 版本,这里有个来自我非常主观的建议:
|
||||
|
||||
* 🚨 避免使用 `Optional[SomeType]`
|
||||
* 改用 ✨**`Union[SomeType, None]`**✨
|
||||
|
||||
两者等价,底层相同,但我更推荐 `Union` 而不是 `Optional`,因为“optional(可选)”这个词看起来像是在说“参数可选”,而它实际上表示“它可以是 `None`”,即使它并不是可选的,仍然是必填的。
|
||||
|
||||
我认为 `Union[SomeType, None]` 更明确地表达了它的意思。
|
||||
|
||||
这只是关于词语和名字。但这些词会影响你和你的队友如何理解代码。
|
||||
|
||||
例如,看下面这个函数:
|
||||
|
||||
{* ../../docs_src/python_types/tutorial009c_py39.py hl[1,4] *}
|
||||
|
||||
参数 `name` 被定义为 `Optional[str]`,但它并不是“可选”的,你不能不传这个参数就调用函数:
|
||||
|
||||
```Python
|
||||
say_hi() # 哦不,这会抛错!😱
|
||||
{!> ../../docs_src/python_types/tutorial011_py310.py!}
|
||||
```
|
||||
|
||||
参数 `name` 仍然是必填的(不是“可选”),因为它没有默认值。不过,`name` 接受 `None` 作为值:
|
||||
|
||||
```Python
|
||||
say_hi(name=None) # 这样可以,None 是有效值 🎉
|
||||
```
|
||||
|
||||
好消息是,一旦你使用 Python 3.10,就无需再为此操心,因为你可以直接用 `|` 来定义类型联合:
|
||||
|
||||
{* ../../docs_src/python_types/tutorial009c_py310.py hl[1,4] *}
|
||||
|
||||
这样你就不必再考虑 `Optional` 和 `Union` 这些名字了。😎
|
||||
|
||||
#### 泛型类型 { #generic-types }
|
||||
|
||||
这些在方括号中接收类型参数的类型称为“泛型类型”(Generic types)或“泛型”(Generics),例如:
|
||||
|
||||
//// tab | Python 3.10+
|
||||
|
||||
你可以把同样的内建类型作为泛型使用(带方括号和内部类型):
|
||||
|
||||
* `list`
|
||||
* `tuple`
|
||||
* `set`
|
||||
* `dict`
|
||||
|
||||
以及与之前的 Python 版本一样,来自 `typing` 模块的:
|
||||
|
||||
* `Union`
|
||||
* `Optional`
|
||||
* ……以及其他。
|
||||
|
||||
在 Python 3.10 中,作为使用泛型 `Union` 和 `Optional` 的替代,你可以使用<abbr title='也叫“按位或运算符(bitwise or operator)”,但这里与该含义无关'>竖线(`|`)</abbr>来声明类型联合,这更好也更简单。
|
||||
|
||||
////
|
||||
|
||||
//// tab | Python 3.9+
|
||||
|
||||
你可以把同样的内建类型作为泛型使用(带方括号和内部类型):
|
||||
|
||||
* `list`
|
||||
* `tuple`
|
||||
* `set`
|
||||
* `dict`
|
||||
|
||||
以及来自 `typing` 模块的泛型:
|
||||
|
||||
* `Union`
|
||||
* `Optional`
|
||||
* ……以及其他。
|
||||
```Python
|
||||
{!> ../../docs_src/python_types/tutorial011_py39.py!}
|
||||
```
|
||||
|
||||
////
|
||||
|
||||
### 类作为类型 { #classes-as-types }
|
||||
//// tab | Python 3.8+
|
||||
|
||||
你也可以把类声明为变量的类型。
|
||||
```Python
|
||||
{!> ../../docs_src/python_types/tutorial011.py!}
|
||||
```
|
||||
|
||||
假设你有一个名为 `Person` 的类,带有 name:
|
||||
////
|
||||
|
||||
{* ../../docs_src/python_types/tutorial010_py39.py hl[1:3] *}
|
||||
|
||||
然后你可以声明一个变量是 `Person` 类型:
|
||||
/// info
|
||||
|
||||
{* ../../docs_src/python_types/tutorial010_py39.py hl[6] *}
|
||||
|
||||
接着,你会再次获得所有的编辑器支持:
|
||||
|
||||
<img src="/img/python-types/image06.png">
|
||||
|
||||
注意,这表示“`one_person` 是类 `Person` 的一个实例(instance)”。
|
||||
|
||||
它并不表示“`one_person` 是名为 `Person` 的类本身(class)”。
|
||||
|
||||
## Pydantic 模型 { #pydantic-models }
|
||||
|
||||
<a href="https://docs.pydantic.dev/" class="external-link" target="_blank">Pydantic</a> 是一个用于执行数据校验的 Python 库。
|
||||
|
||||
你将数据的“结构”声明为带有属性的类。
|
||||
|
||||
每个属性都有一个类型。
|
||||
|
||||
然后你用一些值创建这个类的实例,它会校验这些值,并在需要时把它们转换为合适的类型,返回一个包含所有数据的对象。
|
||||
|
||||
你还能对这个结果对象获得完整的编辑器支持。
|
||||
|
||||
下面是来自 Pydantic 官方文档的一个示例:
|
||||
|
||||
{* ../../docs_src/python_types/tutorial011_py310.py *}
|
||||
|
||||
/// info | 信息
|
||||
|
||||
想了解更多关于 <a href="https://docs.pydantic.dev/" class="external-link" target="_blank">Pydantic 的信息,请查看其文档</a>。
|
||||
想进一步了解 <a href="https://docs.pydantic.dev/" class="external-link" target="_blank">Pydantic,请阅读其文档</a>.
|
||||
|
||||
///
|
||||
|
||||
**FastAPI** 完全建立在 Pydantic 之上。
|
||||
整个 **FastAPI** 建立在 Pydantic 的基础之上。
|
||||
|
||||
你会在[教程 - 用户指南](tutorial/index.md){.internal-link target=_blank}中看到更多的实战示例。
|
||||
实际上你将在 [教程 - 用户指南](tutorial/index.md){.internal-link target=_blank} 看到很多这种情况。
|
||||
|
||||
/// tip | 提示
|
||||
## **FastAPI** 中的类型提示
|
||||
|
||||
当你在没有默认值的情况下使用 `Optional` 或 `Union[Something, None]` 时,Pydantic 有一个特殊行为,你可以在 Pydantic 文档的 <a href="https://docs.pydantic.dev/2.3/usage/models/#required-fields" class="external-link" target="_blank">必填的 Optional 字段</a> 中了解更多。
|
||||
|
||||
///
|
||||
|
||||
## 带元数据注解的类型提示 { #type-hints-with-metadata-annotations }
|
||||
|
||||
Python 还提供了一个特性,可以使用 `Annotated` 在这些类型提示中放入额外的<abbr title="关于数据的数据,在这里是关于类型的信息,例如描述。">元数据</abbr>。
|
||||
|
||||
从 Python 3.9 起,`Annotated` 是标准库的一部分,因此可以从 `typing` 导入。
|
||||
|
||||
{* ../../docs_src/python_types/tutorial013_py39.py hl[1,4] *}
|
||||
|
||||
Python 本身不会对这个 `Annotated` 做任何处理。对于编辑器和其他工具,类型仍然是 `str`。
|
||||
|
||||
但你可以在 `Annotated` 中为 **FastAPI** 提供额外的元数据,来描述你希望应用如何行为。
|
||||
|
||||
重要的是要记住:传给 `Annotated` 的第一个类型参数才是实际类型。其余的只是给其他工具用的元数据。
|
||||
|
||||
现在你只需要知道 `Annotated` 的存在,并且它是标准 Python。😎
|
||||
|
||||
稍后你会看到它有多么强大。
|
||||
|
||||
/// tip | 提示
|
||||
|
||||
这是标准 Python,这意味着你仍然可以在编辑器里获得尽可能好的开发体验,并能和你用来分析、重构代码的工具良好协作等。✨
|
||||
|
||||
同时你的代码也能与许多其他 Python 工具和库高度兼容。🚀
|
||||
|
||||
///
|
||||
|
||||
## **FastAPI** 中的类型提示 { #type-hints-in-fastapi }
|
||||
|
||||
**FastAPI** 利用这些类型提示来完成多件事情。
|
||||
|
||||
在 **FastAPI** 中,用类型提示来声明参数,你将获得:
|
||||
|
||||
* 编辑器支持。
|
||||
* 类型检查。
|
||||
|
||||
……并且 **FastAPI** 会使用相同的声明来:
|
||||
|
||||
* 定义要求:从请求路径参数、查询参数、请求头、请求体、依赖等。
|
||||
* 转换数据:把请求中的数据转换为所需类型。
|
||||
* 校验数据:对于每个请求:
|
||||
* 当数据无效时,自动生成错误信息返回给客户端。
|
||||
* 使用 OpenAPI 记录 API:
|
||||
* 然后用于自动生成交互式文档界面。
|
||||
|
||||
这些听起来可能有点抽象。别担心。你会在[教程 - 用户指南](tutorial/index.md){.internal-link target=_blank}中看到所有这些的实际效果。
|
||||
|
||||
重要的是,通过使用标准的 Python 类型,而且只在一个地方声明(而不是添加更多类、装饰器等),**FastAPI** 会为你完成大量工作。
|
||||
|
||||
/// info | 信息
|
||||
|
||||
如果你已经读完所有教程,又回来想进一步了解类型,一个不错的资源是 <a href="https://mypy.readthedocs.io/en/latest/cheat_sheet_py3.html" class="external-link" target="_blank">`mypy` 的“速查表”</a>。
|
||||
**FastAPI** 利用这些类型提示来做下面几件事。
|
||||
|
||||
使用 **FastAPI** 时用类型提示声明参数可以获得:
|
||||
|
||||
* **编辑器支持**。
|
||||
* **类型检查**。
|
||||
|
||||
...并且 **FastAPI** 还会用这些类型声明来:
|
||||
|
||||
* **定义参数要求**:声明对请求路径参数、查询参数、请求头、请求体、依赖等的要求。
|
||||
* **转换数据**:将来自请求的数据转换为需要的类型。
|
||||
* **校验数据**: 对于每一个请求:
|
||||
* 当数据校验失败时自动生成**错误信息**返回给客户端。
|
||||
* 使用 OpenAPI **记录** API:
|
||||
* 然后用于自动生成交互式文档的用户界面。
|
||||
|
||||
听上去有点抽象。不过不用担心。你将在 [教程 - 用户指南](tutorial/index.md){.internal-link target=_blank} 中看到所有的实战。
|
||||
|
||||
最重要的是,通过使用标准的 Python 类型,只需要在一个地方声明(而不是添加更多的类、装饰器等),**FastAPI** 会为你完成很多的工作。
|
||||
|
||||
/// info
|
||||
|
||||
如果你已经阅读了所有教程,回过头来想了解有关类型的更多信息,<a href="https://mypy.readthedocs.io/en/latest/cheat_sheet_py3.html" class="external-link" target="_blank">来自 `mypy` 的"速查表"</a>是不错的资源。
|
||||
|
||||
///
|
||||
|
||||
@@ -1,30 +1,30 @@
|
||||
# 请求体 { #request-body }
|
||||
# 请求体
|
||||
|
||||
当你需要从客户端(比如浏览器)向你的 API 发送数据时,会把它作为**请求体**发送。
|
||||
FastAPI 使用**请求体**从客户端(例如浏览器)向 API 发送数据。
|
||||
|
||||
**请求体**是客户端发送给你的 API 的数据。**响应体**是你的 API 发送给客户端的数据。
|
||||
**请求体**是客户端发送给 API 的数据。**响应体**是 API 发送给客户端的数据。
|
||||
|
||||
你的 API 几乎总是需要发送**响应体**。但客户端不一定总是要发送**请求体**,有时它们只请求某个路径,可能带一些查询参数,但不会发送请求体。
|
||||
API 基本上肯定要发送**响应体**,但是客户端不一定发送**请求体**。
|
||||
|
||||
使用 <a href="https://docs.pydantic.dev/" class="external-link" target="_blank">Pydantic</a> 模型来声明**请求体**,能充分利用它的功能和优点。
|
||||
使用 <a href="https://docs.pydantic.dev/" class="external-link" target="_blank">Pydantic</a> 模型声明**请求体**,能充分利用它的功能和优点。
|
||||
|
||||
/// info | 信息
|
||||
/// info | 说明
|
||||
|
||||
发送数据应使用以下之一:`POST`(最常见)、`PUT`、`DELETE` 或 `PATCH`。
|
||||
发送数据使用 `POST`(最常用)、`PUT`、`DELETE`、`PATCH` 等操作。
|
||||
|
||||
规范中没有定义用 `GET` 请求发送请求体的行为,但 FastAPI 仍支持这种方式,只用于非常复杂/极端的用例。
|
||||
规范中没有定义使用 `GET` 发送请求体的操作,但不管怎样,FastAPI 也支持这种方式,只不过仅用于非常复杂或极端的用例。
|
||||
|
||||
由于不推荐,在使用 `GET` 时,Swagger UI 的交互式文档不会显示请求体的文档,而且中间的代理可能也不支持它。
|
||||
我们不建议使用 `GET`,因此,在 Swagger UI 交互文档中不会显示有关 `GET` 的内容,而且代理协议也不一定支持 `GET`。
|
||||
|
||||
///
|
||||
|
||||
## 导入 Pydantic 的 `BaseModel` { #import-pydantics-basemodel }
|
||||
## 导入 Pydantic 的 `BaseModel`
|
||||
|
||||
从 `pydantic` 中导入 `BaseModel`:
|
||||
|
||||
{* ../../docs_src/body/tutorial001_py310.py hl[2] *}
|
||||
|
||||
## 创建数据模型 { #create-your-data-model }
|
||||
## 创建数据模型
|
||||
|
||||
把数据模型声明为继承 `BaseModel` 的类。
|
||||
|
||||
@@ -32,9 +32,9 @@
|
||||
|
||||
{* ../../docs_src/body/tutorial001_py310.py hl[5:9] *}
|
||||
|
||||
与声明查询参数一样,包含默认值的模型属性是可选的,否则就是必选的。把默认值设为 `None` 可使其变为可选。
|
||||
与声明查询参数一样,包含默认值的模型属性是可选的,否则就是必选的。默认值为 `None` 的模型属性也是可选的。
|
||||
|
||||
例如,上述模型声明如下 JSON "object"(即 Python `dict`):
|
||||
例如,上述模型声明如下 JSON **对象**(即 Python **字典**):
|
||||
|
||||
```JSON
|
||||
{
|
||||
@@ -45,7 +45,7 @@
|
||||
}
|
||||
```
|
||||
|
||||
...由于 `description` 和 `tax` 是可选的(默认值为 `None`),下面的 JSON "object" 也有效:
|
||||
……由于 `description` 和 `tax` 是可选的(默认值为 `None`),下面的 JSON **对象**也有效:
|
||||
|
||||
```JSON
|
||||
{
|
||||
@@ -54,40 +54,40 @@
|
||||
}
|
||||
```
|
||||
|
||||
## 声明为参数 { #declare-it-as-a-parameter }
|
||||
## 声明请求体参数
|
||||
|
||||
使用与声明路径和查询参数相同的方式,把它添加至*路径操作*:
|
||||
使用与声明路径和查询参数相同的方式声明请求体,把请求体添加至*路径操作*:
|
||||
|
||||
{* ../../docs_src/body/tutorial001_py310.py hl[16] *}
|
||||
|
||||
...并把其类型声明为你创建的模型 `Item`。
|
||||
……此处,请求体参数的类型为 `Item` 模型。
|
||||
|
||||
## 结果 { #results }
|
||||
## 结论
|
||||
|
||||
仅使用这些 Python 类型声明,**FastAPI** 就可以:
|
||||
仅使用 Python 类型声明,**FastAPI** 就可以:
|
||||
|
||||
* 以 JSON 形式读取请求体。
|
||||
* (在必要时)把请求体转换为对应的类型。
|
||||
* 校验数据。
|
||||
* 数据无效时返回清晰的错误信息,并指出错误数据的确切位置和内容。
|
||||
* 把接收的数据赋值给参数 `item`。
|
||||
* 因为你把函数中的参数类型声明为 `Item`,所以还能获得所有属性及其类型的编辑器支持(补全等)。
|
||||
* 为你的模型生成 <a href="https://json-schema.org" class="external-link" target="_blank">JSON Schema</a> 定义,如果对你的项目有意义,还可以在其他地方使用它们。
|
||||
* 这些 schema 会成为生成的 OpenAPI Schema 的一部分,并被自动文档的 <abbr title="User Interfaces - 用户界面">UIs</abbr> 使用。
|
||||
* 以 JSON 形式读取请求体
|
||||
* (在必要时)把请求体转换为对应的类型
|
||||
* 校验数据:
|
||||
* 数据无效时返回错误信息,并指出错误数据的确切位置和内容
|
||||
* 把接收的数据赋值给参数 `item`
|
||||
* 把函数中请求体参数的类型声明为 `Item`,还能获得代码补全等编辑器支持
|
||||
* 为模型生成 <a href="https://json-schema.org" class="external-link" target="_blank">JSON Schema</a>,在项目中所需的位置使用
|
||||
* 这些概图是 OpenAPI 概图的部件,用于 API 文档 <abbr title="用户界面">UI</abbr>
|
||||
|
||||
## 自动文档 { #automatic-docs }
|
||||
## API 文档
|
||||
|
||||
你的模型的 JSON Schema 会成为生成的 OpenAPI Schema 的一部分,并显示在交互式 API 文档中:
|
||||
Pydantic 模型的 JSON 概图是 OpenAPI 生成的概图部件,可在 API 文档中显示:
|
||||
|
||||
<img src="/img/tutorial/body/image01.png">
|
||||
|
||||
并且,还会用于需要它们的每个*路径操作*的 API 文档中:
|
||||
而且,还会用于 API 文档中使用了概图的*路径操作*:
|
||||
|
||||
<img src="/img/tutorial/body/image02.png">
|
||||
|
||||
## 编辑器支持 { #editor-support }
|
||||
## 编辑器支持
|
||||
|
||||
在编辑器中,函数内部你会在各处得到类型提示与补全(如果接收的不是 Pydantic 模型,而是 `dict`,就不会有这样的支持):
|
||||
在编辑器中,函数内部均可使用类型提示、代码补全(如果接收的不是 Pydantic 模型,而是**字典**,就没有这样的支持):
|
||||
|
||||
<img src="/img/tutorial/body/image03.png">
|
||||
|
||||
@@ -95,23 +95,23 @@
|
||||
|
||||
<img src="/img/tutorial/body/image04.png">
|
||||
|
||||
这并非偶然,整个框架都是围绕这种设计构建的。
|
||||
这并非偶然,整个 **FastAPI** 框架都是围绕这种思路精心设计的。
|
||||
|
||||
并且在设计阶段、实现之前就进行了全面测试,以确保它能在所有编辑器中正常工作。
|
||||
并且,在 FastAPI 的设计阶段,我们就已经进行了全面测试,以确保 FastAPI 可以获得所有编辑器的支持。
|
||||
|
||||
我们甚至对 Pydantic 本身做了一些改动以支持这些功能。
|
||||
我们还改进了 Pydantic,让它也支持这些功能。
|
||||
|
||||
上面的截图来自 <a href="https://code.visualstudio.com" class="external-link" target="_blank">Visual Studio Code</a>。
|
||||
虽然上面的截图取自 <a href="https://code.visualstudio.com" class="external-link" target="_blank">Visual Studio Code</a>。
|
||||
|
||||
但使用 <a href="https://www.jetbrains.com/pycharm/" class="external-link" target="_blank">PyCharm</a> 和大多数其他 Python 编辑器,你也会获得相同的编辑器支持:
|
||||
但 <a href="https://www.jetbrains.com/pycharm/" class="external-link" target="_blank">PyCharm</a> 和大多数 Python 编辑器也支持同样的功能:
|
||||
|
||||
<img src="/img/tutorial/body/image05.png">
|
||||
|
||||
/// tip | 提示
|
||||
|
||||
如果你使用 <a href="https://www.jetbrains.com/pycharm/" class="external-link" target="_blank">PyCharm</a> 作为编辑器,可以使用 <a href="https://github.com/koxudaxi/pydantic-pycharm-plugin/" class="external-link" target="_blank">Pydantic PyCharm 插件</a>。
|
||||
使用 <a href="https://www.jetbrains.com/pycharm/" class="external-link" target="_blank">PyCharm</a> 编辑器时,推荐安装 <a href="https://github.com/koxudaxi/pydantic-pycharm-plugin/" class="external-link" target="_blank">Pydantic PyCharm 插件</a>。
|
||||
|
||||
它能改进对 Pydantic 模型的编辑器支持,包括:
|
||||
该插件用于完善 PyCharm 对 Pydantic 模型的支持,优化的功能如下:
|
||||
|
||||
* 自动补全
|
||||
* 类型检查
|
||||
@@ -121,44 +121,42 @@
|
||||
|
||||
///
|
||||
|
||||
## 使用模型 { #use-the-model }
|
||||
## 使用模型
|
||||
|
||||
在*路径操作*函数内部直接访问模型对象的所有属性:
|
||||
在*路径操作*函数内部直接访问模型对象的属性:
|
||||
|
||||
{* ../../docs_src/body/tutorial002_py310.py *}
|
||||
{* ../../docs_src/body/tutorial002_py310.py hl[19] *}
|
||||
|
||||
## 请求体 + 路径参数 { #request-body-path-parameters }
|
||||
## 请求体 + 路径参数
|
||||
|
||||
可以同时声明路径参数和请求体。
|
||||
**FastAPI** 支持同时声明路径参数和请求体。
|
||||
|
||||
**FastAPI** 能识别与**路径参数**匹配的函数参数应该**从路径中获取**,而声明为 Pydantic 模型的函数参数应该**从请求体中获取**。
|
||||
**FastAPI** 能识别与**路径参数**匹配的函数参数,还能识别从**请求体**中获取的类型为 Pydantic 模型的函数参数。
|
||||
|
||||
{* ../../docs_src/body/tutorial003_py310.py hl[15:16] *}
|
||||
|
||||
## 请求体 + 路径 + 查询参数 { #request-body-path-query-parameters }
|
||||
## 请求体 + 路径参数 + 查询参数
|
||||
|
||||
也可以同时声明**请求体**、**路径**和**查询**参数。
|
||||
**FastAPI** 支持同时声明**请求体**、**路径参数**和**查询参数**。
|
||||
|
||||
**FastAPI** 会分别识别它们,并从正确的位置获取数据。
|
||||
**FastAPI** 能够正确识别这三种参数,并从正确的位置获取数据。
|
||||
|
||||
{* ../../docs_src/body/tutorial004_py310.py hl[16] *}
|
||||
|
||||
函数参数按如下规则进行识别:
|
||||
|
||||
* 如果该参数也在**路径**中声明了,它就是路径参数。
|
||||
* 如果该参数是(`int`、`float`、`str`、`bool` 等)**单一类型**,它会被当作**查询**参数。
|
||||
* 如果该参数的类型声明为 **Pydantic 模型**,它会被当作请求**体**。
|
||||
- **路径**中声明了相同参数的参数,是路径参数
|
||||
- 类型是(`int`、`float`、`str`、`bool` 等)**单类型**的参数,是**查询**参数
|
||||
- 类型是 **Pydantic 模型**的参数,是**请求体**
|
||||
|
||||
/// note | 注意
|
||||
/// note | 笔记
|
||||
|
||||
FastAPI 会根据默认值 `= None` 知道 `q` 的值不是必填的。
|
||||
因为默认值是 `None`, FastAPI 会把 `q` 当作可选参数。
|
||||
|
||||
`str | None`(Python 3.10+)或 `Union[str, None]`(Python 3.9+ 中的 `Union`)并不是 FastAPI 用来判断是否必填的依据;是否必填由是否有默认值 `= None` 决定。
|
||||
|
||||
但添加这些类型注解可以让你的编辑器提供更好的支持并检测错误。
|
||||
FastAPI 不使用 `Optional[str]` 中的 `Optional`, 但 `Optional` 可以让编辑器提供更好的支持,并检测错误。
|
||||
|
||||
///
|
||||
|
||||
## 不使用 Pydantic { #without-pydantic }
|
||||
## 不使用 Pydantic
|
||||
|
||||
即便不使用 Pydantic 模型也能使用 **Body** 参数。详见[请求体 - 多参数:请求体中的单值](body-multiple-params.md#singular-values-in-body){.internal-link target=_blank}。
|
||||
即便不使用 Pydantic 模型也能使用 **Body** 参数。详见[请求体 - 多参数:请求体中的单值](body-multiple-params.md#_2){.internal-link target=\_blank}。
|
||||
|
||||
@@ -1,8 +1,8 @@
|
||||
# 第一步 { #first-steps }
|
||||
# 第一步
|
||||
|
||||
最简单的 FastAPI 文件可能像下面这样:
|
||||
|
||||
{* ../../docs_src/first_steps/tutorial001_py39.py *}
|
||||
{* ../../docs_src/first_steps/tutorial001.py *}
|
||||
|
||||
将其复制到 `main.py` 文件中。
|
||||
|
||||
@@ -56,7 +56,7 @@ INFO: Uvicorn running on http://127.0.0.1:8000 (Press CTRL+C to quit)
|
||||
|
||||
该行显示了你的应用在本机所提供服务的 URL 地址。
|
||||
|
||||
### 查看 { #check-it }
|
||||
### 查看
|
||||
|
||||
打开浏览器访问 <a href="http://127.0.0.1:8000" class="external-link" target="_blank">http://127.0.0.1:8000</a>。
|
||||
|
||||
@@ -66,7 +66,7 @@ INFO: Uvicorn running on http://127.0.0.1:8000 (Press CTRL+C to quit)
|
||||
{"message": "Hello World"}
|
||||
```
|
||||
|
||||
### 交互式 API 文档 { #interactive-api-docs }
|
||||
### 交互式 API 文档
|
||||
|
||||
跳转到 <a href="http://127.0.0.1:8000/docs" class="external-link" target="_blank">http://127.0.0.1:8000/docs</a>。
|
||||
|
||||
@@ -74,7 +74,7 @@ INFO: Uvicorn running on http://127.0.0.1:8000 (Press CTRL+C to quit)
|
||||
|
||||

|
||||
|
||||
### 可选的 API 文档 { #alternative-api-docs }
|
||||
### 可选的 API 文档
|
||||
|
||||
前往 <a href="http://127.0.0.1:8000/redoc" class="external-link" target="_blank">http://127.0.0.1:8000/redoc</a>。
|
||||
|
||||
@@ -82,35 +82,35 @@ INFO: Uvicorn running on http://127.0.0.1:8000 (Press CTRL+C to quit)
|
||||
|
||||

|
||||
|
||||
### OpenAPI { #openapi }
|
||||
### OpenAPI
|
||||
|
||||
**FastAPI** 使用定义 API 的 **OpenAPI** 标准将你的所有 API 转换成「模式」。
|
||||
|
||||
#### 「模式」 { #schema }
|
||||
#### 「模式」
|
||||
|
||||
「模式」是对事物的一种定义或描述。它并非具体的实现代码,而只是抽象的描述。
|
||||
|
||||
#### API「模式」 { #api-schema }
|
||||
#### API「模式」
|
||||
|
||||
在这种场景下,<a href="https://github.com/OAI/OpenAPI-Specification" class="external-link" target="_blank">OpenAPI</a> 是一种规定如何定义 API 模式的规范。
|
||||
|
||||
「模式」的定义包括你的 API 路径,以及它们可能使用的参数等等。
|
||||
|
||||
#### 数据「模式」 { #data-schema }
|
||||
#### 数据「模式」
|
||||
|
||||
「模式」这个术语也可能指的是某些数据比如 JSON 的结构。
|
||||
|
||||
在这种情况下,它可以表示 JSON 的属性及其具有的数据类型,等等。
|
||||
|
||||
#### OpenAPI 和 JSON Schema { #openapi-and-json-schema }
|
||||
#### OpenAPI 和 JSON Schema
|
||||
|
||||
OpenAPI 为你的 API 定义 API 模式。该模式中包含了你的 API 发送和接收的数据的定义(或称为「模式」),这些定义通过 JSON 数据模式标准 **JSON Schema** 所生成。
|
||||
|
||||
#### 查看 `openapi.json` { #check-the-openapi-json }
|
||||
#### 查看 `openapi.json`
|
||||
|
||||
如果你对原始的 OpenAPI 模式长什么样子感到好奇,FastAPI 自动生成了包含所有 API 描述的 JSON(模式)。
|
||||
|
||||
你可以直接在:<a href="http://127.0.0.1:8000/openapi.json" class="external-link" target="_blank">http://127.0.0.1:800api.json</a> 看到它。
|
||||
你可以直接在:<a href="http://127.0.0.1:8000/openapi.json" class="external-link" target="_blank">http://127.0.0.1:8000/openapi.json</a> 看到它。
|
||||
|
||||
它将显示以如下内容开头的 JSON:
|
||||
|
||||
@@ -135,7 +135,7 @@ OpenAPI 为你的 API 定义 API 模式。该模式中包含了你的 API 发送
|
||||
...
|
||||
```
|
||||
|
||||
#### OpenAPI 的用途 { #what-is-openapi-for }
|
||||
#### OpenAPI 的用途
|
||||
|
||||
驱动 FastAPI 内置的 2 个交互式文档系统的正是 OpenAPI 模式。
|
||||
|
||||
@@ -143,47 +143,11 @@ OpenAPI 为你的 API 定义 API 模式。该模式中包含了你的 API 发送
|
||||
|
||||
你还可以使用它自动生成与你的 API 进行通信的客户端代码。例如 web 前端,移动端或物联网嵌入程序。
|
||||
|
||||
### 部署你的应用(可选) { #deploy-your-app-optional }
|
||||
## 分步概括
|
||||
|
||||
你可以选择将 FastAPI 应用部署到 <a href="https://fastapicloud.com" class="external-link" target="_blank">FastAPI Cloud</a>,如果还没有,先去加入候补名单。🚀
|
||||
### 步骤 1:导入 `FastAPI`
|
||||
|
||||
如果你已经拥有 **FastAPI Cloud** 账户(我们从候补名单邀请了你 😉),你可以用一条命令部署应用。
|
||||
|
||||
部署前,先确保已登录:
|
||||
|
||||
<div class="termy">
|
||||
|
||||
```console
|
||||
$ fastapi login
|
||||
|
||||
You are logged in to FastAPI Cloud 🚀
|
||||
```
|
||||
|
||||
</div>
|
||||
|
||||
然后部署你的应用:
|
||||
|
||||
<div class="termy">
|
||||
|
||||
```console
|
||||
$ fastapi deploy
|
||||
|
||||
Deploying to FastAPI Cloud...
|
||||
|
||||
✅ Deployment successful!
|
||||
|
||||
🐔 Ready the chicken! Your app is ready at https://myapp.fastapicloud.dev
|
||||
```
|
||||
|
||||
</div>
|
||||
|
||||
就这些!现在你可以通过该 URL 访问你的应用了。✨
|
||||
|
||||
## 分步概括 { #recap-step-by-step }
|
||||
|
||||
### 步骤 1:导入 `FastAPI` { #step-1-import-fastapi }
|
||||
|
||||
{* ../../docs_src/first_steps/tutorial001_py39.py hl[1] *}
|
||||
{* ../../docs_src/first_steps/tutorial001.py hl[1] *}
|
||||
|
||||
`FastAPI` 是一个为你的 API 提供了所有功能的 Python 类。
|
||||
|
||||
@@ -195,17 +159,17 @@ Deploying to FastAPI Cloud...
|
||||
|
||||
///
|
||||
|
||||
### 步骤 2:创建一个 `FastAPI`「实例」 { #step-2-create-a-fastapi-instance }
|
||||
### 步骤 2:创建一个 `FastAPI`「实例」
|
||||
|
||||
{* ../../docs_src/first_steps/tutorial001_py39.py hl[3] *}
|
||||
{* ../../docs_src/first_steps/tutorial001.py hl[3] *}
|
||||
|
||||
这里的变量 `app` 会是 `FastAPI` 类的一个「实例」。
|
||||
|
||||
这个实例将是创建你所有 API 的主要交互对象。
|
||||
|
||||
### 步骤 3:创建一个*路径操作* { #step-3-create-a-path-operation }
|
||||
### 步骤 3:创建一个*路径操作*
|
||||
|
||||
#### 路径 { #path }
|
||||
#### 路径
|
||||
|
||||
这里的「路径」指的是 URL 中从第一个 `/` 起的后半部分。
|
||||
|
||||
@@ -229,7 +193,7 @@ https://example.com/items/foo
|
||||
|
||||
开发 API 时,「路径」是用来分离「关注点」和「资源」的主要手段。
|
||||
|
||||
#### 操作 { #operation }
|
||||
#### 操作
|
||||
|
||||
这里的「操作」指的是一种 HTTP「方法」。
|
||||
|
||||
@@ -264,9 +228,9 @@ https://example.com/items/foo
|
||||
|
||||
我们也打算称呼它们为「操作」。
|
||||
|
||||
#### 定义一个*路径操作装饰器* { #define-a-path-operation-decorator }
|
||||
#### 定义一个*路径操作装饰器*
|
||||
|
||||
{* ../../docs_src/first_steps/tutorial001_py39.py hl[6] *}
|
||||
{* ../../docs_src/first_steps/tutorial001.py hl[6] *}
|
||||
|
||||
`@app.get("/")` 告诉 **FastAPI** 在它下方的函数负责处理如下访问请求:
|
||||
|
||||
@@ -312,7 +276,7 @@ https://example.com/items/foo
|
||||
|
||||
///
|
||||
|
||||
### 步骤 4:定义**路径操作函数** { #step-4-define-the-path-operation-function }
|
||||
### 步骤 4:定义**路径操作函数**
|
||||
|
||||
这是我们的「**路径操作函数**」:
|
||||
|
||||
@@ -320,7 +284,7 @@ https://example.com/items/foo
|
||||
* **操作**:是 `get`。
|
||||
* **函数**:是位于「装饰器」下方的函数(位于 `@app.get("/")` 下方)。
|
||||
|
||||
{* ../../docs_src/first_steps/tutorial001_py39.py hl[7] *}
|
||||
{* ../../docs_src/first_steps/tutorial001.py hl[7] *}
|
||||
|
||||
这是一个 Python 函数。
|
||||
|
||||
@@ -332,17 +296,17 @@ https://example.com/items/foo
|
||||
|
||||
你也可以将其定义为常规函数而不使用 `async def`:
|
||||
|
||||
{* ../../docs_src/first_steps/tutorial003_py39.py hl[7] *}
|
||||
{* ../../docs_src/first_steps/tutorial003.py hl[7] *}
|
||||
|
||||
/// note
|
||||
|
||||
如果你不知道两者的区别,请查阅 [并发: *赶时间吗?*](../async.md#in-a-hurry){.internal-link target=_blank}。
|
||||
如果你不知道两者的区别,请查阅 [并发: *赶时间吗?*](../async.md#_1){.internal-link target=_blank}。
|
||||
|
||||
///
|
||||
|
||||
### 步骤 5:返回内容 { #step-5-return-the-content }
|
||||
### 步骤 5:返回内容
|
||||
|
||||
{* ../../docs_src/first_steps/tutorial001_py39.py hl[8] *}
|
||||
{* ../../docs_src/first_steps/tutorial001.py hl[8] *}
|
||||
|
||||
你可以返回一个 `dict`、`list`,像 `str`、`int` 一样的单个值,等等。
|
||||
|
||||
@@ -350,31 +314,10 @@ https://example.com/items/foo
|
||||
|
||||
还有许多其他将会自动转换为 JSON 的对象和模型(包括 ORM 对象等)。尝试下使用你最喜欢的一种,它很有可能已经被支持。
|
||||
|
||||
### 步骤 6:部署 { #step-6-deploy-it }
|
||||
|
||||
用一条命令将你的应用部署到 **<a href="https://fastapicloud.com" class="external-link" target="_blank">FastAPI Cloud</a>**:`fastapi deploy`。🎉
|
||||
|
||||
#### 关于 FastAPI Cloud { #about-fastapi-cloud }
|
||||
|
||||
**<a href="https://fastapicloud.com" class="external-link" target="_blank">FastAPI Cloud</a>** 由 **FastAPI** 的作者和团队打造。
|
||||
|
||||
它以最小的投入简化了 **构建**、**部署** 和 **访问** API 的流程。
|
||||
|
||||
它把使用 FastAPI 构建应用的相同**开发者体验**带到了将应用**部署**到云端的过程。🎉
|
||||
|
||||
FastAPI Cloud 是 *FastAPI 及其朋友们* 开源项目的主要赞助和资金提供方。✨
|
||||
|
||||
#### 部署到其他云服务商 { #deploy-to-other-cloud-providers }
|
||||
|
||||
FastAPI 是开源并基于标准的。你可以将 FastAPI 应用部署到你选择的任何云服务商。
|
||||
|
||||
按照你的云服务商的指南部署 FastAPI 应用即可。🤓
|
||||
|
||||
## 总结 { #recap }
|
||||
## 总结
|
||||
|
||||
* 导入 `FastAPI`。
|
||||
* 创建一个 `app` 实例。
|
||||
* 编写一个**路径操作装饰器**,如 `@app.get("/")`。
|
||||
* 定义一个**路径操作函数**,如 `def root(): ...`。
|
||||
* 使用命令 `fastapi dev` 运行开发服务器。
|
||||
* 可选:使用 `fastapi deploy` 部署你的应用。
|
||||
|
||||
@@ -1,271 +1,142 @@
|
||||
# 查询参数和字符串校验 { #query-parameters-and-string-validations }
|
||||
# 查询参数和字符串校验
|
||||
|
||||
**FastAPI** 允许你为参数声明额外的信息和校验。
|
||||
|
||||
让我们以下面的应用为例:
|
||||
让我们以下面的应用程序为例:
|
||||
|
||||
{* ../../docs_src/query_params_str_validations/tutorial001_py310.py hl[7] *}
|
||||
|
||||
查询参数 `q` 的类型为 `str | None`,这意味着它是 `str` 类型,但也可以是 `None`。其默认值确实为 `None`,所以 FastAPI 会知道它不是必填的。
|
||||
查询参数 `q` 的类型为 `str`,默认值为 `None`,因此它是可选的。
|
||||
|
||||
/// note | 注意
|
||||
## 额外的校验
|
||||
|
||||
FastAPI 会因为默认值 `= None` 而知道 `q` 的值不是必填的。
|
||||
我们打算添加约束条件:即使 `q` 是可选的,但只要提供了该参数,则该参数值**不能超过50个字符的长度**。
|
||||
|
||||
将类型标注为 `str | None` 能让你的编辑器提供更好的辅助和错误检测。
|
||||
### 导入 `Query`
|
||||
|
||||
///
|
||||
为此,首先从 `fastapi` 导入 `Query`:
|
||||
|
||||
## 额外校验 { #additional-validation }
|
||||
{* ../../docs_src/query_params_str_validations/tutorial002.py hl[1] *}
|
||||
|
||||
我们打算添加约束:即使 `q` 是可选的,但只要提供了该参数,**其长度不能超过 50 个字符**。
|
||||
## 使用 `Query` 作为默认值
|
||||
|
||||
### 导入 `Query` 和 `Annotated` { #import-query-and-annotated }
|
||||
现在,将 `Query` 用作查询参数的默认值,并将它的 `max_length` 参数设置为 50:
|
||||
|
||||
为此,先导入:
|
||||
{* ../../docs_src/query_params_str_validations/tutorial002.py hl[9] *}
|
||||
|
||||
- 从 `fastapi` 导入 `Query`
|
||||
- 从 `typing` 导入 `Annotated`
|
||||
|
||||
{* ../../docs_src/query_params_str_validations/tutorial002_an_py310.py hl[1,3] *}
|
||||
|
||||
/// info | 信息
|
||||
|
||||
FastAPI 在 0.95.0 版本中添加了对 `Annotated` 的支持(并开始推荐使用)。
|
||||
|
||||
如果你的版本更旧,使用 `Annotated` 会报错。
|
||||
|
||||
在使用 `Annotated` 之前,请确保先[升级 FastAPI 版本](../deployment/versions.md#upgrading-the-fastapi-versions){.internal-link target=_blank}到至少 0.95.1。
|
||||
|
||||
///
|
||||
|
||||
## 在 `q` 参数的类型中使用 `Annotated` { #use-annotated-in-the-type-for-the-q-parameter }
|
||||
|
||||
还记得我之前在[Python 类型简介](../python-types.md#type-hints-with-metadata-annotations){.internal-link target=_blank}中说过可以用 `Annotated` 给参数添加元数据吗?
|
||||
|
||||
现在正是与 FastAPI 搭配使用它的时候。🚀
|
||||
|
||||
我们之前的类型标注是:
|
||||
|
||||
//// tab | Python 3.10+
|
||||
|
||||
```Python
|
||||
q: str | None = None
|
||||
```
|
||||
|
||||
////
|
||||
|
||||
//// tab | Python 3.9+
|
||||
|
||||
```Python
|
||||
q: Union[str, None] = None
|
||||
```
|
||||
|
||||
////
|
||||
|
||||
我们要做的是用 `Annotated` 把它包起来,变成:
|
||||
|
||||
//// tab | Python 3.10+
|
||||
|
||||
```Python
|
||||
q: Annotated[str | None] = None
|
||||
```
|
||||
|
||||
////
|
||||
|
||||
//// tab | Python 3.9+
|
||||
|
||||
```Python
|
||||
q: Annotated[Union[str, None]] = None
|
||||
```
|
||||
|
||||
////
|
||||
|
||||
这两种写法含义相同,`q` 是一个可以是 `str` 或 `None` 的参数,默认是 `None`。
|
||||
|
||||
现在进入更有趣的部分。🎉
|
||||
|
||||
## 在 `q` 的 `Annotated` 中添加 `Query` { #add-query-to-annotated-in-the-q-parameter }
|
||||
|
||||
有了 `Annotated` 之后,我们就可以放入更多信息(本例中是额外的校验)。在 `Annotated` 中添加 `Query`,并把参数 `max_length` 设为 `50`:
|
||||
|
||||
{* ../../docs_src/query_params_str_validations/tutorial002_an_py310.py hl[9] *}
|
||||
|
||||
注意默认值依然是 `None`,所以该参数仍是可选的。
|
||||
|
||||
但现在把 `Query(max_length=50)` 放到 `Annotated` 里,我们就在告诉 FastAPI,这个值需要**额外校验**,最大长度为 50 个字符。😎
|
||||
|
||||
/// tip | 提示
|
||||
|
||||
这里用的是 `Query()`,因为这是一个**查询参数**。稍后我们还会看到 `Path()`、`Body()`、`Header()` 和 `Cookie()`,它们也接受与 `Query()` 相同的参数。
|
||||
|
||||
///
|
||||
|
||||
FastAPI 现在会:
|
||||
|
||||
- 对数据进行**校验**,确保最大长度为 50 个字符
|
||||
- 当数据无效时向客户端展示**清晰的错误**
|
||||
- 在 OpenAPI 模式的*路径操作*中**记录**该参数(因此会出现在**自动文档 UI** 中)
|
||||
|
||||
## 另一种(旧的)方式:把 `Query` 作为默认值 { #alternative-old-query-as-the-default-value }
|
||||
|
||||
早期版本的 FastAPI(<abbr title="早于 2023-03">0.95.0</abbr> 之前)要求你把 `Query` 作为参数的默认值,而不是放在 `Annotated` 里。你很可能会在别处看到这种写法,所以我也给你解释一下。
|
||||
|
||||
/// tip | 提示
|
||||
|
||||
对于新代码以及在可能的情况下,请按上文所述使用 `Annotated`。它有多项优势(如下所述),没有劣势。🍰
|
||||
|
||||
///
|
||||
|
||||
像这样把 `Query()` 作为函数参数的默认值,并把参数 `max_length` 设为 50:
|
||||
|
||||
{* ../../docs_src/query_params_str_validations/tutorial002_py310.py hl[7] *}
|
||||
|
||||
由于这种情况下(不使用 `Annotated`)我们必须把函数中的默认值 `None` 替换为 `Query()`,因此需要通过参数 `Query(default=None)` 来设置默认值,它起到同样的作用(至少对 FastAPI 来说)。
|
||||
由于我们必须用 `Query(default=None)` 替换默认值 `None`,`Query` 的第一个参数同样也是用于定义默认值。
|
||||
|
||||
所以:
|
||||
|
||||
```Python
|
||||
q: str | None = Query(default=None)
|
||||
q: Union[str, None] = Query(default=None)
|
||||
```
|
||||
|
||||
……会让参数变成可选,默认值为 `None`,等同于:
|
||||
...使得参数可选,等同于:
|
||||
|
||||
```Python
|
||||
q: str | None = None
|
||||
q: str = None
|
||||
```
|
||||
|
||||
但使用 `Query` 的版本会显式把它声明为一个查询参数。
|
||||
但是 `Query` 显式地将其声明为查询参数。
|
||||
|
||||
然后,我们可以向 `Query` 传入更多参数。本例中是适用于字符串的 `max_length` 参数:
|
||||
然后,我们可以将更多的参数传递给 `Query`。在本例中,适用于字符串的 `max_length` 参数:
|
||||
|
||||
```Python
|
||||
q: str | None = Query(default=None, max_length=50)
|
||||
q: Union[str, None] = Query(default=None, max_length=50)
|
||||
```
|
||||
|
||||
这会校验数据、在数据无效时展示清晰的错误,并在 OpenAPI 模式的*路径操作*中记录该参数。
|
||||
将会校验数据,在数据无效时展示清晰的错误信息,并在 OpenAPI 模式的*路径操作*中记录该参数。
|
||||
|
||||
### 在默认值中使用 `Query` 或在 `Annotated` 中使用 `Query` { #query-as-the-default-value-or-in-annotated }
|
||||
|
||||
注意,当你在 `Annotated` 中使用 `Query` 时,不能再给 `Query` 传 `default` 参数。
|
||||
|
||||
相反,应使用函数参数本身的实际默认值。否则会不一致。
|
||||
|
||||
例如,下面这样是不允许的:
|
||||
|
||||
```Python
|
||||
q: Annotated[str, Query(default="rick")] = "morty"
|
||||
```
|
||||
|
||||
……因为不清楚默认值应该是 `"rick"` 还是 `"morty"`。
|
||||
|
||||
因此,你应该这样用(推荐):
|
||||
|
||||
```Python
|
||||
q: Annotated[str, Query()] = "rick"
|
||||
```
|
||||
|
||||
……或者在旧代码库中你会见到:
|
||||
|
||||
```Python
|
||||
q: str = Query(default="rick")
|
||||
```
|
||||
|
||||
### `Annotated` 的优势 { #advantages-of-annotated }
|
||||
|
||||
**推荐使用 `Annotated`**,而不是把 `Query` 放在函数参数的默认值里,这样做在多方面都**更好**。🤓
|
||||
|
||||
函数参数的**默认值**就是**真正的默认值**,这与 Python 的直觉更一致。😌
|
||||
|
||||
你可以在**其他地方**不通过 FastAPI **直接调用**这个函数,而且它会**按预期工作**。如果有**必填**参数(没有默认值),你的**编辑器**会报错提示;如果在运行时没有传入必填参数,**Python** 也会报错。
|
||||
|
||||
当你不使用 `Annotated` 而是使用**(旧的)默认值风格**时,如果你在**其他地方**不通过 FastAPI 调用该函数,你必须**记得**给函数传参,否则得到的值会和预期不同(例如得到 `QueryInfo` 之类的对象而不是 `str`)。而你的编辑器不会报错,Python 也不会在调用时报错,只有在函数内部的操作出错时才会暴露问题。
|
||||
|
||||
由于 `Annotated` 可以包含多个元数据标注,你甚至可以用同一个函数与其他工具配合,例如 <a href="https://typer.tiangolo.com/" class="external-link" target="_blank">Typer</a>。🚀
|
||||
|
||||
## 添加更多校验 { #add-more-validations }
|
||||
## 添加更多校验
|
||||
|
||||
你还可以添加 `min_length` 参数:
|
||||
|
||||
{* ../../docs_src/query_params_str_validations/tutorial003_an_py310.py hl[10] *}
|
||||
{* ../../docs_src/query_params_str_validations/tutorial003.py hl[10] *}
|
||||
|
||||
## 添加正则表达式 { #add-regular-expressions }
|
||||
## 添加正则表达式
|
||||
|
||||
你可以定义一个参数必须匹配的 <abbr title="正则表达式(regex 或 regexp)是用于定义字符串搜索模式的字符序列。">正则表达式</abbr> `pattern`:
|
||||
你可以定义一个参数值必须匹配的<abbr title="正则表达式或正则是定义字符串搜索模式的字符序列。">正则表达式</abbr>:
|
||||
|
||||
{* ../../docs_src/query_params_str_validations/tutorial004_an_py310.py hl[11] *}
|
||||
{* ../../docs_src/query_params_str_validations/tutorial004.py hl[11] *}
|
||||
|
||||
这个特定的正则表达式通过以下规则检查接收到的参数值:
|
||||
这个指定的正则表达式通过以下规则检查接收到的参数值:
|
||||
|
||||
- `^`:必须以接下来的字符开头,前面没有其他字符。
|
||||
- `fixedquery`:值必须精确等于 `fixedquery`。
|
||||
- `$`:到此结束,在 `fixedquery` 之后没有更多字符。
|
||||
* `^`:以该符号之后的字符开头,符号之前没有字符。
|
||||
* `fixedquery`: 值精确地等于 `fixedquery`。
|
||||
* `$`: 到此结束,在 `fixedquery` 之后没有更多字符。
|
||||
|
||||
如果你对这些**「正则表达式」**概念感到迷茫,不必担心。对很多人来说这都是个难点。你仍然可以在不使用正则表达式的情况下做很多事情。
|
||||
如果你对所有的这些**「正则表达式」**概念感到迷茫,请不要担心。对于许多人来说这都是一个困难的主题。你仍然可以在无需正则表达式的情况下做很多事情。
|
||||
|
||||
现在你知道了,一旦需要时,你可以在 **FastAPI** 中直接使用它们。
|
||||
但是,一旦你需要用到并去学习它们时,请了解你已经可以在 **FastAPI** 中直接使用它们。
|
||||
|
||||
## 默认值 { #default-values }
|
||||
## 默认值
|
||||
|
||||
当然,你也可以使用 `None` 以外的默认值。
|
||||
你可以向 `Query` 的第一个参数传入 `None` 用作查询参数的默认值,以同样的方式你也可以传递其他默认值。
|
||||
|
||||
假设你想要声明查询参数 `q` 的 `min_length` 为 `3`,并且默认值为 `"fixedquery"`:
|
||||
假设你想要声明查询参数 `q`,使其 `min_length` 为 `3`,并且默认值为 `fixedquery`:
|
||||
|
||||
{* ../../docs_src/query_params_str_validations/tutorial005_an_py39.py hl[9] *}
|
||||
{* ../../docs_src/query_params_str_validations/tutorial005.py hl[7] *}
|
||||
|
||||
/// note | 注意
|
||||
/// note
|
||||
|
||||
任何类型的默认值(包括 `None`)都会让该参数变为可选(非必填)。
|
||||
具有默认值还会使该参数成为可选参数。
|
||||
|
||||
///
|
||||
|
||||
## 必填参数 { #required-parameters }
|
||||
## 声明为必需参数
|
||||
|
||||
当我们不需要声明更多校验或元数据时,只需不声明默认值就可以让查询参数 `q` 成为必填参数,例如:
|
||||
当我们不需要声明额外的校验或元数据时,只需不声明默认值就可以使 `q` 参数成为必需参数,例如:
|
||||
|
||||
```Python
|
||||
q: str
|
||||
```
|
||||
|
||||
而不是:
|
||||
代替:
|
||||
|
||||
```Python
|
||||
q: str | None = None
|
||||
q: Union[str, None] = None
|
||||
```
|
||||
|
||||
但现在我们用 `Query` 来声明它,例如:
|
||||
但是现在我们正在用 `Query` 声明它,例如:
|
||||
|
||||
```Python
|
||||
q: Annotated[str | None, Query(min_length=3)] = None
|
||||
q: Union[str, None] = Query(default=None, min_length=3)
|
||||
```
|
||||
|
||||
因此,在使用 `Query` 的同时需要把某个值声明为必填时,只需不声明默认值:
|
||||
因此,当你在使用 `Query` 且需要声明一个值是必需的时,只需不声明默认参数:
|
||||
|
||||
{* ../../docs_src/query_params_str_validations/tutorial006_an_py39.py hl[9] *}
|
||||
{* ../../docs_src/query_params_str_validations/tutorial006.py hl[7] *}
|
||||
|
||||
### 必填,但可以为 `None` { #required-can-be-none }
|
||||
### 使用`None`声明必需参数
|
||||
|
||||
你可以声明一个参数可以接收 `None`,但它仍然是必填的。这将强制客户端必须发送一个值,即使该值是 `None`。
|
||||
你可以声明一个参数可以接收`None`值,但它仍然是必需的。这将强制客户端发送一个值,即使该值是`None`。
|
||||
|
||||
为此,你可以声明 `None` 是有效类型,但不声明默认值:
|
||||
为此,你可以声明`None`是一个有效的类型,并仍然使用`default=...`:
|
||||
|
||||
{* ../../docs_src/query_params_str_validations/tutorial006c_an_py310.py hl[9] *}
|
||||
{* ../../docs_src/query_params_str_validations/tutorial006c.py hl[9] *}
|
||||
|
||||
## 查询参数列表 / 多个值 { #query-parameter-list-multiple-values }
|
||||
/// tip
|
||||
|
||||
当你用 `Query` 显式地定义查询参数时,你还可以声明它接收一个值列表,换句话说,接收多个值。
|
||||
Pydantic 是 FastAPI 中所有数据验证和序列化的核心,当你在没有设默认值的情况下使用 `Optional` 或 `Union[Something, None]` 时,它具有特殊行为,你可以在 Pydantic 文档中阅读有关<a href="https://docs.pydantic.dev/latest/concepts/models/#required-optional-fields" class="external-link" target="_blank">必需可选字段</a>的更多信息。
|
||||
|
||||
///
|
||||
|
||||
## 查询参数列表 / 多个值
|
||||
|
||||
当你使用 `Query` 显式地定义查询参数时,你还可以声明它去接收一组值,或换句话来说,接收多个值。
|
||||
|
||||
例如,要声明一个可在 URL 中出现多次的查询参数 `q`,你可以这样写:
|
||||
|
||||
{* ../../docs_src/query_params_str_validations/tutorial011_an_py310.py hl[9] *}
|
||||
{* ../../docs_src/query_params_str_validations/tutorial011.py hl[9] *}
|
||||
|
||||
然后,访问如下 URL:
|
||||
然后,输入如下网址:
|
||||
|
||||
```
|
||||
http://localhost:8000/items/?q=foo&q=bar
|
||||
```
|
||||
|
||||
你会在*路径操作函数*的*函数参数* `q` 中以一个 Python `list` 的形式接收到多个 `q` *查询参数* 的值(`foo` 和 `bar`)。
|
||||
你会在*路径操作函数*的*函数参数* `q` 中以一个 Python `list` 的形式接收到*查询参数* `q` 的多个值(`foo` 和 `bar`)。
|
||||
|
||||
因此,该 URL 的响应将会是:
|
||||
|
||||
@@ -278,21 +149,21 @@ http://localhost:8000/items/?q=foo&q=bar
|
||||
}
|
||||
```
|
||||
|
||||
/// tip | 提示
|
||||
/// tip
|
||||
|
||||
要声明类型为 `list` 的查询参数(如上例),你需要显式地使用 `Query`,否则它会被解释为请求体。
|
||||
要声明类型为 `list` 的查询参数,如上例所示,你需要显式地使用 `Query`,否则该参数将被解释为请求体。
|
||||
|
||||
///
|
||||
|
||||
交互式 API 文档会相应更新,以支持多个值:
|
||||
交互式 API 文档将会相应地进行更新,以允许使用多个值:
|
||||
|
||||
<img src="/img/tutorial/query-params-str-validations/image02.png">
|
||||
<img src="https://fastapi.tiangolo.com/img/tutorial/query-params-str-validations/image02.png">
|
||||
|
||||
### 具有默认值的查询参数列表 / 多个值 { #query-parameter-list-multiple-values-with-defaults }
|
||||
### 具有默认值的查询参数列表 / 多个值
|
||||
|
||||
你还可以定义在没有给定值时的默认 `list`:
|
||||
你还可以定义在没有任何给定值时的默认 `list` 值:
|
||||
|
||||
{* ../../docs_src/query_params_str_validations/tutorial012_an_py39.py hl[9] *}
|
||||
{* ../../docs_src/query_params_str_validations/tutorial012.py hl[9] *}
|
||||
|
||||
如果你访问:
|
||||
|
||||
@@ -311,163 +182,93 @@ http://localhost:8000/items/
|
||||
}
|
||||
```
|
||||
|
||||
#### 只使用 `list` { #using-just-list }
|
||||
#### 使用 `list`
|
||||
|
||||
你也可以直接使用 `list`,而不是 `list[str]`:
|
||||
你也可以直接使用 `list` 代替 `List [str]`:
|
||||
|
||||
{* ../../docs_src/query_params_str_validations/tutorial013_an_py39.py hl[9] *}
|
||||
{* ../../docs_src/query_params_str_validations/tutorial013.py hl[7] *}
|
||||
|
||||
/// note | 注意
|
||||
/// note
|
||||
|
||||
请记住,在这种情况下 FastAPI 不会检查列表的内容。
|
||||
请记住,在这种情况下 FastAPI 将不会检查列表的内容。
|
||||
|
||||
例如,`list[int]` 会检查(并记录到文档)列表的内容必须是整数。但仅用 `list` 不会。
|
||||
例如,`List[int]` 将检查(并记录到文档)列表的内容必须是整数。但是单独的 `list` 不会。
|
||||
|
||||
///
|
||||
|
||||
## 声明更多元数据 { #declare-more-metadata }
|
||||
## 声明更多元数据
|
||||
|
||||
你可以添加更多有关该参数的信息。
|
||||
|
||||
这些信息会包含在生成的 OpenAPI 中,并被文档用户界面和外部工具使用。
|
||||
这些信息将包含在生成的 OpenAPI 模式中,并由文档用户界面和外部工具所使用。
|
||||
|
||||
/// note | 注意
|
||||
/// note
|
||||
|
||||
请记住,不同的工具对 OpenAPI 的支持程度可能不同。
|
||||
|
||||
其中一些可能还不会展示所有已声明的额外信息,尽管在大多数情况下,缺失的功能已经在计划开发中。
|
||||
其中一些可能不会展示所有已声明的额外信息,尽管在大多数情况下,缺少的这部分功能已经计划进行开发。
|
||||
|
||||
///
|
||||
|
||||
你可以添加 `title`:
|
||||
|
||||
{* ../../docs_src/query_params_str_validations/tutorial007_an_py310.py hl[10] *}
|
||||
{* ../../docs_src/query_params_str_validations/tutorial007.py hl[10] *}
|
||||
|
||||
以及 `description`:
|
||||
|
||||
{* ../../docs_src/query_params_str_validations/tutorial008_an_py310.py hl[14] *}
|
||||
{* ../../docs_src/query_params_str_validations/tutorial008.py hl[13] *}
|
||||
|
||||
## 别名参数 { #alias-parameters }
|
||||
## 别名参数
|
||||
|
||||
假设你想要参数名为 `item-query`。
|
||||
假设你想要查询参数为 `item-query`。
|
||||
|
||||
像这样:
|
||||
像下面这样:
|
||||
|
||||
```
|
||||
http://127.0.0.1:8000/items/?item-query=foobaritems
|
||||
```
|
||||
|
||||
但 `item-query` 不是有效的 Python 变量名。
|
||||
但是 `item-query` 不是一个有效的 Python 变量名称。
|
||||
|
||||
最接近的有效名称是 `item_query`。
|
||||
|
||||
但你仍然需要它在 URL 中就是 `item-query`……
|
||||
但是你仍然要求它在 URL 中必须是 `item-query`...
|
||||
|
||||
这时可以用 `alias` 参数声明一个别名,FastAPI 会用该别名在 URL 中查找参数值:
|
||||
这时你可以用 `alias` 参数声明一个别名,该别名将用于在 URL 中查找查询参数值:
|
||||
|
||||
{* ../../docs_src/query_params_str_validations/tutorial009_an_py310.py hl[9] *}
|
||||
{* ../../docs_src/query_params_str_validations/tutorial009.py hl[9] *}
|
||||
|
||||
## 弃用参数 { #deprecating-parameters }
|
||||
## 弃用参数
|
||||
|
||||
现在假设你不再喜欢这个参数了。
|
||||
现在假设你不再喜欢此参数。
|
||||
|
||||
由于还有客户端在使用它,你不得不保留一段时间,但你希望文档清楚地将其展示为<abbr title="已过时,不推荐使用">已弃用</abbr>。
|
||||
你不得不将其保留一段时间,因为有些客户端正在使用它,但你希望文档清楚地将其展示为<abbr title ="已过时,建议不要使用它">已弃用</abbr>。
|
||||
|
||||
那么将参数 `deprecated=True` 传给 `Query`:
|
||||
那么将参数 `deprecated=True` 传入 `Query`:
|
||||
|
||||
{* ../../docs_src/query_params_str_validations/tutorial010_an_py310.py hl[19] *}
|
||||
{* ../../docs_src/query_params_str_validations/tutorial010.py hl[18] *}
|
||||
|
||||
文档将会像下面这样展示它:
|
||||
|
||||
<img src="/img/tutorial/query-params-str-validations/image01.png">
|
||||
<img src="https://fastapi.tiangolo.com/img/tutorial/query-params-str-validations/image01.png">
|
||||
|
||||
## 从 OpenAPI 中排除参数 { #exclude-parameters-from-openapi }
|
||||
## 总结
|
||||
|
||||
要把某个查询参数从生成的 OpenAPI 模式中排除(从而也不会出现在自动文档系统中),将 `Query` 的参数 `include_in_schema` 设为 `False`:
|
||||
|
||||
{* ../../docs_src/query_params_str_validations/tutorial014_an_py310.py hl[10] *}
|
||||
|
||||
## 自定义校验 { #custom-validation }
|
||||
|
||||
有些情况下你需要做一些无法通过上述参数完成的**自定义校验**。
|
||||
|
||||
在这些情况下,你可以使用**自定义校验函数**,该函数会在正常校验之后应用(例如,在先校验值是 `str` 之后)。
|
||||
|
||||
你可以在 `Annotated` 中使用 <a href="https://docs.pydantic.dev/latest/concepts/validators/#field-after-validator" class="external-link" target="_blank">Pydantic 的 `AfterValidator`</a> 来实现。
|
||||
|
||||
/// tip | 提示
|
||||
|
||||
Pydantic 还有 <a href="https://docs.pydantic.dev/latest/concepts/validators/#field-before-validator" class="external-link" target="_blank">`BeforeValidator`</a> 等。🤓
|
||||
|
||||
///
|
||||
|
||||
例如,这个自定义校验器会检查条目 ID 是否以 `isbn-`(用于 <abbr title="ISBN 的含义是 International Standard Book Number(国际标准书号)">ISBN</abbr> 书号)或 `imdb-`(用于 <abbr title="IMDB(Internet Movie Database)是一个包含电影信息的网站">IMDB</abbr> 电影 URL 的 ID)开头:
|
||||
|
||||
{* ../../docs_src/query_params_str_validations/tutorial015_an_py310.py hl[5,16:19,24] *}
|
||||
|
||||
/// info | 信息
|
||||
|
||||
这在 Pydantic 2 或更高版本中可用。😎
|
||||
|
||||
///
|
||||
|
||||
/// tip | 提示
|
||||
|
||||
如果你需要进行任何需要与**外部组件**通信的校验,例如数据库或其他 API,你应该改用 **FastAPI 依赖项**,稍后你会学到它们。
|
||||
|
||||
这些自定义校验器用于只需检查请求中**同一份数据**即可完成的事情。
|
||||
|
||||
///
|
||||
|
||||
### 理解这段代码 { #understand-that-code }
|
||||
|
||||
关键点仅仅是:在 `Annotated` 中使用带函数的 **`AfterValidator`**。不感兴趣可以跳过这一节。🤸
|
||||
|
||||
---
|
||||
|
||||
但如果你对这个具体示例好奇,并且还愿意继续看,这里有一些额外细节。
|
||||
|
||||
#### 字符串与 `value.startswith()` { #string-with-value-startswith }
|
||||
|
||||
注意到了吗?字符串的 `value.startswith()` 可以接收一个元组,它会检查元组中的每个值:
|
||||
|
||||
{* ../../docs_src/query_params_str_validations/tutorial015_an_py310.py ln[16:19] hl[17] *}
|
||||
|
||||
#### 一个随机条目 { #a-random-item }
|
||||
|
||||
使用 `data.items()` 我们会得到一个包含每个字典项键和值的元组的 <abbr title="可以用 for 循环迭代的对象,例如 list、set 等">可迭代对象</abbr>。
|
||||
|
||||
我们用 `list(data.items())` 把这个可迭代对象转换成一个真正的 `list`。
|
||||
|
||||
然后用 `random.choice()` 可以从该列表中获取一个**随机值**,也就是一个 `(id, name)` 的元组。它可能像 `("imdb-tt0371724", "The Hitchhiker's Guide to the Galaxy")` 这样。
|
||||
|
||||
接着我们把这个元组的**两个值**分别赋给变量 `id` 和 `name`。
|
||||
|
||||
所以,即使用户没有提供条目 ID,他们仍然会收到一个随机推荐。
|
||||
|
||||
……而我们把这些都放在**一行简单的代码**里完成。🤯 你不爱 Python 吗?🐍
|
||||
|
||||
{* ../../docs_src/query_params_str_validations/tutorial015_an_py310.py ln[22:30] hl[29] *}
|
||||
|
||||
## 总结 { #recap }
|
||||
|
||||
你可以为参数声明额外的校验和元数据。
|
||||
你可以为查询参数声明额外的校验和元数据。
|
||||
|
||||
通用的校验和元数据:
|
||||
|
||||
- `alias`
|
||||
- `title`
|
||||
- `description`
|
||||
- `deprecated`
|
||||
* `alias`
|
||||
* `title`
|
||||
* `description`
|
||||
* `deprecated`
|
||||
|
||||
字符串特有的校验:
|
||||
特定于字符串的校验:
|
||||
|
||||
- `min_length`
|
||||
- `max_length`
|
||||
- `pattern`
|
||||
* `min_length`
|
||||
* `max_length`
|
||||
* `regex`
|
||||
|
||||
也可以使用 `AfterValidator` 进行自定义校验。
|
||||
在这些示例中,你了解了如何声明对 `str` 值的校验。
|
||||
|
||||
在这些示例中,你看到了如何为 `str` 值声明校验。
|
||||
|
||||
参阅下一章节,了解如何为其他类型(例如数值)声明校验。
|
||||
请参阅下一章节,以了解如何声明对其他类型例如数值的校验。
|
||||
|
||||
@@ -1,14 +1,14 @@
|
||||
# 虚拟环境 { #virtual-environments }
|
||||
# 虚拟环境
|
||||
|
||||
当你在 Python 工程中工作时,你可能会有必要用到一个**虚拟环境**(或类似的机制)来隔离你为每个工程安装的包。
|
||||
|
||||
/// info | 信息
|
||||
/// info
|
||||
|
||||
如果你已经了解虚拟环境,知道如何创建和使用它们,你可以考虑跳过这一部分。🤓
|
||||
|
||||
///
|
||||
|
||||
/// tip | 提示
|
||||
/// tip
|
||||
|
||||
**虚拟环境**和**环境变量**是不同的。
|
||||
|
||||
@@ -18,7 +18,7 @@
|
||||
|
||||
///
|
||||
|
||||
/// info | 信息
|
||||
/// info
|
||||
|
||||
这个页面将教你如何使用**虚拟环境**以及了解它们的工作原理。
|
||||
|
||||
@@ -26,7 +26,7 @@
|
||||
|
||||
///
|
||||
|
||||
## 创建一个工程 { #create-a-project }
|
||||
## 创建一个工程
|
||||
|
||||
首先,为你的工程创建一个目录。
|
||||
|
||||
@@ -51,11 +51,11 @@ $ cd awesome-project
|
||||
|
||||
</div>
|
||||
|
||||
## 创建一个虚拟环境 { #create-a-virtual-environment }
|
||||
## 创建一个虚拟环境
|
||||
|
||||
在开始一个 Python 工程的**第一时间**,**<abbr title="还有其他做法,此处仅作一个简单的指南">在你的工程内部</abbr>**创建一个虚拟环境。
|
||||
|
||||
/// tip | 提示
|
||||
/// tip
|
||||
|
||||
你只需要 **在每个工程中操作一次**,而不是每次工作时都操作。
|
||||
|
||||
@@ -96,7 +96,7 @@ $ uv venv
|
||||
|
||||
</div>
|
||||
|
||||
/// tip | 提示
|
||||
/// tip
|
||||
|
||||
默认情况下,`uv` 会在一个名为 `.venv` 的目录中创建一个虚拟环境。
|
||||
|
||||
@@ -114,11 +114,11 @@ $ uv venv
|
||||
|
||||
///
|
||||
|
||||
## 激活虚拟环境 { #activate-the-virtual-environment }
|
||||
## 激活虚拟环境
|
||||
|
||||
激活新的虚拟环境来确保你运行的任何 Python 命令或安装的包都能使用到它。
|
||||
|
||||
/// tip | 提示
|
||||
/// tip
|
||||
|
||||
**每次**开始一个 **新的终端会话** 来工作在这个工程时,你都需要执行这个操作。
|
||||
|
||||
@@ -162,19 +162,19 @@ $ source .venv/Scripts/activate
|
||||
|
||||
////
|
||||
|
||||
/// tip | 提示
|
||||
/// tip
|
||||
|
||||
每次你在这个环境中安装一个 **新的包** 时,都需要 **重新激活** 这个环境。
|
||||
|
||||
这么做确保了当你使用一个由这个包安装的 **终端(<abbr title="command line interface - 命令行界面">CLI</abbr>)程序** 时,你使用的是你的虚拟环境中的程序,而不是全局安装、可能版本不同的程序。
|
||||
这么做确保了当你使用一个由这个包安装的 **终端(<abbr title="命令行界面">CLI</abbr>)程序** 时,你使用的是你的虚拟环境中的程序,而不是全局安装、可能版本不同的程序。
|
||||
|
||||
///
|
||||
|
||||
## 检查虚拟环境是否激活 { #check-the-virtual-environment-is-active }
|
||||
## 检查虚拟环境是否激活
|
||||
|
||||
检查虚拟环境是否激活 (前面的命令是否生效)。
|
||||
|
||||
/// tip | 提示
|
||||
/// tip
|
||||
|
||||
这是 **可选的**,但这是一个很好的方法,可以 **检查** 一切是否按预期工作,以及你是否使用了你打算使用的虚拟环境。
|
||||
|
||||
@@ -212,9 +212,9 @@ C:\Users\user\code\awesome-project\.venv\Scripts\python
|
||||
|
||||
////
|
||||
|
||||
## 升级 `pip` { #upgrade-pip }
|
||||
## 升级 `pip`
|
||||
|
||||
/// tip | 提示
|
||||
/// tip
|
||||
|
||||
如果你使用 <a href="https://github.com/astral-sh/uv" class="external-link" target="_blank">`uv`</a> 来安装内容,而不是 `pip`,那么你就不需要升级 `pip`。😎
|
||||
|
||||
@@ -224,7 +224,7 @@ C:\Users\user\code\awesome-project\.venv\Scripts\python
|
||||
|
||||
在安装包时出现的许多奇怪的错误都可以通过先升级 `pip` 来解决。
|
||||
|
||||
/// tip | 提示
|
||||
/// tip
|
||||
|
||||
通常你只需要在创建虚拟环境后 **执行一次** 这个操作。
|
||||
|
||||
@@ -242,37 +242,17 @@ $ python -m pip install --upgrade pip
|
||||
|
||||
</div>
|
||||
|
||||
/// tip | 提示
|
||||
|
||||
有时在尝试升级 pip 时,你可能会遇到 **`No module named pip`** 错误。
|
||||
|
||||
如果发生这种情况,使用下面的命令来安装并升级 pip:
|
||||
|
||||
<div class="termy">
|
||||
|
||||
```console
|
||||
$ python -m ensurepip --upgrade
|
||||
|
||||
---> 100%
|
||||
```
|
||||
|
||||
</div>
|
||||
|
||||
该命令会在尚未安装 pip 时进行安装,并确保安装的 pip 版本不早于 `ensurepip` 提供的版本。
|
||||
|
||||
///
|
||||
|
||||
## 添加 `.gitignore` { #add-gitignore }
|
||||
## 添加 `.gitignore`
|
||||
|
||||
如果你使用 **Git** (这是你应该使用的),添加一个 `.gitignore` 文件来排除你的 `.venv` 中的所有内容。
|
||||
|
||||
/// tip | 提示
|
||||
/// tip
|
||||
|
||||
如果你使用 <a href="https://github.com/astral-sh/uv" class="external-link" target="_blank">`uv`</a> 来创建虚拟环境,它会自动为你完成这个操作,你可以跳过这一步。😎
|
||||
|
||||
///
|
||||
|
||||
/// tip | 提示
|
||||
/// tip
|
||||
|
||||
通常你只需要在创建虚拟环境后 **执行一次** 这个操作。
|
||||
|
||||
@@ -302,11 +282,11 @@ $ echo "*" > .venv/.gitignore
|
||||
|
||||
///
|
||||
|
||||
## 安装软件包 { #install-packages }
|
||||
## 安装软件包
|
||||
|
||||
在激活虚拟环境后,你可以在其中安装软件包。
|
||||
|
||||
/// tip | 提示
|
||||
/// tip
|
||||
|
||||
当你需要安装或升级软件包时,执行本操作**一次**;
|
||||
|
||||
@@ -314,11 +294,11 @@ $ echo "*" > .venv/.gitignore
|
||||
|
||||
///
|
||||
|
||||
### 直接安装包 { #install-packages-directly }
|
||||
### 直接安装包
|
||||
|
||||
如果你急于安装,不想使用文件来声明工程的软件包依赖,您可以直接安装它们。
|
||||
|
||||
/// tip | 提示
|
||||
/// tip
|
||||
|
||||
将程序所需的软件包及其版本放在文件中(例如 `requirements.txt` 或 `pyproject.toml`)是个好(并且非常好)的主意。
|
||||
|
||||
@@ -353,7 +333,7 @@ $ uv pip install "fastapi[standard]"
|
||||
|
||||
////
|
||||
|
||||
### 从 `requirements.txt` 安装 { #install-from-requirements-txt }
|
||||
### 从 `requirements.txt` 安装
|
||||
|
||||
如果你有一个 `requirements.txt` 文件,你可以使用它来安装其中的软件包。
|
||||
|
||||
@@ -396,7 +376,7 @@ pydantic==2.8.0
|
||||
|
||||
///
|
||||
|
||||
## 运行程序 { #run-your-program }
|
||||
## 运行程序
|
||||
|
||||
在你激活虚拟环境后,你可以运行你的程序,它将使用虚拟环境中的 Python 和你在其中安装的软件包。
|
||||
|
||||
@@ -410,7 +390,7 @@ Hello World
|
||||
|
||||
</div>
|
||||
|
||||
## 配置编辑器 { #configure-your-editor }
|
||||
## 配置编辑器
|
||||
|
||||
你可能会用到编辑器(即 IDE —— 译者注),请确保配置它使用与你创建的相同的虚拟环境(它可能会自动检测到),以便你可以获得自动补全和内联错误提示。
|
||||
|
||||
@@ -419,13 +399,13 @@ Hello World
|
||||
* <a href="https://code.visualstudio.com/docs/python/environments#_select-and-activate-an-environment" class="external-link" target="_blank">VS Code</a>
|
||||
* <a href="https://www.jetbrains.com/help/pycharm/creating-virtual-environment.html" class="external-link" target="_blank">PyCharm</a>
|
||||
|
||||
/// tip | 提示
|
||||
/// tip
|
||||
|
||||
通常你只需要在创建虚拟环境时执行此操作**一次**。
|
||||
|
||||
///
|
||||
|
||||
## 退出虚拟环境 { #deactivate-the-virtual-environment }
|
||||
## 退出虚拟环境
|
||||
|
||||
当你完成工作后,你可以**退出**虚拟环境。
|
||||
|
||||
@@ -439,13 +419,13 @@ $ deactivate
|
||||
|
||||
这样,当你运行 `python` 时,它不会尝试从安装了软件包的虚拟环境中运行。(即,它将不再会尝试从虚拟环境中运行,也不会使用其中安装的软件包。—— 译者注)
|
||||
|
||||
## 开始工作 { #ready-to-work }
|
||||
## 开始工作
|
||||
|
||||
现在你已经准备好开始你的工作了。
|
||||
|
||||
|
||||
|
||||
/// tip | 提示
|
||||
/// tip
|
||||
|
||||
你想要理解上面的所有内容吗?
|
||||
|
||||
@@ -453,7 +433,7 @@ $ deactivate
|
||||
|
||||
///
|
||||
|
||||
## 为什么要使用虚拟环境 { #why-virtual-environments }
|
||||
## 为什么要使用虚拟环境
|
||||
|
||||
你需要安装 <a href="https://www.python.org/" class="external-link" target="_blank">Python</a> 才能使用 FastAPI。
|
||||
|
||||
@@ -463,7 +443,7 @@ $ deactivate
|
||||
|
||||
然而,如果你直接使用 `pip`,软件包将被安装在你的**全局 Python 环境**中(即 Python 的全局安装)。
|
||||
|
||||
### 存在的问题 { #the-problem }
|
||||
### 存在的问题
|
||||
|
||||
那么,在全局 Python 环境中安装软件包有什么问题呢?
|
||||
|
||||
@@ -536,7 +516,7 @@ flowchart LR
|
||||
end
|
||||
```
|
||||
|
||||
/// tip | 提示
|
||||
/// tip
|
||||
|
||||
Python 包在推出**新版本**时通常会尽量**避免破坏性更改**,但最好还是要小心,要想清楚再安装新版本,而且在运行测试以确保一切能正常工作时再安装。
|
||||
|
||||
@@ -546,7 +526,7 @@ Python 包在推出**新版本**时通常会尽量**避免破坏性更改**,
|
||||
|
||||
此外,取决于你的操作系统(例如 Linux、Windows、macOS),它可能已经预先安装了 Python。在这种情况下,它可能已经预先安装了一些软件包,这些软件包的特定版本是**系统所需的**。如果你在全局 Python 环境中安装软件包,你可能会**破坏**一些随操作系统一起安装的程序。
|
||||
|
||||
## 软件包安装在哪里 { #where-are-packages-installed }
|
||||
## 软件包安装在哪里
|
||||
|
||||
当你安装 Python 时,它会在你的计算机上创建一些目录,并在这些目录中放一些文件。
|
||||
|
||||
@@ -572,7 +552,7 @@ $ pip install "fastapi[standard]"
|
||||
|
||||
默认情况下,它会将下载并解压的这些文件放在随 Python 安装的目录中,这就是**全局环境**。
|
||||
|
||||
## 什么是虚拟环境 { #what-are-virtual-environments }
|
||||
## 什么是虚拟环境
|
||||
|
||||
解决软件包都安装在全局环境中的问题的方法是为你所做的每个工程使用一个**虚拟环境**。
|
||||
|
||||
@@ -597,7 +577,7 @@ flowchart TB
|
||||
stone-project ~~~ azkaban-project
|
||||
```
|
||||
|
||||
## 激活虚拟环境意味着什么 { #what-does-activating-a-virtual-environment-mean }
|
||||
## 激活虚拟环境意味着什么
|
||||
|
||||
当你激活了一个虚拟环境,例如:
|
||||
|
||||
@@ -643,7 +623,7 @@ $ source .venv/Scripts/activate
|
||||
|
||||
其中之一是 `PATH` 变量。
|
||||
|
||||
/// tip | 提示
|
||||
/// tip
|
||||
|
||||
你可以在 [环境变量](environment-variables.md#path-environment-variable){.internal-link target=_blank} 部分了解更多关于 `PATH` 环境变量的内容。
|
||||
|
||||
@@ -734,7 +714,7 @@ C:\Users\user\code\awesome-project\.venv\Scripts\python
|
||||
|
||||
激活虚拟环境还会改变其他一些东西,但这是它所做的最重要的事情之一。
|
||||
|
||||
## 检查虚拟环境 { #checking-a-virtual-environment }
|
||||
## 检查虚拟环境
|
||||
|
||||
当你检查虚拟环境是否激活时,例如:
|
||||
|
||||
@@ -776,7 +756,7 @@ C:\Users\user\code\awesome-project\.venv\Scripts\python
|
||||
|
||||
因此,你可以确认你是否在正确的虚拟环境中。
|
||||
|
||||
/// tip | 提示
|
||||
/// tip
|
||||
|
||||
激活一个虚拟环境,获取一个 Python,然后**转到另一个工程**是一件很容易的事情;
|
||||
|
||||
@@ -786,7 +766,7 @@ C:\Users\user\code\awesome-project\.venv\Scripts\python
|
||||
|
||||
///
|
||||
|
||||
## 为什么要停用虚拟环境 { #why-deactivate-a-virtual-environment }
|
||||
## 为什么要停用虚拟环境
|
||||
|
||||
例如,你可能正在一个工程 `philosophers-stone` 上工作,**激活了该虚拟环境**,安装了包并使用了该环境,
|
||||
|
||||
@@ -840,7 +820,7 @@ I solemnly swear 🐺
|
||||
|
||||
</div>
|
||||
|
||||
## 替代方案 { #alternatives }
|
||||
## 替代方案
|
||||
|
||||
这是一个简单的指南,可以帮助你入门并教会你如何理解一切**底层**的东西。
|
||||
|
||||
@@ -857,7 +837,7 @@ I solemnly swear 🐺
|
||||
* 确保你有一个**确切**的软件包和版本集合来安装,包括它们的依赖项,这样你就可以确保在生产中运行你的工程与在开发时在你的计算机上运行的工程完全相同,这被称为**锁定**
|
||||
* 还有很多其他功能
|
||||
|
||||
## 结论 { #conclusion }
|
||||
## 结论
|
||||
|
||||
如果你读过并理解了所有这些,现在**你对虚拟环境的了解比很多开发者都要多**。🤓
|
||||
|
||||
|
||||
@@ -51,7 +51,7 @@ from fastapi.logger import logger
|
||||
from fastapi.security.oauth2 import SecurityScopes
|
||||
from fastapi.types import DependencyCacheKey
|
||||
from fastapi.utils import create_model_field, get_path_param_names
|
||||
from pydantic import BaseModel, Json
|
||||
from pydantic import BaseModel
|
||||
from pydantic.fields import FieldInfo
|
||||
from starlette.background import BackgroundTasks as StarletteBackgroundTasks
|
||||
from starlette.concurrency import run_in_threadpool
|
||||
@@ -66,7 +66,6 @@ from starlette.requests import HTTPConnection, Request
|
||||
from starlette.responses import Response
|
||||
from starlette.websockets import WebSocket
|
||||
from typing_extensions import Literal, get_args, get_origin
|
||||
from typing_inspection.typing_objects import is_typealiastype
|
||||
|
||||
multipart_not_installed_error = (
|
||||
'Form data requires "python-multipart" to be installed. \n'
|
||||
@@ -371,9 +370,6 @@ def analyze_param(
|
||||
depends = None
|
||||
type_annotation: Any = Any
|
||||
use_annotation: Any = Any
|
||||
if is_typealiastype(annotation):
|
||||
# unpack in case PEP 695 type syntax is used
|
||||
annotation = annotation.__value__
|
||||
if annotation is not inspect.Signature.empty:
|
||||
use_annotation = annotation
|
||||
type_annotation = annotation
|
||||
@@ -453,9 +449,7 @@ def analyze_param(
|
||||
depends = dataclasses.replace(depends, dependency=type_annotation)
|
||||
|
||||
# Handle non-param type annotations like Request
|
||||
# Only apply special handling when there's no explicit Depends - if there's a Depends,
|
||||
# the dependency will be called and its return value used instead of the special injection
|
||||
if depends is None and lenient_issubclass(
|
||||
if lenient_issubclass(
|
||||
type_annotation,
|
||||
(
|
||||
Request,
|
||||
@@ -466,6 +460,7 @@ def analyze_param(
|
||||
SecurityScopes,
|
||||
),
|
||||
):
|
||||
assert depends is None, f"Cannot specify `Depends` for type {type_annotation!r}"
|
||||
assert field_info is None, (
|
||||
f"Cannot specify FastAPI annotation for type {type_annotation!r}"
|
||||
)
|
||||
@@ -726,19 +721,11 @@ def _validate_value_with_model_field(
|
||||
return v_, []
|
||||
|
||||
|
||||
def _is_json_field(field: ModelField) -> bool:
|
||||
return any(type(item) is Json for item in field.field_info.metadata)
|
||||
|
||||
|
||||
def _get_multidict_value(
|
||||
field: ModelField, values: Mapping[str, Any], alias: Union[str, None] = None
|
||||
) -> Any:
|
||||
alias = alias or get_validation_alias(field)
|
||||
if (
|
||||
(not _is_json_field(field))
|
||||
and is_sequence_field(field)
|
||||
and isinstance(values, (ImmutableMultiDict, Headers))
|
||||
):
|
||||
if is_sequence_field(field) and isinstance(values, (ImmutableMultiDict, Headers)):
|
||||
value = values.getlist(alias)
|
||||
else:
|
||||
value = values.get(alias, None)
|
||||
|
||||
@@ -46,7 +46,6 @@ dependencies = [
|
||||
"starlette>=0.40.0,<0.51.0",
|
||||
"pydantic>=2.7.0",
|
||||
"typing-extensions>=4.8.0",
|
||||
"typing-inspection>=0.4.2",
|
||||
"annotated-doc>=0.0.2",
|
||||
]
|
||||
|
||||
|
||||
@@ -23,7 +23,7 @@ SUPPORTED_LANGS = {
|
||||
"de",
|
||||
"en",
|
||||
"es",
|
||||
"fr",
|
||||
# "fr",
|
||||
"ja",
|
||||
"ko",
|
||||
"pt",
|
||||
|
||||
@@ -347,12 +347,9 @@ def list_outdated(language: str) -> list[Path]:
|
||||
|
||||
|
||||
@app.command()
|
||||
def update_outdated(
|
||||
language: Annotated[str, typer.Option(envvar="LANGUAGE")],
|
||||
max: Annotated[int, typer.Option(envvar="MAX")] = 10,
|
||||
) -> None:
|
||||
def update_outdated(language: Annotated[str, typer.Option(envvar="LANGUAGE")]) -> None:
|
||||
outdated_paths = list_outdated(language)
|
||||
for path in outdated_paths[:max]:
|
||||
for path in outdated_paths:
|
||||
print(f"Updating lang: {language} path: {path}")
|
||||
translate_page(language=language, en_path=path)
|
||||
print(f"Done updating: {path}")
|
||||
@@ -360,12 +357,9 @@ def update_outdated(
|
||||
|
||||
|
||||
@app.command()
|
||||
def add_missing(
|
||||
language: Annotated[str, typer.Option(envvar="LANGUAGE")],
|
||||
max: Annotated[int, typer.Option(envvar="MAX")] = 10,
|
||||
) -> None:
|
||||
def add_missing(language: Annotated[str, typer.Option(envvar="LANGUAGE")]) -> None:
|
||||
missing_paths = list_missing(language)
|
||||
for path in missing_paths[:max]:
|
||||
for path in missing_paths:
|
||||
print(f"Adding lang: {language} path: {path}")
|
||||
translate_page(language=language, en_path=path)
|
||||
print(f"Done adding: {path}")
|
||||
@@ -373,14 +367,11 @@ def add_missing(
|
||||
|
||||
|
||||
@app.command()
|
||||
def update_and_add(
|
||||
language: Annotated[str, typer.Option(envvar="LANGUAGE")],
|
||||
max: Annotated[int, typer.Option(envvar="MAX")] = 10,
|
||||
) -> None:
|
||||
def update_and_add(language: Annotated[str, typer.Option(envvar="LANGUAGE")]) -> None:
|
||||
print(f"Updating outdated translations for {language}")
|
||||
update_outdated(language=language, max=max)
|
||||
update_outdated(language=language)
|
||||
print(f"Adding missing translations for {language}")
|
||||
add_missing(language=language, max=max)
|
||||
add_missing(language=language)
|
||||
print(f"Done updating and adding for {language}")
|
||||
|
||||
|
||||
|
||||
@@ -1,27 +0,0 @@
|
||||
from typing import Annotated
|
||||
|
||||
from fastapi import Depends, FastAPI
|
||||
from fastapi.testclient import TestClient
|
||||
from typing_extensions import TypeAliasType
|
||||
|
||||
|
||||
async def some_value() -> int:
|
||||
return 123
|
||||
|
||||
|
||||
DependedValue = TypeAliasType(
|
||||
"DependedValue", Annotated[int, Depends(some_value)], type_params=()
|
||||
)
|
||||
|
||||
|
||||
def test_pep695_type_dependencies():
|
||||
app = FastAPI()
|
||||
|
||||
@app.get("/")
|
||||
async def get_with_dep(value: DependedValue) -> str: # noqa
|
||||
return f"value: {value}"
|
||||
|
||||
client = TestClient(app)
|
||||
response = client.get("/")
|
||||
assert response.status_code == 200
|
||||
assert response.text == '"value: 123"'
|
||||
@@ -1,63 +0,0 @@
|
||||
import json
|
||||
from typing import Annotated
|
||||
|
||||
from fastapi import Cookie, FastAPI, Form, Header, Query
|
||||
from fastapi.testclient import TestClient
|
||||
from pydantic import Json
|
||||
|
||||
app = FastAPI()
|
||||
|
||||
|
||||
@app.post("/form-json-list")
|
||||
def form_json_list(items: Annotated[Json[list[str]], Form()]) -> list[str]:
|
||||
return items
|
||||
|
||||
|
||||
@app.get("/query-json-list")
|
||||
def query_json_list(items: Annotated[Json[list[str]], Query()]) -> list[str]:
|
||||
return items
|
||||
|
||||
|
||||
@app.get("/header-json-list")
|
||||
def header_json_list(x_items: Annotated[Json[list[str]], Header()]) -> list[str]:
|
||||
return x_items
|
||||
|
||||
|
||||
@app.get("/cookie-json-list")
|
||||
def cookie_json_list(items: Annotated[Json[list[str]], Cookie()]) -> list[str]:
|
||||
return items
|
||||
|
||||
|
||||
client = TestClient(app)
|
||||
|
||||
|
||||
def test_form_json_list():
|
||||
response = client.post(
|
||||
"/form-json-list", data={"items": json.dumps(["abc", "def"])}
|
||||
)
|
||||
assert response.status_code == 200, response.text
|
||||
assert response.json() == ["abc", "def"]
|
||||
|
||||
|
||||
def test_query_json_list():
|
||||
response = client.get(
|
||||
"/query-json-list", params={"items": json.dumps(["abc", "def"])}
|
||||
)
|
||||
assert response.status_code == 200, response.text
|
||||
assert response.json() == ["abc", "def"]
|
||||
|
||||
|
||||
def test_header_json_list():
|
||||
response = client.get(
|
||||
"/header-json-list", headers={"x-items": json.dumps(["abc", "def"])}
|
||||
)
|
||||
assert response.status_code == 200, response.text
|
||||
assert response.json() == ["abc", "def"]
|
||||
|
||||
|
||||
def test_cookie_json_list():
|
||||
client.cookies.set("items", json.dumps(["abc", "def"]))
|
||||
response = client.get("/cookie-json-list")
|
||||
assert response.status_code == 200, response.text
|
||||
assert response.json() == ["abc", "def"]
|
||||
client.cookies.clear()
|
||||
@@ -1,173 +0,0 @@
|
||||
"""Test using special types (Response, Request, BackgroundTasks) as dependency annotations.
|
||||
|
||||
These tests verify that special FastAPI types can be used with Depends() annotations
|
||||
and that the dependency injection system properly handles them.
|
||||
"""
|
||||
|
||||
from typing import Annotated
|
||||
|
||||
from fastapi import BackgroundTasks, Depends, FastAPI, Request, Response
|
||||
from fastapi.responses import JSONResponse
|
||||
from fastapi.testclient import TestClient
|
||||
|
||||
|
||||
def test_response_with_depends_annotated():
|
||||
"""Response type hint should work with Annotated[Response, Depends(...)]."""
|
||||
app = FastAPI()
|
||||
|
||||
def modify_response(response: Response) -> Response:
|
||||
response.headers["X-Custom"] = "modified"
|
||||
return response
|
||||
|
||||
@app.get("/")
|
||||
def endpoint(response: Annotated[Response, Depends(modify_response)]):
|
||||
return {"status": "ok"}
|
||||
|
||||
client = TestClient(app)
|
||||
resp = client.get("/")
|
||||
|
||||
assert resp.status_code == 200
|
||||
assert resp.json() == {"status": "ok"}
|
||||
assert resp.headers.get("X-Custom") == "modified"
|
||||
|
||||
|
||||
def test_response_with_depends_default():
|
||||
"""Response type hint should work with Response = Depends(...)."""
|
||||
app = FastAPI()
|
||||
|
||||
def modify_response(response: Response) -> Response:
|
||||
response.headers["X-Custom"] = "modified"
|
||||
return response
|
||||
|
||||
@app.get("/")
|
||||
def endpoint(response: Response = Depends(modify_response)):
|
||||
return {"status": "ok"}
|
||||
|
||||
client = TestClient(app)
|
||||
resp = client.get("/")
|
||||
|
||||
assert resp.status_code == 200
|
||||
assert resp.json() == {"status": "ok"}
|
||||
assert resp.headers.get("X-Custom") == "modified"
|
||||
|
||||
|
||||
def test_response_without_depends():
|
||||
"""Regular Response injection should still work."""
|
||||
app = FastAPI()
|
||||
|
||||
@app.get("/")
|
||||
def endpoint(response: Response):
|
||||
response.headers["X-Direct"] = "set"
|
||||
return {"status": "ok"}
|
||||
|
||||
client = TestClient(app)
|
||||
resp = client.get("/")
|
||||
|
||||
assert resp.status_code == 200
|
||||
assert resp.json() == {"status": "ok"}
|
||||
assert resp.headers.get("X-Direct") == "set"
|
||||
|
||||
|
||||
def test_response_dependency_chain():
|
||||
"""Response dependency should work in a chain of dependencies."""
|
||||
app = FastAPI()
|
||||
|
||||
def first_modifier(response: Response) -> Response:
|
||||
response.headers["X-First"] = "1"
|
||||
return response
|
||||
|
||||
def second_modifier(
|
||||
response: Annotated[Response, Depends(first_modifier)],
|
||||
) -> Response:
|
||||
response.headers["X-Second"] = "2"
|
||||
return response
|
||||
|
||||
@app.get("/")
|
||||
def endpoint(response: Annotated[Response, Depends(second_modifier)]):
|
||||
return {"status": "ok"}
|
||||
|
||||
client = TestClient(app)
|
||||
resp = client.get("/")
|
||||
|
||||
assert resp.status_code == 200
|
||||
assert resp.headers.get("X-First") == "1"
|
||||
assert resp.headers.get("X-Second") == "2"
|
||||
|
||||
|
||||
def test_response_dependency_returns_different_response_instance():
|
||||
"""Dependency that returns a different Response instance should work.
|
||||
|
||||
When a dependency returns a new Response object (e.g., JSONResponse) instead
|
||||
of modifying the injected one, the returned response should be used and any
|
||||
modifications to it in the endpoint should be preserved.
|
||||
"""
|
||||
app = FastAPI()
|
||||
|
||||
def default_response() -> Response:
|
||||
response = JSONResponse(content={"status": "ok"})
|
||||
response.headers["X-Custom"] = "initial"
|
||||
return response
|
||||
|
||||
@app.get("/")
|
||||
def endpoint(response: Annotated[Response, Depends(default_response)]):
|
||||
response.headers["X-Custom"] = "modified"
|
||||
return response
|
||||
|
||||
client = TestClient(app)
|
||||
resp = client.get("/")
|
||||
|
||||
assert resp.status_code == 200
|
||||
assert resp.json() == {"status": "ok"}
|
||||
assert resp.headers.get("X-Custom") == "modified"
|
||||
|
||||
|
||||
# Tests for Request type hint with Depends
|
||||
def test_request_with_depends_annotated():
|
||||
"""Request type hint should work in dependency chain."""
|
||||
app = FastAPI()
|
||||
|
||||
def extract_request_info(request: Request) -> dict:
|
||||
return {
|
||||
"path": request.url.path,
|
||||
"user_agent": request.headers.get("user-agent", "unknown"),
|
||||
}
|
||||
|
||||
@app.get("/")
|
||||
def endpoint(
|
||||
info: Annotated[dict, Depends(extract_request_info)],
|
||||
):
|
||||
return info
|
||||
|
||||
client = TestClient(app)
|
||||
resp = client.get("/", headers={"user-agent": "test-agent"})
|
||||
|
||||
assert resp.status_code == 200
|
||||
assert resp.json() == {"path": "/", "user_agent": "test-agent"}
|
||||
|
||||
|
||||
# Tests for BackgroundTasks type hint with Depends
|
||||
def test_background_tasks_with_depends_annotated():
|
||||
"""BackgroundTasks type hint should work with Annotated[BackgroundTasks, Depends(...)]."""
|
||||
app = FastAPI()
|
||||
task_results = []
|
||||
|
||||
def background_task(message: str):
|
||||
task_results.append(message)
|
||||
|
||||
def add_background_task(background_tasks: BackgroundTasks) -> BackgroundTasks:
|
||||
background_tasks.add_task(background_task, "from dependency")
|
||||
return background_tasks
|
||||
|
||||
@app.get("/")
|
||||
def endpoint(
|
||||
background_tasks: Annotated[BackgroundTasks, Depends(add_background_task)],
|
||||
):
|
||||
background_tasks.add_task(background_task, "from endpoint")
|
||||
return {"status": "ok"}
|
||||
|
||||
client = TestClient(app)
|
||||
resp = client.get("/")
|
||||
|
||||
assert resp.status_code == 200
|
||||
assert "from dependency" in task_results
|
||||
assert "from endpoint" in task_results
|
||||
2
uv.lock
generated
2
uv.lock
generated
@@ -1021,7 +1021,6 @@ dependencies = [
|
||||
{ name = "starlette", version = "0.49.3", source = { registry = "https://pypi.org/simple" }, marker = "python_full_version < '3.10'" },
|
||||
{ name = "starlette", version = "0.50.0", source = { registry = "https://pypi.org/simple" }, marker = "python_full_version >= '3.10'" },
|
||||
{ name = "typing-extensions" },
|
||||
{ name = "typing-inspection" },
|
||||
]
|
||||
|
||||
[package.optional-dependencies]
|
||||
@@ -1203,7 +1202,6 @@ requires-dist = [
|
||||
{ name = "pyyaml", marker = "extra == 'all'", specifier = ">=5.3.1" },
|
||||
{ name = "starlette", specifier = ">=0.40.0,<0.51.0" },
|
||||
{ name = "typing-extensions", specifier = ">=4.8.0" },
|
||||
{ name = "typing-inspection", specifier = ">=0.4.2" },
|
||||
{ name = "ujson", marker = "extra == 'all'", specifier = ">=4.0.1,!=4.0.2,!=4.1.0,!=4.2.0,!=4.3.0,!=5.0.0,!=5.1.0" },
|
||||
{ name = "uvicorn", extras = ["standard"], marker = "extra == 'all'", specifier = ">=0.12.0" },
|
||||
{ name = "uvicorn", extras = ["standard"], marker = "extra == 'standard'", specifier = ">=0.12.0" },
|
||||
|
||||
Reference in New Issue
Block a user