3.6 KiB
Creating a Plugin
This guide walks you through the steps to create a plugin for our platform. You'll start by setting up the basic structure, configuring necessary files, and then running a local server to preview your plugin.
If you prefer to create the plugin with angular, there's also a Creating a Plugin (angular).
Keep in mind that this guide is for creating a plugin inside penpot-plugins monorepo. If you want to create a plugin outside our environment you can check the Penpot Plugin Starter Template or the documentation at Create a Plugin.
Let's dive in.
Step 1: Initialize the Plugin
First, you need to create the scaffolding for your plugin. Create a new folder for your plugin:
mkdir -p apps/example-plugin/src apps/example-plugin/public
Create a basic package.json in apps/example-plugin:
{
  "name": "example-plugin",
  "private": true,
  "scripts": {
    "dev": "vite",
    "build": "vite build",
    "preview": "vite preview",
    "lint": "eslint src --ext .ts"
  }
}
Create a vite.config.ts file (see apps/create-palette-plugin/vite.config.ts for reference).
Step 2: Create ESLint Config
Create an eslint.config.js file:
import tseslint from 'typescript-eslint';
import eslintConfigPrettier from 'eslint-config-prettier';

export default tseslint.config(
  ...tseslint.configs.recommended,
  eslintConfigPrettier,
  {
    languageOptions: {
      parserOptions: {
        project: './tsconfig.*?.json',
        tsconfigRootDir: import.meta.dirname,
      },
    },
  },
);
Step 3: Configure the Manifest
Next, create a manifest.json file inside the /public directory. This file is crucial as it defines key properties of your plugin, including permissions and the entry point script.
{
  "name": "Example Plugin",
  "host": "http://localhost:4201",
  "code": "/plugin.js",
  "icon": "/icon.png",
  "permissions": [
    "content:write",
    "library:write",
    "user:read",
    "comment:read",
    "allow:downloads"
  ]
}
Step 4: Update Vite Configuration
Now, add the following configuration to your vite.config.ts to specify the entry points for the build process:
build: {
  rollupOptions: {
    input: {
      plugin: 'src/plugin.ts',
      index: './index.html',
    },
    output: {
      entryFileNames: '[name].js',
    },
  },
}
Step 5: Modify TypeScript Configuration
Update your tsconfig.app.json to include the necessary TypeScript files for your plugin:
{
  "include": ["src/**/*.ts", "../../libs/plugin-types/index.d.ts"]
}
Step 6: Run a Static Server
To preview your plugin, start a static server by running:
pnpm --filter example-plugin dev
Or for production preview:
pnpm --filter example-plugin build && pnpm --filter example-plugin preview
Step 7: Load the Plugin in Penpot
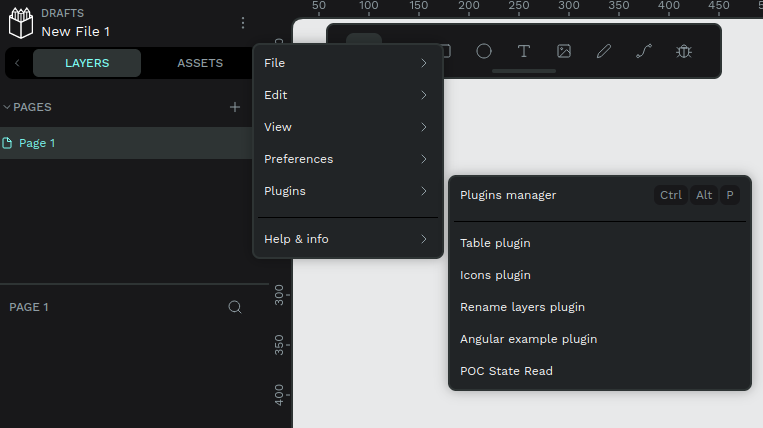
To load your plugin into Penpot you can use the shortcut Ctrl + Alt + P to directly open the Plugin manager modal. There you need to provide the plugin's manifest URL (example: http://plugin.example/manifest.json) for the installation. If there's no issues the plugin will be installed and then you would be able to open it whenever you like.
You can also open the Plugin manager modal via:
-
Menu

Learn More About Plugin Development
For more detailed information on plugin development, check out our guides: